Beanies are the fastest way to add handmade warmth and style to your wardrobe. Below you’ll find one concise, practical introduction (materials, sizing, gauge and a digit-by-digit stitch conversion example), then five full beanie patterns. Each pattern includes: skill level, materials & tools, finished sizes, precise gauge, step-by-step construction (brim, body, crown), variations, finishing tips, blocking/care, and styling ideas. The language is practical and easy to follow so you — and your readers — can pick a project and get crocheting.
All patterns use US crochet terms.
Quick primer — yarn, hooks, sizing, gauge and the stitch math you’ll need
Yarn & tools (general)
- Yarn weights: For cozy fall/winter beanies choose worsted/aran (category 4) for warm, structured hats or bulky (category 5) for very quick, extra-warm hats. Cotton blends are fine for transitional seasons but wool/merino/acrylic blends give more loft and warmth.
- Hooks: follow yarn label; for firmer fabric use 1 size smaller than label suggests, for looser slouch use the recommended size or slightly larger. Typical choices: 5.0 mm (H) for worsted; 6.5–8.0 mm for bulky.
- Notions: tapestry needle, stitch marker, measuring tape, scissors, optional pom-pom maker or small amount of coordinating yarn for a faux-fur pom.
Sizing basics
- Standard head circumferences (unstretched):
- Baby: 14–16 in (35–41 cm)
- Toddler: 16–18 in (41–46 cm)
- Child: 18–20 in (46–51 cm)
- Teen/Small Adult: 20–21 in (51–53 cm)
- Adult Medium (average): 21.5–22.5 in (54–57 cm)
- Adult Large: 23–24 in (58–61 cm)
Decide desired finished circumference (FC): snug hats subtract 0–0.5 in ease; comfortable hats use 0–1 in positive ease; slouchy hats add 1–3 in extra circumference for drape.
Gauge & converting head circumference → stitches (digit-by-digit)
Make a small swatch in the stitch pattern you plan to use and measure stitches per inch (spi) across several inches for accuracy. Then multiply target FC by spi to get the number of stitches to chain (or to match your round).
Example (digit-by-digit): target finished circumference = 22 in (average adult), your swatch shows 4 stitches per inch (spi = 4). Compute 22 × 4.
- Break 22 into 20 + 2.
- 20 × 4 = 80.
- 2 × 4 = 8.
- Add: 80 + 8 = 88 stitches.
So you need 88 stitches around at the brim (or the nearest number matching your stitch multiple — e.g., if your stitch pattern requires a multiple of 6, round 88 to 90 or 84 depending on fit; prefer 90 for a slightly slouchier fit). Always round to the nearest valid multiple, or adjust hook/yarn until the number fits pattern multiple without changing fit drastically.
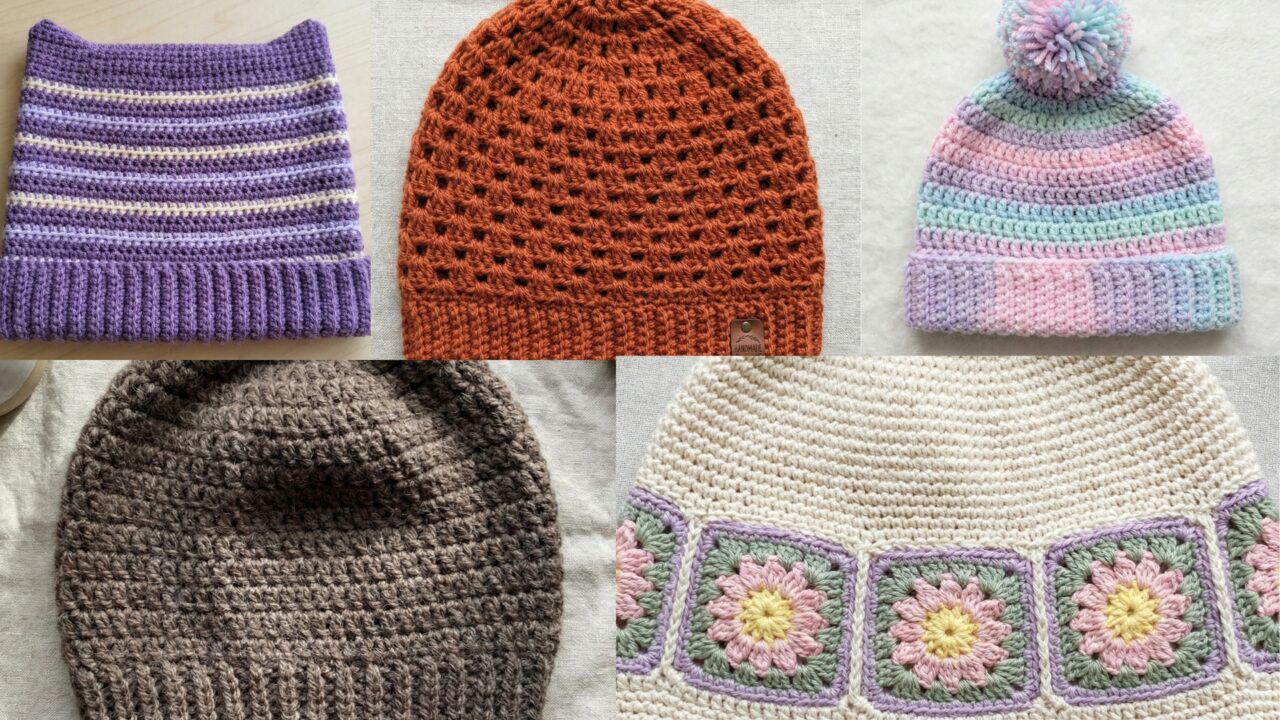
1. Crochet Purple Striped Cat Beanie Pattern
Vibe: playful, fitted beanie with narrow stripes and cute cat ear appliqués — perfect for kids or cat-loving adults.
Skill level: Confident beginner (basic color changes and small appliqués)
Finished sizes (approx): Child 20 in, Teen/Adult S 21.5 in, Adult M 22.5 in — the pattern includes stitch counts for S and M.
Yarn & tools
- Worsted weight yarn (main purple color MC + contrast stripes in lavender or cream). ~150–200 yd MC, 50 yd contrast.
- Hook: 5.0 mm (H).
- Tapestry needle, stitch marker, small amount of stuffing (optional for ears if you want 3D), scissors.
- Optional: yarn for pom-pom.
Gauge (example): 4 sc = 1 in in the round (adjust for your yarn — always swatch).
Stitch multiple: pattern works in multiples of 4 for stripe repeat and ear placement.
Construction overview
Worked seamless in the round from brim up to crown. Brim is worked in ribbing (hdc in BLO) for stretch. Body is worked in sc with color stripes every 2 rounds. Crown decreases are worked evenly. Cat ears are made separately and sewn on.
Step-by-step (Adult Medium example — 22.5 in target; adjust as needed)
1. Calculate stitch count
- Target FC = 22.5 in; spi = 4 sc/in → 22.5 × 4 = digit calculation: (20 × 4 = 80) + (2.5 × 4 = 10) → 80 + 10 = 90 stitches. Choose 90 sts (already a multiple of 4).
2. Brim (ribbed stretch band)
- Foundation: ch 91, join to work in the round careful not to twist. (You can use a foundation hdc row for a cleaner edge.)
- Round 1: hdc in BLO in each ch around, join with sl st to first hdc. (90 hdc)
- Rounds 2–10: repeat Round 1 until brim measures ~2.5 in (adjust for preferred cuff width). Keep BLO ribbing for elasticity.
3. Body with stripes
- Join MC and switch to sc in both loops: Round 1 (RS): sc around (90 sc). Join.
- Round 2: sc around.
- Change to stripe color (CC) — to make narrow stripes, work 2 rounds in CC, then 2 rounds in MC, repeating. We recommend 2 rounds per stripe for crisp bands. Continue until body height measured from brim is ~7.5–8 in (for a fitted beanie). For slouch, stop at ~9–10 in.
4. Crown shaping (start decreases when hat measures desired height — e.g., 7.5 in)
- Decrease rounds (maintain stripe pattern if possible; if a stripe falls in decrease rounds that’s fine):
- R1: sc 8, sc2tog repeat around. (90 → 90 − 10 = 80) — compute: 90 / 9 repeats = 10 decreases.
- R2: sc around.
- R3: sc 7, sc2tog repeat around. (80 → 80 − 10 = 70)
- R4: sc around.
- R5: sc 6, sc2tog repeat around. Continue decreasing every other round in this pattern until you end with about 10–12 sts. (Always keep decrease spacing even; if you get a remainder, distribute extra decreases across the round.)
- When you have 10–12 sts left, cut yarn leaving ~8 in, thread through tapestry needle, draw through remaining loops, pull tight to close. Weave in tail inside hat.
5. Cat ears (make 2)
- With MC, MR, R1: 6 sc (6). R2: inc around (12). R3: sc, inc ×6 (18). R4: sc around (18). R5: sc 2, dec ×6 (12). R6: dec around to 6, fasten off leaving tail for sewing. Slightly stuff if you want firm ears; sew to top edge of hat, spacing ears symmetrically (for 90-st hat, place ears approx 22–24 sts in from center or measure visually).
- Option: make inner ear in CC (small triangle) and sew inside for contrast.
6. Finishing
- Weave in ends, block lightly by steaming or pinning over a form to set shape. Add a small pom if desired or leave ears as the focal point.
Variations & styling
- Make stripes wider (4 rounds) or as ombré by changing CC each stripe.
- For younger kids reduce brim rows and use smaller hook (4.0 mm) to get a tighter fit.
- Add embroidered whiskers with embroidery floss for character.
Care
- Machine wash gentle in cool water, reshape, and air-dry. If using wool blends, follow yarn label (handwash/cold, dry flat).
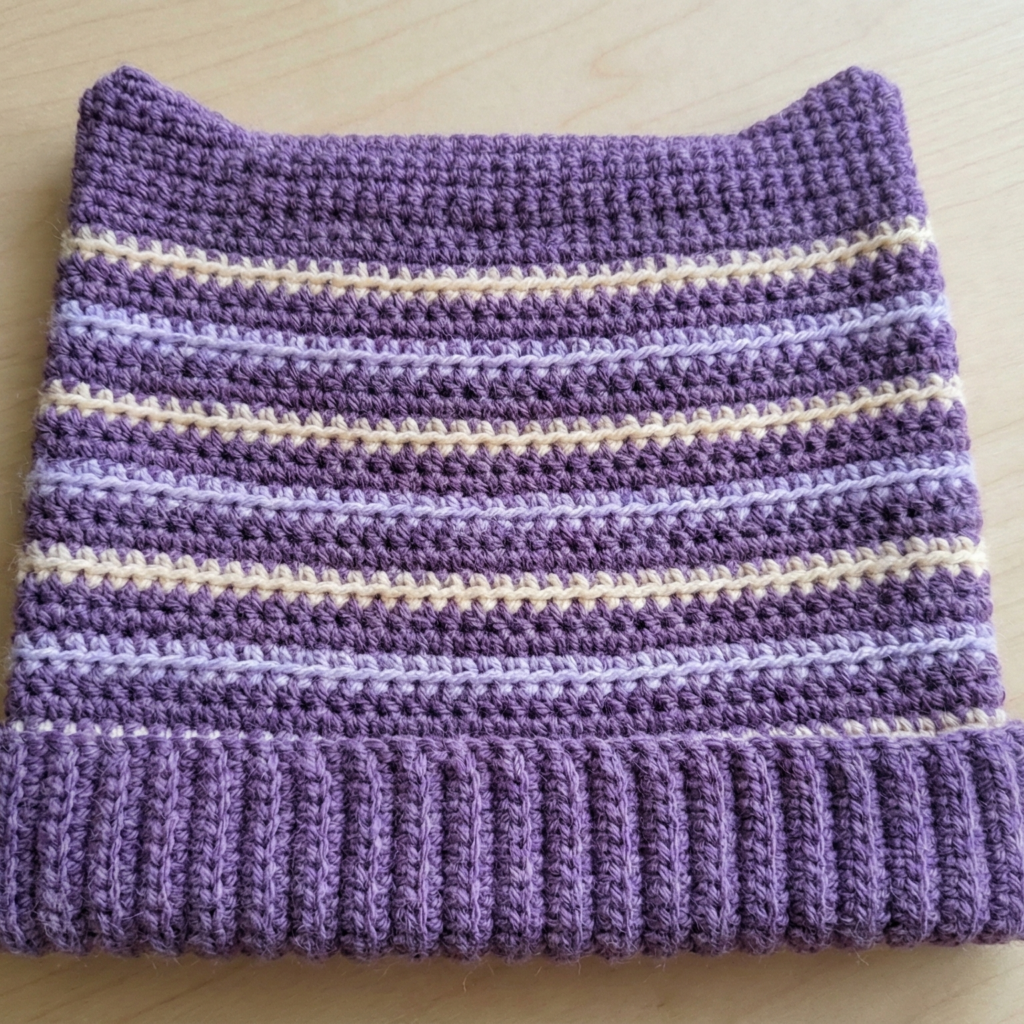
2. Crochet Brown Slouchy Beanie Pattern
Vibe: relaxed, lived-in slouch beanie in neutral brown — perfect for layering with coats.
Skill level: Beginner–Confident beginner (basic stitches and crown shaping)
Finished sizes: Teen/Adult S (21.5 in), Adult M (22.5 in), Adult L (23.5 in) — pattern gives counts for M.
Yarn & tools
- Bulky yarn (category 5) for quick slouch; ~150–200 yd. Classic brown or marled brown recommended.
- Hook: 6.5 mm (K) or 8.0 mm for extra slouch.
- Stitch marker, tapestry needle.
Gauge (example): 3 sc = 1 in in the round (bulky yarn).
Stitch multiple: any number — crown decreases will be based on total stitches.
Construction overview
Worked top-down seamless raglan-style shaping is one way, but here we’ll do a classic bottom-up slouch with a folded or simple rib brim, worked in dc for drape. Because it’s slouchy, add extra height before decreases.
Step-by-step (Adult Medium example)
1. Swatch & stitch count
- Decide FC. For M = 22.5 in and spi = 3 sc/in → 22.5 × 3 = 67.5 → round to 68 stitches (even number works for decrease math). If using dc as main stitch, measure dc per inch and recalc — we’ll continue assuming 3 sts/in.
2. Brim (optional folded cuff)
- Purchaseable folded cuff: Chain 34 (for half circumference folded band) or simply work ribbing in BLO. Simpler: Work in hdc in BLO around foundation chain to create a stretchy cuff and fold up. Example: ch 69, join; R1: hdc in BLO around (68 sts), R2–R6: repeat until brim reaches 3 in, fold up and stitch down if you prefer a fixed cuff.
3. Body (dc for drape)
- Join MC with sl st, ch2 (counts as hdc for many patterns — we’ll use dc for quicker build) — or ch1 and sc depending on desired look. For a drapey slouch: R1: dc in each st around (68 dc). Join.
- R2–R8: dc around; stop when distance from brim to crown base is ~9–10 in for good slouch. (Adjust shorter for less slouch.)
4. Crown decreases (gentle for slouch)
- Begin decreases: R1: dc 6, dc2tog repeat around. (68 → 68 − 8 = 60)
- R2: dc around.
- R3: dc 5, dc2tog repeat (60 → 54)
- R4: dc around.
- R5: dc 4, dc2tog (54 → 48)
- R6: dc around. Continue decreasing every other round until about 10–12 sts remain. Close as described previously.
5. Finish
- Weave in ends; optionally add a wide pom in a matching or contrasting cream.
Variations & styling
- Use a textured stitch (wheat stitch or herringbone) in place of simple dc for more visual interest.
- For a brimless slouch, omit cuff and start body directly; elastic tension will keep it on the head.
Care
- Bulky wool blends: handwash cold or machine on wool cycle; dry flat. Acrylic blends can be machine dried low but reshape while damp for best fit.
3. Crochet Spring Floral Beanie Pattern
Vibe: feminine beanie with delicate floral surface appliqués — ideal for transitional seasons and a soft feminine look.
Skill level: Intermediate (appliqués + sewn details)
Finished sizes: Adult S/M (21–22 in) — pattern tailored to M.
Yarn & tools
- Light DK or sport yarn for neat stitch definition; ~200 yd main color (cream or pale), small amounts of colored yarn for tiny flower appliqués.
- Hook: 4.0 mm (G).
- Tapestry needle, small sewing pins to arrange flowers.
Gauge (example): 4 sc = 1 in in pattern.
Stitch multiple: multiple of 4 convenient for flower spacing.
Construction overview
Worked seamless in the round from brim up. Brim is a gentle rolled edge or simple sc band. Body uses simple stitch (sc or hdc) to provide neat background for sewn flowers. Tiny 5-petal flowers are crocheted separately and sewn to the hat after blocking.
Step-by-step (Adult Medium)
1. Brim (rolled or band)
- Rolled brim: foundation ch 88, join, sc around 2–3 rounds; the natural tension will roll.
- Band alternative: hdc in BLO for 1–1.5 in.
2. Body
- R1: sc around (88 sc).
- R2–R10: sc around until hat measures ~7.5 in from brim for fitted; for a slouch add 1–2 in.
3. Crown decreases
- Begin decreases: sc 7, sc2tog repeat around → maintain pattern of decreasing every 2 rounds until ~10–12 sts remain, fasten off as before.
4. Tiny flower appliqués (make multiple)
- With flower color: MR, ch1, R1: 8 sc in MR — (8). R2: ch3, 3 dc in same st, sl st in next st repeat 4 times to form 4 petals; or make 5 petals by working sc base and shell petals: MR, R1: 5 sc; R2: ch2, (3 dc) in next sc, ch2, sl st ×5. Fasten off leaving tail. Make 8–12 small flowers in varying colors.
5. Assembly & placement
- Block hat to shape. Arrange flowers around lower side or cluster over one ear area for asymmetry. Pin and sew each flower through center to secure. Add tiny bead or french knot center if desired (for child gifts, use embroidered knots not beads).
Variations & styling
- Add tiny leaves (simple ch5 leaf) between flowers for botanical look.
- For a boho version, make larger flowers and add a thin crochet vine around the crown.
Care
- Handwash or machine gentle depending on fiber; remove flowers before machine drying if they’re delicate (or secure very well).
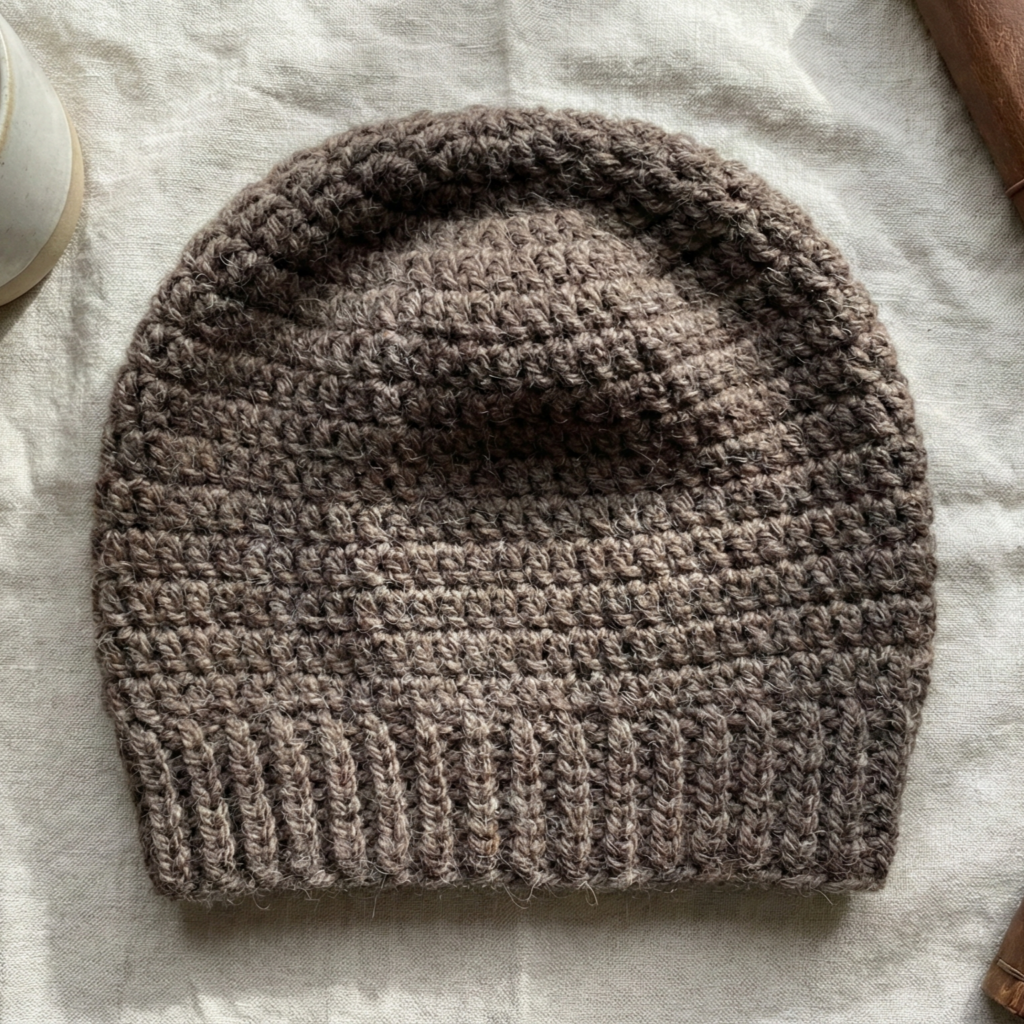
4. Crochet Granny Stitch Beanie Pattern
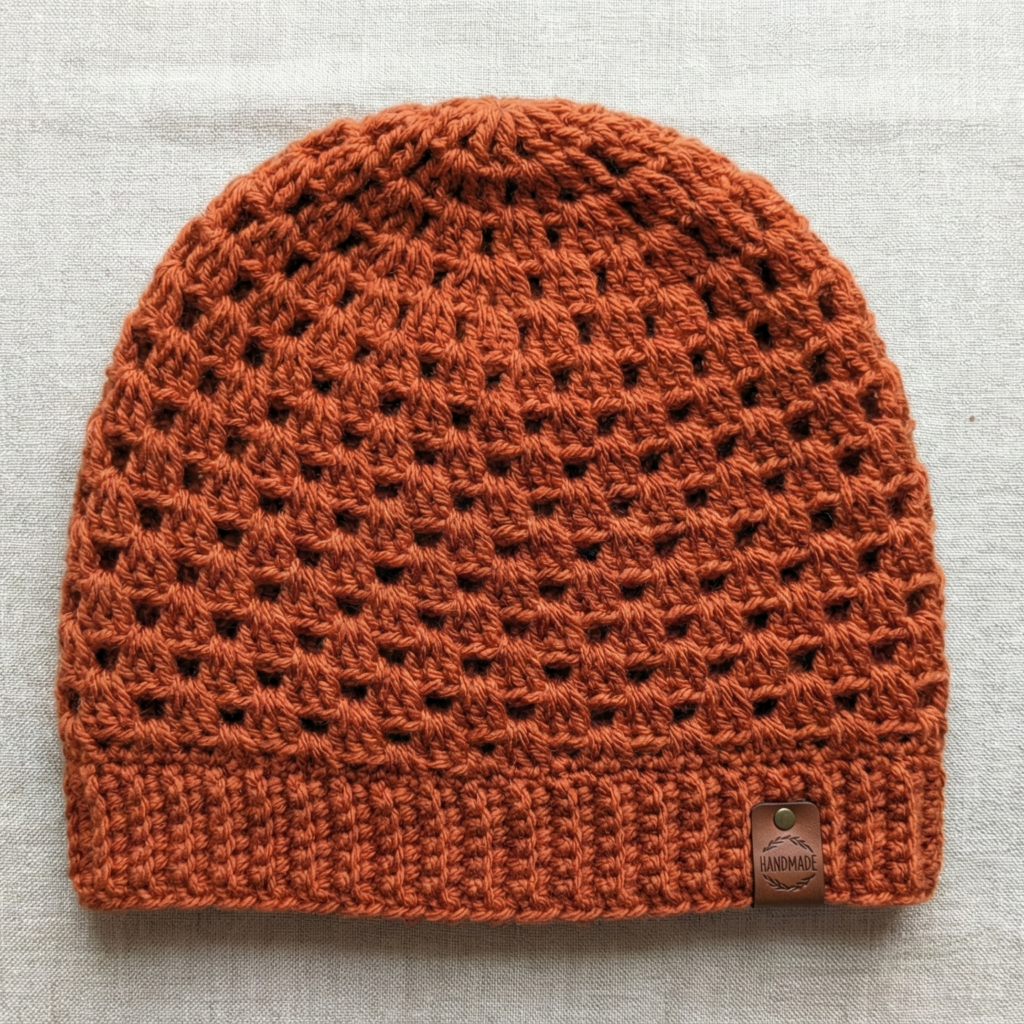
Vibe: textured, retro granny-stitch beanie that nods to classic motifs but works up as a snug hat.
Skill level: Intermediate (granny/cluster stitch rhythm)
Finished sizes: Adult M 22 in (pattern example).
Yarn & tools
- DK or light worsted yarn for stitch definition; ~200 yd.
- Hook: 4.5 mm.
- Tapestry needle.
Gauge (example): gauge depends on cluster size — sample: 3 clusters = 1 in.
Construction overview
This beanie uses a granny-style cluster stitch worked in rounds to build a textured fabric. The brim can be worked in ribbed hdc or as a folded granny border. Crown decreases are made by converting clusters to shorter clusters and then closing.
Granny cluster stitch reference
- A common cluster: (3 dc) cluster, ch1 worked into the same space or into chain spaces depending on the motif. For beanie, we’ll use a dense cluster: in each stitch work dc3tog base to form tight clusters (explained below).
Step-by-step (Adult Medium)
1. Brim (ribbed or granny band)
- Option A (rib): ch 88, R1: hdc in BLO across, join. R2–R6: repeat until 2 in height. Fold and seam to create cuff.
- Option B (granny folded brim): work granny clusters in rounds until brim height ~2 in, then fold for a thicker cuff.
2. Body in granny clusters
- Start round after brim: dc cluster in next stitch (see cluster note), ch1, skip 1 around — this creates a staggered cluster matrix. Keep stitch counts so that cluster repeats are even around; for 88 base stitches, you’ll have 44 clusters if cluster takes 2 sts. Continue rows until crown depth ~7.5 in.
3. Crown shaping
- To decrease while maintaining pattern, begin reducing cluster counts by working cluster decreases across each repeat:
- Round 1: cluster in next 2 clusters worked as combined cluster (work 3 dc together across 2 spaces), ch1 repeat. This halves cluster count.
- Continue similar rounds until only a few clusters remain. Close top by drawing yarn through remaining loops, weaving in securely.
4. Finish & blocking
- Block lightly to relax clusters. Granny texture will bloom and soften. Weave in ends.
Variations & styling
- Marled yarn (two strands held together) produces a vintage look.
- Add a small leather label or button at brim for subtle branding.
Care
- Follow yarn label — cotton/linen may shrink; wool may need hand washing.
5. Crochet Cotton Candy Beanie with Pom-Pom Pattern
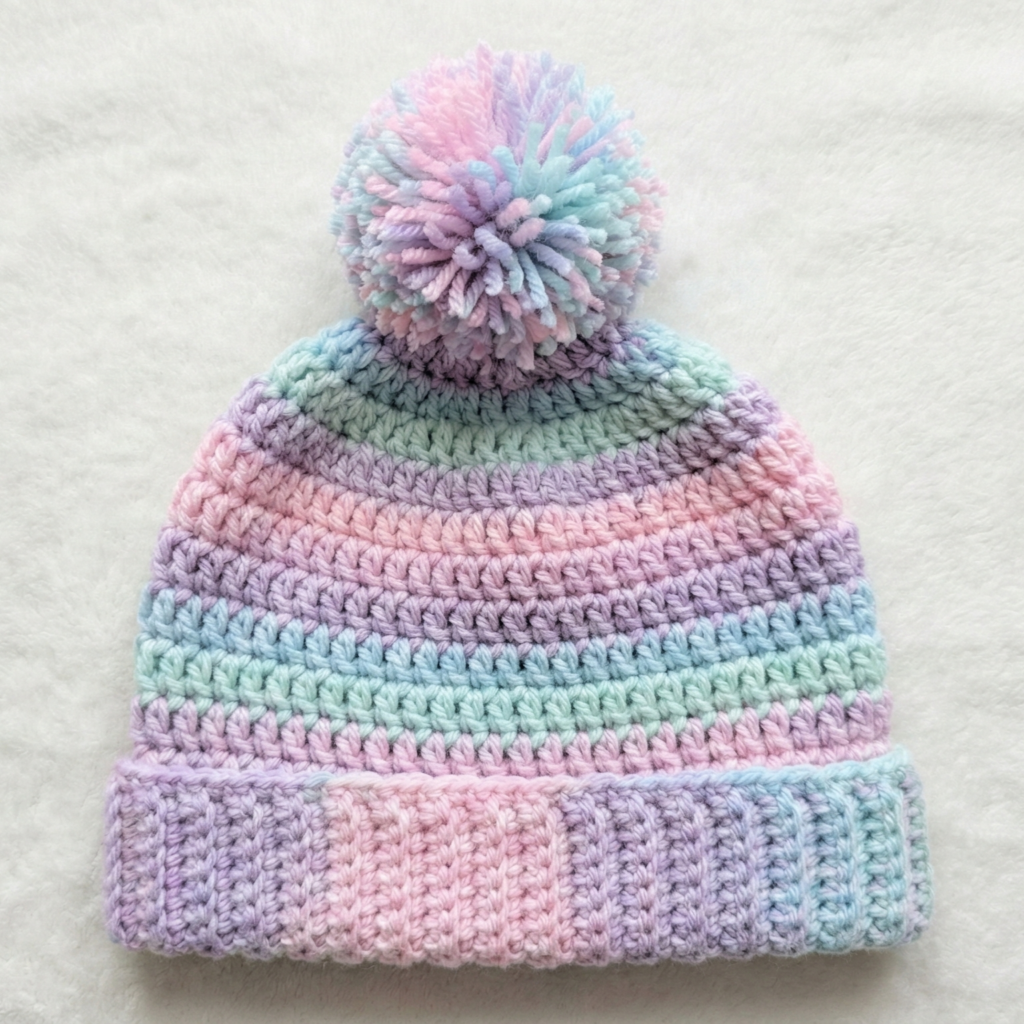
Vibe: fun, slightly chunky beanie in pastel “cotton candy” hues finished with a large pom-pom. Great gift for teens and anyone who likes a playful pop.
Skill level: Confident beginner (color pooling and large pom attachment)
Finished sizes: Teen/Adult S 21.5 in; adjust for adult M by increasing rounds/initial stitch count.
Yarn & tools
- Bulky gradient or variegated yarn in pastel shades (or hold two DK strands together for a candy effect). ~150–200 yd.
- Hook: 6.0–7.0 mm depending on yarn.
- Large faux-fur pom or make yarn pom with a 3–4 in diameter. Pom-pom maker optional.
Gauge (example): 3.5 sc = 1 in (bulky).
Construction overview
Worked bottom-up in simple stitches (hdc or sc for squish), brim may be ribbed or single round, crown decreases are gentle to preserve fluffy top, attach large pom.
Step-by-step (Adult S example)
1. Swatch & stitch count
- For 21.5 in and spi = 3.5 → 21.5 × 3.5 = compute: 20 × 3.5 = 70; 1.5 × 3.5 = 5.25; total 75.25 → round to 76 sts (even number convenient for decrease math).
2. Brim
- Work 10 rounds of hdc in BLO for a stretchy cuff (76 hdc per round).
3. Body
- Switch to sc or hdc in combined loops and work 8–10 rounds until hat height ~7 in for fitted; add 1–2 in for slouch. Because yarn may change color, enjoy gradual striping.
4. Crown decreases (soft, round top)
- R1: sc 6, sc2tog repeat around. (76 → 76 − 10 = 66)
- R2: sc around.
- R3: sc 5, sc2tog (66 → 60)
- Continue every other round until 12–16 sts remain. Close top as usual.
5. Pom-pom attachment
- Make large pomom or use purchased faux fur. Securely sew pom to top with several passes and a strong knot inside hat. Use a few extra stitches through pom base to anchor; hide ends inside hat.
Variations & styling
- For extra texture, alternate rounds of hdc and puff stitch.
- Use a faux-fur pom for a luxe look or a multicolor yarn pom to echo the hat colors.
Care
- Hand wash recommended for bulky handknits; reshape and dry flat to keep pom look; faux fur poms should be spot-cleaned.
conclusion
You now have five full beanie patterns that cover playful, practical, feminine and statement styles — from the striped cat beanie to a lofty cotton candy pom-pom hat. A few final suggestions to make your blog post practical and clickable:
- Swatch & calculate: always begin with the stitch-per-inch swatch and use the digit-by-digit multiplication shown in the intro to convert head circumference into stitches. It prevents fit surprises.
- Fit check early: for top-down or slouch patterns, try the hat on as you go; for bottom-up hats, measure crown depth before decreasing.
- Photography tips: photograph hats on a head mannequin or worn by a model (natural light, neutral background). Include close-ups of stitch texture and creative shots showing ear/side views for beanies with ears or appliqués. For pom-pom hats show top and side view.
- Gift set ideas: pair a beanie with matching fingerless gloves, a cowl, or a small pom keychain for market-ready bundles.
- Care & labeling: include yarn fiber and care instructions with each finished hat you sell or gift — e.g., “50% wool/50% acrylic — hand wash cold, lay flat to dry.”