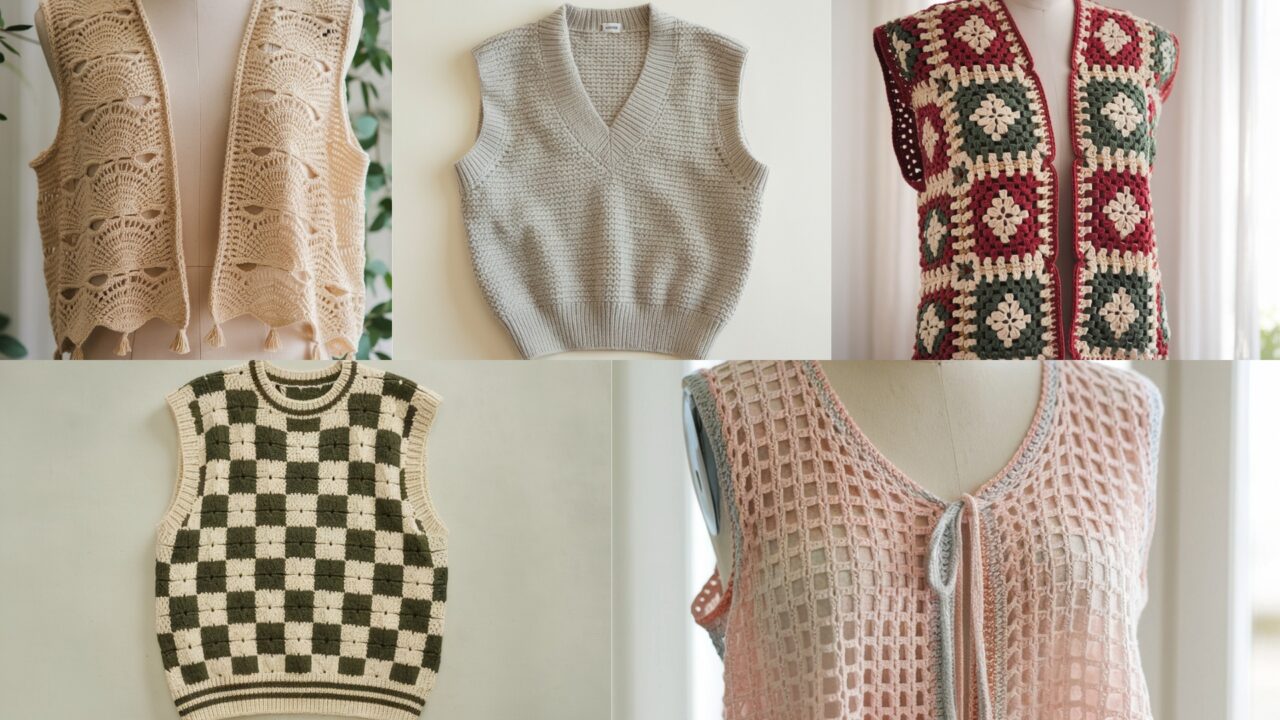
Vests are the cheat code of fashion: they add structure, warmth, and polish without the commitment of a full sweater. They layer beautifully (tee, turtleneck, button-down, or nothing at all if you’re vibing daring) and they’re fast to make compared with full-cardigan drama. These five vests cover a range of textures and styles — modern checkerboard, vintage granny squares for the holidays, breezy tie-front mesh, classic V-neck vest top, and a sun-ready Sunnyside vest. I wrote each pattern for real wearability: clear shaping, realistic stitch counts, and finishing steps that stop things from sagging after one laundry cycle.
Read the quick universal notes first. They’ll save you time and grief.
Quick universal notes (do this, seriously)
Abbreviations (US): ch, sc, hdc, dc, tr, sl st, st(s), BLO/FLO = back/front loop only, inc = 2 sc in same st, dec = sc2tog, MR = magic ring.
Yarn/hook baseline I use in examples: worsted weight (#4) cotton/soft wool blend — comfy structure; 5.0 mm hook (H). If you prefer drapey vests, use DK + 4.0 mm or switch to a larger hook/softer yarn.
Swatch & gauge (non-negotiable)
- Make a 4″ (10 cm) square in the stitch pattern you will use, block it the way you’ll treat the finished garment.
- Count stitches across 4″. Example gauge used in these samples: 16 sts = 4″ → 4 sts/in and 8 rows = 2″ → 4 rows/in. Use your swatch numbers when you work.
- Write them down. Repeat: swatch.
Sizing logic (simple, reliable)
- Pick a target finished bust circumference. For a relaxed vest add 2–4″ positive ease (e.g., for 40″ bust choose 42–44″ finished).
- Half-width (front + back) = finished circumference ÷ 2 = width of back + both front panels. Many vests are made as back panel + two front panels; we’ll give step math per design.
Sample adult-medium target I’ll use in examples: finished bust 44″ (40″ body + 4″ ease). With gauge 4 sts/in → total stitches around = 44 × 4 = 176 sts. If you work flat as back (half) it’s 88 sts for back+front layout; if back panel alone = 44″ ÷ 2 = 22″ width → 22 × 4 = 88 sts for back. The examples below show counts based on this sample; scale with your swatch.
Common finishing touches
- Block panels before seaming for straighter lines.
- Always reinforce shoulder seams and button/closure areas with a second pass of stitches or a sewn-in strip of fabric.
- Use a tidy edging: 1 round sc or hdc in BLO gives a neat frame and reduces stretching.
- Lining is optional; small fabric shoulder patches under straps help with structure.
1. Crochet Checkerboard Sweater Vest Pattern
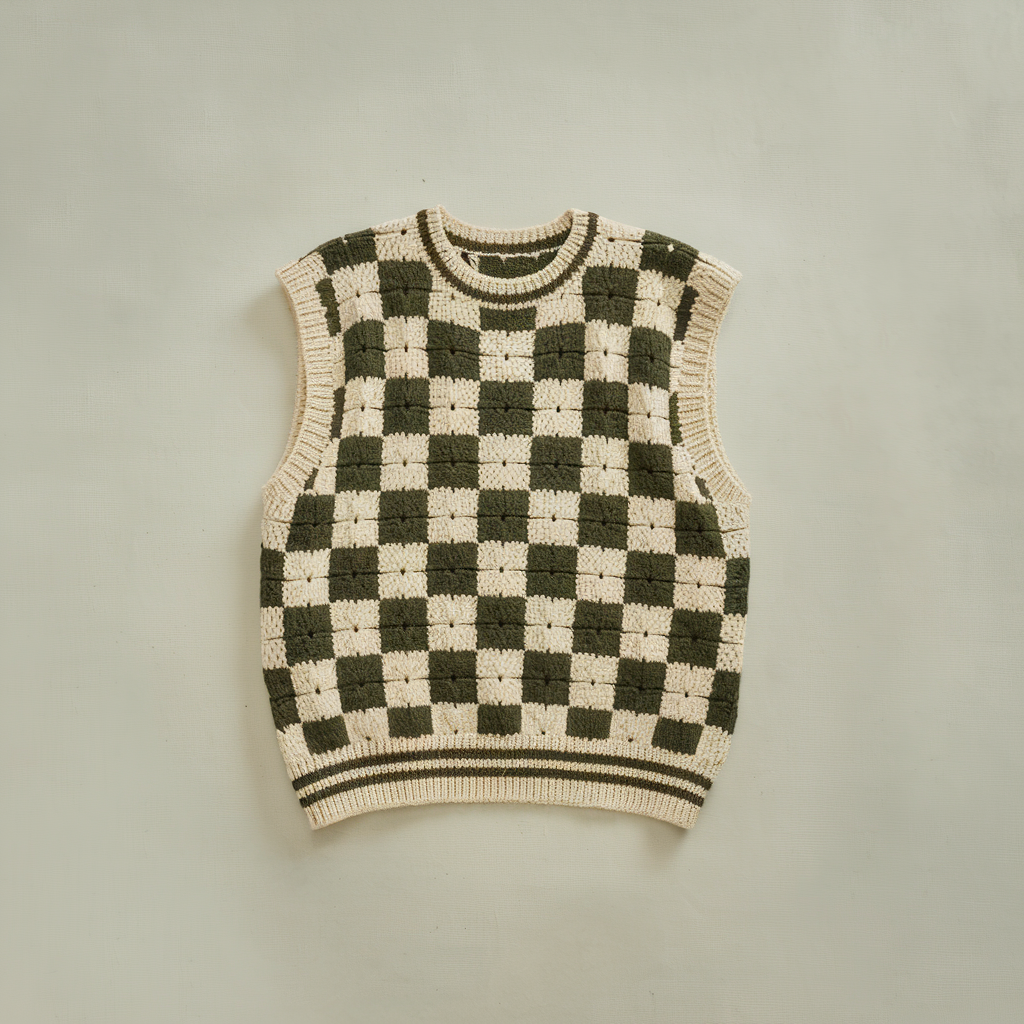
Modern, bold, and great for layering over shirts. Uses two-color checkerboard via simple block-check technique (tapestry or mosaic).
Skill level: Confident Beginner → Intermediate (colorwork)
Sample finished size: 44″ bust (relaxed) — Back panel width = 22″ → 88 sts (at 4 sts/in), length 22″ from shoulder to hem.
Materials: worsted (#4) in two contrasting colors (MC & CC), 5.0 mm hook, tapestry needle, blocking pins. Approx yarn: 900–1200 yds total depending on length.
Stitch repeat / multiple: checker squares made as multiple of 4 sts (2 × 2 blocks); across 88 sts you get 22 blocks of 4 sts.
Construction overview
Make three flat panels: Back (one large rectangle) and Two front panels (left/right), shaped at neck and armholes. Seam shoulders and sides. Add tidy ribbed edges and optional buttons.
Step-by-step (adult-medium using gauge 4 sts/in)
Back panel
- Foundation: ch 89 (gives 88 base sc). R1: sc across 88 sc. Turn.
- Work checkerboard chart: treat each block as 2 sts × 2 rows. For example Row 2 switch color at block edges to form 2×2 squares. If you’re tapestry crocheting, carry unused yarn along wrong side or use mosaic slip for fewer floats. Work until panel height = 22″ (22 × rows/in = 22 × 4 = 88 rows). (So you’ll work 88 rows of the checker motif.) Block.
Front panels (make 2, mirror shaping for neck)
3. Make foundation ch 45 (gives 44 sts). Work same checkerboard pattern and until front panel height = same as back to the point where you start V-neck or straight neck shaping — typically 6–7″ from top to create shoulders. For a crewish vest: work full height then shape neckline by skipping middle stitches. For V-neck: decrease center over a few rows. Example: for a gentle V, when front panel reaches 16″ from hem, start decreasing center by decing 1 st at center every other row for 6 rows then continue straight for shoulders.
Armhole & shoulder shaping
4. Armholes: On back, bind off (or stop working) outer 4″ each side at the top 6″ to create armhole depth — convert inches to sts: 4″ × 4 sts/in = 16 sts. Work shoulder straps for remaining width. Front panels mirror. For petite adjust these numbers.
Seaming
5. With RS together, seam shoulders (about 3–4″ each) with mattress stitch (for invisible seam) or whipstitch. Seam sides from hem up to armhole opening (leave armhole gap). Block after seaming.
Edging
6. Work 1 round sc around all edges in MC or CC: sc evenly around armholes, neckline, front edges and bottom for a neat frame. For a ribbed look do 6 rounds of BLO hdc to create a faux rib.
Finishing
7. Weave ends, press lightly. Add shoulder reinforcement: short strip of felt inside shoulders if you want structured hold for heavier yarn.
Variations & Tips
- Use mosaic crochet instead of carrying two colors for simpler floats.
- Make cropped version by reducing height to 16–18″.
- Add a row of buttons down the front and buttonholes into the edging if you prefer closure.
2. Crochet Holiday Granny Square Vest Pattern
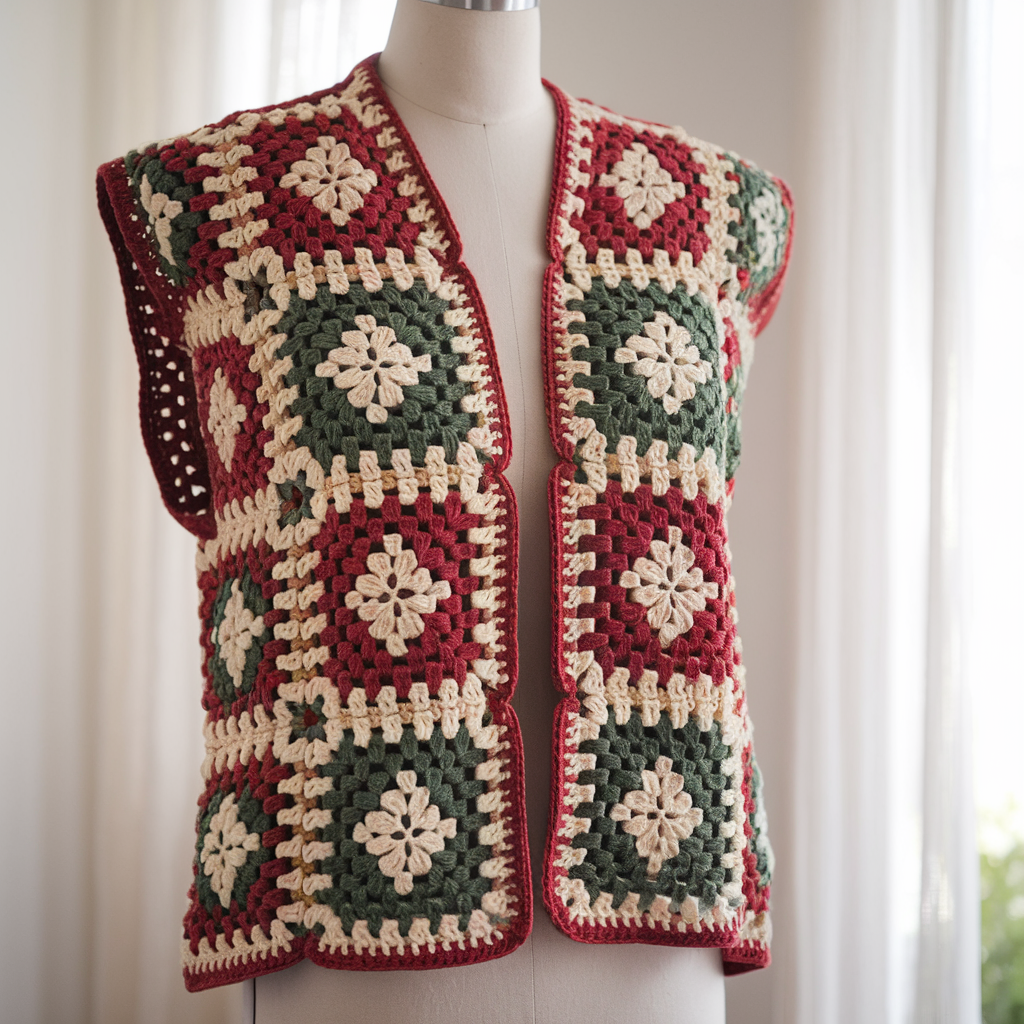
Vintage charm with a holiday palette — make a grid of granny squares joined into a vest. Great stash-buster.
Skill level: Confident Beginner → Intermediate (many squares & joining)
Sample finished size: 44″ bust; if you use 6″ blocked granny squares: layout 4 squares across × 3 squares tall (front) → back uses 2 rows of squares etc. I’ll give a practical layout: front left = 2 × 3 squares, front right = 2 × 3 squares, back = 4 × 3 squares for a roomy vest.
Materials: worsted cotton or acrylic in holiday colors, 5.0 mm hook, 5–12 granny squares per panel depending on size — expect ~1000–1400 yds.
Square size: establish square size first: make a sample granny square and block to measure. Here sample granny = approx 6″.
Construction overview
Make granny squares, block them to identical size, join-as-you-go into panels, seam panels, add edging.
Step-by-step
Squares (make required count; example total 16 squares)
- MR, ch3 (counts as dc), work 2 dc, ch2, 3 dc, ch2 repeat in ring to create 4 corners. Continue rounds increasing in classic granny cluster method until square measures target (6″ when blocked). Use color changes every round for holiday palette (red/green/cream). Block each square to exact 6″ — critical.
Layout & join
2. Arrange squares: back = 4 across × 3 down (12 squares). Fronts = 2 across × 3 down each (6 squares total front).
3. Join-as-you-go or whipstitch squares together: pick a joining method (flat slip-stitch join for a tidy seam or whipstitch for softer seam). Joining-as-you-go is efficient and hides tails.
Arm & neck shaping
4. For armholes, leave the side squares open at top: for example, on side seam skip the top 1/2 square or work additional rows to shape. You can also make little half-squares to create curved armholes. If you want clean armholes, after joining panels, pick up stitches and work a 6–10 row sc border that forms a tidy opening.
Shoulder & side seams
5. Seam shoulders by overlapping the top square corners (about 2–3″ seam) using whipstitch sewn through joins for strength. Side seams join up to desired armhole height.
Edging & finishing
6. Work a round of sc around entire vest and then 2–3 rows of shell or picot edging for a holiday flourish. Add tassels or pompom accents at hem if desired.
Variations & Tips
- Make oversized granny squares for an artful patchwork look.
- For a less holiday-specific vest, choose neutral + one accent color.
- Add pockets by crocheting two small granny squares and sewing them into the front lower panels.
3. Crochet Tie-Front Mesh Vest Pattern

Lightweight, breezy, and perfect over dresses and tanks — open mesh body and tie-front option.
Skill level: Confident Beginner
Sample finished size: 44″ bust (finished), cropped to 18–20″ body length from shoulder to hem for summer layering. Back width = 22″ → 88 sts baseline if worked in sc; mesh stitch will change counts (see notes).
Materials: DK cotton-linen blend or light worsted, 4.0 mm hook, yarn ~600–900 yds depending on length. Optional small button for tie base.
Stitch repeat / multiple: V–mesh / V-stitch typical multiple 3 + 1 per repeat; we’ll use that to calculate chains.
Construction overview
Worked in two panels (back as full panel; fronts as two narrow panels or a single front split with tie), or worked in one piece in the round and split—here we use flat panels for simplicity. Mesh will make fabric more forgiving so use swatch to get stitches/in.
Step-by-step (adult-medium example)
Swatch for mesh gauge
- Make a 4″ swatch in the chosen mesh (V-stitch = dc, ch1, dc in same space or dc, ch1, dc in chain space). Count stitches per inch — mesh yields fewer sts per inch vs sc; assume for example 3 sts/in for DK mesh.
Back panel
2. Desired back width = 22″ → stitches = 22 × 3 = 66 ch foundation (plus turning chain) — because V-stitch is multiple of 3 + 1, make chain accordingly: 3 × 22 = 66 + 1 = 67 ch foundation.
3. Row1: dc in 4th ch from hook or follow V-stitch setup: Row1 often is dc in 4th ch for balance. Row2: dc, ch1, dc into ch1 spaces of previous row (V-repeat). Continue until back height = 18–20″. Fasten off.
Front panels
4. Make two identical panels — each half the front width; for a moderate front opening, each front panel width = (finished circumference ÷ 2) − back width/2? Simpler: make front panels each 8–9″ wide depending on how open you want the front. Using mesh gauge 3 sts/in, 9″ × 3 = 27 ch each. Work same number of rows as back.
Neck & armhole shaping
5. Because mesh is forgiving, shaping can be minimal: reduce 1–2 repeats at shoulder rows to create gentle slope.
Tie-front finishing
6. Add two narrow bands (crocheted straps) at lower front corners to tie — ch to desired length (e.g., 36–48″ for long ties) and sc into or attach. Alternatively create one continuous long band that wraps around and ties.
Edging
7. Work 2–3 rounds sc along edges and around armholes to stabilize mesh and prevent stretching.
Variations & Tips
- For a more polished look add a simple button loop and button near bust so ties can be secured.
- Add a lining or inner camisole if you want coverage; mesh works best as a layering piece.
4. Crochet V-Neck Vest Top Pattern

Classic, preppy, and flattering: V-necklines, fitted waist shaping, and ribbed trim for a sweater-vest finish.
Skill level: Intermediate (shaping + ribbing)
Sample finished size: 44″ bust with slightly tapered waist; back panel width = 22″ = 88 sts at sc gauge. Length from shoulder to hem ~22″.
Materials: worsted or wool-blend for sweater feel (wool/nylon blend is great), 5.0 mm hook, optional set of 3–4 buttons if you want partial opening. Yarn ~900–1200 yds.
Stitch repeat / multiple: For classic texture use hdc or 1×1 rib in panels. Ribbing using BLO hdc multiples -> no strict multiple for width but use swatch.
Construction overview
Worked back and two fronts with waist shaping and V-neck shaping on fronts. Finishing with ribbed hem and neckband.
Step-by-step (adult-medium example)
Back panel
- Chain foundation to match back width: ch 89 for 88 sc across (4 sts/in gauge). R1: sc 88. Turn.
- Work in chosen stitch (hdc or sc) until panel height reaches underarm depth (about 16″ from shoulder to underarm is typical — but we work bottom-up style: many prefer to make entire back then shape shoulders). If working top-down adapt accordingly. For simplicity we’ll work bottom-up: make panel height total 22″.
Front panels & V-neck shaping
3. Chain 45 for each front (44 sts) to match half front width. Work same stitch until you reach 6–8″ below shoulder where you’ll shape the V. For V shape: decrease 1 st at the center-front edge every other row (or every row for sharper V) until you achieve desired neckline depth (typically 6–8″ deep). Mirror for other front.
Shoulder shaping
4. After neck shaping, continue to shoulder width and stop. For a neat shoulder seam, ensure back shoulder width matches front shoulder. Usually you’ll bind off outermost 16–18 sts for back shoulders leaving middle to match with front strap.
Waist shaping (optional)
5. For a fitted look decrease 1–2 sts on each side every 4–6 rows from waist to hem to create a subtle tapered shape; increase again toward hem if you want peplum. Keep decreases symmetrical.
Ribbed hem & neckband
6. Pick up stitches around bottom edge and work 2–3″ of BLO hdc ribbing (or sc in BLO) for a classic band. Work rib on armholes and V-neck: pick up stitches along neck shaping and work 1–2″ of ribbing, shaping corner with short rows or by adjusting count.
Finishing
7. Seam shoulders and sides with mattress stitch. Block lightly. Weave ends. Add button placket if desired: crochet a small band along one front and attach buttons with matched button loops on the other.
Variations & Tips
- Make sleeveless arm pattern longer for a tank-style vest.
- Use slightly smaller hook on ribbing to tighten band and prevent flare.
5. Crochet Sunnyside Vest Pattern
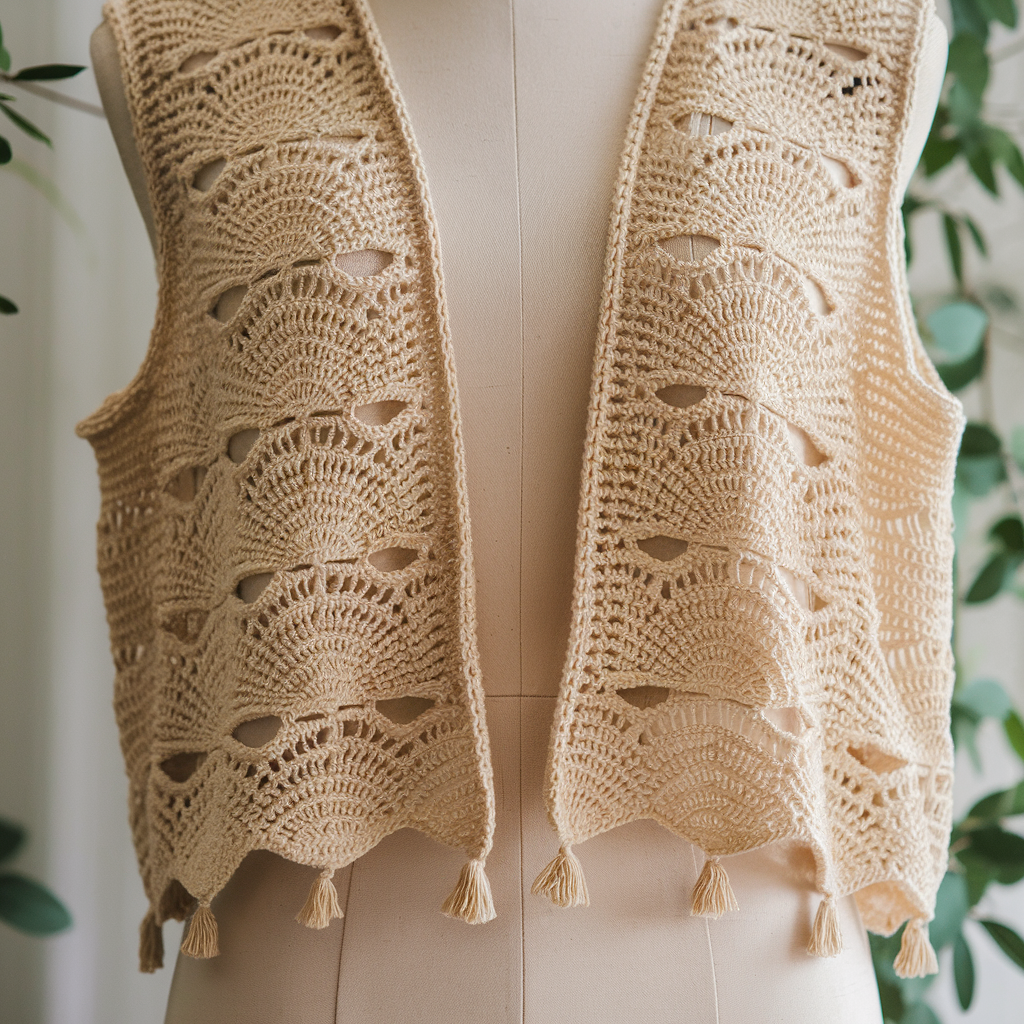
A sun-ready open front vest with structured panels and breezy stitchwork — good for warm weather and festival layers.
Skill level: Confident Beginner → Intermediate
Sample finished size: 44″ bust relaxed; length longer (hip-length 24–26″). Back width computed like earlier example 22″ → 88 sts if worked in dense stitch; for airy stitch counts reduce by gauge.
Materials: DK cotton-linen blend or light worsted, 4.0–4.5 mm hook, 800–1200 yds depending on length.
Stitch repeat / multiple: open shell or fan stitch with multiple of 6 + 2 — we’ll present multiple guidance.
Construction overview
Worked as back panel plus two front panels or worked flat and left center split. The Sunnyside pattern uses shell/fan repeats to create scalloped texture; edges get simple bands.
Step-by-step (adult-medium example)
Swatch & repeat setup
- Make a sample repeat: shell = (dc3, ch2, dc3) into a single point. Determine sts/in of the chosen yarn in the shell stitch. Suppose you get 3.5 shell repeats per inch and each repeat is 6 sts wide. For a 22″ back you need ~22 × 3.5 = 77 repeats? That’s unrealistic — instead convert: if 6 sts = ~1.25″, then for 22″ width you need 22 ÷ 1.25 ≈ 17.6 repeats → round to 18 repeats. So foundation = 18 × 6 = 108 sts + edge st(s). This example shows why swatching matters.
Back panel
2. Chain foundation: ch (108 + 1) as your sample required (multiple of 6 + 2). Row1: sc or dc baseline row. Row2: work shells across: (3 dc in next space, ch2, 3 dc) in each ch-space or anchor point per stitch chart. Continue until desired back length (hip-length 24″).
Front panels
3. Each front panel width = half of front width (finished circumference ÷2 minus back half). Simpler: make two panels each ~11″ width (44 – 22)/2 = 11″ → in repeats ~9 repeats each depending on repeat width. Work same rows count as back.
Armhole & neckline shaping
4. For armholes, omit corner shells for several rows to form curve or decrease one repeat at each side for 4–6 rows. For front neckline shape, decrease shells toward center front as desired (or leave straight for open vest).
Joining & edges
5. Seam shoulders and side panels or work a long edge seam if you prefer open-front. Work 2–3 rounds of sc around entire vest to stabilize. Add a 2–3″ band across front edges made with hdc in BLO for a subtle frame. Optionally add tiny tassels to scallop edges for festival vibe.
Variations & Tips
- Make a cropped Sunnyside by shortening body rows.
- Use brighter, variegated yarn for playful look; keep edges neutral to tame the pattern.
How to adjust sizing (quick guide)
- Compute desired finished bust = body measurement + ease (2–4″ for relaxed; 0–1″ for fitted).
- Multiply by stitches-per-inch from your swatch: finished circumference × sts/in = total stitches around.
- Decide panel layout (back single panel vs. back + front panels) and divvy the total stitches accordingly.
- Round to stitch repeat multiples required by your stitch pattern (check “multiple of” notes above).
- Adjust length by rows using rows-per-inch from swatch.
Blocking, Care & Maintenance
- Blocking: Always block panels after knitting/crocheting and BEFORE seaming when stitch patterns have lace/openwork. Pin to measurements, mist / steam as appropriate for fiber.
- Care: Cotton & blends: machine wash gentle in mesh bag; tumble low or air dry flat. Wool: hand wash or machine wool cycle, dry flat. Avoid rough jewelry that can snag openwork vests.
- Storage: Fold vests rather than hanging if heavy yarn is used to avoid shoulder stretch. Use cedar blocks or sachets for natural moth protection.
conclusion
There: five chic vest patterns ranging from bold checkerboard and nostalgic granny squares to airy tie-front and classic V-neck silhouettes. The difference between a vest that flatters and a vest that sags is not magic — it’s a swatch, consistent stitch tension, and good finishing (blocking + reinforced seams). Pick your yarn based on how you’ll wear the vest (structured wool for shape; cotton-linen for summer drape), do the math (finished measurement × stitches-per-inch), and don’t skip that edging round.