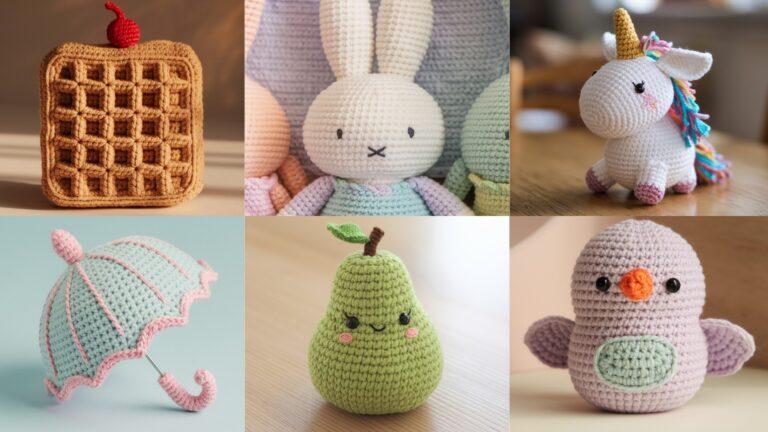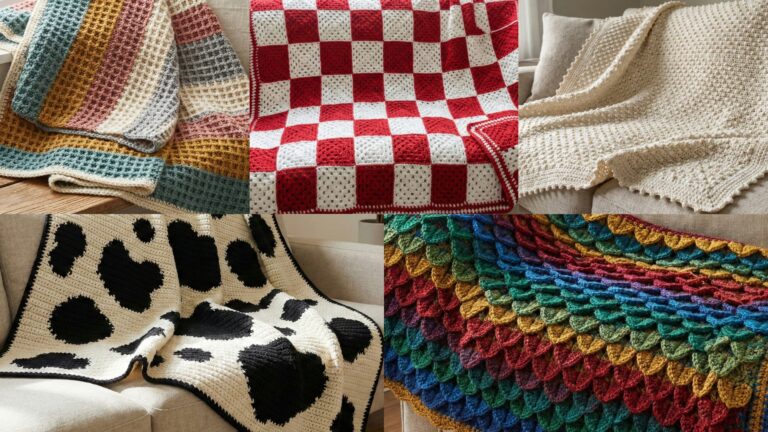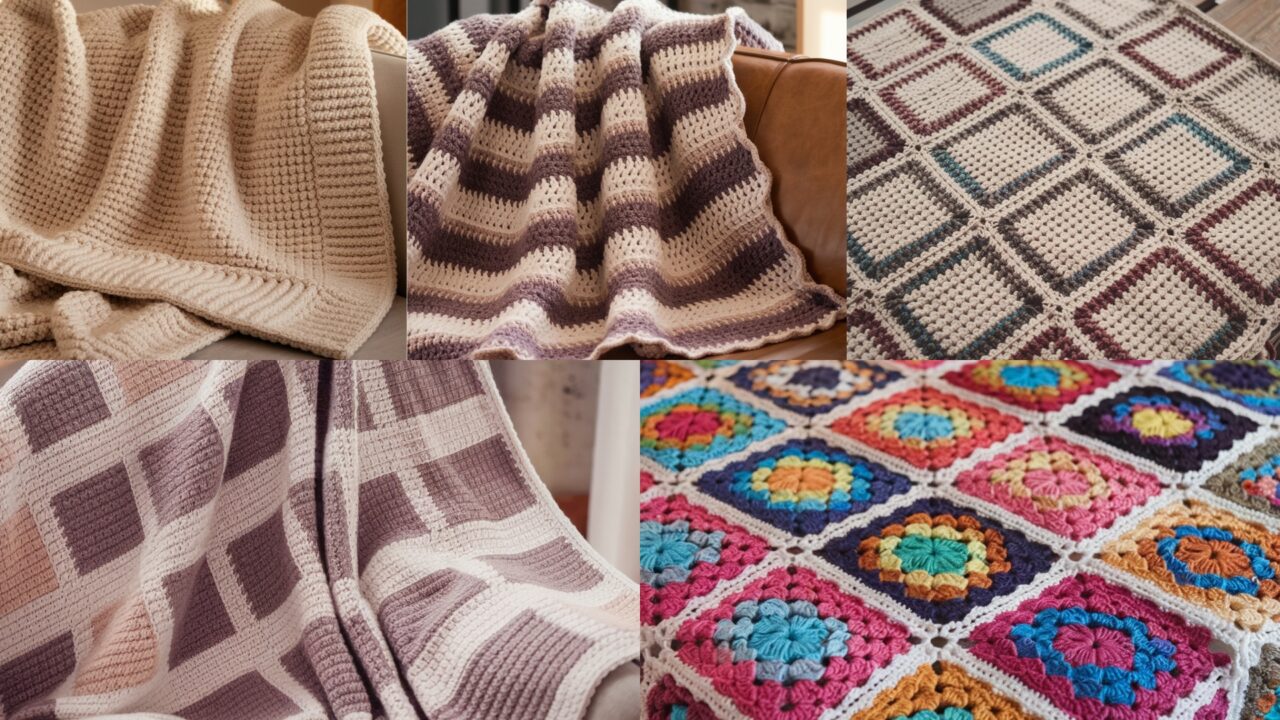
A great blanket starts with two things most people ignore: a good swatch and a sensible plan. Do those, and you’ll get a blanket that drapes, layers, and actually looks like you meant it to. This collection gives you five distinct directions — classic granny squares, dense waffle texture, a grown-up plaid granny layout, a traditional afghan (ripple/chevron style), and a clean gingham-style block blanket. I’ve written each pattern so you can scale it to baby, throw, couch, or bed sizes without guessing.
Read the universal notes. Do the swatch. Then pick a pattern and make something useful.
Universal notes (read this — it saves time)
Abbreviations (US): ch = chain, sc = single crochet, hdc = half double crochet, dc = double crochet, tr = treble, sl st = slip stitch, st(s) = stitch(es), sk = skip, BLO/FLO = back/front loop only, rep = repeat, MR = magic ring.
Yarn & hooks: I recommend cotton-blend or a soft acrylic for easy care and nice stitch definition. For cozy throws use worsted (#4) yarn; for lighter cotton throws use DK (#3). Sample hooks used in examples: 5.0 mm (H) for worsted, 4.0 mm for DK. If you want a more drapey blanket, go up a hook size.
Swatch & gauge (you must do this):
- Make a 4″ (10 cm) square in the main stitch you’ll use.
- Measure stitches across 4″. Example we’ll use in the math below: 16 dc across 4″. That means stitches-per-inch = 16 ÷ 4 = 4 sts/in. (I’m showing the digits so you can see how to do this at home.)
- Measure rows per inch too if pattern height matters. Block your swatch exactly like you’ll treat the blanket.
Sizing targets (examples):
- Baby: ~36″ × 36″
- Lap/Small throw: ~48″ × 60″
- Couch/Standard throw: ~50″ × 70″
- Twin/Small bed: ~65″ × 90″
- Queen: ~90″ × 90″
How to compute foundation chain or motifs across (3-step):
- Decide finished width (example: 50″ for a throw).
- Multiply finished width × stitches-per-inch (example: 50 × 4 = 200 stitches). Show digits: 50 × 4 = 200.
- Round to nearest pattern multiple required by the stitch repeat (I’ll list each pattern’s multiple). That gives your chain or number of motifs across.
1. Crochet Granny Square Blanket Pattern
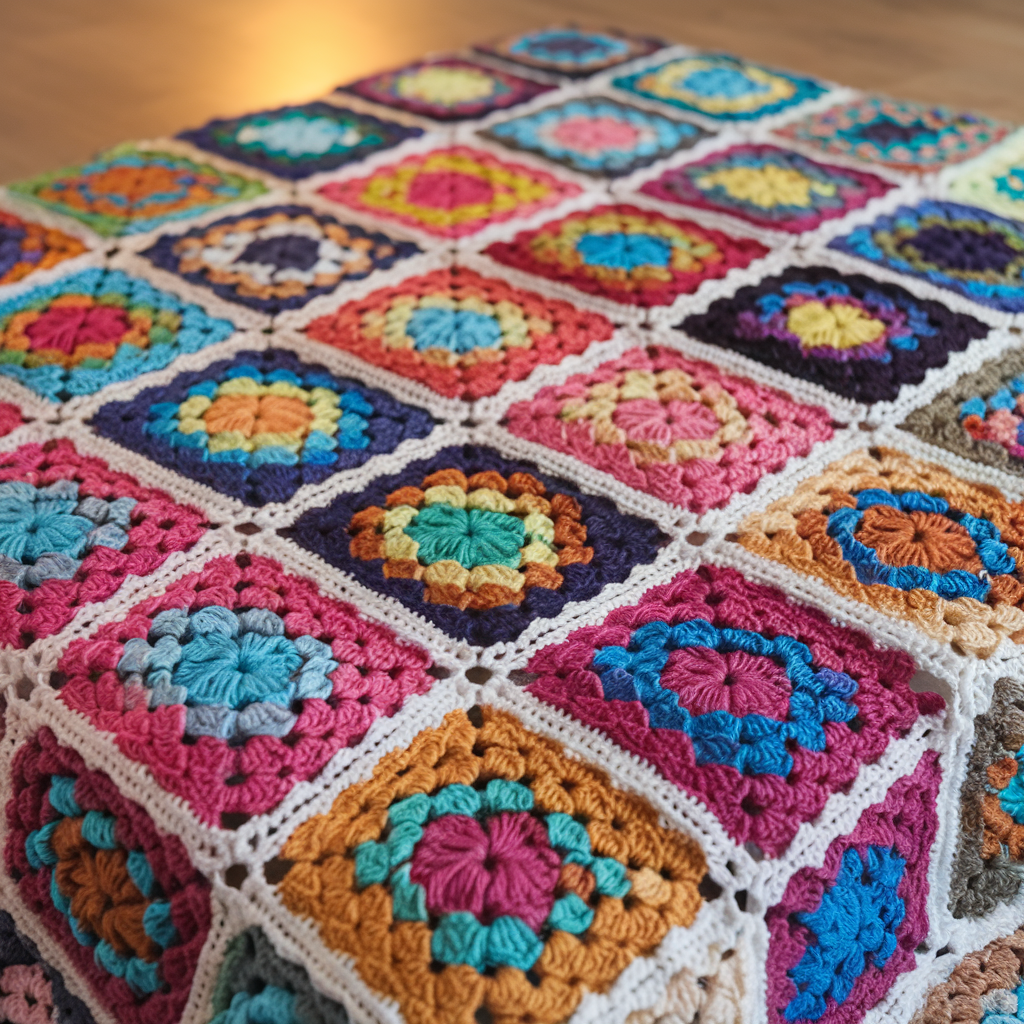
Classic, endlessly customizable, stash-friendly. Make lots of squares and join for a nostalgic, cozy throw.
Skill level: Beginner → Confident Beginner
Yarn & tools: worsted weight (#4) recommended, 5.0 mm hook, tapestry needle. Approx yarn: Baby 800–1,000 yds; Throw 1,800–2,500 yds depending on color changes.
Finished size example: throw 50″ × 70″ using 6″ granny squares (blocked).
Concept
Make identical granny squares (or mix colors), block them to size, arrange into a pleasing layout, join, and add a tidy border. This is modular: you can start now and expand later.
Square size & motif math
If one finished granny square (blocked) = 6″, then squares across for 50″ width = 50 ÷ 6 = 8.333 → round to 8 or 9. I recommend rounding to 8 squares across (8 × 6 = 48″) for a slightly smaller throw or 9 for bigger (9 × 6 = 54″).
Detailed arithmetic for 8 squares: 6 × 8 = 48. (Six times eight equals forty-eight.) That gives finished width 48″.
For a 50″ × 70″ target using 6″ squares, rows needed for length = 70 ÷ 6 = 11.666 → choose 12 rows (12 × 6 = 72″). Arithmetic: 6 × 12 = 72.
So blanket layout: 8 squares across × 12 rows down = 96 squares.
Square pattern (classic 4-round granny square; size adjustable)
(make one square; repeat 96 times for example)
- MR, ch3 (counts as dc), 2 dc in ring, ch2, 3 dc in ring, ch2 repeat 3 more times — total 4 clusters with ch2 corners. Sl st to top of ch3. — (Round 1 complete)
- Join new color, sl st into corner ch-2 space, ch3, (2 dc, ch2, 3 dc) in same corner, skip to next corner, (3 dc, ch2, 3 dc) in corner repeat around. Sl st to join. — (Round 2: square forms)
- Round 3: repeat Round 2 into corner ch-2 spaces, adding color changes as desired. Add more rounds until the square measures 6″ blocked.
Make and block: Make intended number of squares, then block each to exact 6″ (pin edges square, spray or steam lightly). Blocking evens sizes so joining fits.
Joining
Options: whipstitch with matching yarn for neat seams; join-as-you-go during final round for fewer ends; or mattress stitch for invisible joins. I prefer join-as-you-go in the last round — it saves weaving and makes a flat join.
Join-as-you-go method quick steps:
- Work the last round of square A until the corner before the joining side. Place square B (finished) beneath A, and slip-stitch through corresponding sts of B as you continue the round on A to connect. Keep tension even.
Border
Work 3–4 rounds of sc around the whole blanket, putting 3 sc in each corner to avoid puckering. Finish with a subtle shell or picot round if you want a feminine edge.
Variations & tips
- Use tonal colors for a modern look; bright mixing for boho.
- Make larger squares (8–10″) to reduce seaming.
- For a sturdier blanket add a fabric or flannel backing sewn to the crochet (prevents stretching).
2. Crochet Waffle Stitch Blanket Pattern
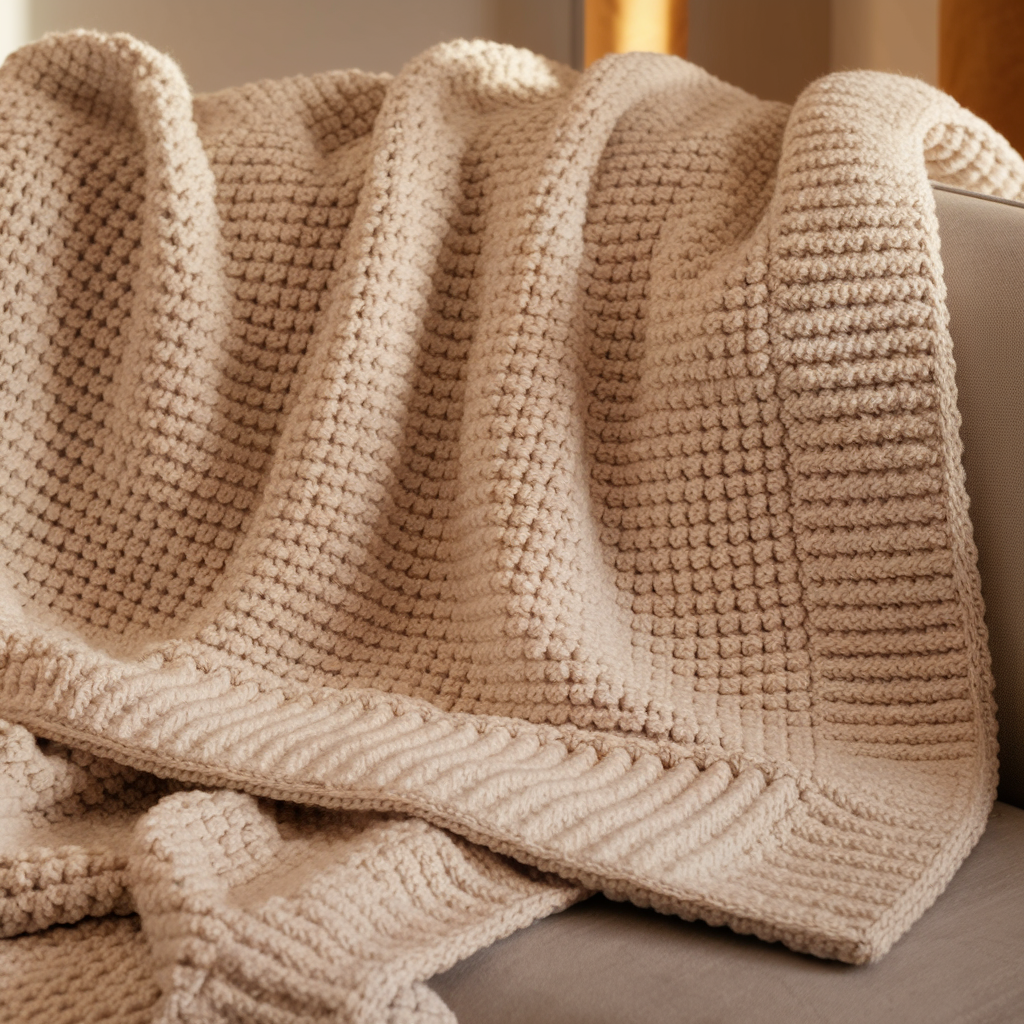
Dense, squishy, and thermal — waffle stitch traps air and looks expensive on a couch. Highly recommended for winter throws.
Skill level: Confident Beginner
Yarn & tools: worsted (#4) yarn, 6.0 mm hook for lofty waffles (or 5.0 mm for firmer fabric). Approx yarn: throw ~2,000–2,500 yds.
Gauge & multiple: waffle stitch is worked in multiples of 3 + 2 (foundation). Example swatch: 4″ = 12 waffle-style ridges — check your swatch.
Waffle stitch quick pattern (hdc-based waffle)
Foundation: ch (multiple of 3) + 2.
Row 1: hdc in 3rd ch from hook and across. Turn.
Row 2: ch2 (counts as hdc), fpdc around next st, hdc in next 2 sts repeat across. Turn.
Row 3: ch2, hdc across working into posts and tops as they fall (this is the anchoring row). Turn.
Repeat Rows 2–3 until desired length.
What’s happening: Front post double crochets (fpdc) build the vertical waffle ribs; alternating hdc rows anchor them into a dense fabric.
Sizing math example (throw 50″ × 70″)
Swatch gave 4″ = 12 sts across in waffle pattern → stitches-per-inch = 12 ÷ 4 = 3 sts/in.
Compute stitches for 50″ width: 50 × 3 = 150 stitches. Show digits: 50 × 3 = 150.
Foundation must be multiple of 3 + 2: 150 is divisible by 3? 150 ÷ 3 = 50 exactly. Good. So chain = 150 + 2 = 152 chains. Build rows until length ~70″.
Rows per inch from swatch: if 4″ = 11 rows, then rows per inch = 11 ÷ 4 = 2.75 rows/in. For 70″ length: 70 × 2.75 = 192.5 → round to 193 rows. Break the arithmetic: 70 × 2 = 140; 70 × 0.75 = 52.5; 140 + 52.5 = 192.5 → 193 rows.
Work 193 rounds (Rows 2–3 repeat = two rounds per repeat) — or measure as you go.
Edging and finishing
Add 4–6 rounds sc or hdc in doubled yarn around edges for a framed, structured finish. Waffle fabric looks great with a chunky rib border.
Variations & tips
- Hold two strands of DK for a lighter waffle.
- Waffle blankets stretch widthwise; add a short hem or pick up a foundation row for stability.
- Machine wash gentle for acrylic; reshape damp.
3. Crochet Plaid Granny Square Blanket Pattern
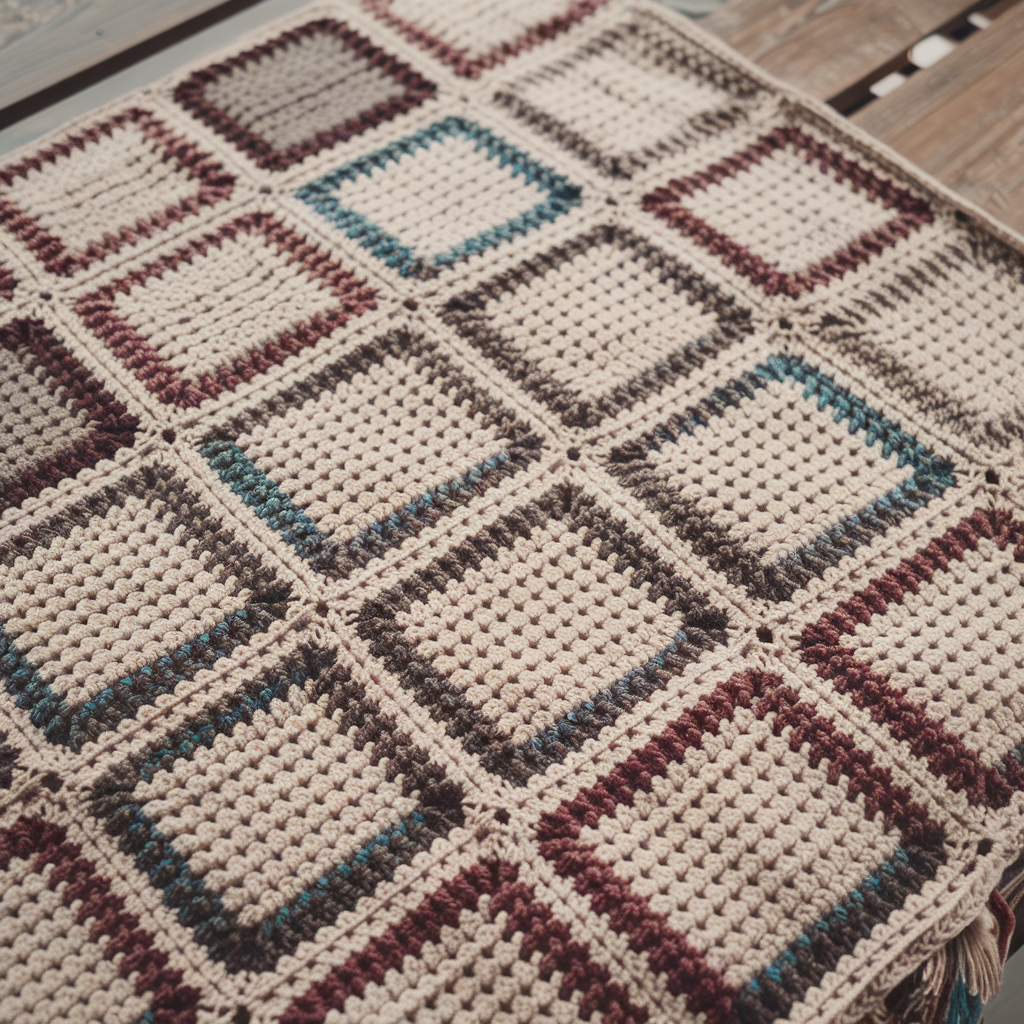
A fresh take: granny squares arranged in plaid blocks with color changes that read like woven fabric — grown-up, not grandma’s table runner.
Skill level: Intermediate (color planning + joining)
Yarn & tools: DK or worsted in 3–4 complementary colors, 4.5–5.0 mm hook. Approx yarn: throw ~2,000–3,000 yds depending on palette.
Concept
Make granny squares with two or three overlay colors to mimic a plaid intersection. Join a grid where vertical and horizontal color placement forms larger plaid blocks. Block squares carefully.
Square & color layout
Square recipe (6–8 rounds) using main background, stripe color 1, stripe color 2. Example for 6″ squares: Plan a 7 × 10 grid for ~42″ × 60″ throw (7 × 6″ = 42; 10 × 6″ = 60).
Arithmetic example: For width 42″ with 6″ squares → 42 ÷ 6 = 7 squares across. (Forty-two divided by six equals seven.)
Plaid technique
- Round 1–2: background color.
- Round 3: change to color A for a narrow stripe round.
- Round 4–5: background color.
- Round 6: change to color B for crossing stripe.
- Round 7: background color to finish square.
When you join squares, stagger colors so A rounds align in vertical columns and B rounds align horizontally to create the plaid overlay effect.
Join & border
Use visible join such as slip-stitch join in contrasting color to emphasize grid lines, or invisible join for a woven look. Finish with a 4–6 round border in a neutral.
Variations & tips
- Use muted neutrals plus one pop color for a sophisticated plaid.
- Make squares larger for a bolder plaid.
4. Crochet Afghan Blanket Pattern
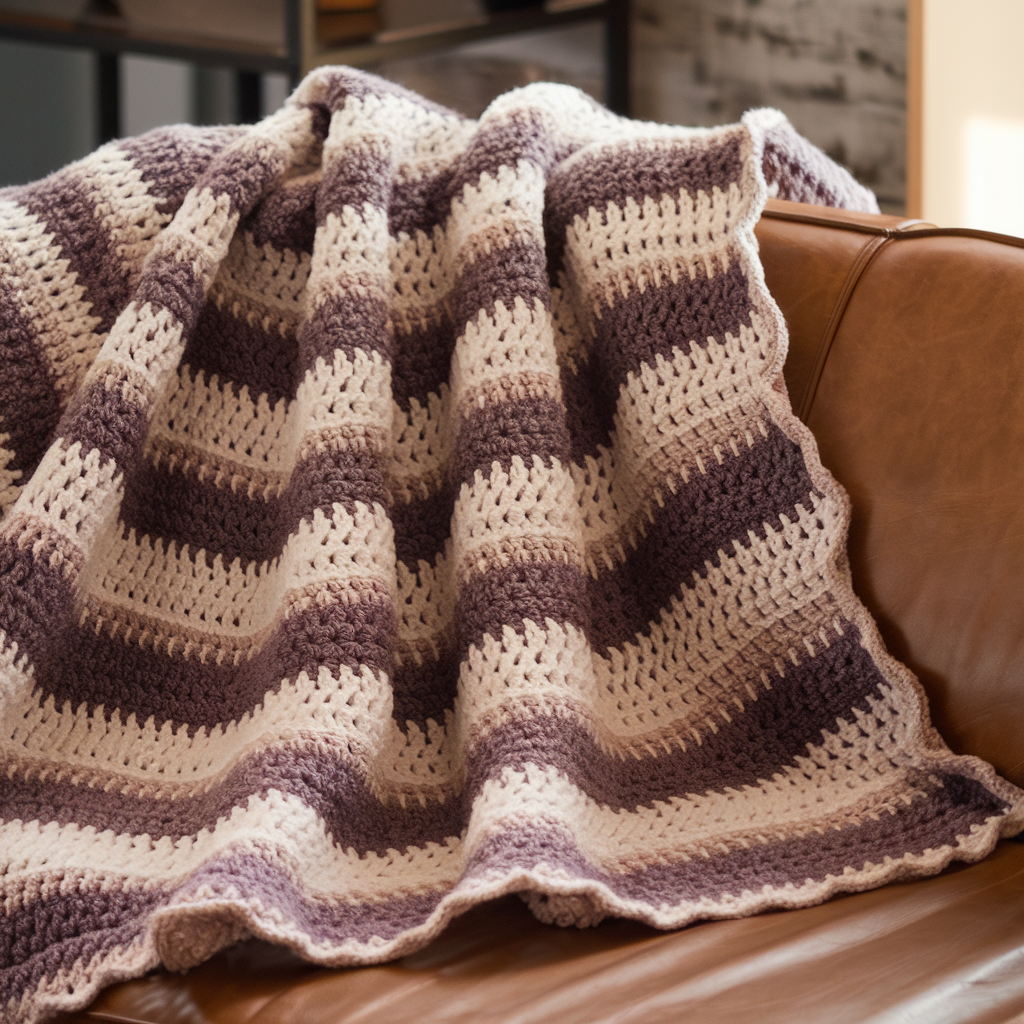
A classic ripple/chevron afghan — clean stripes and flattering drape. Great for landscape colorwork.
Skill level: Confident Beginner → Intermediate
Yarn & tools: worsted (#4), 5.0–6.0 mm hook. Approx yarn: throw ~2,000–3,000 yds.
Concept
Chevron uses increases and decreases to create peaks and valleys. The stitch repeat is long but predictable, so it’s ideal for TV crocheting.
Basic ripple repeat (example)
Typical ripple repeat is multiple of 14 + 2 (foundation). For a throw 50″ width and gauge 4 sts/in example:
Stitch-per-inch example: 4 sts/in → needed stitches = 50 × 4 = 200. Round to nearest multiple of 14 + 2. Solve 200 − 2 = 198; 198 ÷ 14 = 14.142 → nearest whole multiple is 14 × 14 = 196; plus 2 = 198 Which is slightly under 200; choose 15 × 14 = 210 + 2 = 212 for a slightly wider blanket. That arithmetic broken down:
- Compute 50 × 4 = 200.
- Subtract 2 → 200 − 2 = 198.
- 198 ÷ 14 = 14 remainder 2 (198 divided by 14 equals 14 remainder 2) — close to 14 repeats but not exact. For clean repeats choose 14 repeats → 14 × 14 = 196; add 2 → 198 foundation stitches. Or choose 15 repeats → 15 × 14 = 210; +2 = 212. I recommend 198 for slightly narrower or 212 for a wider throw. Pick 198 foundation chain for a neat coverage slightly under 50″. (198 ÷ 4 = 49.5″ width).
Foundational chain: ch 198 (for chosen 198). This is large; chain with good tension.
Ripple row (one popular variation)
Row 1: dc in 4th ch from hook, dc across to pattern point; at peaks and valleys you do 3 dc in one stitch (for peak) and skip 2 stitches or do decreases (dc2tog) at valleys. Classic formula: dc across to 3 sts before valley, dc2tog, dc in next, dc2tog, continue; at peak make 3 dc in next stitch; repeat. Chart the exact repeat on scrap before committing.
Color & striping
Stripe every 6–10 rows depending on desired band size. Use a schedule: 8 rows color A, 8 rows color B, etc. If you want subtle variation use heathered yarn.
Edging
Finish with 4 rounds sc; add a scallop or shell edge for softness.
Tips
- Keep a stitch marker at valley peaks to keep counts straight.
- When joining a new color, change at the end of a repeat to keep stripes aligned.
5. Crochet Gingham Blanket Pattern
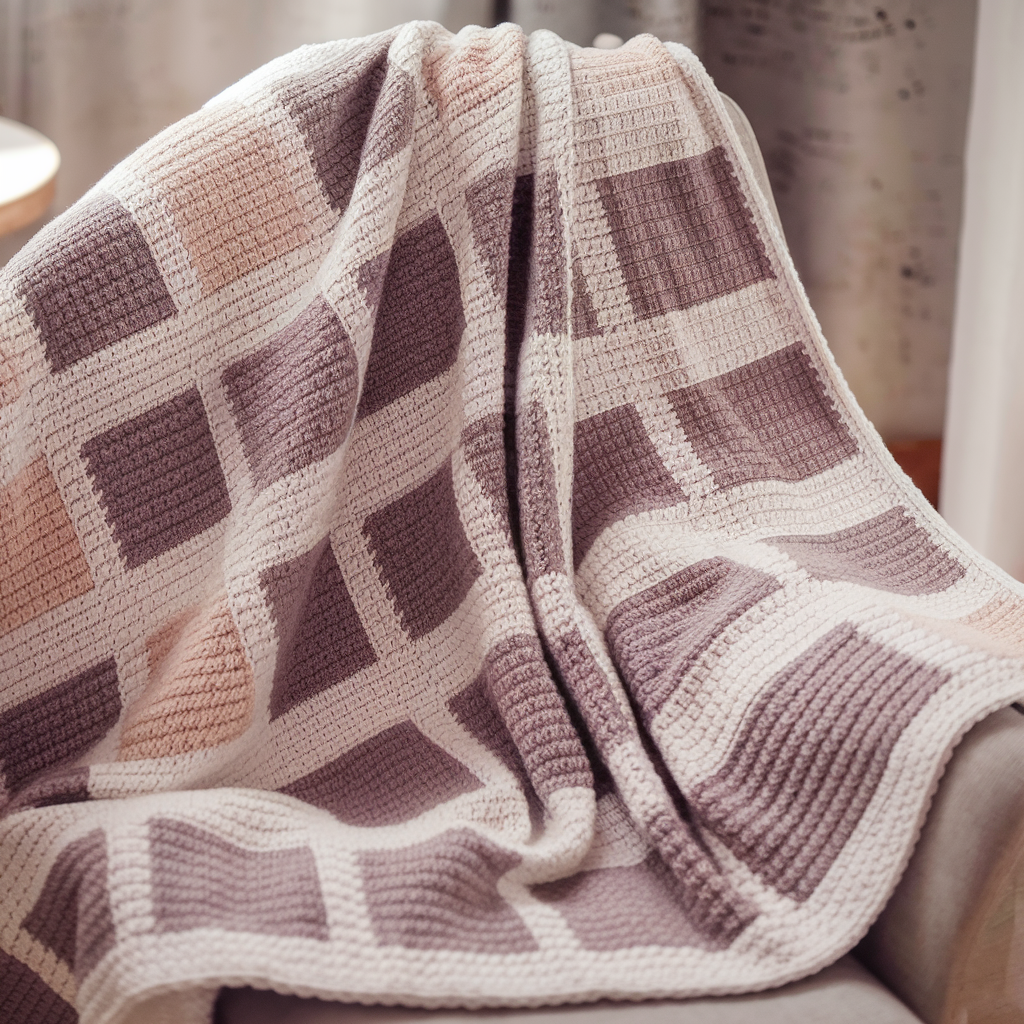
Crisp, modern gingham style made with colorblock squares or mosaic/overlay technique — a contemporary grid that reads like woven gingham.
Skill level: Intermediate (color changes or mosaic technique)
Yarn & tools: DK or worsted depending on desired scale, 4.0–5.0 mm hook. Approx yarn: throw 1,800–2,500 yds depending on color alternation.
Two valid approaches
- Color-block granny squares: Make small 4″ squares in two colors, assemble in alternating checkerboard for gingham effect.
- Overlay mosaic technique: Work a single rectangle and use mosaic slip-stitch colorwork to create the gingham blocks without carrying floats across large gaps.
I’ll outline the color-block square method (easier to manage).
Color-block square approach
Pick square size 4″ (blocked). For a 50″ width: 50 ÷ 4 = 12.5 → choose 12 or 13 squares across. I recommend 12 squares across (12 × 4 = 48″).
For 70″ length and 4″ squares: 70 ÷ 4 = 17.5 → choose 18 rows (18 × 4 = 72″ length). Blanket: 12 × 18 = 216 squares.
Square pattern: Simple 4-round granny or 4″ solid sc square depending on desired look. Example sc square (solid look): ch 17, sc across, work rows until square measures 4″ blocked.
Assembly: Lay out squares in checkerboard — Light/Dark alternating both rows and columns. Join using whipstitch or join-as-you-go. Finish with 3–4 rows sc or a clean picot border.
Variations & tips
- For a softer gingham, use heathered colors or use a half-square technique (two triangles) to make diagonal gingham.
- Mosaic alternative uses slip stitch technique to produce blocks in one piece — good for advanced crocheters who hate seaming.
Final finishing, blocking & care (applies to all five designs)
- Weave and tidy ends: For blankets, bury ends at least 2–3″ into fabric and stitch them through multiple layers; heavy blankets show sloppy ends.
- Blocking: Block if pattern needs it (granny, plaid, gingham squares). Waffle and afghan ripples usually need mild blocking to even edges. Use a dry blocking or spray method depending on fiber.
- Lining/backing: If you want a stable, no-snag blanket for daily use on a family couch, sew a cotton flannel backing to the crochet. It stabilizes shape and increases warmth.
- Washing: Most acrylic/wool blends will have care instructions — for acrylic, machine wash gentle in cold in a mesh bag; lay flat to dry. For pure wool, hand wash cold and dry flat. Cotton can be machine-washed but may shrink — prewash your yarn if you’re worried.
- Storage: Store flat or rolled. If you fold and stash, put acid-free tissue between layers to avoid creases for long-term storage.
Conclusion
A blanket is two things: a long-term asset and an opportunity to do something that lasts longer than a season. Pick the pattern that matches your patience and usage: granny squares for modular, waffle for winter cuddling, plaid granny for grown-up colorwork, ripple for classic motion, and gingham for crisp modern decor. Swatch, do the math (stitches-per-inch × finished width), and choose your method of joining before you commit to 200 chains. The rest is repetition — and the rewarding, slow construction of something that will be used, loved, and possibly found on the couch months from now with a coffee ring that you’ll laugh about.