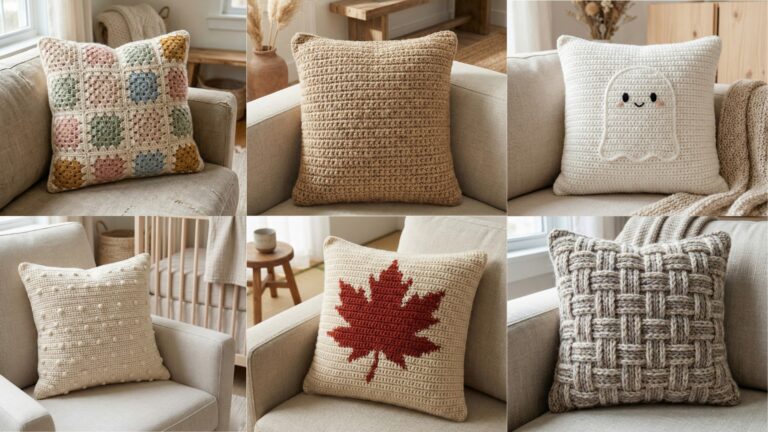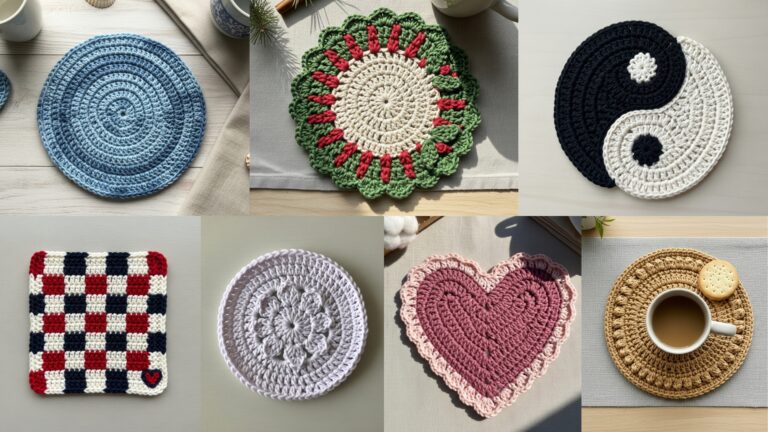
Crochet pillows are one of the fastest, most satisfying ways to add handmade personality to a sofa, bed, or reading nook. This collection gives you five different boho-style pillows — each with a clear materials list, skill level, sample gauge and finished-size guidance, exact step-by-step instructions for making the pillow front (and back), and professional finishing tips (linings, closures, stuffing, blocking, care). Patterns are written for a square pillow cover that fits a standard insert (16″, 18″, or 20″ — I’ll give stitch counts you can scale). All instructions use US crochet terms.
Read the quick notes below first — they explain sizing, common abbreviations, and general finishing advice that apply to every pattern.
Quick notes: sizing, gauge, supplies, and finishing (applies to all five patterns)
Common abbreviations: ch = chain, sc = single crochet, hdc = half double crochet, dc = double crochet, tr = treble, sl st = slip stitch, sk = skip, sp = space, rep = repeat, BLO/FLO = back/front loop only, RS/WS = right/wrong side, MR = magic ring, tog = together.
Pillow sizes & how to choose stitches
- Standard pillow insert sizes: 16″ × 16″, 18″ × 18″, 20″ × 20″. I’ll give example stitch counts for 18″×18″ as the default. To adapt to other sizes measure stitches per inch from a 4″ swatch in the stitch you plan to use, then multiply stitches-per-inch by desired width (18).
- Example default gauge (worsted weight yarn with 5.0 mm hook): 14 sc = 4 in → 3.5 sc/in. Using that, an 18″ pillow requires ~63 sc across (18 × 3.5 = 63). Many stitch patterns need stitch counts to be a multiple — I’ll note that per pattern.
Yarn & hook choices
- Boho look works especially well with cotton, cotton blends, linen blends, or a rustic acrylic/linen mix. For textured pillows consider using Aran/worsted (weight 4) yarn. For softer drape use DK.
- Typical hooks: 4.0–5.5 mm depending on yarn and pattern. Use a smaller hook for firmer fabric (good for pillows) and a larger hook for softer, cushy drape.
- For heavily textured pillows (cables, bobbles) a slightly denser fabric is better to keep motifs crisp and the insert supported.
Notions
- Tapestry needle, stitch marker, small sewing needle for lining, fabric for lining (optional), zipper (18″ or 20″ depending on size), buttons (if you prefer button closure), stuffing (pillow insert of recommended size or polyfil), measuring tape, blocking tools.
Finishing options
- Invisible zipper sewn into one side for a clean finish.
- Buttoned flap: a flap covers the opening and secures with buttons.
- Envelope back (two overlapping panels) — easiest if you don’t want sewing a zipper.
- Add a fabric lining to protect cards and reduce stretch — recommended for cotton yarns.
Care
- Choose washable yarn for items that will be used daily. Most cotton blends are machine-washable on delicate; check yarn label. For special fibers (wool/hand-dyed), hand wash and dry flat.
1. Crochet Surfside Mosaic Pillow Pattern
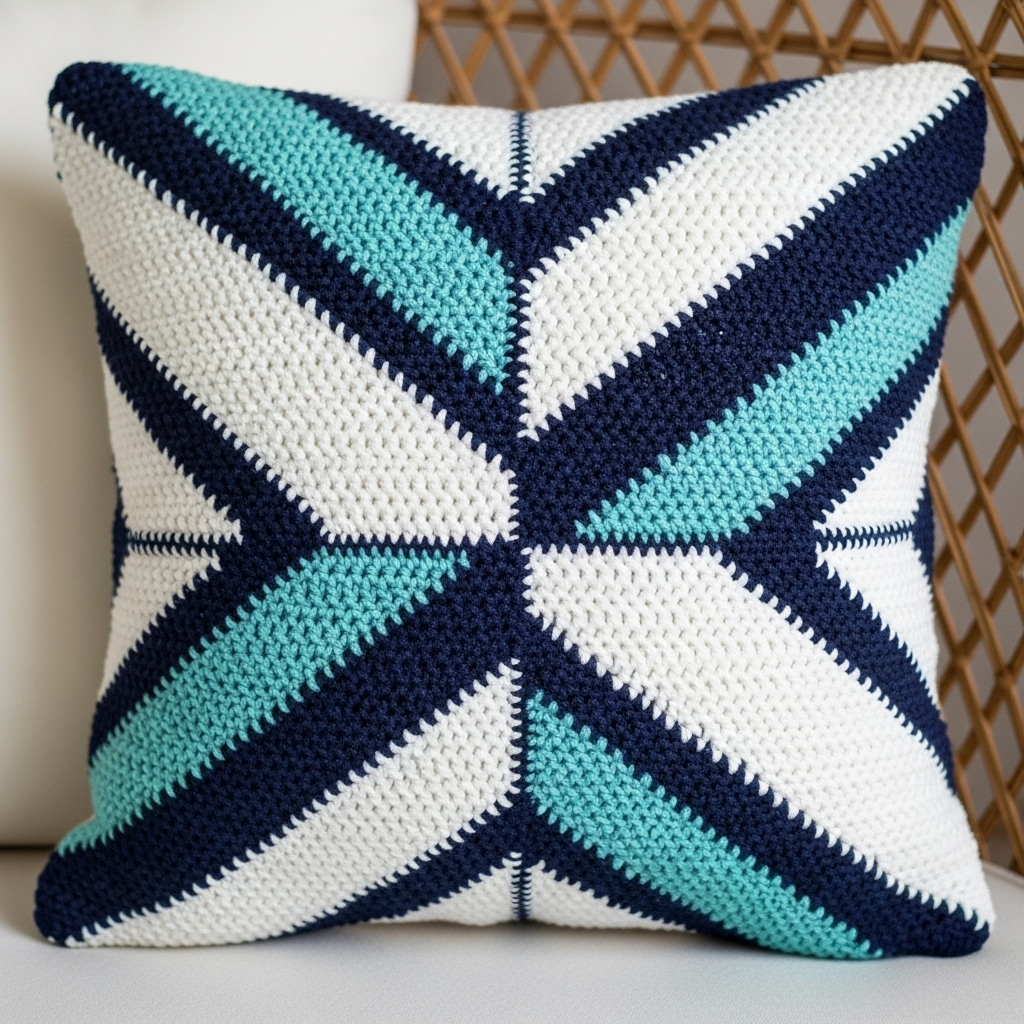
A crisp, graphic mosaic motif that evokes tiles and coastal geometry. Mosaic crochet uses slipped stitches and one color per row, creating a bold two-color pattern with excellent structure.
Skill level: Intermediate (color changes and slipped-stitch mosaic technique)
Materials (18″ pillow example)
- Worsted-weight cotton in two contrasting colors: Color A (background) ~250 yds, Color B (contrast/tile) ~150 yds.
- Hook 5.0 mm (or size to meet gauge).
- Pillow insert 18″ × 18″ or stuffing.
- Invisible zipper 18″ (optional), tapestry needle.
Gauge & stitch multiple
- Mosaic patterns below work with sc-based chart repeats. Using sample gauge (3.5 sc/in) aim for 63 sc across for 18″ pillow. The mosaic chart repeat here is 6 sts; so choose a usable count near 63 divisible by 3 or 6 — 64 sts (round to nearest multiple and allow small trim) or 66 sts. For this pattern use 66 sts (6 × 11). Adjust as needed.
Design concept
- Work two rectangular panels (front/back) in mosaic technique, seam or place zipper on one side. The mosaic motif is worked from a chart — each row uses one color, and you slip stitches for the color not being worked.
Step-by-step
- Make a 4″ swatch in sc with your planned hook and yarn colors to confirm stitches per inch. Recalculate final stitch count: stitches-per-inch × 18 → round to nearest mosaic repeat multiple (6). Example: SW = 3.5 st/in → 63 → nearest multiple of 6 is 66.
- Foundation chain for front panel
- Ch 67 (66 sc + 1 turning ch). Or ch 66 if you prefer foundation sc and then work flat.
- Work flat mosaic chart
- Row 1 (RS): With Color A, sc across (66 sc). Turn.
- Row 2 (pattern): With Color B, follow chart: sc / sl st sequence across. (Mosaic technique: when chart indicates a slipped stitch in B, you insert hook, pull loop through but do not yarn over with B — effectively carrying A or not working that stitch — the previously worked color forms the motif.)
- Important: For mosaic, you always work the row in the single color shown in the chart; the “slipped” stitches are slipped purl-wise or as the chart indicates so that the underlying color shows. Carry floats loosely across the back only a few stitches before catching to avoid long floats.
- Continue following chart rows, alternating colors per chart. Work the chart until the panel height equals 18″ (or slightly taller to allow seam allowance and overlap if making envelope back).
- Make a back panel
- Option A (matching mosaic back): make a second panel identical to front.
- Option B (solid back): ch 67 and sc in Color A for the whole back to simplify.
- Edge finishing
- Work one round of sc in Color A around the panel to tidy edges keeping corner increases neat (3 sc in corners). For a polished edge, pick up Color B for a contrasting narrow frame.
- Assembly options
- Envelope back: For a no-sew zipper finish, work two back panels each 2–3″ shorter in height than front; these overlap when centered. Sew three sides and insert pillow.
- Invisible zipper: Sew zipper to inside of one side — fold seam hems and hand sew zipper tape into panels, then sew remaining seams with whipstitch. Use lining behind the zipper for extra neatness.
- Blocking & trimming
- Block panels slightly to even the mosaic edges; lay flat to dry. Sew panels together with sturdy whipstitch or mattress stitch for an invisible join.
Variations
- Repeat a different mosaic chart for a geometric border.
- Use three colors and swap background mid-row for a more complex tile look (advanced).
Finishing & care
- Weave in ends; test zipper closure. Machine-wash gentle for cotton; line-dry to avoid shrinking.
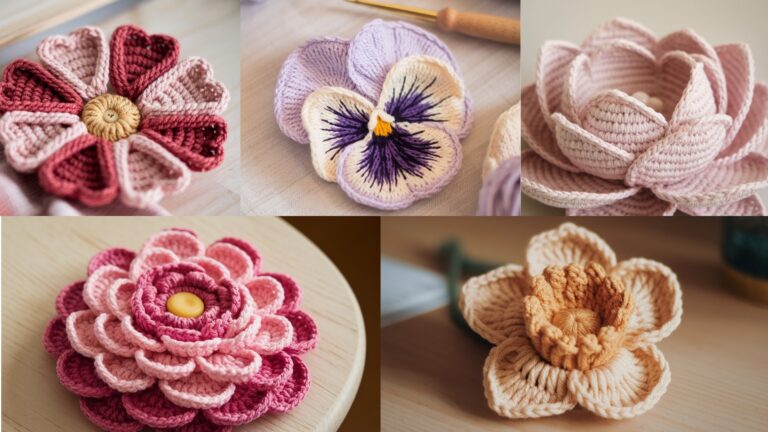
2. Crochet Bloom Pillow Pattern
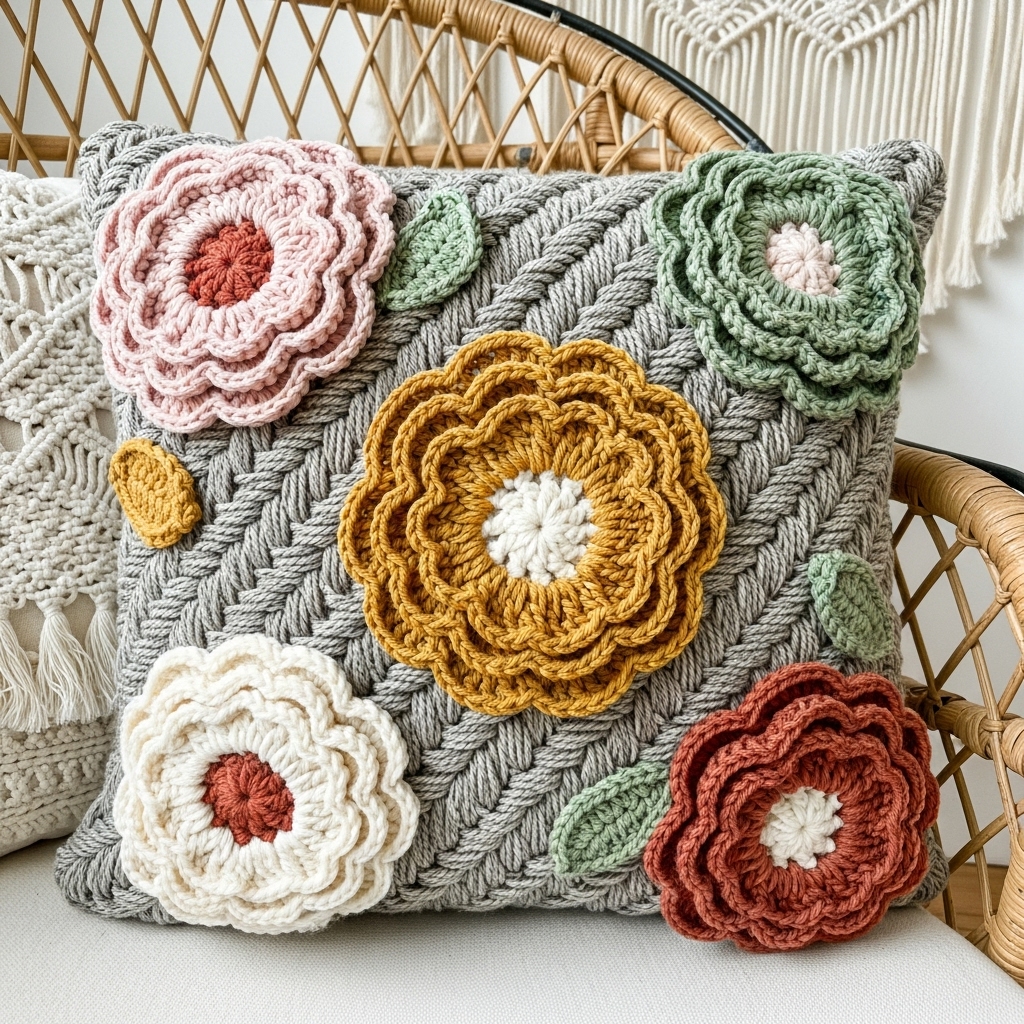
An ultra-boho pillow featuring raised floral appliqués (big central bloom or clustered blooms) on a textured ground. The flowers can be slightly three-dimensional for tactile interest.
Skill level: Confident beginner → intermediate (appliqués and sewing)
Materials (18″ pillow example)
- Worsted cotton in Main Color (MC) for background (~300 yds), small amounts of 2–3 contrast colors for flowers (20–50 yds each).
- Hook 5.0 mm.
- Pillow insert 18″ or fiberfill, tapestry needle, small piece of cotton fabric for lining (optional).
Design concept
- Work a textured ground (e.g., moss/linen stitch or basketweave) for structure, then create 1–3 layered blossom appliqués sewn to the front panel. Optionally add leaves and embroidered centers.
Step-by-step
- Swatch and sizing
- Make a 4″ swatch in your background stitch (example below uses moss/linen stitch). Determine stitches per inch and compute chain count for 18″.
- Background panel (moss stitch example)
- Chain 66 + 1 for turning. Row 1 (RS): sc across (66). Row 2: ch1, sc in first st, ch1, skip next st, sc in next across. Row 3: ch1, sc in ch1 spaces, ch1, sc in next sc across. Repeat Rows 2–3 until panel reaches ~18″ high (estimate 30–36 rows depending on gauge). The linen stitch creates a woven look perfect for boho.
- Make bloom appliqués (large layered bloom)
- Center disk: MR, ch1, 8 sc in ring; sl st join (8). R2: (inc) around → 16 sc. Fasten off leaving long tail. Flatten disk and sew base for petal rows.
- Petal round (layer 1): Join petal color into back loop or outer edge, ch4, sl st into next st repeat to create 8 loops. In each loop work (sc, hdc, dc, hdc, sc) to shape petals. Fasten off.
- Layer 2 (larger petals): Join second petal color into st between petals and make ch5 loops then (sc, hdc, 2dc, hdc, sc) — larger petals. Make 8 or 10 petals depending on size desired. Add a third layer if you want a bigger bloom.
- Leaves: With green, ch8, sc across, use a sequence sc, hdc, dc, hdc, sc to shape leaves; make 2–4 leaves.
- Embroidered center
- Add French knot clusters, seed stitch, or a tuft of cotton yarn in the center for visual texture. Use embroidery thread or contrasting yarn.
- Placement & attachment
- Position blooms on the panel — typical boho arrangements: single large bloom off-center, a trio of small blooms in a cluster, or a row across a corner. Baste them down with large-loop stitches to test placement. Once satisfied, sew blossoms secure with hidden stitches and reinforce petals at base. Add leaves and embroidery.
- Back panel & closure
- Make a solid back in sc or a complementary texture. For easy finishing, create envelope closure: make two back panels each measuring 18″ × ~12″ (overlap to close) or add an invisible zipper. Consider adding a small lining piece behind the bloom area for extra strength.
- Finishing
- Weave ends. For a 3D bloom, stuff slightly under bloom with a small cut of batting if you want extra loft, but keep it subtle. Insert pillow and test.
Variations
- Use gradient yarn for petals for a watercolor bloom.
- Make multiple small blooms for a meadow effect.
Finishing & care
- Secure appliqués thoroughly. If associating with daily-use furniture, consider a sewn lining to prevent drape/stretch. Machine-wash gentle for cotton; remove stuffing and line-dry.
3. Crochet Cable Pillow Pattern
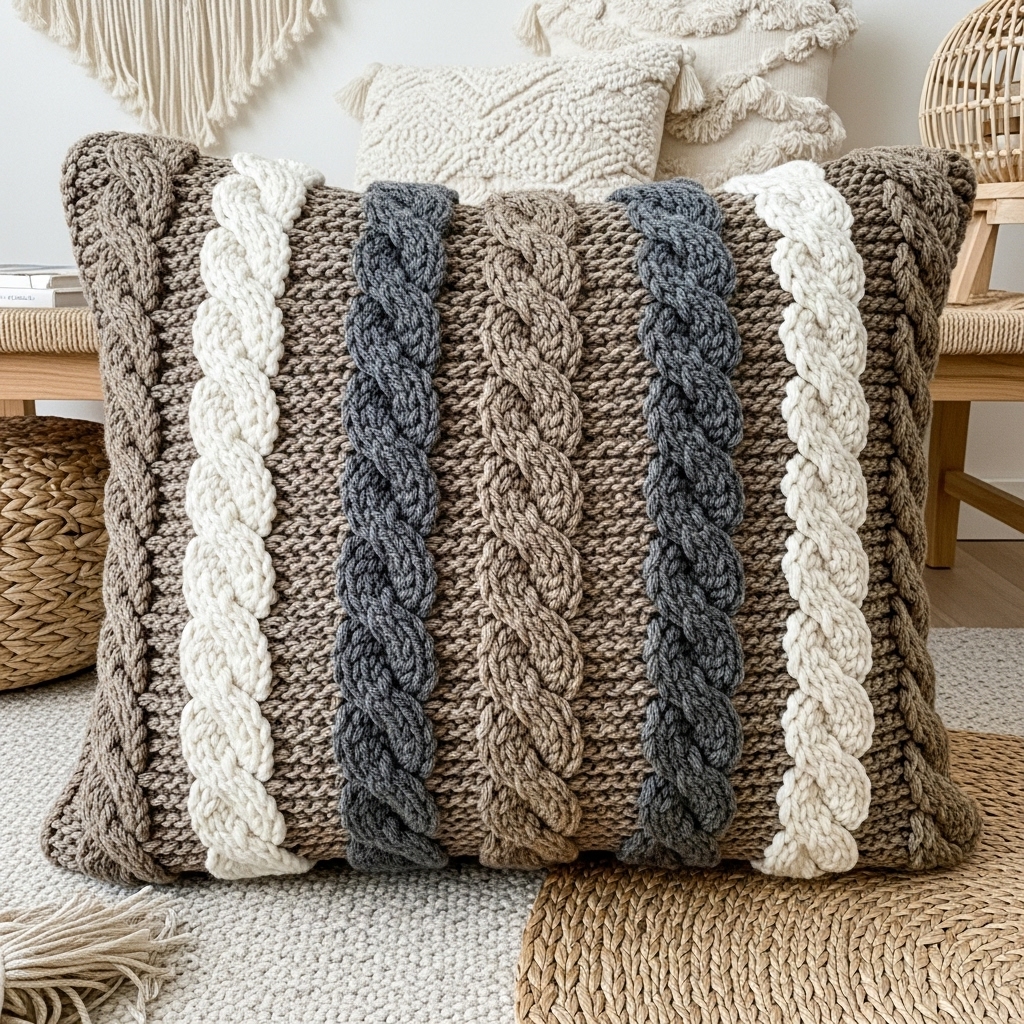
A richly textured pillow that mimics knitted cables using front- and back-post stitches or crossed stitch techniques. Cables add a heavy, cozy, boho feeling — ideal in neutral, rustic tones.
Skill level: Intermediate (post stitches and cable crosses)
Materials (18″ pillow example)
- Bulky or worsted weight yarn (sample uses worsted for crisper cables) ~350–450 yds for front panel (cables use more yarn).
- Hook 5.5 mm (or recommended for yarn).
- Pillow insert 18″, zipper optional.
Gauge & stitch multiple
- Cable repeat generally works in multiples of 12 to 16 stitches depending on cable width. For 18″ target with 3.5 st/in we used earlier, choose a count divisible by 8 or 12 — 72 sts is a good base.
Design concept
- Work rectangular front panel in stitch pattern that includes cable columns (FPdc/BPdc or crossed treble groups). Make a solid or simple textured back and assemble with zipper.
Step-by-step
- Swatch for cable pattern
- Because cable height and crossing frequency affect gauge significantly, swatch at least 6″×6″ working full cable repeats and blocking.
- Foundation chain
- Ch 73 for 72 sts +1 turning chain. Row 1: sc across or start with two rows of dc base to stabilize.
- Cable panel pattern (example repeat)
- Row A (setup): ch2, hdc across (or sc if you prefer denser fabric) and mark cable columns.
- Row B (cable row): work front post double crochets (fpdc) around stitches belonging to the cable column and back post double crochets (bpdc) around spacers to make ribs. A common cable motif: Column A (6 sts): fpdc in next 6; spacer: sc 4; Column B (6 sts): fpdc next 6 etc.
- Cable crossing: Every 8–10 rows, stop and perform a cable cross: temporarily hold first column’s loops or work them in a different order to swap their horizontal relationship. In crochet, one simple cross technique: work Column B first into the post of Column B, then go back and work Column A into post stitches left behind, so they visually cross; more advanced: work into the post from the stitch below and hold groups to create an over/under effect. (I include a sample cross below.)
- Worked example of a 3×3 cable cross (conceptual)
- Rows 1–8: Work fpdc in cables and sc in spacers to build columns.
- Row 9 (cross): Work fpdc around the post of the next 3 stitches from the right-hand column first (Column B), then work fpdc into the left-hand column posts (Column A) — by changing the order of working post stitches you create the cable cross. Continue pattern.
- Panel height
- Continue alternating cable rows and crossing rows until front panel height measures 18″ (or desired dimension). Repeat cable motif across width as many times as you decided.
- Back & closure
- The back panel can be solid sc or a large panel of moss stitch to offset texture. Add an invisible zipper sewn to the inside edge to hide closure. If you prefer minimal sewing, an envelope back (two overlapping panels) works and shows the cable front nicely.
- Blocking & shaping
- Block panels carefully to set cable columns. Because post stitches can distort, pin evenly and steam lightly if using acrylic-size yarn; use wet blocking for natural fibers.
Variations
- Use a central cable column flanked by smaller twists for a focal point.
- Work pillow in monochrome neutrals for sophisticated boho minimalism.
Finishing & care
- Cables benefit from a lining to preserve shape. Hand-wash or gentle machine wash depending on yarn; reshape while damp.
4. Crochet Basic Sunburst Pillow Pattern
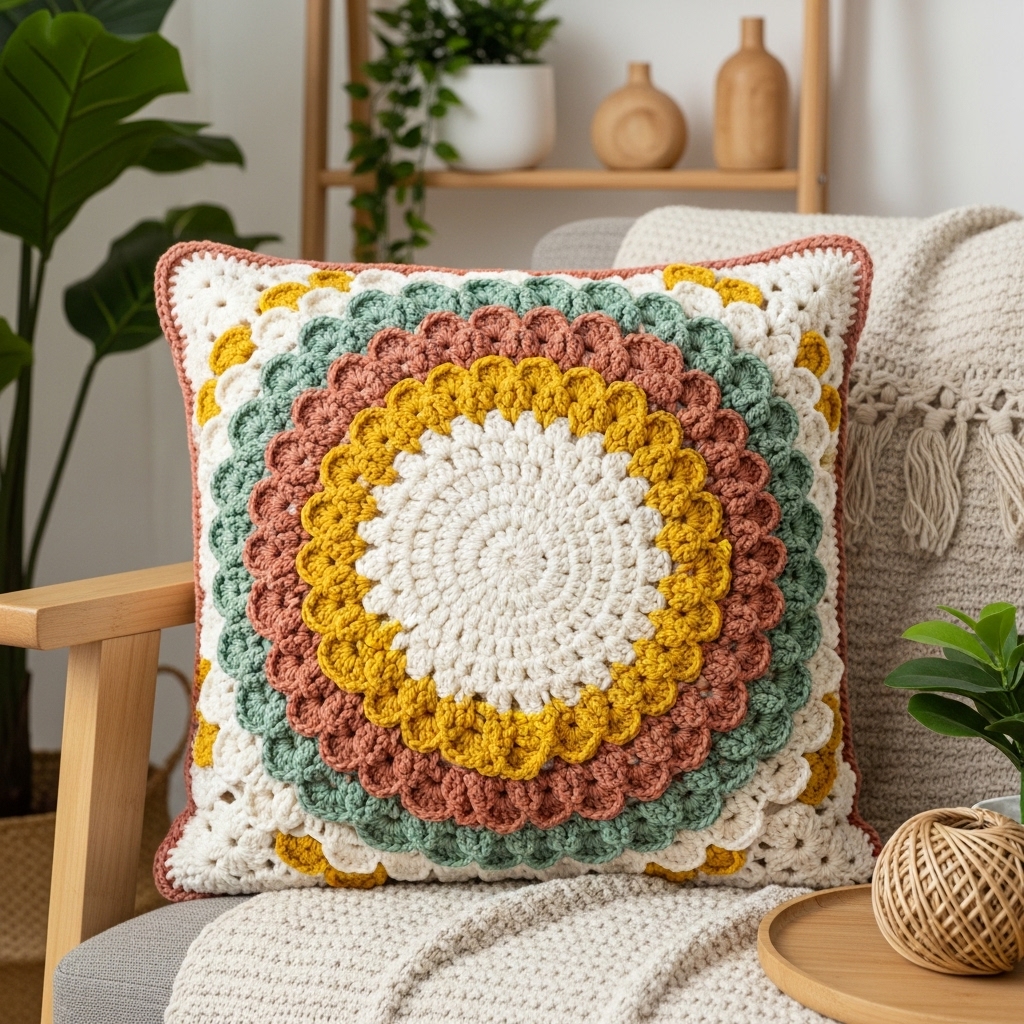
Sunbursts are classic boho: radiating petals or concentric rounds that read like mandalas. This pillow uses a central sunburst medallion worked outward in rounds and mounted on a square or circular cushion.
Skill level: Confident beginner — circular motifs and join techniques
Materials (18″ pillow example)
- Worsted cotton in 3–4 coordinating colors (main + 2 accents) total ~400–600 yds depending on rounds and border.
- Hook 5.0 mm.
- Pillow insert 18″, yarn needle.
Design concept
- Make one large circular sunburst medallion sized to fit or slightly exceed the pillow height, then square it up with a border (work rounds that create a square shape) or sew medallion to a square back panel.
Step-by-step
- Center medallion (sunburst basics)
- R1: MR, ch1, 8 sc in ring; sl st to join. (8)
- R2: ch3, (2 dc) in same st, ch1, 3 dc in next st repeat around to form petal clusters. Sl st to join.
- R3: Into each ch1 space work (sc, ch3, sc) to make small arches between petals. Join.
- R4: In each arch work 5 dc for a second petal layer; continue adding layers that gradually increase stitch count to expand the medallion.
- Sunburst rays & texture
- Alternate rounds of puff/popcorn stitches and tall stitches (tr or dtr) to create bulging sunburst rays. Example: R5: (fpdc, 2 dtr skipped st cluster, fpdc) across petals to add vertical texture.
- Grow to desired size
- Continue layered rounds, changing colors every 2–4 rounds for visual interest, until medallion diameter is about 18″ or a little larger if you plan to square up.
- Square-up border (if you want a square pillow)
- To make the round medallion into a square: work rounds that include chain corners and partial rounds at each quarter to create straight edges. Common method: after medallion reaches near pillow size, work a round of sc across but add (ch 4, sc) at four equidistant points to create corner loops; in the next round work clusters into those corner loops to turn the circle into a square. Repeat a few times to build square shape. Alternatively, make a solid square back and appliqué medallion to front.
- Back panel options
- Solid square (sc or textured) to match size; or make a patterned back and seam together. If medallion is larger than pillow, center and stitch around edges to secure.
- Assembly
- Stitch medallion and back panels together leaving one side open for post closure or zipper. Use mattress stitch for near-invisible seam or heavy whipstitch if you want a visible saddle stitch aesthetic.
- Finishing touches
- Add tasseled corners or a crocheted lace edging for more boho flair. Block medallion to open petals and ensure square sides.
Variations
- Use raised popcorn rounds to create a tactile sun surface (great for tactile boho style).
- Work multiple small medallions across front for mosaic pillow.
Care
- Weave ends; securing the medallion well is important for durability. Hand wash recommended if using delicate yarn.
5. Crochet Tunisian Pillow Pattern
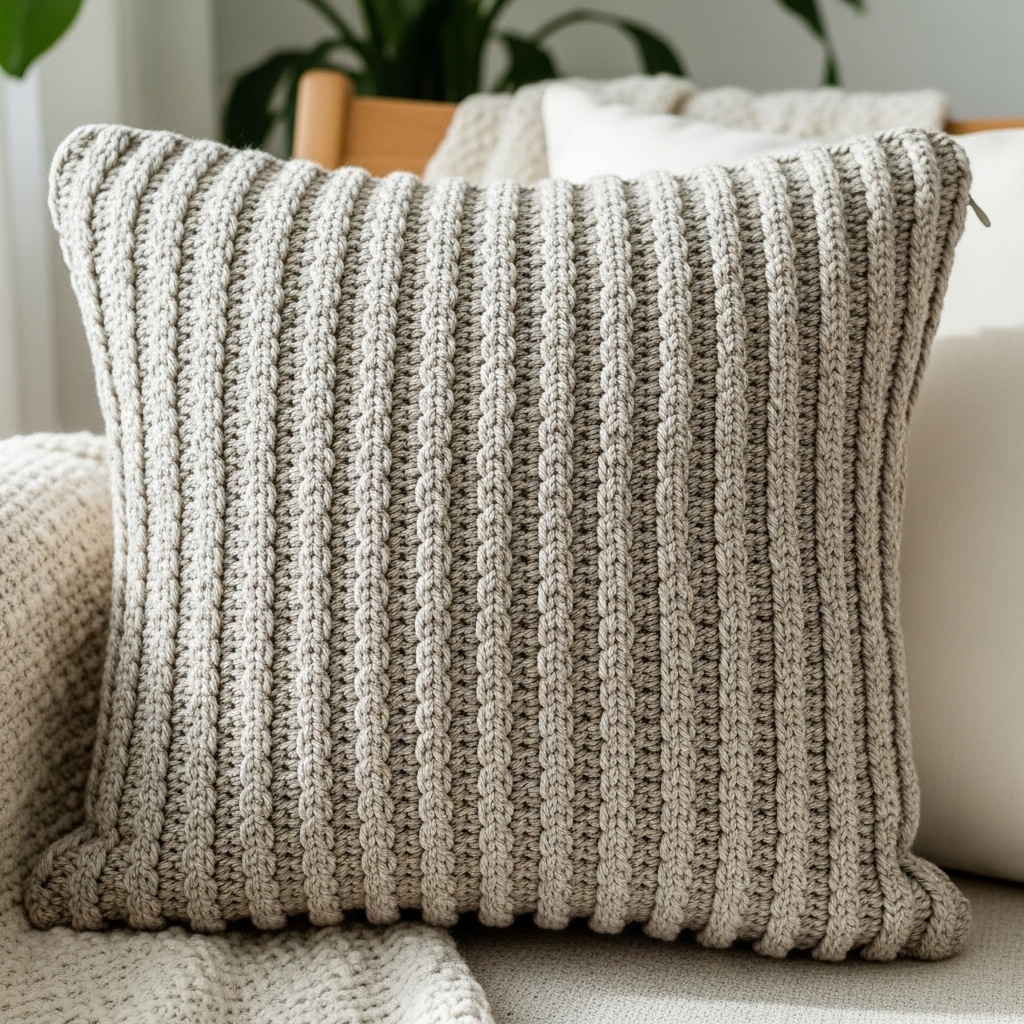
A dense, sculptural pillow using Tunisian crochet — honeycomb, waffle, or knit-look Tunisian stitches create a luxe, textured cushion that reads handmade and modern.
Skill level: Intermediate (Tunisian stitches & long hook)
Materials (18″ pillow example)
- Sport or DK weight yarn (Tunisian likes slightly lighter yarn for drape) 400–600 yds.
- Tunisian hook (long/cabled) 4.5–6.0 mm depending on yarn.
- Pillow insert 18″, tapestry needle.
Design concept
- Make two panels in Tunisian stitch (same pattern) sized slightly larger than insert, seam together and add zipper or envelope back. Tunisian fabric is less stretchy horizontally, so plan counts carefully.
Stitch choices
- Tunisian Simple Stitch (TSS) for a classic grid.
- Tunisian Honeycomb or Tunisian Cable for added texture. I’ll use honeycomb example because it gives the sculptural boho texture.
Step-by-step (Tunisian honeycomb panel)
- Swatch & stitch count
- Work a 4″×4″ Tunisian swatch in honeycomb pattern to determine stitches-per-inch. Because forward passes pick up loops that stay on hook, chain foundation is smaller. Suppose you get 10 sts = 4 in for TSS, then for 18″ pillow plan ~45–46 sts (18 × 10/4 = 45).
- Foundation & forward pass
- Chain 46 + 1 extra chain (if required by your tunisian foundation method) and perform a forward pass picking up loops across using TSS or preferred Tunisian foundation stitch. You’ll have 46 loops on the hook.
- Return pass
- Work the standard return pass (yo, pull through 2 loops) across.
- Tunisian honeycomb repeat
- The honeycomb pattern typically alternates Front Post / Back Post TKS columns. A conceptual two-row repeat (forward & return considered separately) may look like:
- Row A (forward pass): pick up loops across in TSS, but when you reach column positions, work TKS for columns and pick up loop in corresponding stitch to create offset.
- Row B (return): work the return pass as normal, then on next forward pass change the order of post stitches to build the honeycomb bead.
- Because Tunisian stitch patterns can be tricky to describe purely in text, follow a honeycomb chart or detailed two-row written repeat: Row 1 pick up loops across as TSS; Row 2 return pass; Row 3 forward: TKS in columns 1–3, loop pick up in next 2; Row 4 return; Row 5 forward invert order to form honeycomb. Work a 6–8 row repeat to create hexagonal cells.
- The honeycomb pattern typically alternates Front Post / Back Post TKS columns. A conceptual two-row repeat (forward & return considered separately) may look like:
- Width & height
- Continue repeats until the panel height equals 18″ (or slightly taller to allow seams). Make two identical panels.
- Finishing
- Tunisian edges can be uneven — work a finishing round of sc along sides (pick up loops along edge and sc) to stabilize before seaming.
- Block panels lightly (steam or wet block per yarn) to square edges.
- Assembly & lining
- Sew panels together on three sides and insert pillow. For extra stability use a fabric lining between insert and Tunisian shell to prevent catching. Install zipper or whipstitch last side closed.
Variations
- Use a TSS center with a Tunisian rib border for a mixed texture pillow.
- Work honeycomb band only on the front and plain TSS back for less bulk and lower yarn usage.
Troubleshooting tips
- Tunisian fabric gets dense and can be heavy — ensure pillow insert size matches or choose lighter yarn for drape.
- Keep tension consistent; uneven forward pass loop pickup leads to wavy edges.
Care
- Many Tunisian stitches block out differently — follow yarn care. For home-use pillows, washable yarns reduce laundering effort.
Final finishing: seams, lining, closures, and styling tips
- Seams: Mattress stitch or whipstitch with matching yarn gives a neat seam. For a decorative finish, use blanket stitch. When joining textured surfaces (cables, Tunisian), seam on the wrong side and block before seaming for accuracy.
- Zipper vs. envelope: Zippers give the cleanest look and easiest laundering. For a no-sew alternative, envelope backs are fast and charming but add bulk at the back. Invisible zippers look professional when sewn into the seam just inside the edge; consider a small fabric strip or folded sc row to box the zipper tape in.
- Lining: For pillows used daily, add a cotton lining to the pillow shell before inserting the pillow or stuffing; it prevents yarn abrasion and reduces stretch. Cut lining 1/4″ smaller than the crochet shell to keep edges taut; sew to the shell by hand through the crochet stitches near the seam.
- Stuffing: Professional look uses a pre-made pillow insert slightly overstuffed (90–95% of shell size) so the pillow is plump. For a softer boho look use polyfill and stuff manually to desired loft.
- Blocking: Block panels flat before assembly. For delicate lace or medallions, pin out points and dry completely.
- Trim and embellishments: Tassels, fringing, sewn beads, and small leather labels add the final boho touches. Anchor tassels in the seam or onto a reinforcement strip for durability.
Conclusion
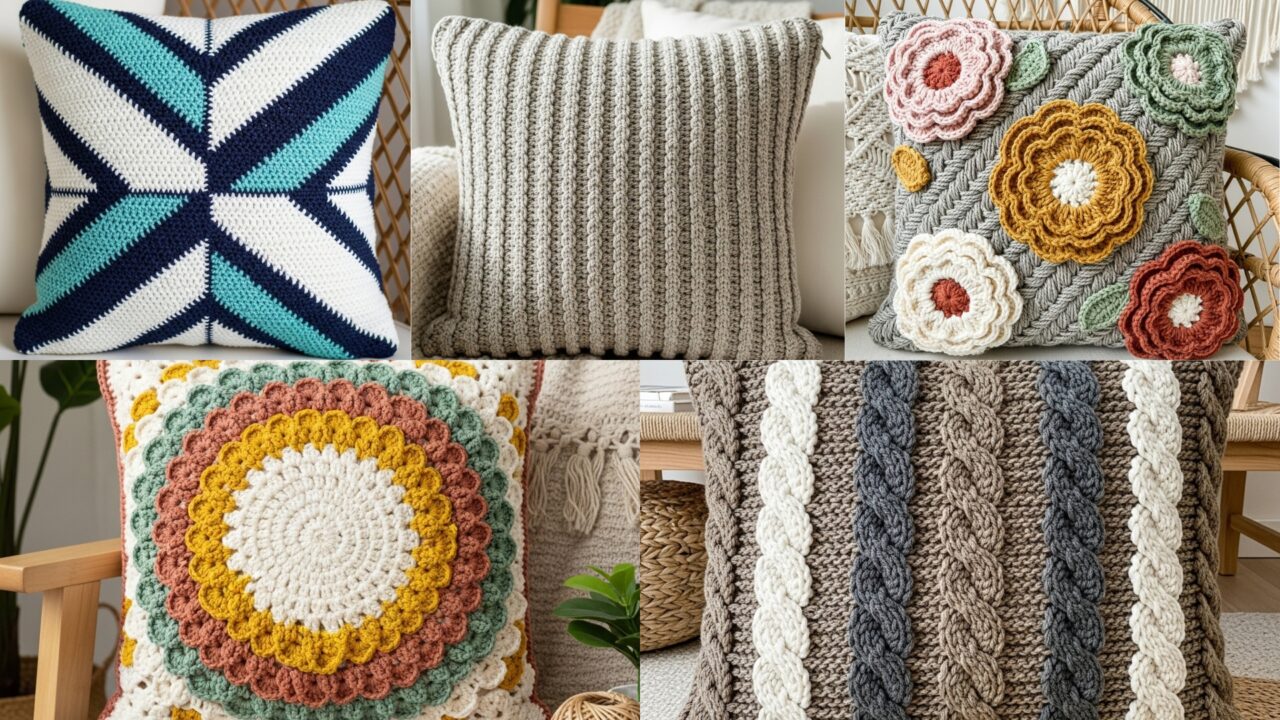
These five boho pillow patterns — Mosaic Surfside, Bloom, Cable, Sunburst, and Tunisian — give you a full range of shapes, textures, and moods for decorating a modern, artisanal home. Each pattern is designed so you can adapt it to 16″, 18″, or 20″ inserts by checking your swatch and adjusting stitch counts to match the repeat multiples indicated. Whether you want clean geometric tiles, sculptural cables, three-dimensional flowers, a mandala medallion, or a dense Tunisian texture, these pillows are approachable, rewarding, and photogenic.