Pillow covers are one of the fastest, most satisfying home projects — they’re small, forgiving, and a fantastic way to try new stitches or use leftover yarn. In this post you’ll find five beginner-friendly crochet pillow cover patterns with full materials lists, stitch notes, clear step-by-step instructions, finishing tips, and easy variations so you can make cushions that look designer-made without a lot of work.
Each pattern includes measurements for three common pillow sizes (12″, 16″, 18″). I use US terms throughout. Before we jump into patterns, read the quick materials and abbreviations section so everything that follows is easy to follow.
Quick materials, sizing & abbreviations
Suggested pillow insert sizes (choose the nearest):
- Small accent: 12″ (30 cm) square
- Standard throw: 16″ (40 cm) square
- Large throw: 18″ (45 cm) square
Common materials
- Yarn: see each pattern; typical choices:
- Chunky/bulky (#5) for fast, sculptural covers
- Worsted (#4) for classic, resilient covers
- DK/sport (#3) or fingering (#2) for lighter, delicate covers
- Hook sizes: given per pattern. Use what gets you the gauge and fabric feel you want.
- Tapestry needle for weaving ends, stitch markers, buttons or zipper (optional), safety pins, scissors.
- 1 pillow insert per cover.
Gauge (general note)
Always make a 4″ (10 cm) swatch using the stitch used in the pattern, measured and blocked the same way you’ll finish the cover. If your gauge differs, change hook size.
Abbreviations (US)
- ch = chain
- sc = single crochet
- hdc = half double crochet
- dc = double crochet
- tr = treble (tr)
- sl st = slip stitch
- st(s) = stitch(es)
- sk = skip
- BLO = back loop only
- FLO = front loop only
- rep = repeat
- RS = right side
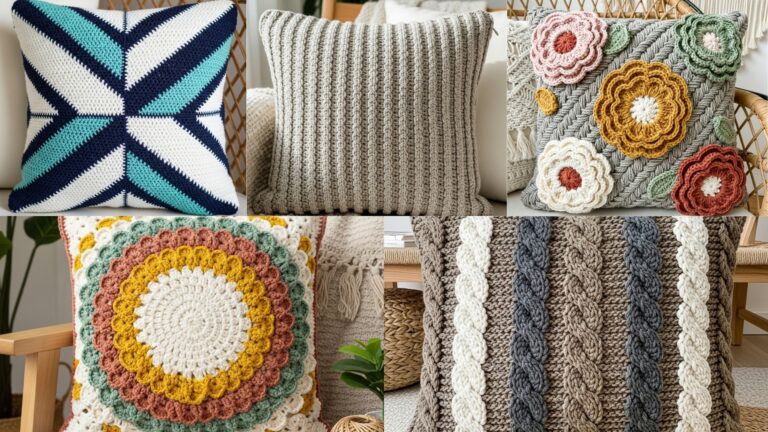
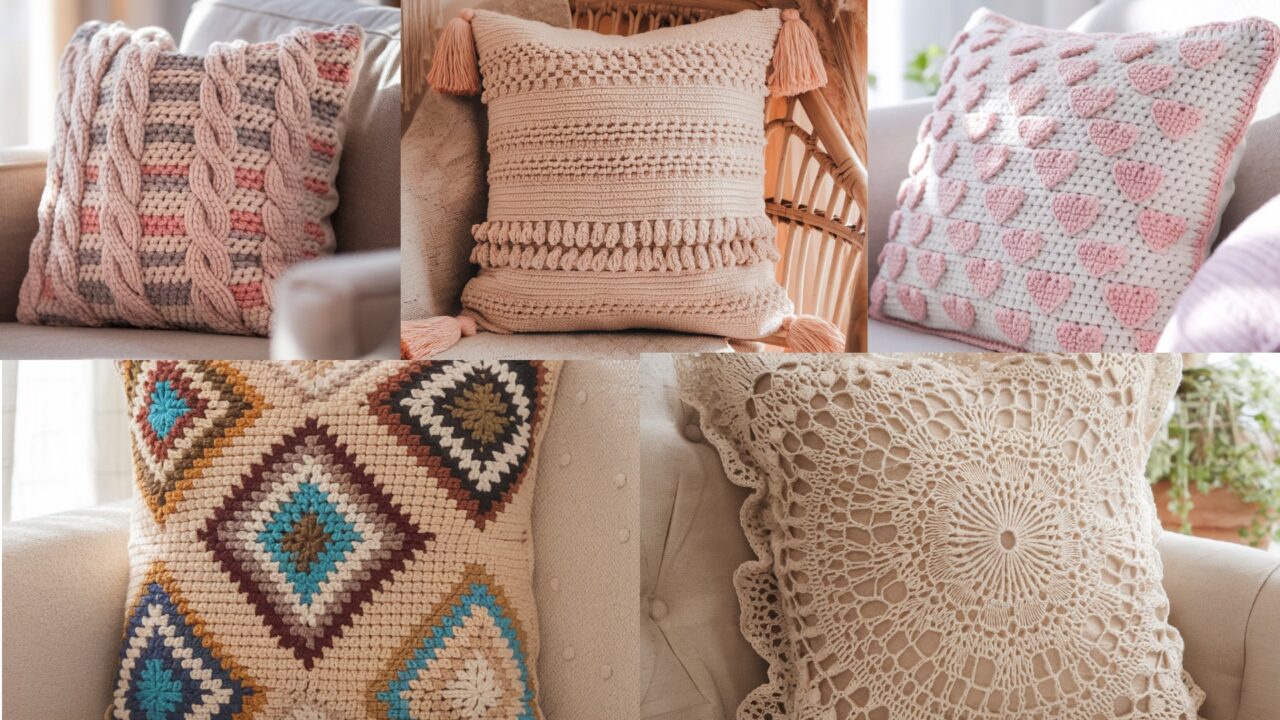
A pillow cover is a small canvas for texture and color. You don’t have to be an advanced crocheter to get professional-looking results — choosing the right yarn, a clean stitch repeat, and tidy finishing are the keys. Below are five distinct looks:
- Chunky Cable — sculptural, cozy, tactile
- Bohemian — tassels, fringe and boho texture
- Charleston Lace — airy vintage lace for dressy spaces
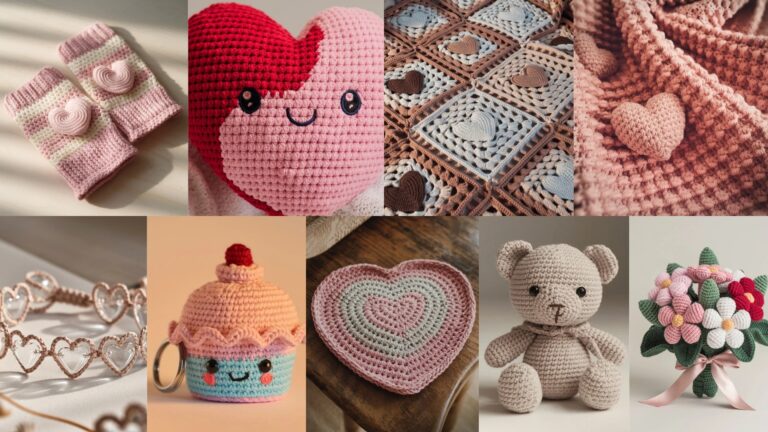
- Timeless Mini Hearts — sweet, graphic, great for gifts
- Mosaic — colorwork with a bold geometric look
Each pattern is written for the three insert sizes above. Where helpful, I give exact stitch counts for the 16″ (middle) size and explain how to scale. If you want a printable one-page pattern for any design, say which one and I’ll format it.
1. Crochet Chunky Cable Pillow Cover Pattern
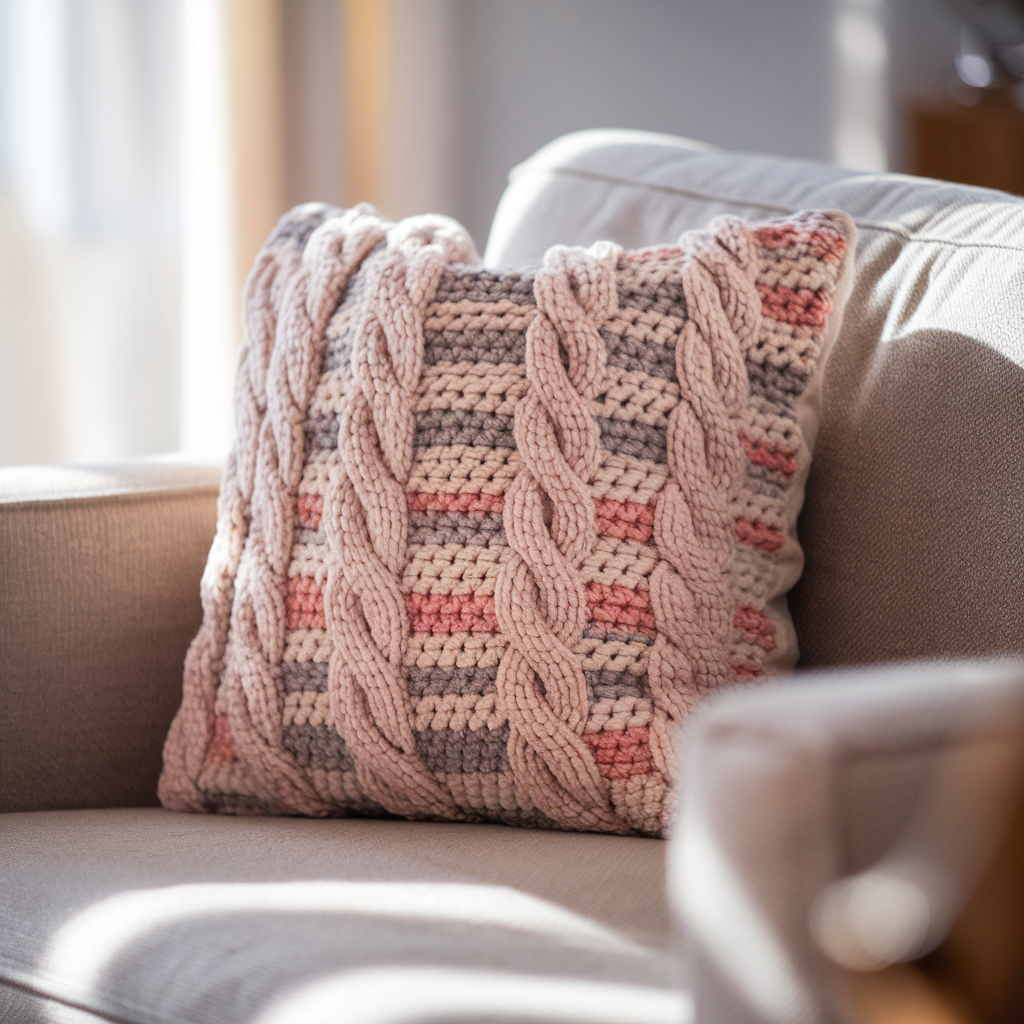
A very beginner-friendly textured cover that mimics knitted cables using front/post stitches and a dense, squishy fabric. Best in bulky yarn for quick results.
Finished sizes (flat cover panels):
- 12″ insert — make 12″ × 12″ panels
- 16″ insert — make 16″ × 16″ panels
- 18″ insert — make 18″ × 18″ panels
Materials (16″ example)
- Bulky yarn (#5), about 220–300 yards total (both panels), estimate varies by yarn length and stitch density
- Hook: 8.0 mm (L) or size to reach gauge
- Tapestry needle, scissors, 16″ pillow insert or zipper/buttons
Gauge (rough, unblocked):
8 sc × 8 rows = 4″ in sc; cables will pull fabric so measure a swatch in the cable repeat.
Stitches used
- sc, hdc, dc, FPdc (front-post double crochet), BPdc (back-post double crochet)
Cable motif explanation (visual)
- Cable panel = stacked columns of FPdc and BPdc crossed every N rows to imitate a 4-stitch cable twist. The cable “rope” uses post stitches for depth, set over a background of hdc or sc.
Panel foundation (16″ example stitch count)
- For a 16″ panel with gauge above you might start with 32 foundation chains + 2 turning chains. Cable repeat uses multiples of 8 + 2 for edges — adjust if your gauge differs.
Pattern — Front panel (16″)
Work flat; RS shows cable face.
Row 1 (base): ch 34, sc in 2nd ch from hook and across (33 sc). Turn.
Row 2: ch 2 (counts as hdc), hdc across. Turn.
Row 3 (start cable pattern): ch 2, FPdc around next st, BPdc around next st, FPdc around next st, BPdc around next st — repeat across, end ch 1, turn. (This sets four-post groups)
Rows 4–6: ch 2, hdc across to frame cable groups (or repeat Row 3 if you prefer very raised cables).
Row 7 (cable cross): Work crosses: locate each 4-post group: skip first 2 posts and work FPdc around the 3rd post, then FPdc around the 4th post, return to the first and second to form cross — if you prefer a simpler twist, instead do FPdc around next post, then FPdc around previous post to cross. (Cable crossing technique is written below.) Turn.
Rows 8–12: Repeat Rows 4–7 for length until panel height equals the pillow size (16″). End with a neat sc border row if desired.
Cable crossing technique (simple step-by-step)
- Work across until you reach the 4-stitch cable group. Place a removable marker at the start if helpful.
- To cross left over right (traditional cable): sl st into post 3 and hold it on hook (or insert hook around post 3 and pull up loop), then work FPdc around post 4, and then FPdc around post 3. Many crocheters prefer to work cable crosses using stitch markers and replacing loops — a clear video helps; keep crossings loose enough to not choke the fabric.
If the cable crossing detail is unfamiliar, you can substitute a column of FPdc / BPdc without crossing — you’ll still get strong texture.
Back panel
- For an envelope-style cover: make a full back panel as one piece the same width and about 60–70% of the height then overlap with a second flap to form the envelope. For simplicity, make two identical panels and seam three sides, insert pillow, then seam last side or add buttons/zipper.
Finishing
- Weave ends, block lightly (bulky yarn not heavily blocked). Option: Add a narrow sc border around the edges for neatness, and use mattress stitch or whipstitch to seam two panels with RS out or in depending on finish. For an easy closure, overlap two shorter back flaps 3–4″ and add two buttons to secure or use a hidden zipper.
Variations & tips
- Use a super-bulky roving yarn and 10–12 mm hook for dramatic, sculptural cushions.
- Alternate cable columns with moss stitch for a modern farmhouse look.
- If you prefer no seams, make one long rectangle wide enough to wrap around the insert and join short ends, leaving an opening to insert pillow.
2. Crochet Bohemian Pillow Cover Pattern
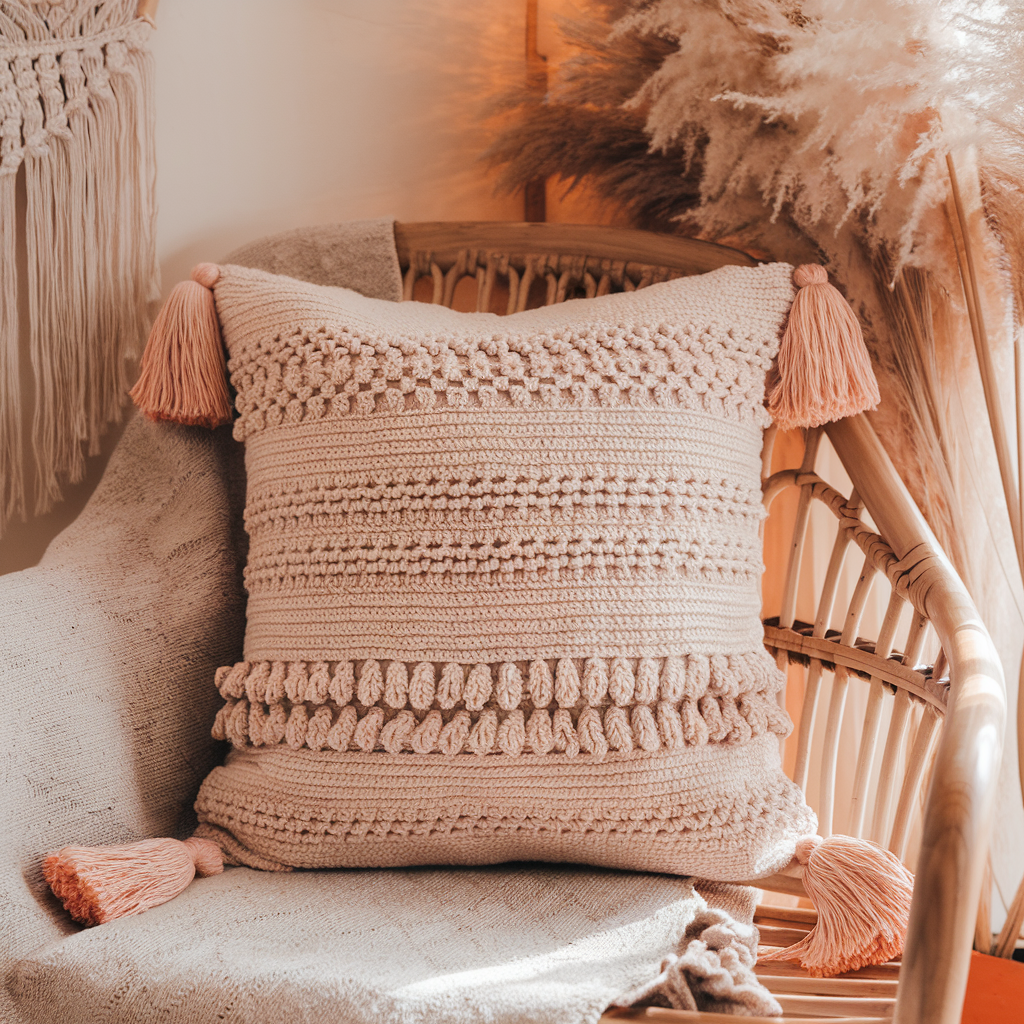
This boho cover features tassels, texture panels, and fringe — ideal in cotton, linen blend or wool-cotton for summer/warmth. It’s forgiving and lots of small techniques make it look elaborate but it’s all beginner-friendly stitches.
Materials (16″)
- Worsted (#4) cotton or cotton-blend yarn, ~300–350 yds total
- Hook: 4.5 mm (7)
- Tapestry needle, scissors, 8 small tassels or fringe materials, 16″ pillow insert
Stitches used
- sc, hdc, puff stitch (simple 3-loop puff), shell stitch, dc clusters
Layout & concept
Work a front panel that’s divided into horizontal bands: textured band, shell band, puff band, plain band. Add fringe or tassels at top or bottom.
Front panel (16″) — counts & repeat
- Chain to width for 16″: ch 40 + 1 turning (approx; adjust to your gauge). Work in rows.
Band A — base (plain): Rows 1–4: ch 1, sc across.
Band B — shell band: Row 5: sk 2, (5 dc) in next st, sk 2, sc in next st repeat across. Row 6: sc across to secure shells.
Band C — puff cluster band: Work a row of puff stitches: ch 2, (yo, pull up loop) 3 times into same st to make 3-loop puff, yo and pull through all loops, ch 1 to secure — leave a sc spacer between puffs. Repeat into several rows to create puffy band.
Band D — openwork band: 2–4 rows of ch3, sk1, sc grid for airy texture.
Repeat bands until panel reaches 16″ height.
Tassel & fringe finishing
- Attach tassels at corners or a continuous fringe along the bottom: cut 6–8 strands of yarn 14″ long, fold in half, use a crochet hook to pull loop through edge and pull ends through loop to knot (lark’s head).
Back panel & closure
- Make a plain sc panel or a simple granny square panel for the back. For an envelope closure: make two back flaps each 10–12″ tall to overlap. Sew sides leaving overlap, add a button at top flap for extra security.
Variations & tips
- Add beads to tassels for boho luxe.
- Use color-blocked bands for strong visual impact.
- For a textured modern boho, use a neutral base and one accent color for tassels and puff band.
3. Crochet Charleston Lace Cushion Cover Pattern
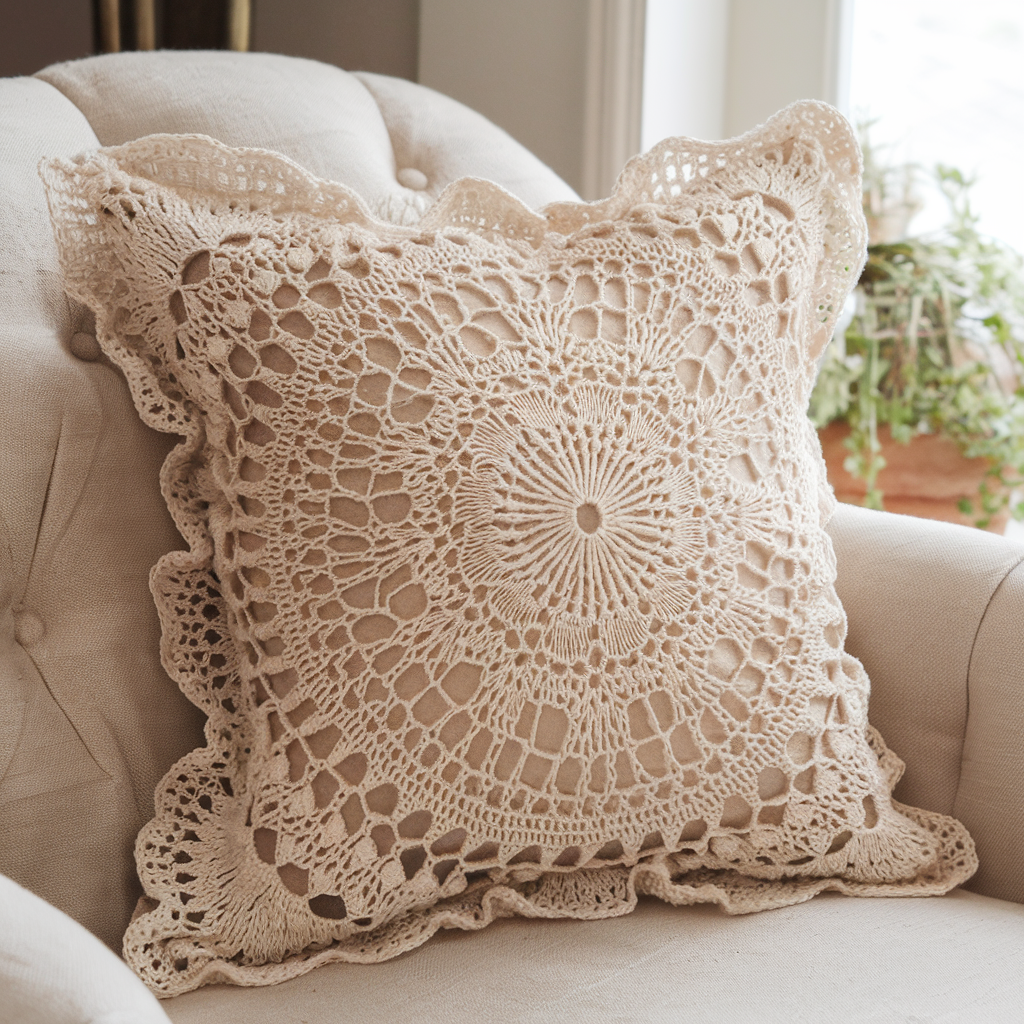
An elegant, airy lace cushion inspired by vintage Charleston crochet. Works beautifully in DK weight cotton or bamboo-blend yarn.
Materials (16″)
- DK weight cotton yarn, ~350–400 yds total (lighter yarn takes more length)
- Hook: 4.0 mm (G) or size for lace gauge
- Blocking pins, blocking mat, tapestry needle, pillow insert
Stitches used
- ch, sc, dc, shell (5 dc in ch-spaces), picot (optional), cluster
Lace stitch repeat
A classic shell-and-chain openwork: multiples of 8 + 4 for foundation.
Sample lace repeat (one row): sc, ch 3, sk 2, 5 dc in next ch-3 sp, ch 3, sc — these alternating rows of shells and chains create delicate flowers.
Front panel (16″ example)
Foundation: ch 44 + 4 turning (multiple of 8 + 4).
Row 1: sc in 2nd ch from hook and across to set base.
Row 2 (shell row): ch 4 (counts as dc + ch1), 5 dc in next sc, ch 1, sk 1 sc, dc in next sc — adjust so shells sit centered.
Row 3: ch 1, sc across and into ch-1 spaces as needed to stabilize.
Repeat Rows 2–3 until panel height = 16″.
Blocking is essential — after finishing, wet-block pinned to 16″ square to open lace and even edges.
Back panel & closure
- For a neat finish and to showcase lace, make a solid single-color back panel in dc or hdc and use a zipper so lace overlays show. Alternatively, make two smaller back panels for envelope closure.
Edge & picot trim (optional)
- When blocked, pick up stitches along edge with smaller hook and work picot border: sc 3, ch 3, sl st in 3rd ch for a delicate scalloped border.
Variations & tips
- Pair with a plain linen cushion insert for a vintage look.
- Use mercerized cotton for sheen, or bamboo-blend for drape and softness.
4. Crochet Timeless Mini Hearts Pillow Cover Pattern
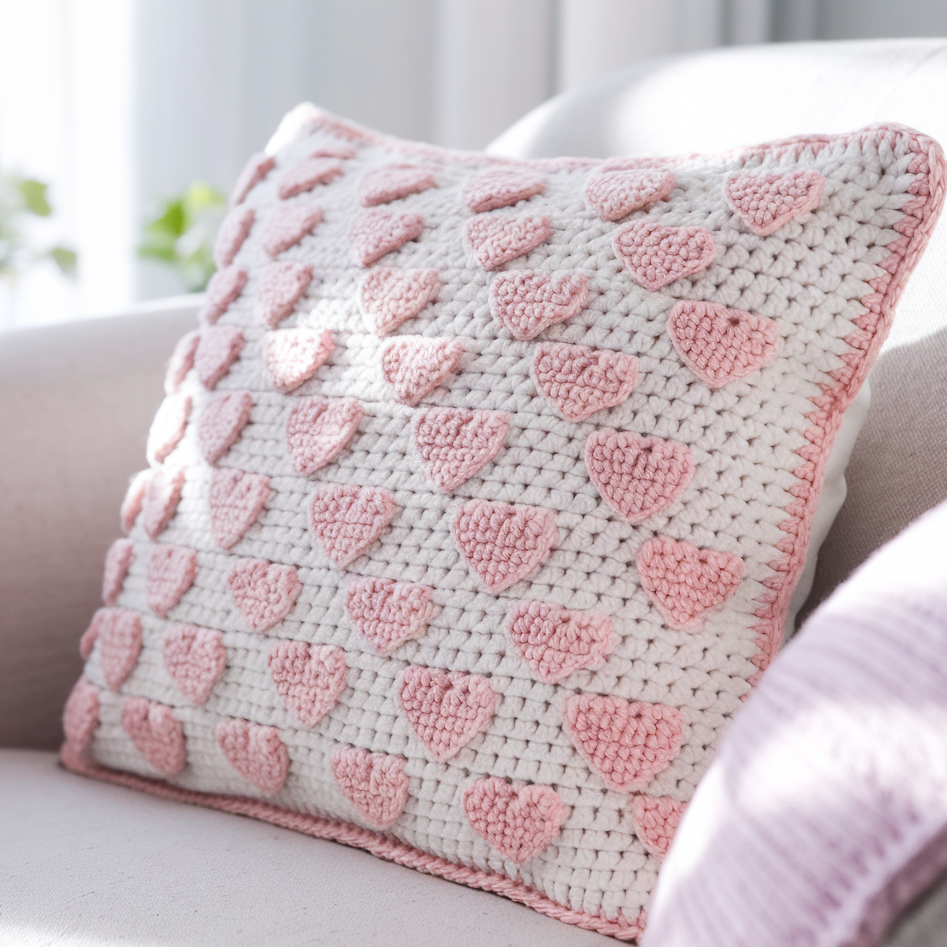
A sweet, graphic cushion using a repeated mini-heart motif in tapestry or duplicate-stitch colorwork. Great for gifts and fast to stitch in worsted yarn.
Materials (16″)
- Worsted yarn in two contrasting colors (A = background, B = heart color), ~350 yds total
- Hook: 4.5 mm (7)
- Tapestry needle for colorwork or for doing duplicate stitch if you prefer to embroider hearts post facto
- Pillow insert, scissors
Technique options
- Tapestry crochet (carry floats) to crochet hearts into panel as you go.
- Solid panel + duplicate stitch — crochet whole panel in background color and embroider hearts afterward (easier for beginners).
Heart motif (chart)
A small 7×7 pixel heart chart (rep across the panel in a grid). For 16″ width, plan 4–5 hearts across and 4–5 rows down depending on scale.
Panel instructions (duplicate-stitch method — easiest)
- Make a full background panel: ch 40 + 1, work sc or hdc rows until panel = 16″. Use whichever stitch gives tidy fabric (hdc makes a slightly taller stitch and is nice for embroidery base).
- Transfer chart: mark the panel with locking stitch markers where top-left corner of each heart should be. Using tapestry needle and heart color yarn, work duplicate stitch (like cross-stitch but couching on top of crochet loops) following the heart pixel chart. Duplicate stitch hugs the fabric and is machine-washable if ends are secured.
- Back & closure: make a plain panel for the back and either whipstitch edges with RS out, or make envelope back flaps. For a polished look, hide embroidery edges inside overlapping flaps.
Alternative — tapestry crochet
- Use color changes row-by-row to create hearts; carry floats no longer than 6 sts. Tapestry crocheting is worked in sc; changes are made by inserting the new color and continuing.
Finishing
- Weave in ends thoroughly since you’ll have colorwork. Add a small sc border in heart color for definition.
Variations
- Make a monochrome cover and embroider metallic hearts for a glam effect.
- Use mini-heart vertical repeats to create a striped heart pattern.
5. Crochet Mosaic Pillow Cover Pattern
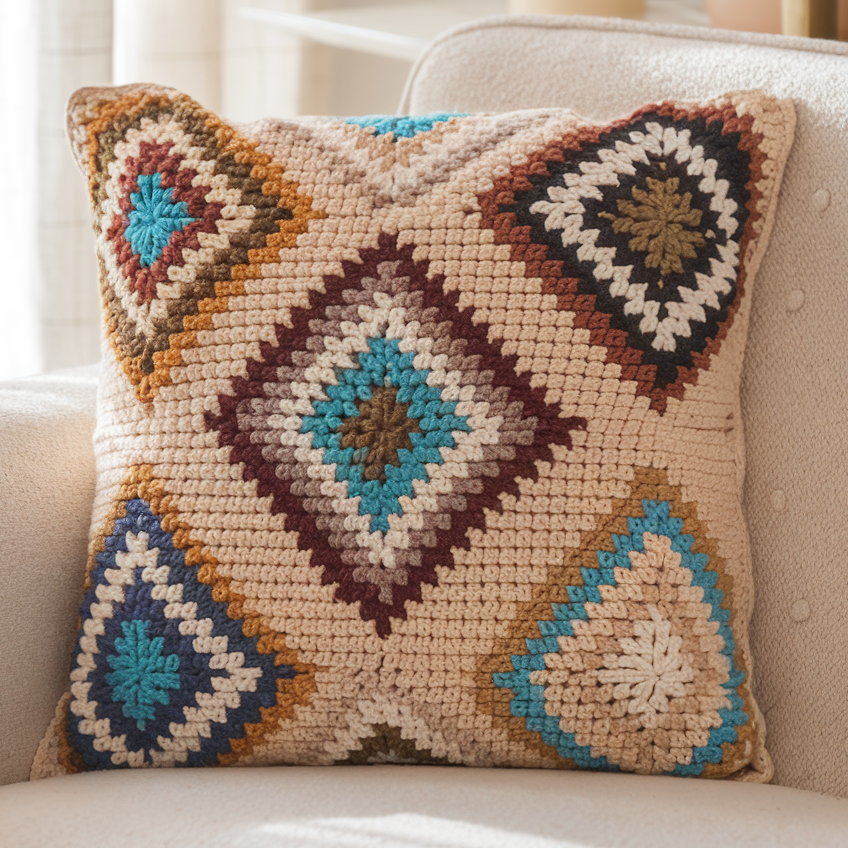
Mosaic crochet lets you create bold colorwork while working one color per row — easy for crisp geometric motifs. This produces a thick, slightly structured fabric perfect for statement cushions.
Materials (16″)
- Two or three colors (A = main/background, B = motif color, optional C) in worsted or DK, about 400 yds total depending on coverage
- Hook: 4.0–4.5 mm
- Tapestry needle, blocking tools
Stitch basics
Mosaic crochet uses slipped stitches to create color blocks while working rows in a single color. It’s usually done in sc or hdc; sc gives denser look.
Foundation & chart
- Choose a simple geometric chart (diamonds, chevrons, or Greek key). Panel width for 16″ might be ch 64 + 1 (even multiple matching chart width).
Mosaic method (sc version)
Row 1 (A): sc across in color A.
Row 2 (B): ch 1, sc in first st with color B, sl st in color A st below and change color as chart instructs — the trick: when working in color B row you will slip stitches that are background color but work sc where motif requires it. The following row is in color A and you invert.
Because mosaic uses slipped stitches you work only one color at a time, making it beginner-friendly relative to stranded work.
Full panel (16″)
- ch 65 (for a 16″ panel, adjust to your gauge and chart multiple).
- Work mosaic chart rows until panel height = 16″. Use stitch markers at pattern repeats.
- Finish with a tidy sc border in color A.
Back & closure
- Make a back panel (plain color or small mosaic band) and assemble with an envelope back or zipper for a professional finish.
Finishing
- Because mosaic can be firm, block gently to soften and square the panel. Mattress stitch seams make clean joins.
Variations & tips
- Use 3 colors for an ombré mosaic.
- Mosaic charts for pillow fronts are readily adaptable — a small 8×8 motif repeated makes modern pillows.
Final finishing & care for all covers
Seaming options
- Invisible mattress stitch for nearly invisible joins.
- Whipstitch (RS inside) for quick assembly.
- Zipper insertion: pick up single crochet along back opening and sew in zipper for a built-in look.
Blocks & polish
- Block panels to final measurements (especially important for lace and mosaic) by wet-blocking or steam-blocking per yarn care instructions. Pin to square and allow to dry.
Lining & durability
- For cushions that will be heavy-use or washed often, line the inside with a thin cotton fabric before inserting pillow — this protects yarn and reduces friction. Stitch lining to seams.
Care
- Follow yarn label. Cotton/wool blends often hand-wash and dry flat; acrylic/washable blends can be machine washed on gentle and dried flat or tumble dried on low if yarn allows.
Conclusion
These five beginner-friendly pillow cover patterns span a range of looks — sculptural cables, boho fringes, vintage lace, cute hearts, and bold mosaic. All are small, satisfying projects that can be completed in a weekend or a few evenings. Pick one that suits your home decor and desired difficulty, swatch to confirm gauge, and enjoy turning a simple insert into a distinctive handmade accent.