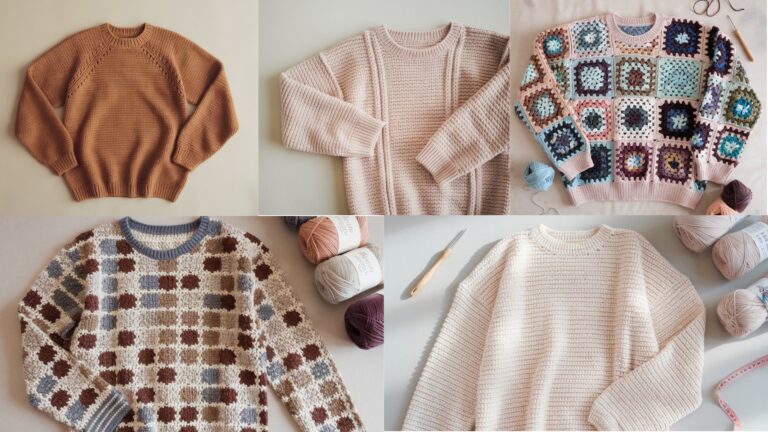
Crochet vests are one of those wardrobe pieces that feel timeless, creative, and easy to personalize. They can be layered over tees, dresses, blouses, or even simple tank tops, and they instantly add texture and handmade charm to any outfit. The best part is that vests are much more flexible than fitted sweaters, which makes them a wonderful project for crocheters who want something stylish without needing complex shaping.
In this post, you will find five detailed vest patterns that are designed to be beautiful, wearable, and beginner-friendly to intermediate. Each pattern includes a clear skill level, materials, finished size guidance, step-by-step construction, fit tips, and finishing instructions so you can make a vest that looks polished and feels comfortable.
Before starting, make a swatch. Crochet garments can change a lot depending on yarn, hook size, and tension. For the best results, use your bust measurement and decide how much ease you want before choosing a size. A vest usually works well with about 2 to 4 inches of positive ease for a relaxed fit.
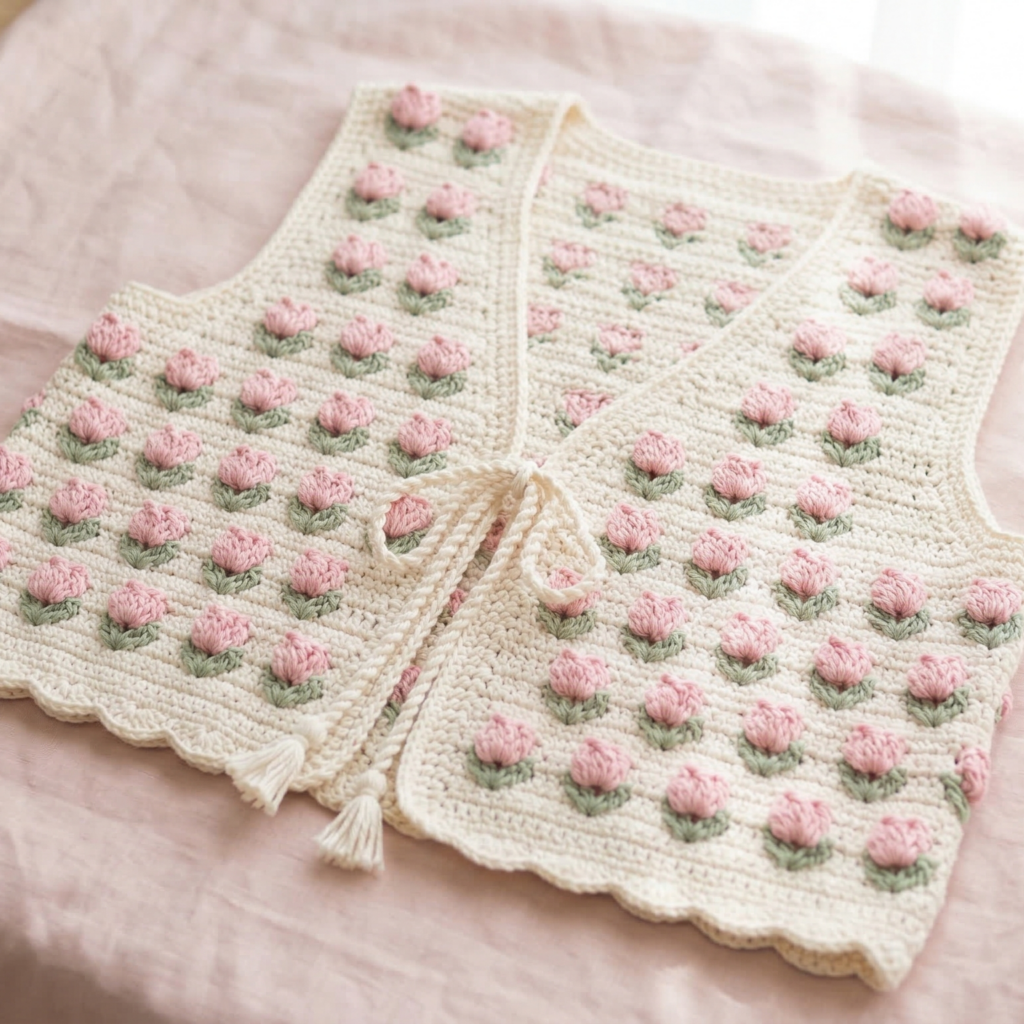
1. Crochet Tulip Stitch Tie Vest Pattern
Skill level: Beginner to intermediate
Style: Soft, feminine, slightly open-front vest with waist ties
Best for: Cottagecore outfits, spring layering, everyday wear
This vest uses tulip stitch texture to create a delicate floral look. The tie-front shape makes it easy to wear open or closed, and it is especially pretty in pastel yarns.
Materials
- DK weight cotton or cotton-blend yarn
- Crochet hook 3.5 mm to 4.5 mm
- Tapestry needle
- Scissors
- Optional: stitch markers for shaping
- Optional: buttons if you prefer button closure instead of ties
Abbreviations
ch = chain
sc = single crochet
dc = double crochet
hdc = half double crochet
sl st = slip stitch
st(s) = stitch(es)
Finished size
Sample pattern is written for an adult medium, but the number of rows can be increased or decreased to fit different body sizes.
Step-by-step guide
Front panel
- Measure the width you want for one front panel. A simple guide is to make each front panel wide enough to cover from the side seam to the center front with a little overlap.
- Chain a multiple that works with your stitch repeat. For a tulip stitch base, chain an even number plus 1.
- Work the first row in sc across the chain.
- On the second row, begin the tulip stitch texture by working a cluster or petal-like stitch every few stitches.
- Repeat the tulip stitch row and an anchor row of sc or hdc until the panel reaches the length from shoulder to waist.
- Shape the armhole by stopping the increase in width on the upper edge if needed, or by leaving a small opening where the front panel will meet the back.
Back panel
- Make a second panel the same length as the front.
- Keep the back panel straight for a simple fit.
- If you want a slightly shaped waist, work a few decrease rows at the center of the back.
Shoulder shaping
- Lay the front and back panels flat.
- Leave an opening for the neckline.
- Sew the shoulder sections together with mattress stitch or whipstitch.
Side seams
- Join the side edges from the lower hem up to the underarm.
- Leave the armhole open.
- Try the vest on before fully sewing the side seams to make sure the fit feels comfortable.
Ties
- Crochet two long chains or cord ties.
- Attach them to the lower front edges.
- Reinforce the attachment with extra stitches so the ties stay secure.
Finishing
- Add a round of sc or crab stitch around the neckline, armholes, and front edges for a clean look.
- Weave in all loose ends.
- Block the vest lightly so the tulip stitch lies evenly.
Fit tips
- For a longer vest, add more rows before the armhole shaping.
- For a cropped style, stop sooner and keep the hem higher.
- For a looser vest, use a larger hook or lighter ease.
Styling ideas
This vest looks beautiful over a plain tee, long sleeve blouse, or a light summer dress.
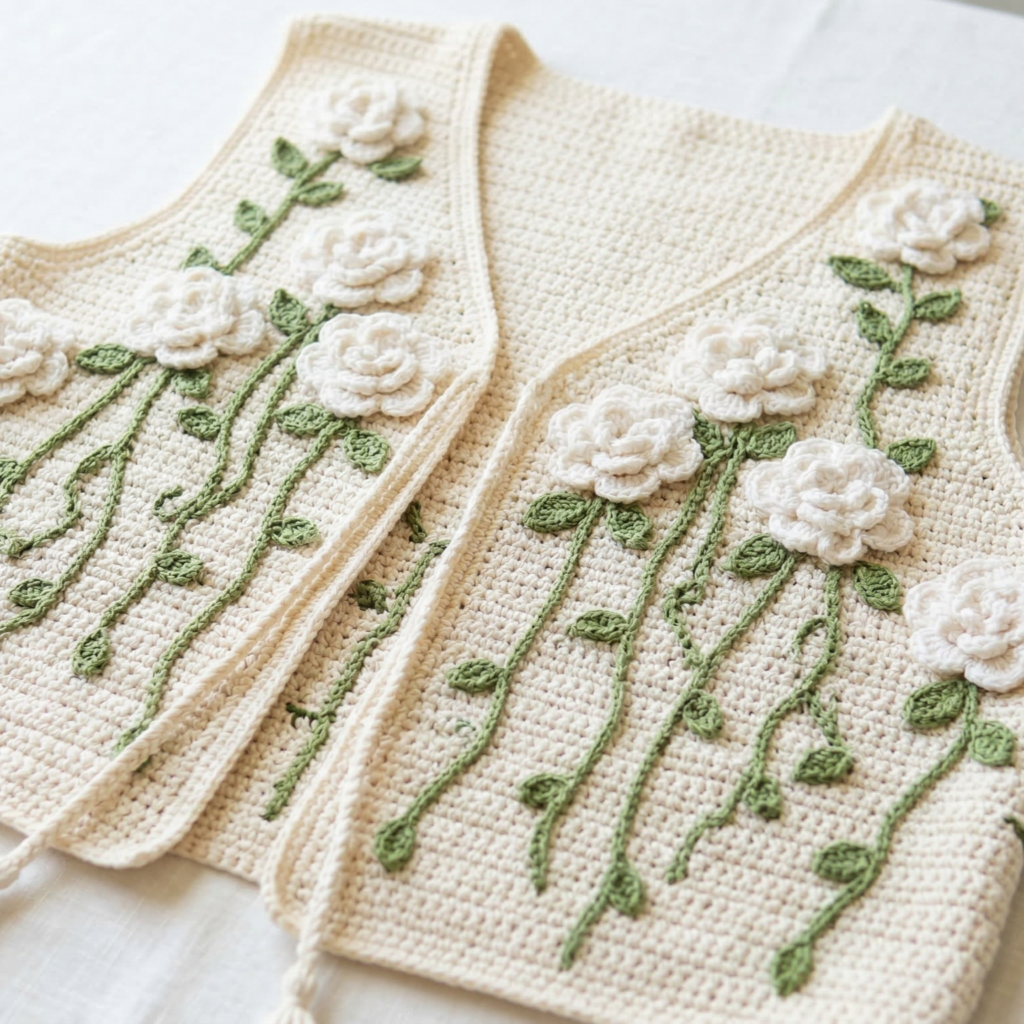
2. Crochet Gardenia Vest Pattern
Skill level: Intermediate
Style: Elegant, floral-inspired, slightly structured
Best for: Special outfits, layered looks, handmade gifts
The gardenia vest has a refined floral feel that is soft but still polished. It works well with subtle stitch texture and simple shaping, making it a lovely everyday statement piece.
Materials
- Sport or DK weight cotton yarn
- Crochet hook 3.5 mm to 4.0 mm
- Tapestry needle
- Stitch markers
- Optional decorative buttons
Abbreviations
ch = chain
sc = single crochet
hdc = half double crochet
dc = double crochet
sl st = slip stitch
Finished size
This sample is written for adult medium, with simple measurements that can be increased by adding more rows or more stitch repeats.
Step-by-step guide
Bodice start
- Chain enough for the back width plus front sections if working as one piece, or make separate front and back pieces.
- Work sc rows for a firm base.
- Add the gardenia-like floral texture using a combination of shells and small clusters.
Front panels
- Make two front panels or one wrap-style front.
- Keep the stitches fairly tight so the vest holds its shape.
- Add gentle shaping at the upper edge for the neckline.
Back panel
- Make the back panel straight and slightly longer if you want a more relaxed drape.
- Add the same floral texture or keep the back simple for contrast.
Assembly
- Sew the shoulders first.
- Try the vest on before sewing the side seams.
- Leave enough room at the armholes for comfort.
- Join the side seams partway down and leave a small slit if desired.
Floral edging
- Add a flower-inspired edging around the neckline and front edges.
- You can use shell stitches or picot edging for a gardenia effect.
- Work evenly to prevent curling.
Closure
- Add buttons if you want a more classic vest.
- Leave it open for a relaxed look.
- Add a belt or crocheted ties if you want shaping at the waist.
Finishing tips
- Steam block gently for a refined finish.
- Keep the floral stitches balanced so they do not pull the fabric too tightly.
- Use soft neutral or creamy shades for a true gardenia feel.
Styling ideas
Pair it with a linen dress, blouse, or fitted tank top for a soft, romantic look.
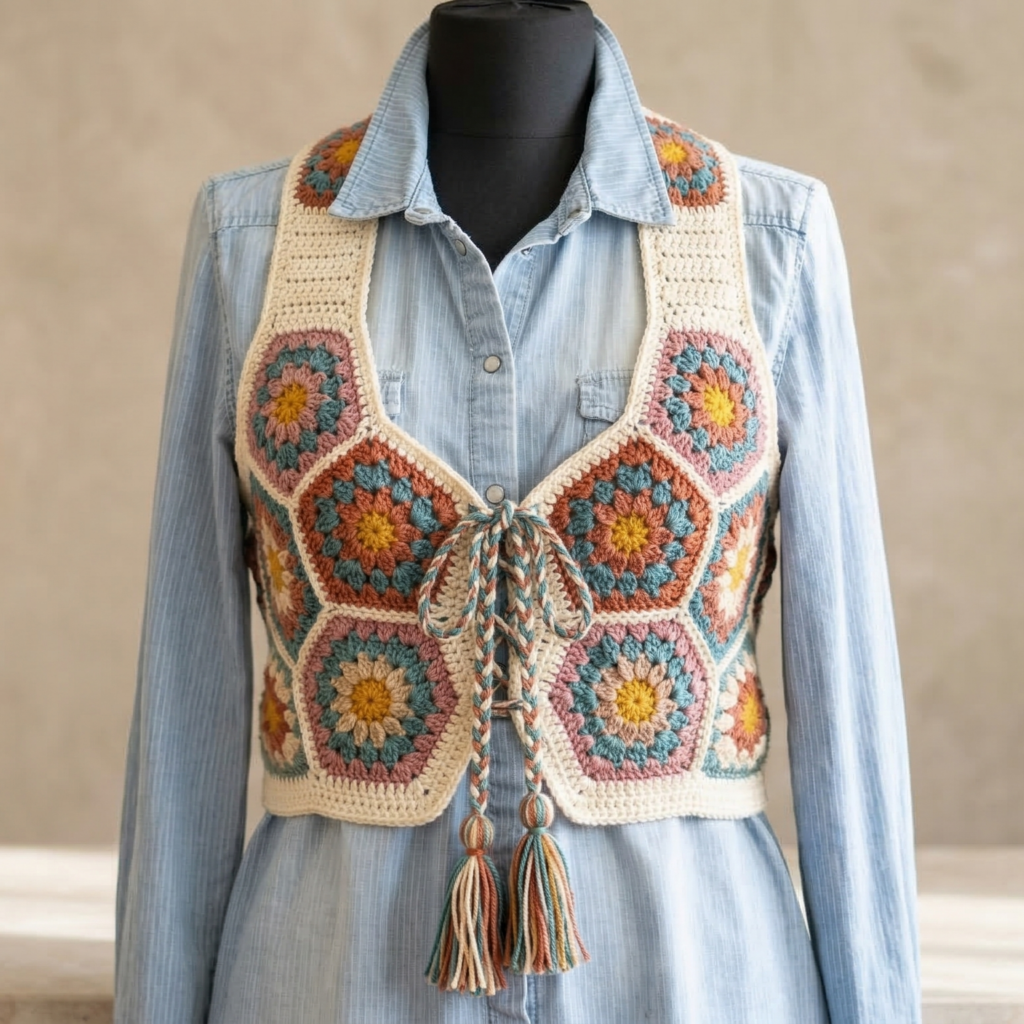
3. Crochet Granny Pentagon Waistcoat Vest Pattern
Skill level: Beginner to intermediate
Style: Retro, patchwork-inspired waistcoat
Best for: Boho outfits, colorwork lovers, stash busting
This vest uses granny pentagon motifs, which create a fun, geometric shape that stands out from standard square granny garments. It is an excellent project for using leftover yarn and creating a unique handmade piece.
Materials
- Worsted or DK weight yarn in multiple colors
- Crochet hook 4.0 mm to 5.0 mm
- Tapestry needle
- Stitch markers
- Optional buttons or ties
Abbreviations
MR = magic ring
ch = chain
dc = double crochet
sl st = slip stitch
sp = space
Finished size
One pentagon motif can be adapted to fit across the back and front. The finished vest size depends on how many motifs you join.
Step-by-step guide
Make the pentagon motifs
- Start with a magic ring.
- Work your first round of granny clusters into the ring, placing chain spaces at the points where the pentagon corners will be.
- On the next rounds, continue building out from each side of the pentagon.
- Keep the edges even so the shape stays symmetrical.
- Make enough pentagons to cover the front and back of the vest.
Front construction
- Lay two pentagon motifs so the flat side faces the center front.
- Join the motifs at the shoulders and side sections.
- Leave the armholes open by only joining the sections needed for the body.
Back construction
- Make the back using one larger pentagon arrangement or a row of joined pentagons.
- Keep the back wider than the front if you want a standard vest fit.
- Join the back to the front at the shoulders.
Shape the vest
- Add a few rows of sc around the neckline and armholes to stabilize the edges.
- If the vest is too boxy, add side shaping by sewing slightly inward at the waist.
- If you want more flare, leave the lower sides looser.
Finishing
- Add a border around the hem.
- Weave in all ends carefully.
- Block the motifs before and after joining for the best shape.
Fit tips
- Use different colors for each pentagon for a bold, patchwork look.
- Keep the same yarn weight across all motifs.
- If your motifs are slightly different sizes, block them before assembly.
Styling ideas
This vest looks great layered over a simple top or dress and pairs especially well with wide-leg trousers or a skirt.
4. Crochet Bohemian Style Vest with Tassels and Beads Pattern
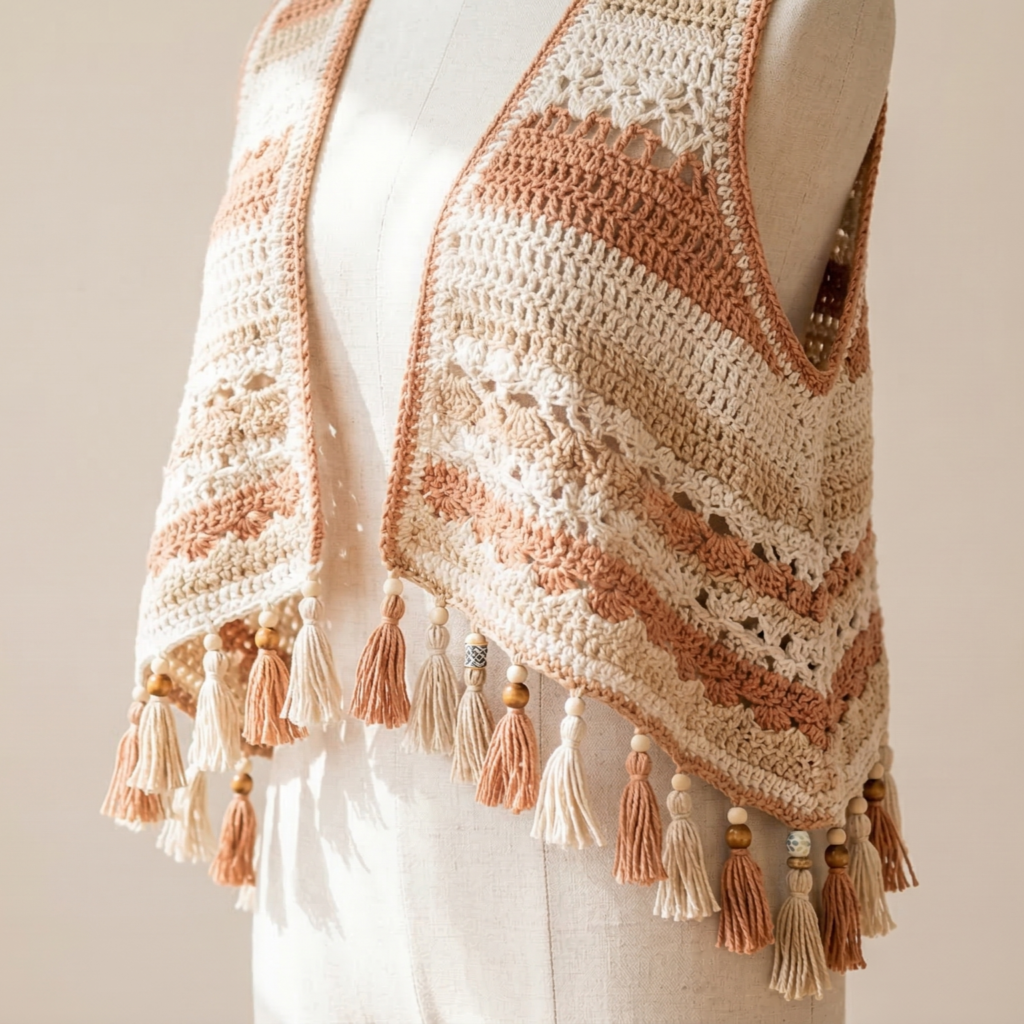
Skill level: Intermediate
Style: Loose, free-flowing boho vest with movement and detail
Best for: Festival wear, casual layering, statement handmade fashion
This vest is all about texture and personality. The tassels and beads create movement and charm, while the vest shape stays easy and wearable.
Materials
- DK or worsted weight yarn
- Crochet hook 4.0 mm to 5.0 mm
- Tapestry needle
- Beads, wooden beads, or lightweight decorative beads
- Scissors
- Optional lining for a more finished interior
Abbreviations
ch = chain
sc = single crochet
dc = double crochet
sl st = slip stitch
sp = space
Finished size
Written as a relaxed medium fit, but easy to adjust by adding more rows or more width.
Step-by-step guide
Body panel
- Chain to the width you want for the back.
- Work a simple stitch pattern such as dc rows, shell rows, or an open lace stitch.
- Continue until the back reaches the length from shoulders to hip or waist, depending on the style you want.
Front panels
- Make two front pieces that are narrower than the back.
- Shape them into slightly angled panels so they drape nicely.
- Keep the neckline open and comfortable.
Shoulder and side assembly
- Sew the shoulders first.
- Try it on before sewing the sides.
- Leave enough room for movement and layering.
- Join the side seams partially so the vest stays open and airy.
Tassels
- Cut several strands of yarn to the same length.
- Fold them in half and attach them to the bottom edge using lark’s head knots.
- Space the tassels evenly across the hem and front edges.
- Trim them so they hang evenly.
Bead details
- Thread beads onto the yarn ends before attaching if needed.
- Add them to tassel ends or along the front edges.
- Make sure all beads are sewn on tightly.
Finishing
- Add a neat border around armholes, neckline, and hem.
- Block lightly to make the vest drape properly.
- Check that tassels are evenly spaced and secure.
Fit tips
- Use a lighter yarn for a more flowing drape.
- For a longer vest, add more body rows.
- For a shorter boho look, stop at the waist or high hip.
Styling ideas
This vest works beautifully over a tank top, a simple dress, or jeans and a tee. It gives every outfit a relaxed handmade feel.
5. Crochet Cloudlace Cottagecore Vest Pattern
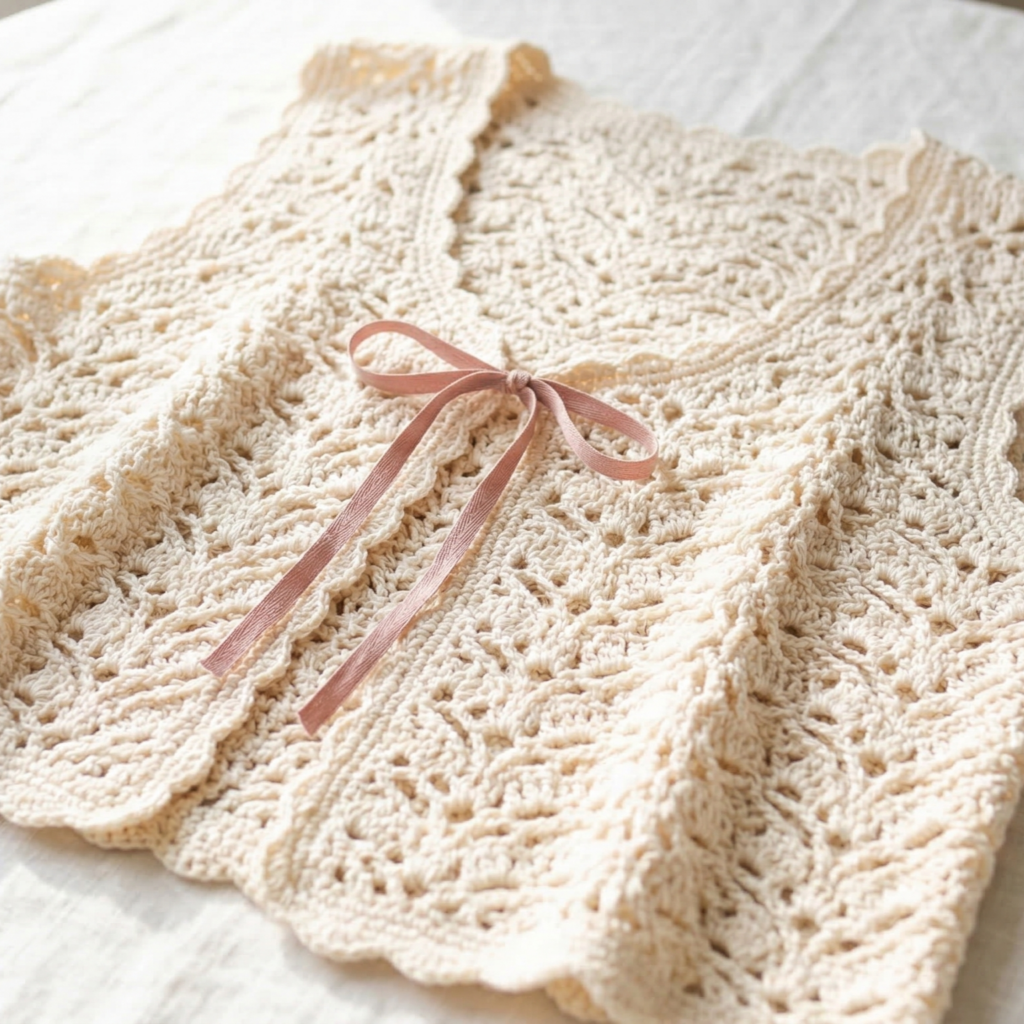
Skill level: Intermediate
Style: Soft, airy, romantic cottagecore vest
Best for: Layering over dresses, blouses, and vintage-inspired outfits
Cloudlace is a dreamy name for a vest that feels light and delicate. This style is made with an open lace pattern so it drapes softly without feeling heavy.
Materials
- Fine DK or sport weight yarn
- Crochet hook 3.5 mm to 4.5 mm
- Tapestry needle
- Stitch markers
- Optional buttons, ties, or ribbon closure
Abbreviations
ch = chain
sc = single crochet
hdc = half double crochet
dc = double crochet
tr = treble crochet
sl st = slip stitch
Finished size
Designed for adult medium with a relaxed fit, but easy to adapt by changing the width and length.
Step-by-step guide
Back panel
- Chain to your desired back width.
- Work a lace stitch repeat such as chain spaces with dc or shell stitches.
- Continue until the back panel reaches the desired length.
- Keep the stitch pattern loose enough to feel airy, but not so open that the vest loses shape.
Front panels
- Make two front panels that mirror each other.
- Shape the neckline by reducing stitches near the center edge.
- Keep the armhole edges straight for easy joining.
- Make the front slightly shorter if you want a cropped cottagecore silhouette.
Joining
- Sew the shoulders first.
- Leave the neckline open and rounded.
- Join the side seams only partway, leaving the lower section open for drape.
Edging
- Work a simple lace border around the hem, neckline, and armholes.
- A shell or picot edge works especially well for this design.
- Add ribbon ties if you want a softer, vintage finish.
Finishing
- Weave in all ends carefully.
- Block the vest to open the lace.
- If using ribbon ties, make sure they are stitched on securely.
Fit tips
- Fine yarn gives a more delicate look, while sport weight gives slightly more structure.
- Make the armholes generous enough for layering over blouses or dresses.
- If you prefer a more fitted style, add a waist shaping row.
Styling ideas
This vest looks especially beautiful in cream, soft white, sage, pale blue, or dusty rose. It pairs well with puff sleeves, long skirts, and vintage-style outfits.
Conclusion
Crochet vests are such a rewarding project because they blend creativity with wearability. Each of the five patterns above offers a different mood: the Tulip Stitch Tie Vest feels soft and romantic, the Gardenia Vest is elegant and refined, the Granny Pentagon Waistcoat has a retro patchwork feel, the Bohemian Tassel Vest brings movement and personality, and the Cloudlace Cottagecore Vest gives you an airy, dreamy finish.
The best part about making your own vest is that you can customize nearly everything: length, width, yarn type, color palette, and closure style. A crochet vest does not need to be complicated to look beautiful. With careful measuring, a good yarn choice, and a little patience with finishing, you can create a piece that feels handmade in the best possible way.