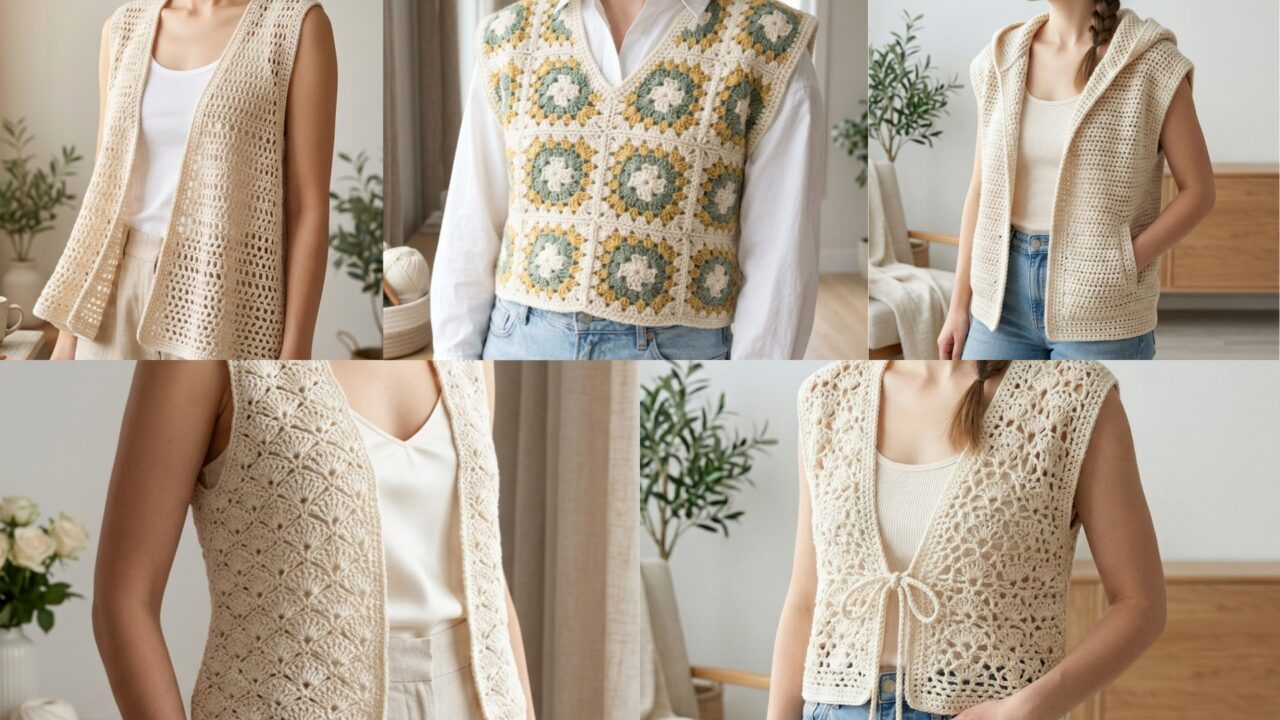
Crochet vests are one of the most versatile and stylish handmade garments you can create. They are perfect for layering, easy to customize, and suitable for every season. Whether you want something light and airy for summer or cozy and structured for cooler weather, a crochet vest can instantly elevate your outfit.
What makes crochet vests especially appealing is their balance between simplicity and style. Many patterns use repetitive stitches or modular construction, making them enjoyable to work on while still producing a polished, wearable piece. In this guide, you will find five beautiful crochet vest patterns that combine comfort, creativity, and practicality.
Quick Notes
- Always check your gauge to ensure proper sizing.
- Choose yarn based on season (cotton for summer, acrylic/wool for cooler weather).
- Keep edges neat to give the vest a professional finish.
- Try on your vest while working to adjust fit easily.
- Blocking helps improve shape and drape.
- Use stitch markers for shaping sections like armholes and neckline.
Common Materials
- Yarn (cotton, acrylic, or blends depending on pattern)
- Crochet hook (usually 3.5 mm – 6 mm)
- Tapestry needle
- Scissors
- Stitch markers
- Measuring tape
- Buttons or ties (optional)
1. Crochet Granny Square Spencer Vest Pattern
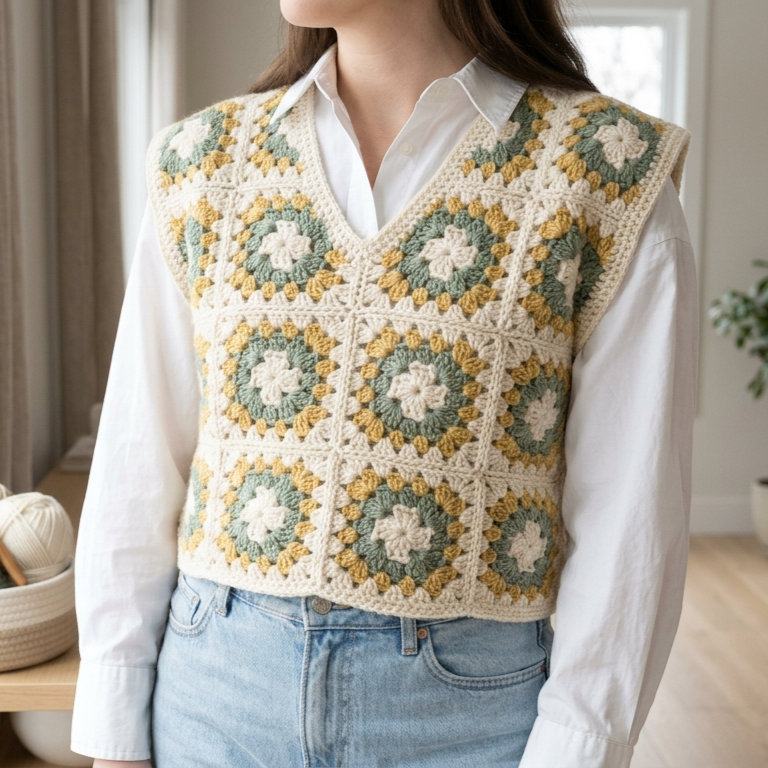
This vest combines classic granny squares with a modern cropped spencer style. It is colorful, customizable, and perfect for layering over shirts or dresses.
Skill Level
Beginner to Intermediate
Materials
- Medium-weight yarn
- Crochet hook
- Tapestry needle
Stitches Used
- Chain (ch)
- Double crochet (dc)
- Slip stitch (sl st)
- Granny clusters
Step-by-Step Guide
Step 1: Make granny squares
Create multiple identical granny squares using your preferred colors.
Step 2: Plan layout
Arrange squares for front and back panels.
Step 3: Join squares
Join using slip stitch or sewing method.
Step 4: Shape armholes
Leave openings while joining side seams.
Step 5: Join shoulders
Attach front and back at shoulders.
Step 6: Add edging
Work border around neckline, armholes, and hem.
Finishing
- Weave in ends
- Block for shape
- Adjust seams if needed
Pro Tips
- Use contrasting colors for a bold look
- Block squares before joining
2. Crochet Summer Breeze Vest Pattern
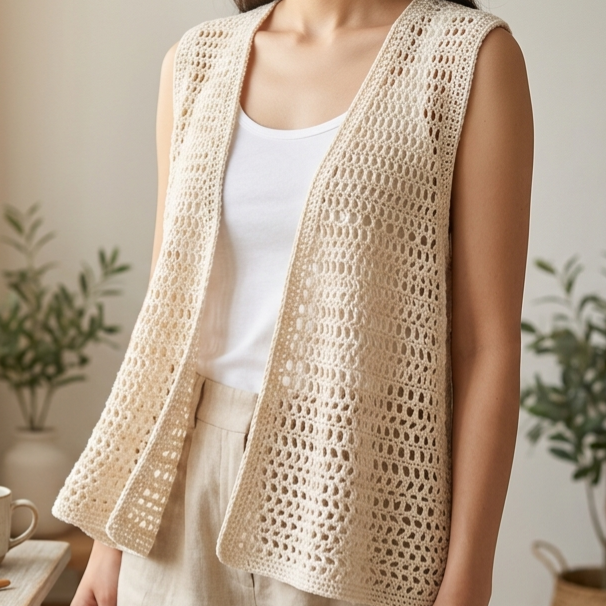
A light, airy vest perfect for warm weather and layering over summer outfits.
Skill Level
Beginner to Intermediate
Materials
- Lightweight cotton yarn
- Crochet hook
- Tapestry needle
Stitches Used
- Chain (ch)
- Double crochet (dc)
- Treble crochet (tr)
- Slip stitch (sl st)
Step-by-Step Guide
Step 1: Foundation chain
Create a loose chain for airflow.
Step 2: Work open stitches
Use airy stitch patterns with chain spaces.
Step 3: Build panels
Create front and back panels.
Step 4: Shape openings
Mark armholes and neckline.
Step 5: Join panels
Attach sides and shoulders.
Step 6: Add border
Finish edges neatly.
Finishing
- Weave in ends
- Light blocking for drape
Pro Tips
- Use breathable yarn like cotton
- Keep stitches loose
3. Crochet Seashell Vest Pattern
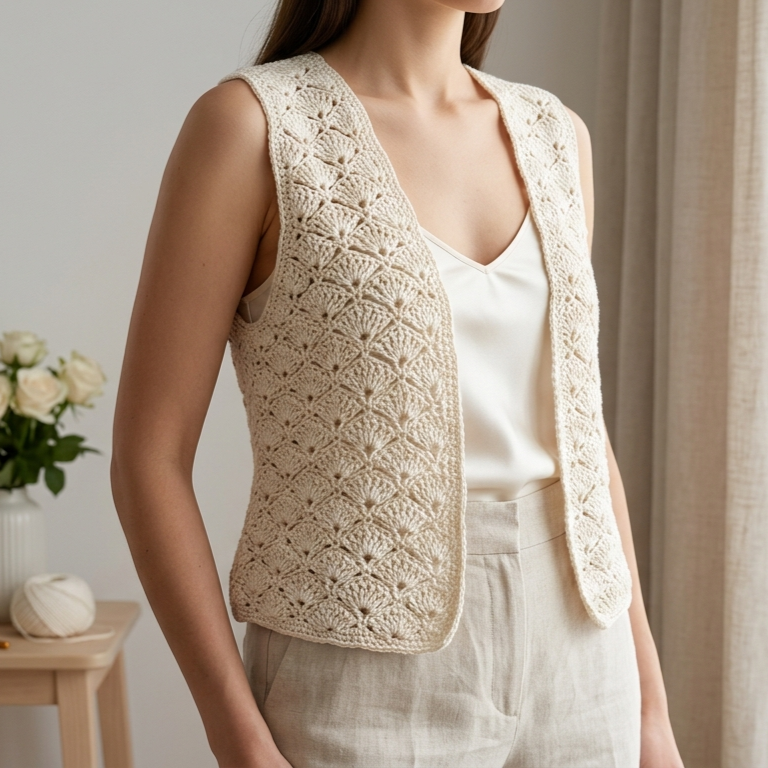
This vest features elegant shell stitches that create a soft, textured, and feminine look.
Skill Level
Intermediate
Materials
- Lightweight yarn
- Crochet hook
- Tapestry needle
Stitches Used
- Chain (ch)
- Double crochet (dc)
- Shell stitch
- Slip stitch (sl st)
Step-by-Step Guide
Step 1: Start base chain
Chain according to width needed.
Step 2: Create shell pattern
Work shell stitches across rows.
Step 3: Repeat rows
Build consistent textured fabric.
Step 4: Shape vest
Adjust for neckline and armholes.
Step 5: Join panels
Sew shoulders and sides.
Step 6: Add decorative edging
Optional shell border.
Finishing
- Weave in ends
- Block to open shells
Pro Tips
- Solid colors highlight texture
- Maintain even spacing
4. Crochet Layering Hooded Vest Pattern
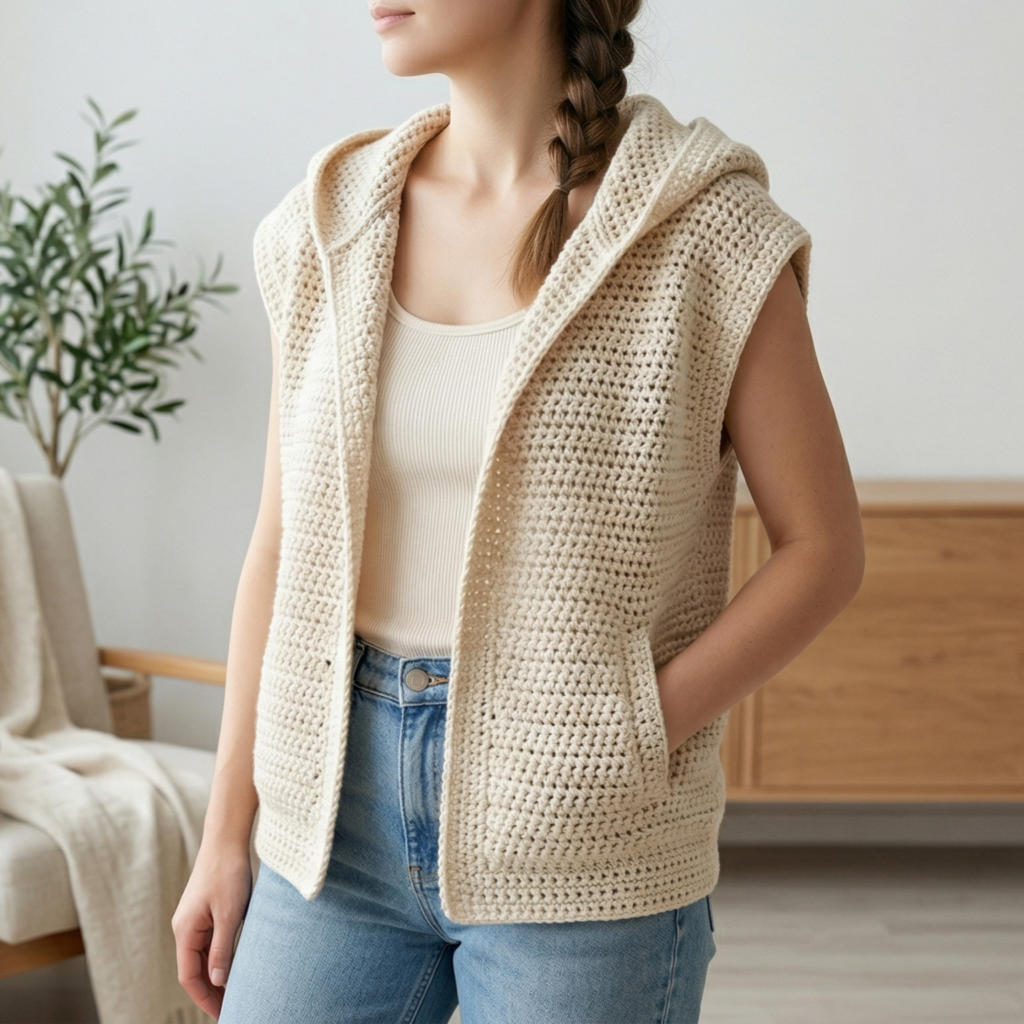
A cozy, practical vest with a hood for added warmth and style.
Skill Level
Intermediate
Materials
- Medium-weight yarn
- Crochet hook
- Tapestry needle
Stitches Used
- Chain (ch)
- Half double crochet (hdc)
- Double crochet (dc)
- Slip stitch (sl st)
Step-by-Step Guide
Step 1: Make back panel
Crochet rectangle to desired size.
Step 2: Create front panels
Make two matching panels.
Step 3: Shape openings
Leave space for arms and neckline.
Step 4: Join shoulders
Attach front and back.
Step 5: Crochet hood
Create and shape hood piece.
Step 6: Attach hood
Sew hood to neckline and add edging.
Finishing
- Weave in ends
- Block garment
- Add closures if needed
Pro Tips
- Use soft yarn for comfort
- Check hood size before attaching
5. Crochet Openwork Tie Front Vest Pattern
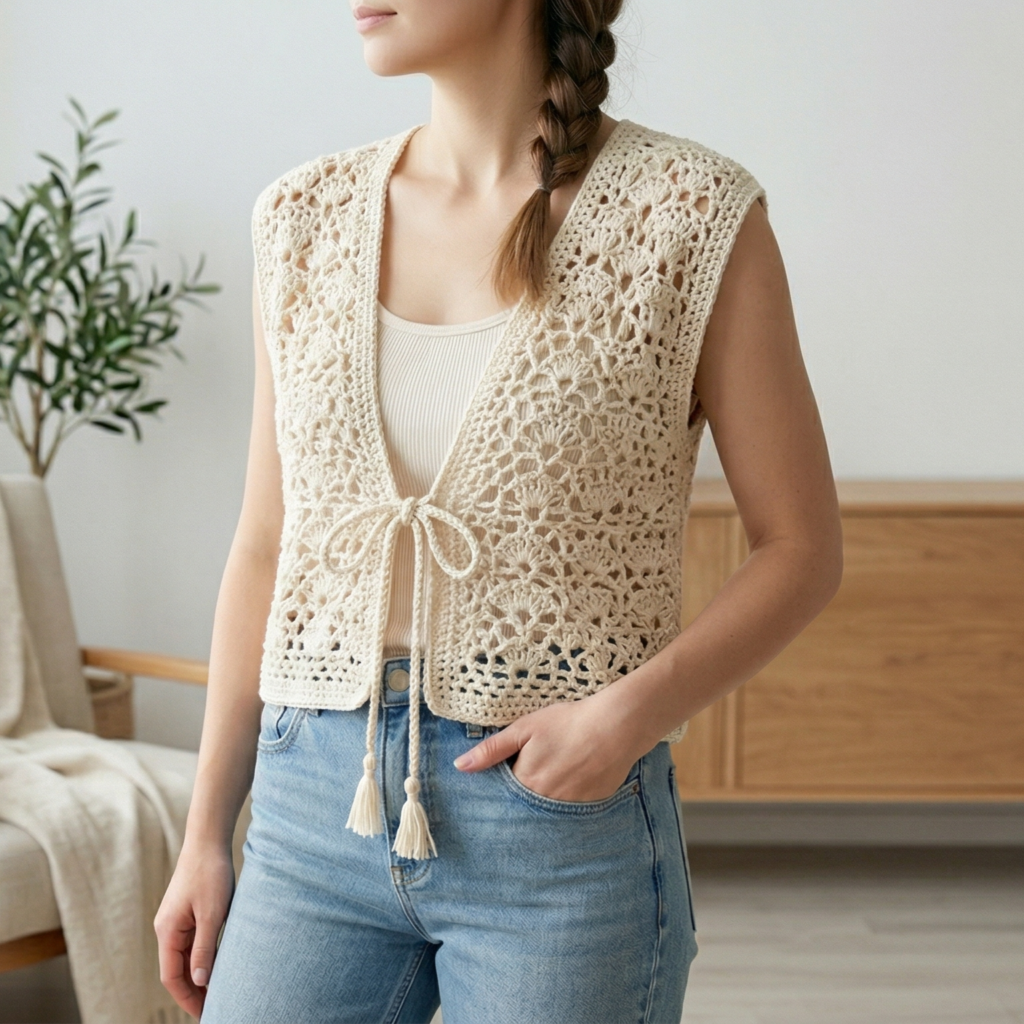
This vest is stylish and breathable with a tie-front detail for a modern look.
Skill Level
Beginner to Intermediate
Materials
- Lightweight yarn
- Crochet hook
- Tapestry needle
Stitches Used
- Chain (ch)
- Double crochet (dc)
- Slip stitch (sl st)
Step-by-Step Guide
Step 1: Create panels
Work open stitch fabric for front and back.
Step 2: Shape neckline
Adjust for comfortable fit.
Step 3: Join shoulders
Attach panels together.
Step 4: Add ties
Crochet long chains for front closure.
Step 5: Add edging
Finish borders cleanly.
Step 6: Adjust fit
Try on and refine length or ties.
Finishing
- Weave in ends
- Light blocking
Pro Tips
- Neutral tones look elegant
- Add tassels for style
Conclusion
Crochet vests are a perfect blend of style, comfort, and creativity. They are easy to customize, enjoyable to make, and practical for everyday wear. Whether you prefer classic granny squares, airy summer designs, textured stitches, or cozy hooded layers, there is a vest pattern here for every style and season.
The key to a beautiful crochet vest lies in good yarn choice, even stitching, and clean finishing. With these patterns, you can create handmade pieces that feel both fashionable and personal.