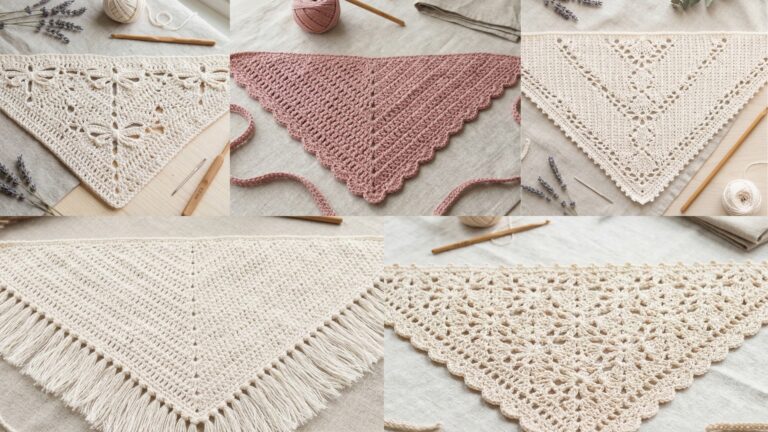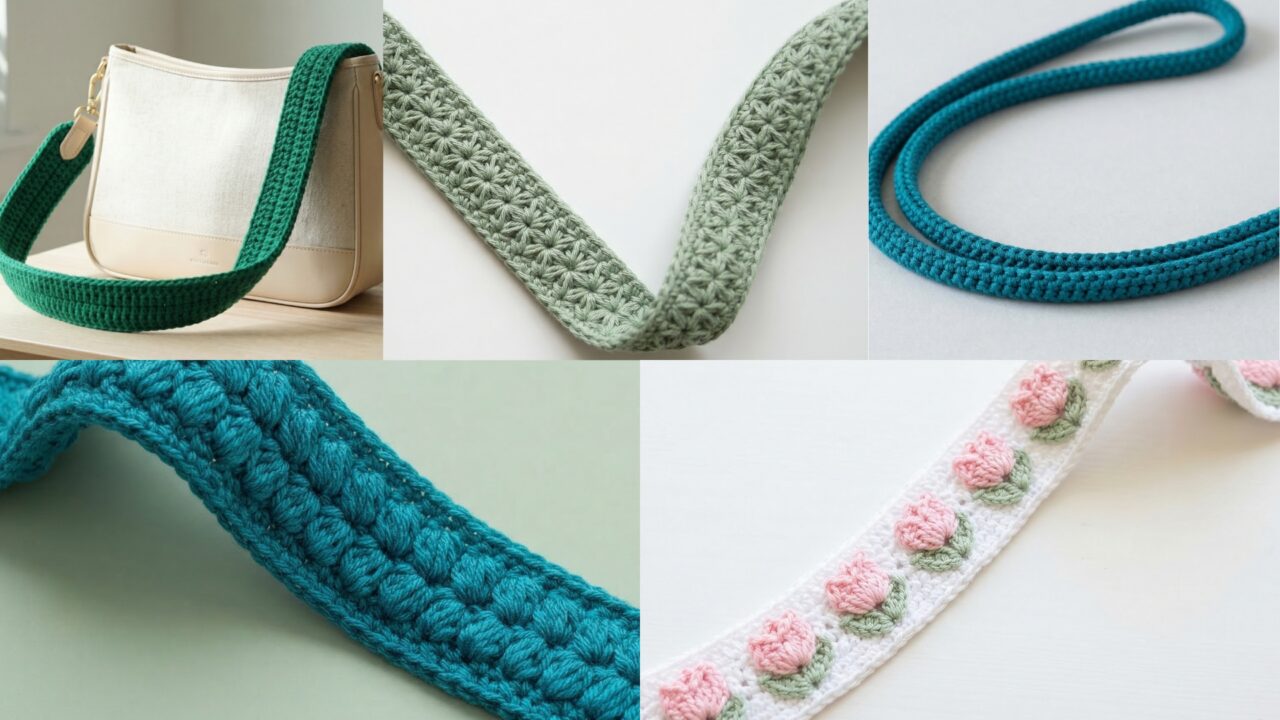
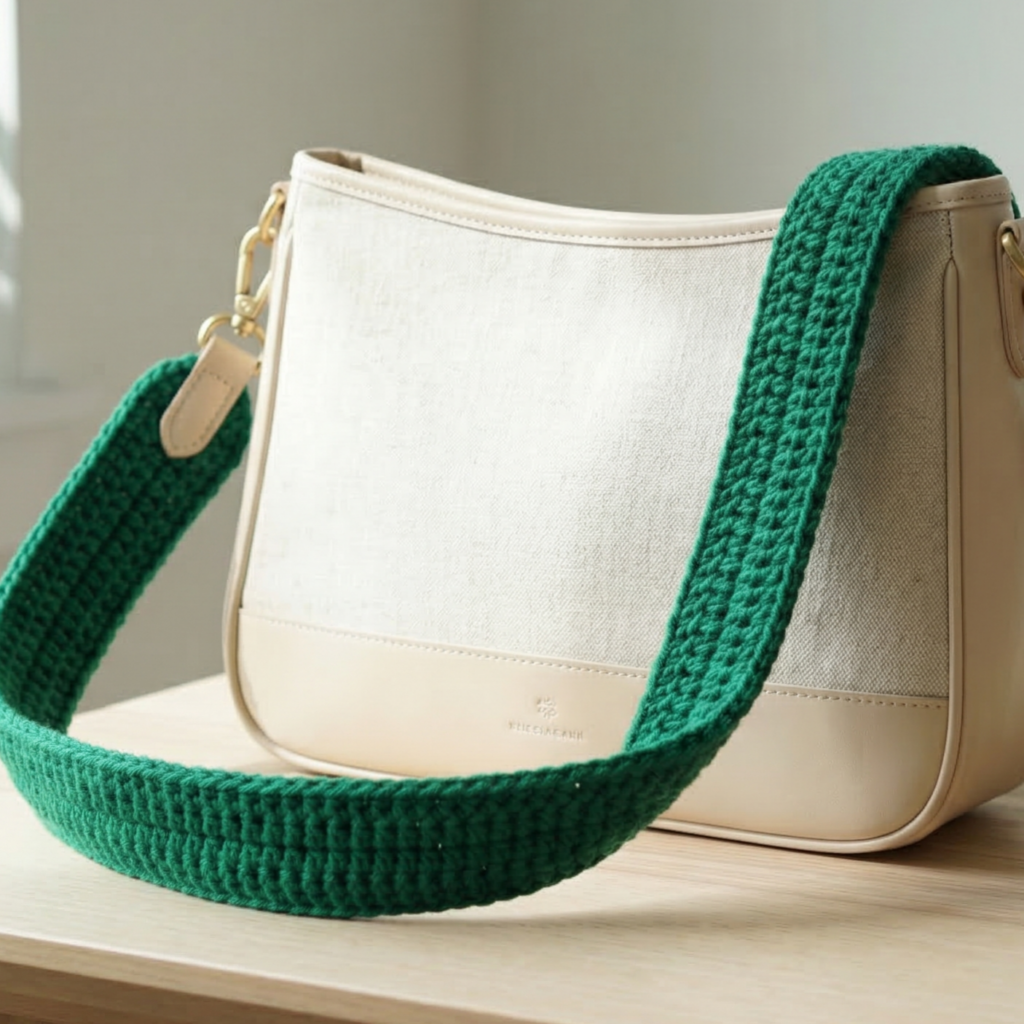
A good bag strap can completely change the look, comfort, and durability of a handmade bag. It is the part that gets the most use, so it should not only look beautiful but also feel strong and dependable. That is why crochet straps are such a useful project: they let you add a handmade finish while choosing the exact width, length, texture, and color you want.
The five strap patterns below are designed for everyday bags, crossbody bags, shoulder bags, and tote bags. Each one uses a stitch pattern that looks stylish but still works well for a practical strap. You will find detailed instructions, sizing notes, materials, and finishing tips for every design so the straps come out neat, sturdy, and ready to attach to your favorite bag.
A few quick notes before starting:
Use cotton or a cotton-blend yarn for the strongest results. Choose a hook that creates a tight, firm fabric so the strap does not stretch too much with use. For bag straps, it is always smart to test the length before sewing it on, especially for crossbody styles. A strap that looks perfect on the table may feel too short or too long once it is attached to a bag.
1. Crochet Bean Stitch Strap Pattern
Skill level: Beginner to intermediate
Best for: Shoulder bags, tote bags, and everyday purses
Finished size: Adjustable; a typical strap is about 1.25 to 1.5 inches wide
The bean stitch creates a soft textured surface that looks rich and polished while still staying fairly dense. It is a wonderful choice for a strap because it feels substantial without being overly bulky.
Materials
- Cotton or cotton-blend yarn
- Crochet hook suitable for your yarn, usually 4.0 mm to 5.0 mm
- Tapestry needle
- Scissors
Abbreviations
ch = chain
sc = single crochet
bean stitch = a cluster stitch worked into the same stitch
sl st = slip stitch
Step-by-step guide
Step 1: Make the foundation chain
- Measure the strap length you need before starting. A shoulder strap may be 24 to 30 inches, while a crossbody strap may be 42 to 54 inches depending on the bag and body size.
- Chain the length you need, then add 1 more chain for turning.
- If you want a wider strap, you can chain a few extra stitches and make the rows slightly taller.
Step 2: Work the first row
- Sc in the second chain from the hook and across the row.
- Turn your work.
Step 3: Make the bean stitch row
- Chain 1.
- In the first stitch, work a bean stitch. To do this, yarn over, insert hook into the stitch, pull up a loop, yarn over, insert into the same stitch again, pull up a loop, and repeat this process until you have several loops on the hook. Then yarn over and pull through all loops together.
- Skip the next stitch and work a bean stitch in the following stitch.
- Repeat across the row.
- End with a single crochet in the final stitch if needed to keep the edge even.
- Turn.
Step 4: Anchor the texture
- Chain 1.
- Sc across the entire row.
- Turn.
- Repeat the bean stitch row and the sc row until the strap reaches the width you want, usually about 1.25 to 1.5 inches.
Step 5: Finish the edges
- Once the strap is long enough, work one final row of sc across.
- Fasten off, leaving a long tail for sewing.
- Weave in all loose ends.
Finishing tips
- Keep your tension even so the bean stitches line up neatly.
- If the strap feels too soft, try going down one hook size.
- For a matching set, use the same stitch to make a small bag charm.
Variations
- Make a two-tone bean stitch strap by alternating colors every two rows.
- Use a slightly thinner yarn for a more delicate look.
- Add a lining strip inside if you want extra strength for heavy bags.
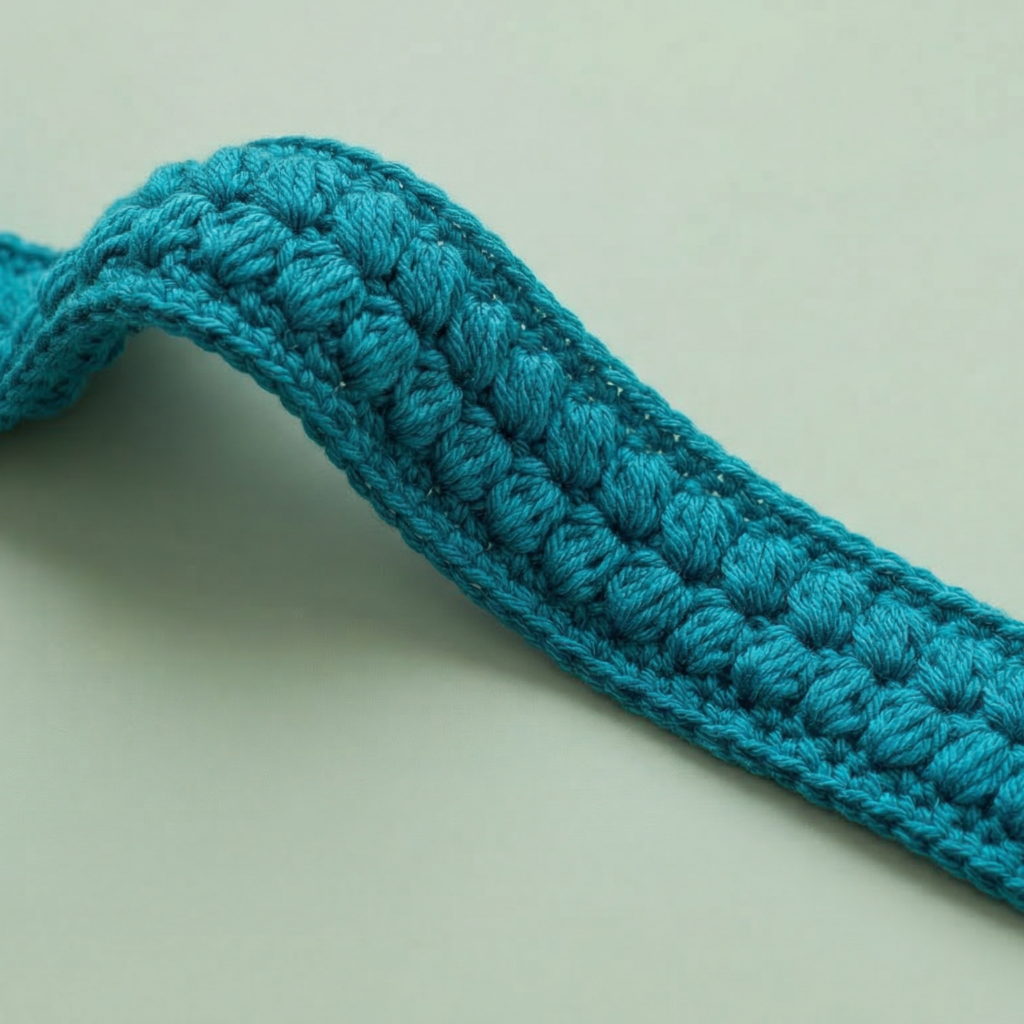
2. Crochet Thermal Stitch Strap Pattern
Skill level: Intermediate
Best for: Heavy tote bags, market bags, and sturdy shoulder bags
Finished size: Usually 1.5 to 2 inches wide, depending on yarn and hook
The thermal stitch is one of the strongest crochet stitches you can use for a strap. It creates a thick, dense, double-layered feel that makes it ideal for bags that need more support.
Materials
- Strong cotton yarn
- Crochet hook, usually one size smaller than the yarn label recommends
- Tapestry needle
- Scissors
Abbreviations
ch = chain
sc = single crochet
BLO = back loop only
FLO = front loop only
sl st = slip stitch
Step-by-step guide
Step 1: Chain the strap length
- Measure the length carefully.
- Chain the number of stitches needed for the full strap length.
- Add 1 turning chain.
Step 2: Foundation row
- Sc in the second chain from the hook and across.
- Turn.
Step 3: Start the thermal stitch
- Chain 1.
- Insert the hook into the front loop of the stitch below and the back loop of the row beneath that.
- Yarn over and pull through both loops.
- Yarn over and pull through both loops on the hook.
- Repeat across the row.
This creates the thermal effect by linking two rows together in each stitch.
Step 4: Continue the texture
- Chain 1 and repeat the thermal stitch across each row.
- Keep the stitches snug so the strap remains firm and does not stretch much over time.
- Continue until the strap is the desired width, usually 8 to 12 rows depending on your yarn and hook.
Step 5: Finish
- End with one row of sc for a neat edge, if desired.
- Fasten off and weave in ends carefully.
Finishing tips
- Thermal stitch straps are dense, so they are excellent for bags that carry heavier items.
- Test the strap for flexibility before attaching it permanently.
- If the stitch feels too stiff, use a slightly larger hook.
Variations
- Make a striped thermal strap by changing colors every two rows.
- Use the thermal stitch for a crossbody strap if you want a thick, comfortable feel.
3. Crochet Romanian Cord Strap Pattern
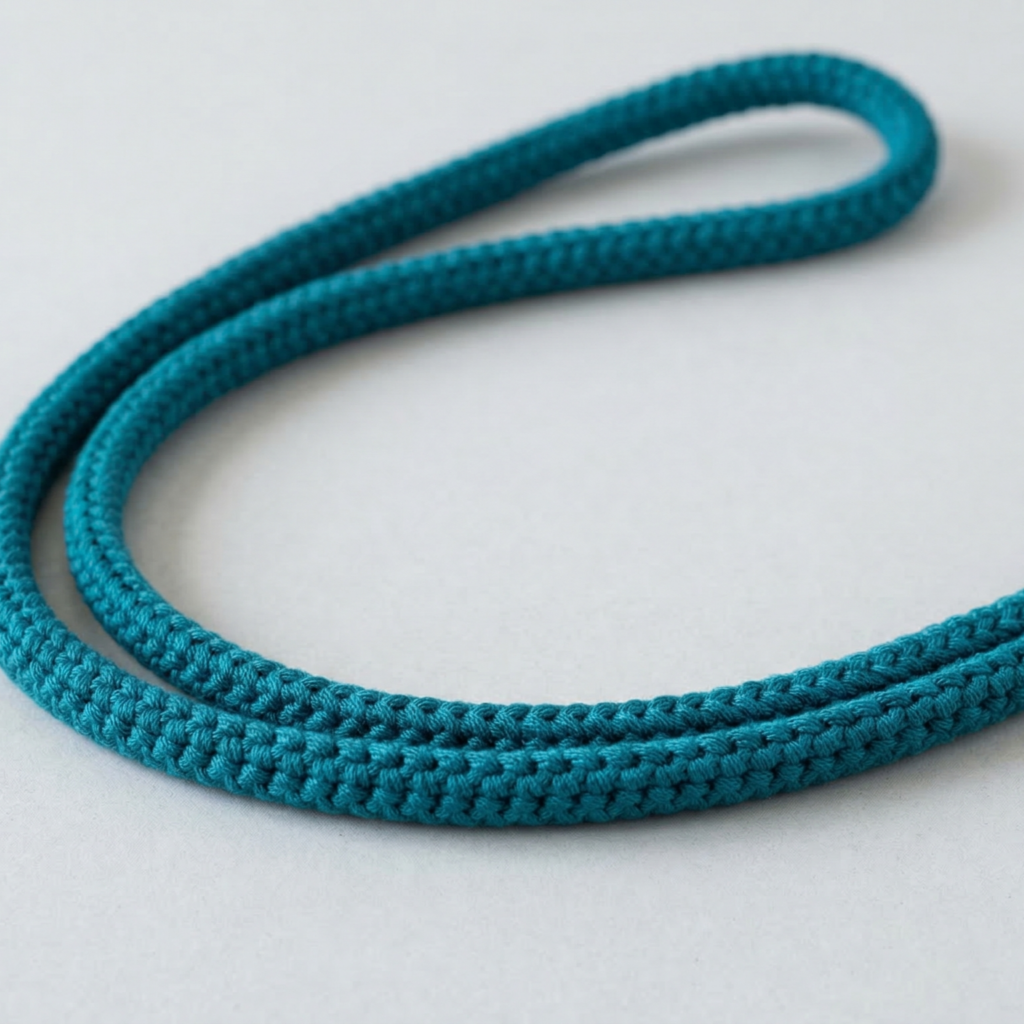
Skill level: Intermediate
Best for: Elegant crossbody straps, decorative handles, lightweight purses
Finished size: Cord thickness can be adjusted; usually slim and round
Romanian cord is a beautiful choice for a bag strap because it looks neat, polished, and almost rope-like. It works especially well for small handbags or decorative straps.
Materials
- Smooth cotton or mercerized cotton yarn
- Crochet hook slightly smaller than normal
- Tapestry needle
- Scissors
Abbreviations
ch = chain
sc = single crochet
sl st = slip stitch
Step-by-step guide
Step 1: Start the cord
- Chain 2.
- Work 1 single crochet into the second chain from the hook.
- Turn the work slightly so the stitch is worked along the side of the previous row.
- Insert the hook into the side loops and work another sc.
Step 2: Keep building the cord
- Continue turning and working into the side loops.
- Each stitch builds the cord into a narrow, rounded rope.
- Keep your tension consistent so the cord stays even.
Step 3: Make the cord as long as needed
- Work until the strap reaches the length you want.
- For a handle, shorter lengths may be enough. For crossbody straps, make it much longer.
- Try the strap against the bag or body before finishing.
Step 4: Finish the end
- Fasten off carefully.
- Weave the end back through the cord so it stays hidden.
- Repeat to make a second cord if you want a double-strap look.
Finishing tips
- Romanian cord is lovely for structured bags and small purses.
- It looks neat in solid colors and also works well in subtle color changes.
- If you want a wider handle, you can make two cords and braid them together.
Variations
- Make a twisted double cord by braiding two Romanain cords.
- Add leather or metal clasps to each end for a polished finish.
- Use a metallic thread held with the yarn for a fancy evening bag strap.
4. Crochet Star Stitch Strap Pattern
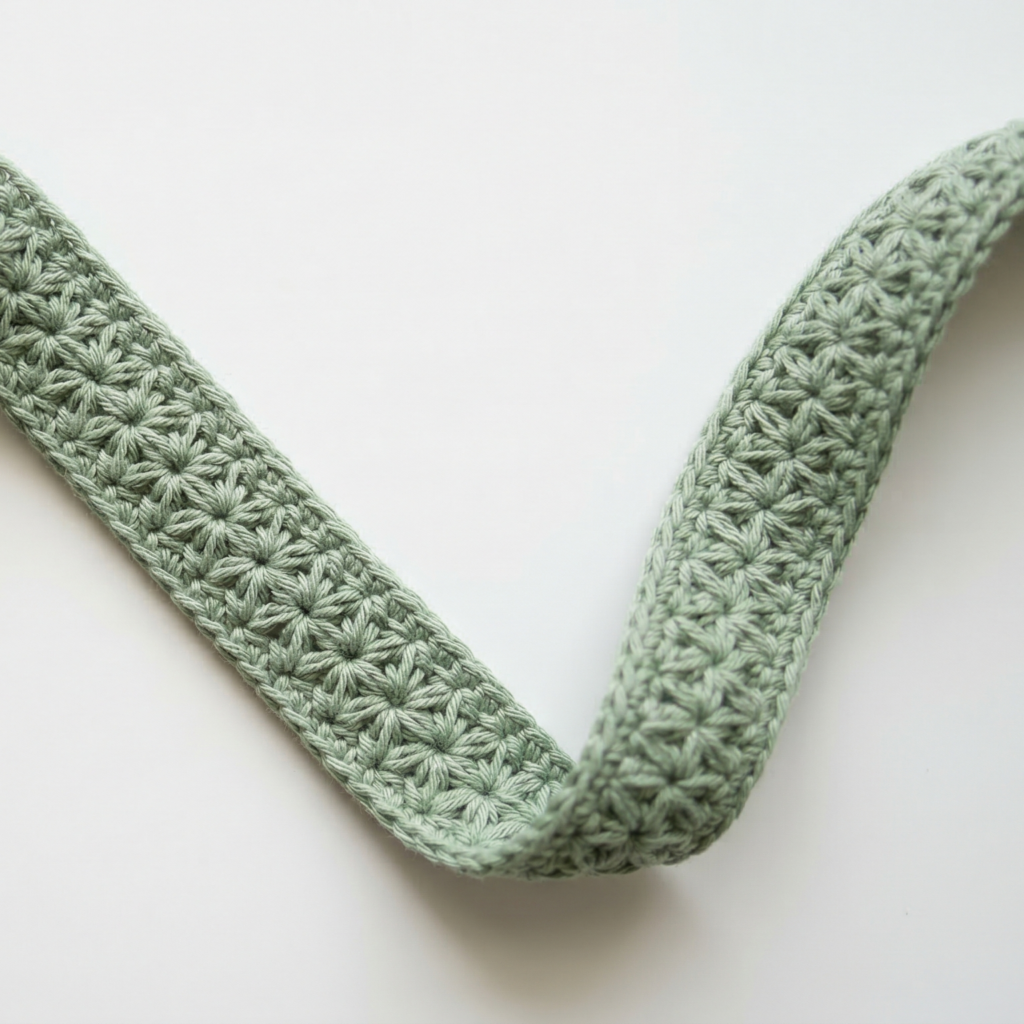
Skill level: Intermediate
Best for: Decorative bags, crossbody purses, and feminine everyday totes
Finished size: Typically 1.25 to 1.75 inches wide
The star stitch creates a beautiful textured surface that feels soft but still looks strong and detailed. It is one of the prettiest stitch options for a handmade strap.
Materials
- Cotton or cotton-blend yarn
- Crochet hook, usually 3.5 mm to 4.5 mm
- Tapestry needle
- Scissors
Abbreviations
ch = chain
sc = single crochet
star stitch = special cluster stitch
sl st = slip stitch
Step-by-step guide
Step 1: Make the foundation chain
- Chain a multiple that works for your desired length.
- Add one extra chain at the end.
- Turn your chain.
Step 2: First row of star stitch
- Insert the hook into the second chain from the hook and pull up a loop.
- Pull up loops in the next few chains as well until you have several loops on the hook.
- Yarn over and pull through all loops.
- Chain 1 to close the star.
- Continue making star stitches across the row.
- At the end, work one half stitch or sc to balance the edge.
- Turn.
Step 3: Anchor row
- Chain 1.
- Work sc in each chain space or eye of the star stitch from the previous row.
- This creates a firm, neat row between the textured star rows.
- Turn.
Step 4: Repeat
- Repeat the star stitch row and the sc anchor row.
- Continue until the strap is the width you want.
- Keep the tension slightly firm so the strap stays strong.
Step 5: Finish
- Add one final row of sc.
- Fasten off and weave in the ends.
Finishing tips
- Star stitch straps look especially beautiful in solid or tonal yarn.
- Use a slightly smaller hook if the stitch holes are too open.
- This stitch is decorative enough to stand on its own, so no extra trimming is needed.
Variations
- Try a two-color star stitch strap for a striking striped look.
- Use soft blush, cream, or sage for a cottage-style accessory.
- Make the strap narrower for a delicate purse or wider for a shoulder bag.
5. Crochet Tulip Stitch Strap Pattern
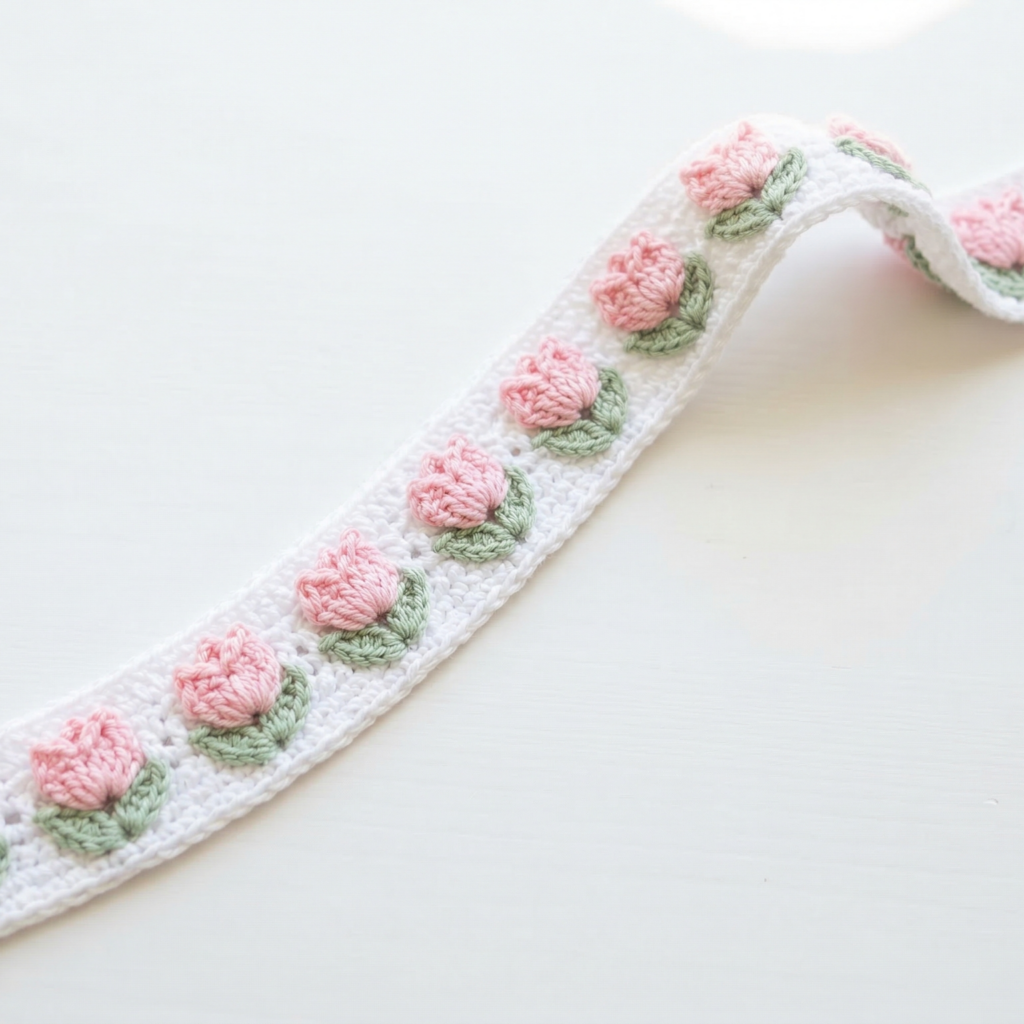
Skill level: Intermediate
Best for: Cottagecore bags, floral handbags, and feminine everyday accessories
Finished size: Usually 1.25 to 1.75 inches wide
Tulip stitch gives the strap a soft floral texture that feels elegant and handmade. It pairs beautifully with bags that have a romantic or vintage style.
Materials
- Cotton or cotton-blend yarn
- Crochet hook, usually 3.5 mm to 4.5 mm
- Tapestry needle
- Scissors
Abbreviations
ch = chain
sc = single crochet
dc = double crochet
hdc = half double crochet
sl st = slip stitch
Step-by-step guide
Step 1: Foundation chain
- Chain the length you need for the strap.
- Add one turning chain.
- Turn your work.
Step 2: Base row
- Sc across the full chain.
- Turn.
Step 3: Tulip row
- Chain 2 or 3, depending on your preferred height.
- Make a small cluster or petal-like shape in the stitch below.
- Skip one stitch and repeat, creating little floral points across the row.
- The pattern should look like tiny tulips growing across the strap.
Step 4: Anchor row
- Work a row of sc across the entire piece.
- This helps the tulip shapes stay defined and keeps the strap sturdy.
Step 5: Repeat
- Alternate the tulip row and the anchor row.
- Continue until the strap reaches the width you want.
Step 6: Finish
- Add a final row of sc for a clean edge.
- Fasten off and weave in the loose ends.
Finishing tips
- Tulip stitch looks especially pretty in pastel shades or floral color combinations.
- Keep the strap slightly firm so the flower shapes hold their form.
- This stitch is ideal for spring and summer bags.
Variations
- Use a single color for a subtle textured finish.
- Add tiny crocheted flowers at the ends of the strap.
- Pair the strap with a matching bag body in the same stitch family.
Conclusion
A handmade bag strap can do more than hold a bag together. It can give the whole project style, personality, and strength. The five patterns above offer a range of looks, from the textured beauty of bean stitch and star stitch to the clean strength of thermal stitch and Romanian cord. If you want something romantic and soft, the tulip stitch and floral textures are a perfect match.
The best strap for your project depends on the bag itself. A tote that carries heavier items benefits from a dense stitch like thermal stitch. A smaller handbag may suit a slimmer Romanian cord or star stitch strap. A cottage-inspired bag will shine with tulip or bean stitch details. The key is to choose a yarn and stitch combination that balances beauty with durability.
A good strap should feel comfortable on the shoulder, hold its shape, and match the size of the bag. Measuring before you start and testing as you go will save time and help you create a strap that fits perfectly. With the patterns above, you can make straps that are practical, stylish, and unique enough to make any bag feel special.