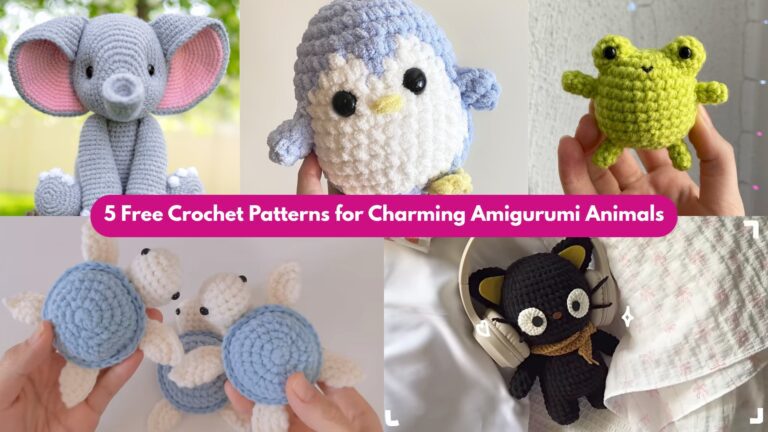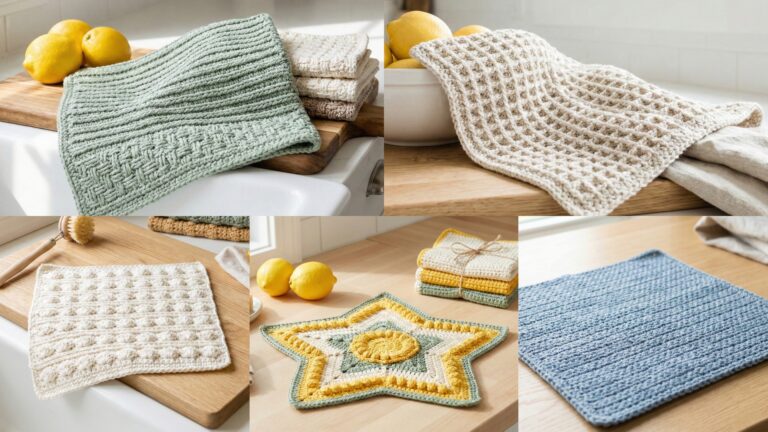
Stop scrolling through endless stitch galleries and make something that looks like you knew what you were doing. These five stitches—Star, Alpine, Flower, Wattle, and Moss—cover texture, lace, and reversible surfaces. They’re beginner-friendly to intermediate-level, and each one is given with the tiny math and repeat info you need to scale it for any project.
One clear rule: swatch first. Make a 4″ (10 cm) square in the stitch you’ll use, wash and block it the way you’ll care for the finished piece, measure stitches-per-inch and rows-per-inch, then do the arithmetic. If you skip the swatch you’ll be frogging at 2 a.m. and I don’t want to be the one who foretold it.
Quick common notes (read this to avoid dumb mistakes)
- Abbreviations (US): ch, sc, hdc, dc, tr, fpdc (front post double crochet), bpdc, sl st, st(s), rep, sk = skip, BLO/FLO = back/front loop only, MR = magic ring.
- Hook & yarn baseline used in examples: worsted weight (#4) yarn + 5.0 mm (H) hook. If you change weight/hook, swatch and recalc.
- How to calculate foundation chains: stitches-per-inch × desired width = chain count. Round to nearest stitch multiple required by stitch repeat (I state the multiple for each stitch).
- For reversible stitches, count both faces in gauge because fabric behaves differently.
- Swatch advice: always block your swatch. Some stitches relax massively after blocking (moss, alpine), and your project scale depends on that.
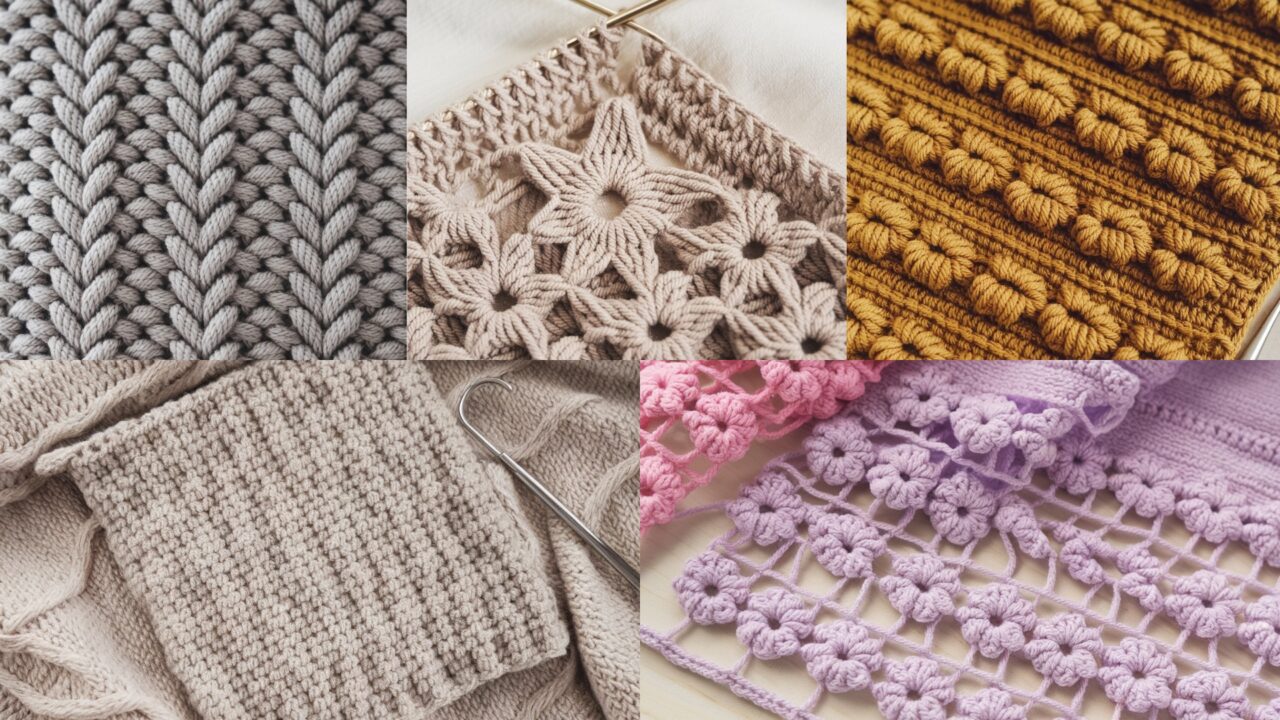
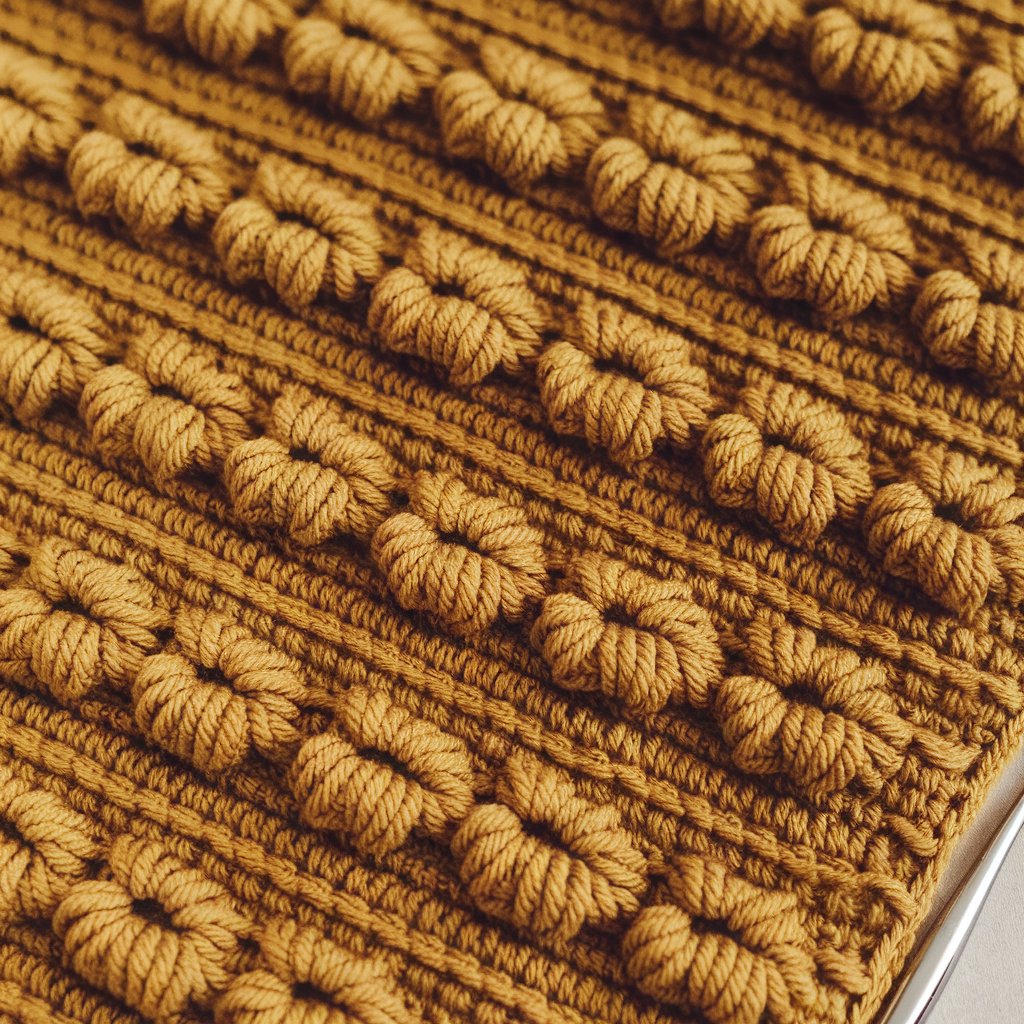
1. Crochet Star Stitch Pattern
Compact textured clusters that read like tiny stars. It’s dramatic, squishy, and works brilliantly for blankets, hats, and baby items.
Skill level: Confident Beginner
Repeat multiple: multiple of 2 chains + 1 (for foundation).
Recommended yarn & hook: worsted (#4) + 5.0 mm for samples; use DK + 4.0 mm for finer fabric.
Sample swatch gauge (unblocked): 4″ = 16 stitches × 18 rows in Star stitch (your mileage will vary — swatch).
How the stitch works (short)
Star stitch builds little 6-loop star clusters that are anchored by single crochet rows. The cluster creates a dense, puff-like, two-row repeat: one row of clusters, one row of single crochets.
Written stitch pattern (row-by-row)
Make foundation chain: any even number + 1.
Row 1 (cluster row — star forming): Work a Star stitch in next 2 chains (see Star stitch construction below), repeat across; end with sc in last ch. Turn.
Row 2: Ch1, sc in each st across (this anchors the stars). Turn.
Repeat Rows 1–2.
Star stitch (how to make one star)
- Insert hook in the next chain, yarn over, pull up a loop — repeat 6 times into the same chain (you’ll have 13 loops on hook if you count the starting loop).
- Yarn over and pull through all loops on hook. Ch1 to close the star.
- Finish: sc into the next chain (or designated anchor stitch) to secure.
Tip: keep loops small and even. If your loops get long the “star” flops.
Step-by-step swatch (example)
- Ch 21 (20 + 1).
- Row 1: make Star stitch in ch2, ch0? (follow above) across ending with sc.
- Row 2: sc across.
- Repeat for 8–10 rows, block lightly and measure 4″.
Uses & project ideas
- Chunky baby blanket: hold two strands and use a 6.5–8 mm hook for dramatic stars.
- Hat body: use star rows for texture; switch to sc rib at brim.
- Accent panel on a bag for robust texture.
Tips & troubleshooting
- If stars look smashed, increase hook size slightly or block while pins support star shape.
- If fabric stretches too much: use one size smaller hook or add sc rows between star rows (i.e., sc row after every star row already exists — keep it).
- To increase/decrease: increase by adding additional star repeats across; decrease by skipping stars and making sc anchors.
2. Crochet Alpine Stitch Pattern
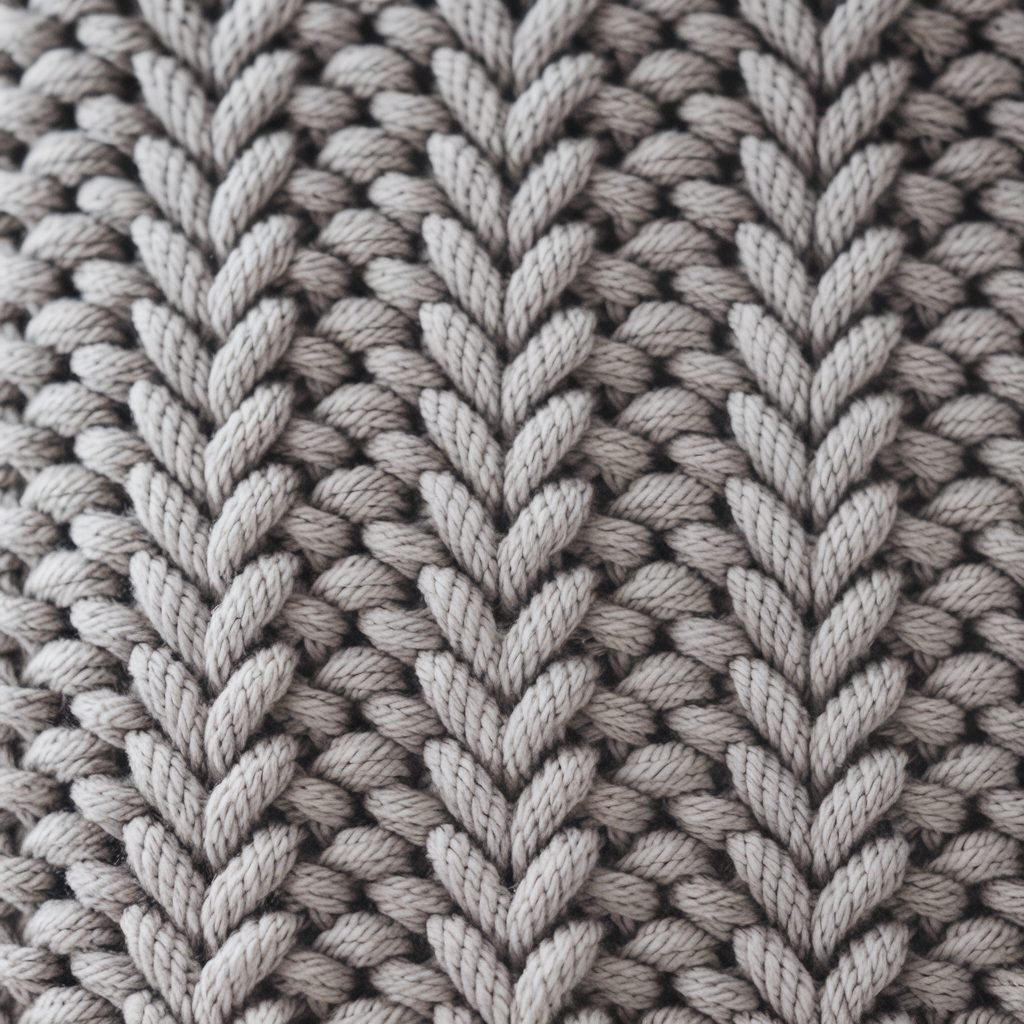
A dense, sculptural pattern using front-post and back-post stitches to create vertical ridges — looks knitting-like and is sturdy. Great for sweaters, hats, cushions.
Skill level: Intermediate (post stitches)
Repeat multiple: multiple of 6 + 3 (for balance in typical repeats) — I’ll give a 6-repeat chart.
Recommended yarn & hook: worsted (#4) + 5.0 mm; use a smaller hook for tighter fabric.
Concept
Alpine uses tall post stitches and chain spaces to form a raised vertical motif. It’s reversible but the two sides read differently (front has more pronounced ribs).
Pattern (classic alpine grid — 6-st multiple)
Foundation chain: multiple of 6 + 3.
Row 1 (setup): sc across foundation to create solid base; turn.
Row 2: ch3 (counts as dc), skip 1, fpdc around next st, bpdc around next 2 sts, fpdc around next, skip 1, dc in next; repeat across. Turn.
Row 3: ch1, sc across (sc in top of posts where possible), turn.
Row 4: repeat Row 2 but offset the placement of fpdc/bpdc if you want staggered cables (creates twisting look). Continue Rows 2–4 as repeat.
Exact short repeat (compact)
- Set up a 3-row repeat where row 2 forms posts and rows 1/3 are sc anchor rows. This stabilizes the tall posts.
Swatch example
- Ch 33 (6×5 + 3) → foundation.
- Row 1: sc 33.
- Row 2: ch3, skip 1, fpdc around next st, bpdc around next 2, fpdc around next st, skip1, dc in next rep to end.
- Row 3: sc across.
- Repeat steps to build height.
Uses
- Structured garments (cardigans) look knit-like with alpine stitch.
- Home decor: cushion covers, dense placemats, mugs cozies.
Tips & notes
- Post stitches are slow but give premium texture. Keep tension consistent; use stitch markers at panel repeats.
- If fabric puckers, try switching to a larger hook by 0.25–0.5 mm.
- For deeper relief, use tr in post positions instead of dc.
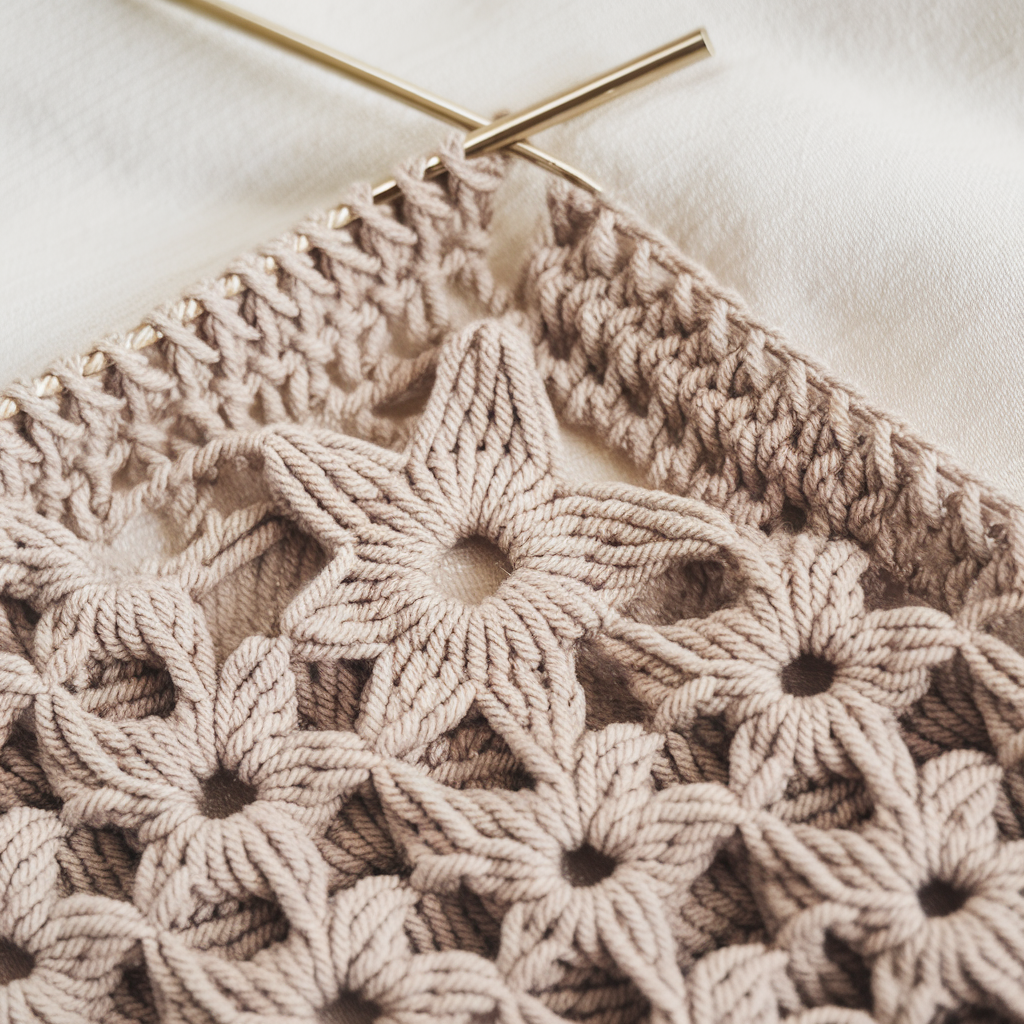
3. Crochet Flower Stitch Pattern

A lacy, floral surface stitch that reads like tiny daisies across the fabric. Lovely for shawls, summer tops, and trims.
Skill level: Confident Beginner → Intermediate
Repeat multiple: multiple of 4 + 1 (works nicely)
Recommended yarn & hook: DK with 4.0 mm for drape; worsted + 5.0 mm for chunkier flowers.
The idea
Each flower is a little cluster built over a small base, with one anchor row of single crochet between flower rows so the floral surface keeps structure.
Row pattern (row pair)
Foundation: chain a multiple of 4 + 1.
Row A (flower formation): [work a petal: ch3, (hdc, dc, hdc) all into same stitch], ch1, skip next 2 sts, sc in next; repeat across finishing with sc in final st. Turn.
Row B (anchor row): ch1, sc in each st across (including petal bases), turn.
Alternate Row A and Row B.
Petal explained
- The petal is a small composite of hdc/dc/hdc in one stitch or ch-space, producing a rounded “petal.” The ch1 space between petals allows separation.
Swatch example
- Ch 25 (24 +1).
- Row 1: setup: sc across.
- Row 2 (Row A): make petals across with ch1 spaces per pattern.
- Row 3: sc across.
- Repeat for 8–10 rows and block lightly.
Uses & variations
- Make a lacy scarf: use DK, larger hook, and long repeats.
- Make small floral trims: only 2–3 flower rows and attach to edges.
- For dense floral texture replace sc anchor rows with hdc rows for more body.
Troubleshooting
- If flowers flop: reduce hook by 0.5 mm or increase petal height (dc→tr).
- If petal spacing looks crowded, increase the skip count (skip 3 instead of 2) to open fabric.
4. Crochet Wattle Stitch Pattern
An Australian-inspired textured stitch—grid-like raised “pods” across a flat, drapey background. It is surprisingly quick and reversible. Excellent for warm scarves and heavy blankets.
Skill level: Confident Beginner
Repeat multiple: multiple of 3 + 2 (chain) — I give a practical multiple.
Recommended yarn & hook: worsted + 5.0 mm; DK + 4.0 mm for lighter wattle.
What it looks like
Wattle stitch uses clusters (often 3 dc clusters) offset across rows with sc anchors, producing small bobble-like pods that resemble wattle flowers or millet heads.
Written repeat (row pair)
Foundation: multiple of 3 + 2.
Row 1 (pod row): sc in next st, ch2, work 3-dc cluster into next st, ch1, sc in next st; repeat across. Turn.
Row 2 (anchor): ch1, sc in each st across including ch spaces and cluster tops (work sc in the third dc of cluster or into the ch1 as anchor depending on your preferred look). Turn.
Repeat Rows 1–2.
Variant cluster (bobble)
- Replace 3-dc cluster with 5-loop puff for extra puffiness; the anchor row will flatten slightly but keep pods distinct.
Swatch example
- Ch 32 (3×10 + 2)
- Row 1: pod/cluster pattern across.
- Row 2: sc across.
- Repeat for 12 rows; block lightly.
Uses
- Warm textural scarves, winter cushions, and robust blankets.
- Works well as sleeve panels on cardigans for visual interest.
Tips & troubleshooting
- If pods look uneven, pay attention to which loop you anchor sc into — consistent anchoring across the row makes pods sit evenly.
- When using puff stitch clusters, keep tension slightly tighter on loops so cluster doesn’t open too wide.
5. Crochet Moss Stitch Pattern
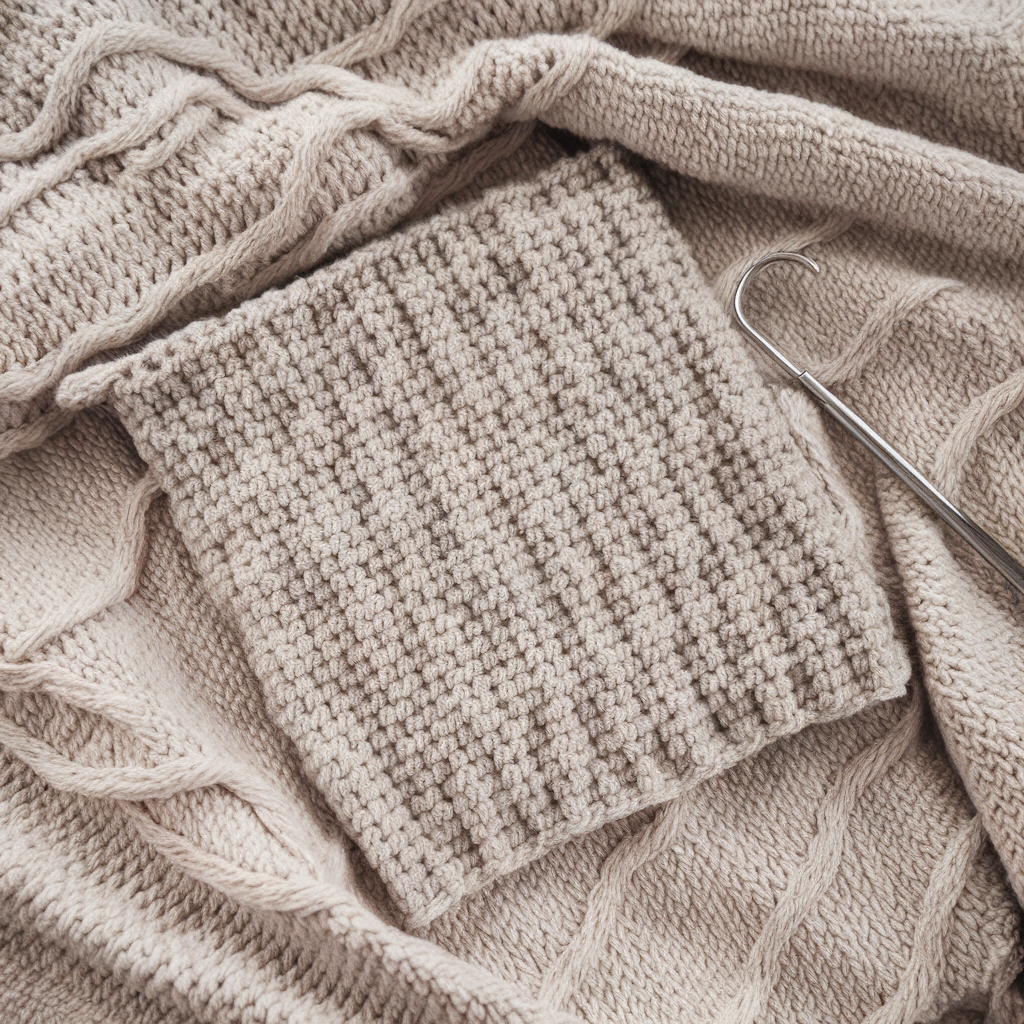
A deceptively simple, almost woven-looking textured stitch. It’s reversible, flat, and perfect for modern minimal projects: dishcloths, blankets, lightweight cardigans.
Skill level: Beginner → Confident Beginner
Repeat multiple: any odd number (commonly multiple of 2 + 1 gives neat edges).
Recommended yarn & hook: DK + 4.0 mm for drape; worsted + 5.0 mm for sturdier fabric.
Why you’ll like it
Moss stitch (aka linen stitch) alternates single crochets and chains across rows to create a dense, stable fabric with tiny squares. It’s slow but efficient; the fabric is stable with minimal curling.
Written stitch pattern (classic)
Foundation chain: odd number of chains for clean edges (or any number + 1).
Row 1: sc in 2nd ch from hook, ch1, sk1, sc in next ch; repeat across; turn.
Row 2: ch1, sc in ch-1 space (not in sc), ch1; repeat across; sc in turning space. Turn.
Repeat Row 2 for desired length.
Short form
- Row: sc, ch1, skip 1
- Next row: sc into chain space, ch1.
Swatch example
- Ch 21 (20 +1).
- Row 1: sc, ch1, skip across.
- Row 2: sc into chain spaces; ch1.
- Repeat for 12 rows, block, measure.
Uses & variations
- Reversible baby blankets: moss stitch lies flat, lightweight.
- Summer tops and cardigans: linen stitch breathes while keeping structure.
- Dishcloths: worsted cotton + 4.0 mm makes excellent absorbent cloths.
Tips & troubleshooting
- If edges look messy, chain an extra stitch at the beginning of each row as a turning chain and sc into the turning chain to tidy the edge.
- For denser fabric, replace sc with hdc; for airier fabric use dc in place of sc but increase hook by 0.5–1 mm.
Quick comparison (pick this one if you want a one-line cheat)
- Want plush & squishy? — Star stitch.
- Want structured cables & vertical relief? — Alpine stitch.
- Want delicate floral texture for shawls? — Flower stitch.
- Want bold pods/bobbles for winter? — Wattle stitch.
- Want flat, modern, reversible fabric? — Moss (linen) stitch.
Finishing tips that actually help
- Always block your final fabric to set stitch definition (lace blooms, moss evens out, star opens up).
- If a stitch pattern feels too busy for your project, scale it: fewer repeats per row or larger yarn + larger hook for chunkier, calmer motifs.
- Chart it for brainless repetition: map each row as symbols or simple letters so you stop losing your place.
- Test color shifts on a 6-row sample: some textures flatten with high-contrast stripes and read as noise.
conclusion
There. Five distinct stitch patterns with exact repeats, sample swatches, uses and troubleshooting so you can finally pick a stitch and make something that actually looks intentional. Do your swatch, do the math (stitches-per-inch × target width), and then follow the repeats I gave.