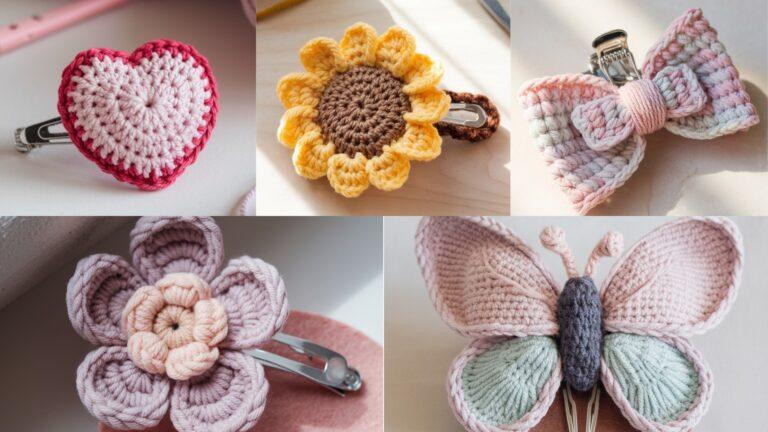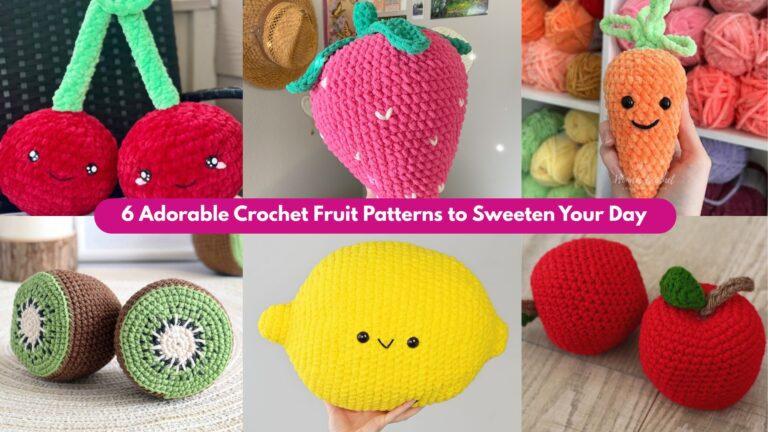
Crochet hair clips are one of the quickest ways to turn a few leftovers of yarn into something beautiful and useful. They are small enough to finish in no time, but they still feel special because they add color, texture, and personality to any hairstyle. These kinds of accessories are also perfect for gifts, markets, party favors, and matching sets.
For this post, all five designs are made to be entirely crocheted, including the “snap” style fastening. That means no metal barrette base is needed. Instead, each clip uses a crocheted base with a yarn-made closure, so the whole accessory stays soft, lightweight, and fully handmade.
These patterns are written to be easy to follow and simple to customize. You can make them in pastel yarns for a soft look, bold shades for a playful style, or neutrals for everyday wear. For younger children, just keep the decorations securely sewn and avoid tiny beads or anything loose.
A quick note before starting: use a slightly smaller hook than the yarn label suggests so the clip base stays firm. A tight fabric helps the clip keep its shape better.
Shared materials for all five patterns
- Lightweight cotton yarn or baby yarn
- Crochet hooks in sizes 2.0 mm to 3.5 mm
- Tapestry needle
- Scissors
- Stitch marker
- Small amount of fiberfill, if you want raised details
- Optional embroidery thread for tiny accents
Common abbreviations
- ch = chain
- sc = single crochet
- hdc = half double crochet
- dc = double crochet
- sl st = slip stitch
- inc = increase
- dec = decrease
- MR = magic ring
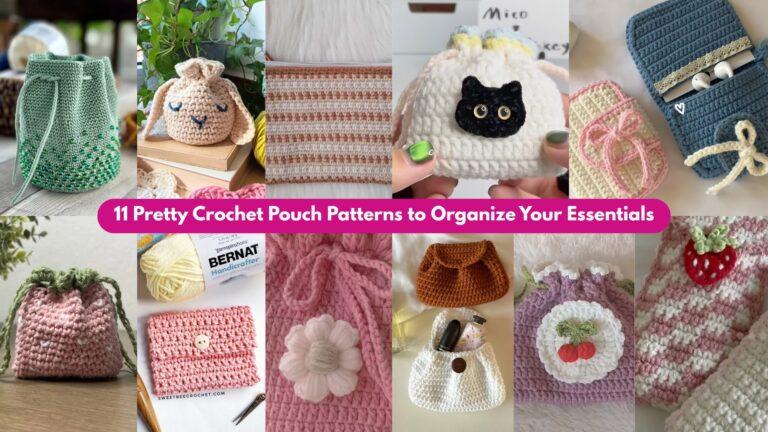
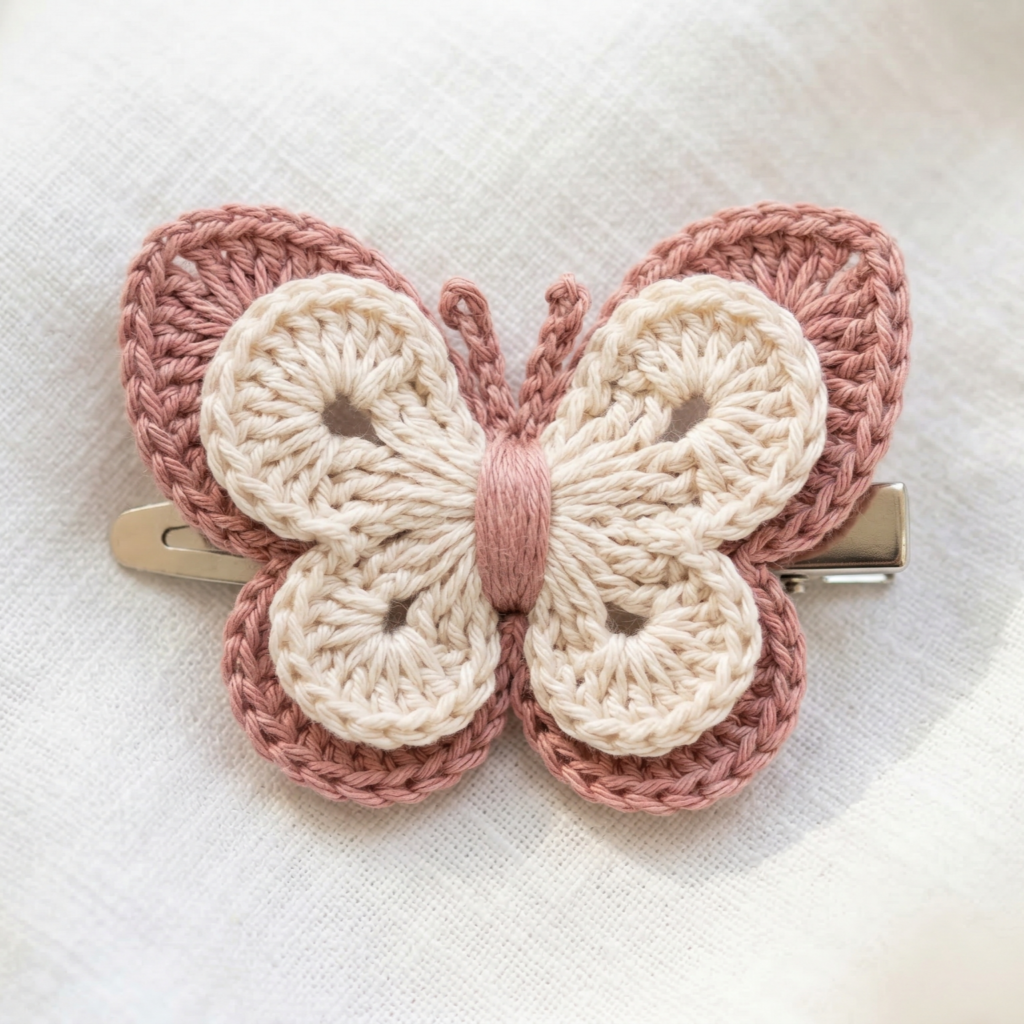
1. Crochet Vintage Butterfly Hair Clip Pattern
Skill level: Beginner to intermediate
Style: Soft, vintage, delicate
Best for: Everyday wear, gifts, spring outfits
This butterfly clip has a sweet old-fashioned look and works beautifully with soft yarn colors like cream, blush, lavender, or dusty blue. The base is fully crocheted and closes with a yarn loop and crochet button.
Finished size
About 3 to 4 inches wide, depending on yarn and hook.
Materials
- Light cotton yarn in two colors
- Crochet hook 2.5 mm to 3.0 mm
- Tapestry needle
- Scissors
Step-by-step guide
Step 1: Make the crocheted snap base
- Chain about 18 stitches.
- Work sc in the second chain from the hook and across.
- Turn and make 3 more rows of sc to create a firm strip.
- This strip will be the base of the clip.
- On one end, crochet a tiny loop by chaining 4 to 5 stitches and slip stitching back into the same edge stitch.
- On the opposite end, make a small crochet button by working a tiny round of sc into a magic ring and sewing it to the end of the strip.
Step 2: Make the butterfly wings
- Start with a magic ring.
- Work 6 sc into the ring.
- On the next round, create the upper wings by working a combination of dc, hdc, and ch spaces.
- Make the upper wings slightly larger than the lower wings.
- Repeat for the lower wings so the butterfly has a balanced shape.
Step 3: Shape the butterfly
- Fold the butterfly slightly in the middle to create the body line.
- Use yarn to stitch the center tightly.
- Add a small yarn strand or tiny crocheted tube in the middle as the butterfly body.
Step 4: Attach the butterfly to the snap base
- Sew the butterfly center firmly onto the middle of the crocheted strip.
- Make sure the wings sit flat and do not curl too much.
- Reinforce the stitches so the butterfly stays secure.
Step 5: Finish the snap
- Test the button-and-loop closure.
- The loop should slide over the button securely.
- Adjust the size if needed by making the loop slightly tighter or looser.
Finishing tips
- Use two shades of the same color for a vintage look.
- Sew the butterfly wings carefully so they hold their shape.
- Keep the base tight so the clip feels polished.
Style ideas
- Cream and rose for a romantic style
- Soft blue and white for a dreamy look
- Lavender and pale pink for spring
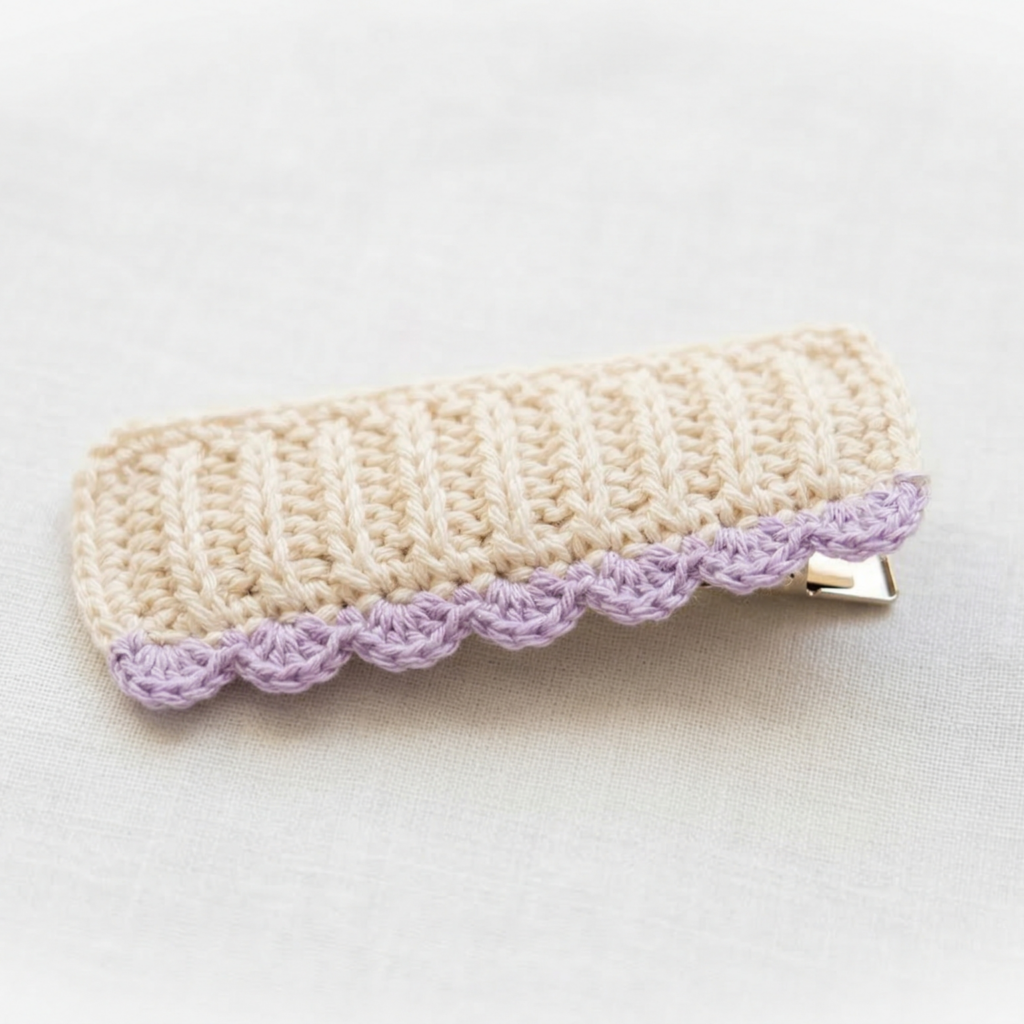
2. Crochet Scalloped Edge Knit Snap Hair Clip Pattern
Skill level: Beginner
Style: Knit-look with a scalloped edge
Best for: Simple everyday styling, kids, and teens
This clip looks like knitwork but is fully crocheted. The scalloped edge gives it a neat and elegant finish, while the snap closure stays soft and comfortable.
Finished size
About 2.5 to 3.5 inches long.
Materials
- Cotton yarn
- Crochet hook 2.0 mm to 3.0 mm
- Tapestry needle
- Scissors
Step-by-step guide
Step 1: Make the base strip
- Chain 14 to 16 stitches.
- Work sc in the back loop only across the row.
- Turn and repeat this for 4 to 6 rows.
- The back-loop stitches create a knit-like texture.
Step 2: Add the scalloped edge
- On one long edge, work sl st, ch3, sl st in every other stitch to create a small scallop.
- Keep the scallops even so the edge looks neat.
- If you want a fuller edge, use 5 dc in the same stitch instead of a chain picot.
Step 3: Shape the snap ends
- At one end of the strip, crochet a small loop using ch 4 or 5.
- On the opposite end, make a tiny crochet button.
- The loop and button should be placed so the clip closes naturally.
Step 4: Make the button
- Make a magic ring.
- Work 6 sc into the ring.
- Join and fasten off.
- Sew the small circle to the end of the strip.
Step 5: Finish and test
- Weave in ends.
- Fold the strip around a small section of hair or a braid and test the closure.
- Adjust if the loop is too loose or too tight.
Finishing tips
- Use one color for a simple look or two colors for a striped knit effect.
- The back-loop-only rows help the clip stay tidy and structured.
- Keep the scallops small so the clip stays lightweight.
Style ideas
- White with a pastel edge
- Beige with cream scallops
- Pink with a slightly darker pink border
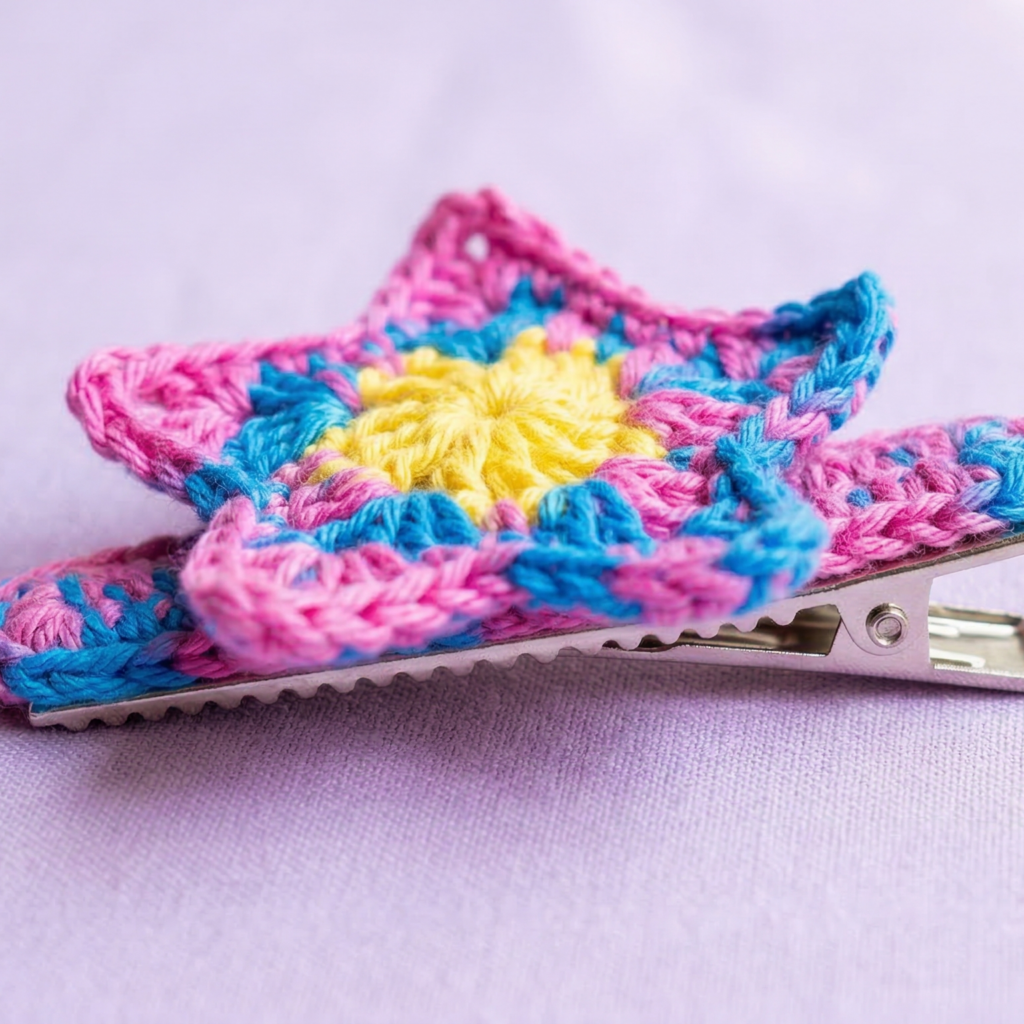
3. Crochet Star Shaped Y2K Hair Clip Pattern
Skill level: Beginner to intermediate
Style: Fun, playful, Y2K-inspired
Best for: Trendy outfits, kids, teens, and statement looks
This star clip is bright, cheerful, and easy to customize. It is a good stash-busting project and looks especially cute in bold colors.
Finished size
About 3 to 4 inches across.
Materials
- Bright cotton yarn or acrylic yarn
- Crochet hook 2.5 mm to 3.5 mm
- Tapestry needle
- Scissors
Step-by-step guide
Step 1: Make the star base
- Start with a magic ring.
- Work 5 or 6 sc into the ring.
- Join and begin forming points with chain loops.
Step 2: Create each star point
- Chain 5 to 7 stitches.
- Work back into the chain using sc, hdc, dc, hdc, sc.
- Slip stitch back into the center ring.
- Repeat for all star points until the shape is complete.
Step 3: Make the crocheted snap base
- Chain 16 to 18 stitches.
- Work sc across for 4 rows.
- At one end, crochet a small loop.
- At the other end, crochet a small button.
Step 4: Attach the star
- Sew the star to the center of the base strip.
- Keep the stitches secure so the points stay lifted.
- If you want a puffier star, add a tiny bit of fiberfill in the center before closing the shape.
Step 5: Finish the clip
- Test the button-and-loop closure.
- Make sure the star sits flat enough to stay comfortable in hair.
- Weave in all ends neatly.
Finishing tips
- Use bright colors for a true Y2K look.
- Try metallic yarn for a shiny finish.
- Make a mini star or two and attach them together for a layered effect.
Style ideas
- Hot pink and silver
- Yellow and white
- Blue and lavender
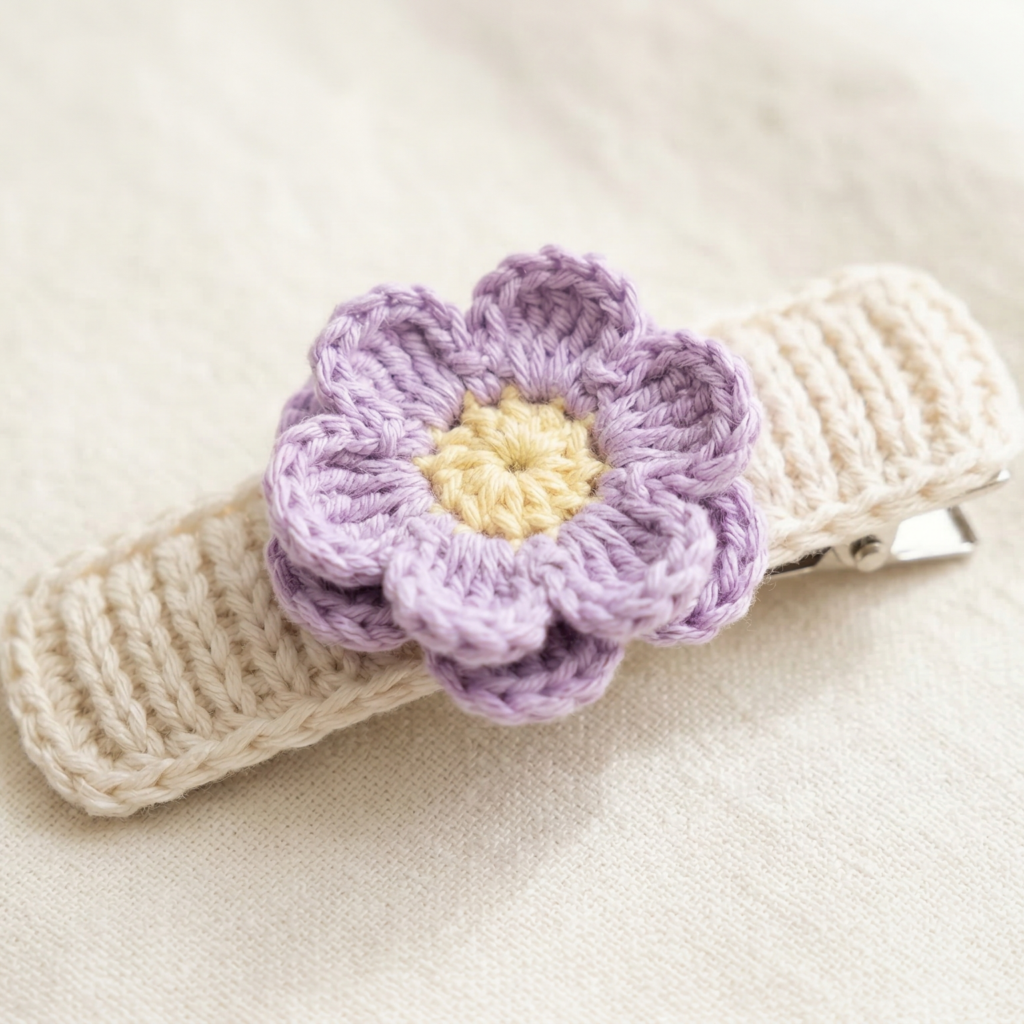
4. Crochet Floral Knit Snap Hair Clip Pattern
Skill level: Beginner
Style: Soft floral, feminine, and classic
Best for: All ages, spring outfits, everyday wear
This clip combines a knit-look base with a pretty flower on top. It is sweet without being complicated, which makes it a lovely gift idea.
Finished size
About 3 inches long.
Materials
- Soft yarn in your favorite flower colors
- Crochet hook 2.0 mm to 3.0 mm
- Tapestry needle
- Scissors
Step-by-step guide
Step 1: Make the snap base
- Chain 16 to 20 stitches.
- Work sc in each chain.
- Make 4 to 5 rows for a firm strip.
- Use back-loop-only rows if you want a knit-like look.
Step 2: Crochet the flower
- Start with a magic ring.
- Work 6 sc into the ring.
- For the petals, chain 4 or 5 and slip stitch back into the next stitch.
- Work a petal into each stitch around.
- Make the petals round and soft by adding sc, hdc, dc, hdc, sc into each loop.
Step 3: Add the flower center
- Use a small crochet circle or a small French knot embroidery center.
- Sew it into the middle of the flower.
- Keep it flat so it is comfortable for hair use.
Step 4: Attach flower to the base
- Sew the flower onto the center of the crocheted strip.
- Reinforce the middle so it does not shift.
- Make sure the flower sits securely.
Step 5: Add the crocheted snap
- Make a small loop on one end of the strip.
- Make a crochet button on the other end.
- Test the closure to make sure the clip stays closed well.
Finishing tips
- Choose soft pastel colors for a gentle floral look.
- Use one color for the base and another for the flower.
- Keep the flower flat enough to stay light.
Style ideas
- White flower with green center
- Pink flower with cream base
- Lavender flower with pale yellow center
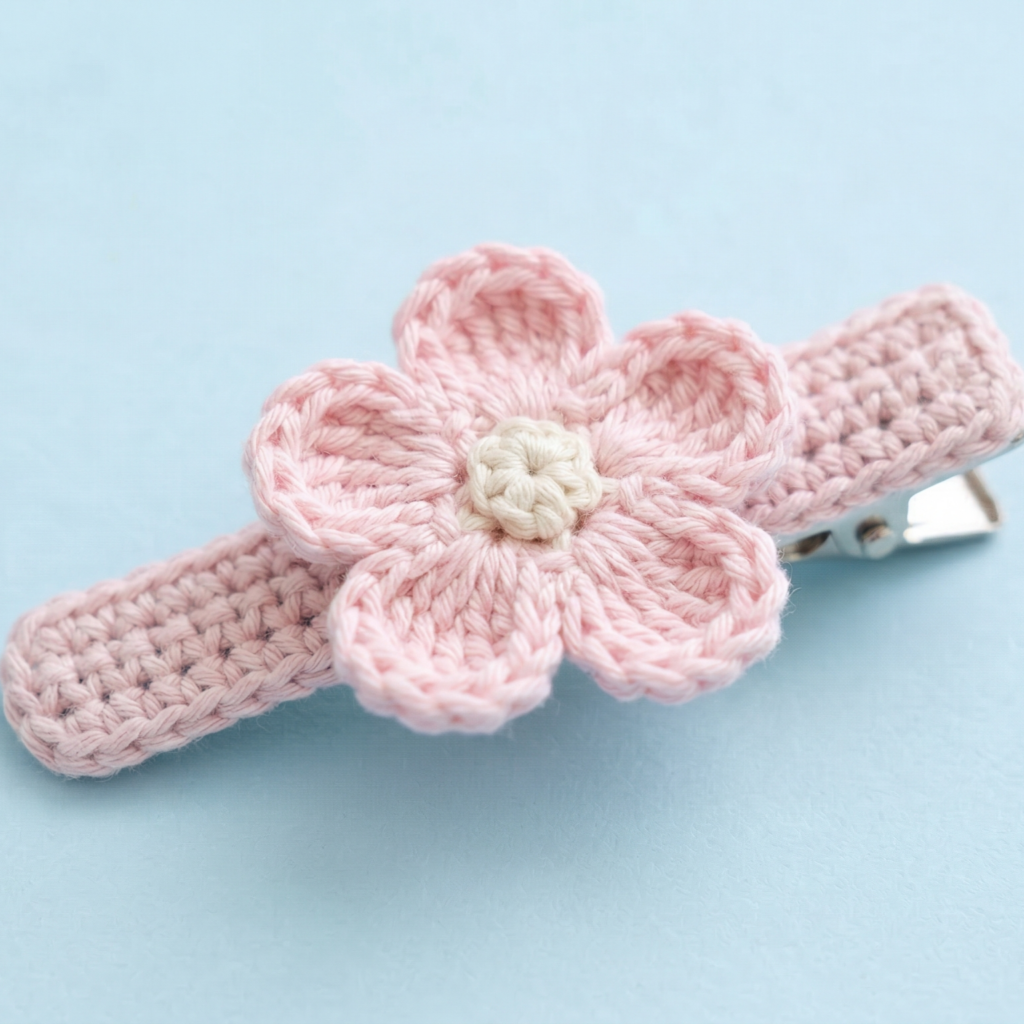
5. Crochet Simple Soft Cherry Blossom Hair Clip Pattern
Skill level: Beginner
Style: Sweet, delicate, and soft
Best for: Children, teens, spring styles, gifts
Cherry blossoms are a beautiful choice if you want something soft and graceful. This clip works especially well in pale pink and cream.
Finished size
About 2.5 to 3.5 inches long.
Materials
- Light pink yarn
- White or cream yarn for the center
- Crochet hook 2.0 mm to 3.0 mm
- Tapestry needle
- Scissors
Step-by-step guide
Step 1: Make the snap base
- Chain 14 to 18 stitches.
- Work sc across for 4 rows.
- Use a firm tension so the base stays neat.
- Add a small loop on one end and a crochet button on the other.
Step 2: Make the cherry blossom petals
- Start with a magic ring.
- Work 5 sc into the ring.
- For each petal, chain 4 and work sc, hdc, dc, hdc, sc into the chain loop.
- Repeat until all petals are formed.
- Make the petals rounded and soft.
Step 3: Add the center
- Use a tiny stitched center in cream or yellow.
- Work a small knot or one tiny stitched circle in the middle.
- Keep the center small and neat.
Step 4: Attach to the base
- Sew the cherry blossom onto the middle or side of the snap base.
- Make sure the petals are evenly spaced.
- Reinforce the center stitch so the flower stays secure.
Step 5: Finish the clip
- Weave in all ends carefully.
- Test the crocheted closure.
- Adjust the loop or button if needed.
Finishing tips
- Soft pink gives the best cherry blossom look.
- A tiny second blossom can be added for a fuller design.
- Keep the petals flat and tidy.
Style ideas
- Pale pink with cream center
- Blush with a darker pink accent
- White blossom with soft green leaves
Conclusion
These five crochet hair clip patterns are perfect when you want something small, pretty, and fully handmade. Because the clips are entirely crocheted, including the fastening style, they stay soft and lightweight while still feeling special. You can make them in pastel shades for a delicate look, bright colors for playful styles, or neutral tones for everyday wear.
The best part is that each clip can be finished quickly, which makes them ideal for gifts, sets, and market items. They are also easy to customize with flowers, stars, butterflies, or scalloped edges, so every clip can feel unique. With a little yarn and a small hook, you can create beautiful hair accessories that work for all ages and styles.