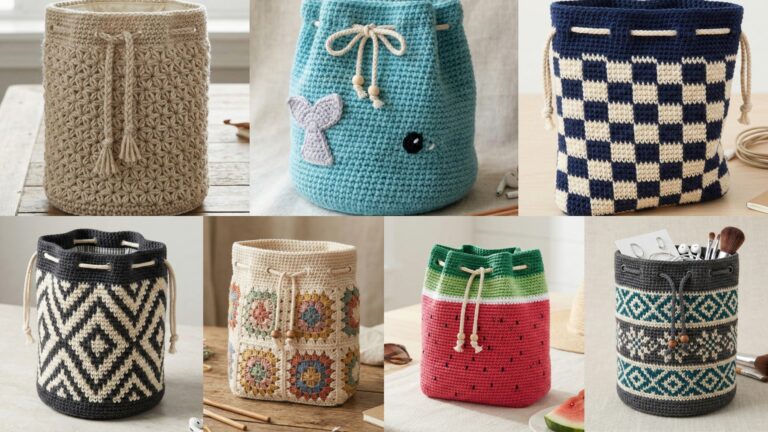
Drawstring bags are the craft world’s Swiss army knife: compact, quick to make, endlessly customizable, and actually useful. Need a makeup pouch, a beach bag for sunscreen and snacks, a tiny emery bag to store needles, or something cute for gift packaging? Drawstring bags do all of that. The difference between a sloppy sack and a proud little carrier comes down to three things: correct gauge, a clean casing for the cord, and sensible reinforcement where strain is highest (top edges and cord holes). I’ll help you with all three.
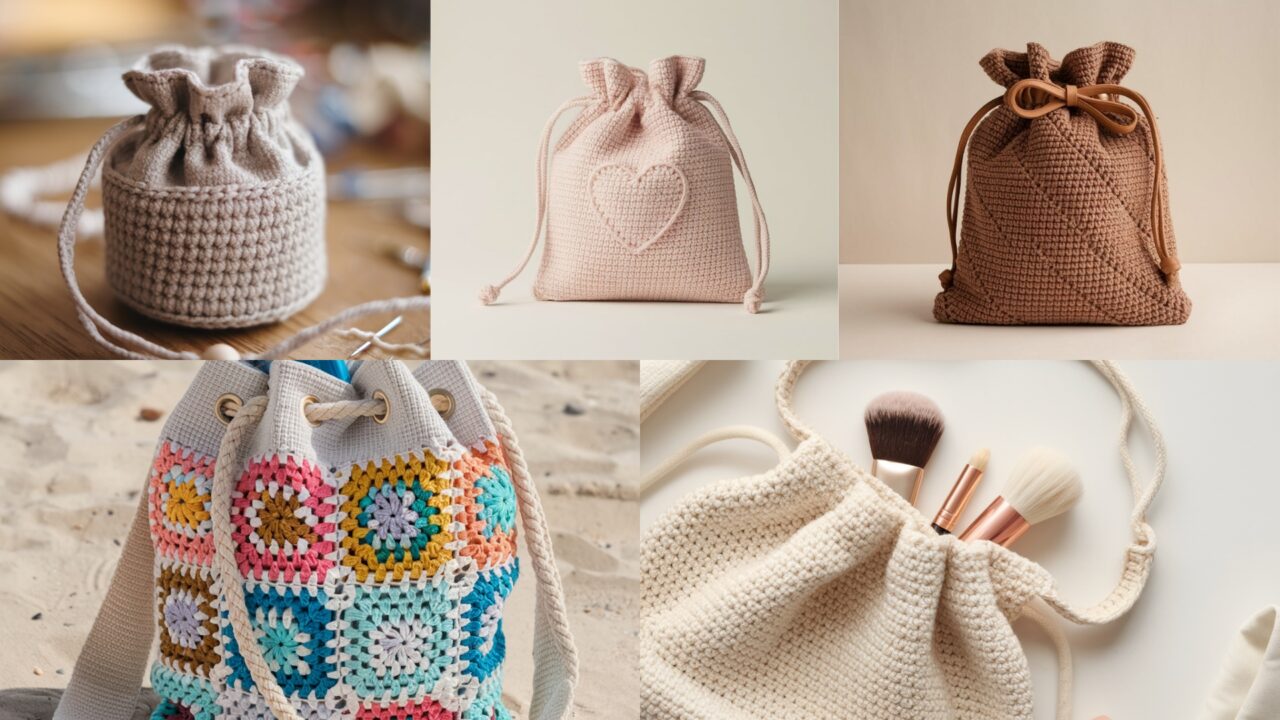
This post gives five reliable patterns — heart motif tote, herringbone textured pouch, flat-lay makeup pouch, granny-square beach sack, and a tiny emery pouch — written to scale for real life and easy to adapt.
Universal Notes — read this, please
Abbreviations (US): ch = chain, sc = single crochet, hdc = half double crochet, dc = double crochet, tr = treble, sl st = slip stitch, st(s) = stitch(es), MR = magic ring, BLO / FLO = back / front loop only, hhdc = herringbone half double crochet (explained below), sp = space, rep = repeat.
Materials baseline: Most examples below use worsted weight (#4) cotton or cotton-blend yarn and a 5.0 mm (H) hook unless otherwise stated. Cotton gives structure and machine-washability; acrylic is smoother but can be slippery for knotted cords.
Swatch & gauge — you will do this
- Make a 4″ (10 cm) square in the main stitch used for the bag. Block it the way you’ll care for the finished bag.
- Count stitches across 4″. Example I’ll use in math: 16 sts across 4″ → 16 ÷ 4 = 4 sts/in. Write that number down.
- Rows per inch matter for height; count rows in 4″ and divide by 4.
Sizing logic (3-step):
- Decide finished width (W) of bag.
- Multiply width × sts/in = stitches needed across (S = W × sts/in).
- Round S to nearest multiple required by stitch pattern (I’ll say multiples when needed).
Drawstring/casing options (pick one)
- Internal tunnel (classic): finish top with 2–3 rounds of sc, then a round of ch-loops (or picot) to create holes for passing the cord. Good for small bags.
- External eyelet row: make decorative eyelets (ch1, sk1) then overlay a narrow braid or cord through. Easy and pretty.
- Folded drawstring tube (rolled casing): fold top edge inward and seam to form wide tunnel — good for thicker cords and heavier bags.
- Toggle closure option: add toggles to cord ends and use one toggle on two cords if you prefer knotless closure.
Safety & care:
- Never use long cords for children’s bags — drawstrings pose strangulation risk. Use short straps, snaps, or no cords for young children.
- Reinforce cord holes/areas with a small felt patch or extra rows of sc for longevity.
- Wash bags according to fiber labels; machine-wash cotton on gentle, reshape and dry flat.
1. Crochet Heart Drawstring Bag Pattern
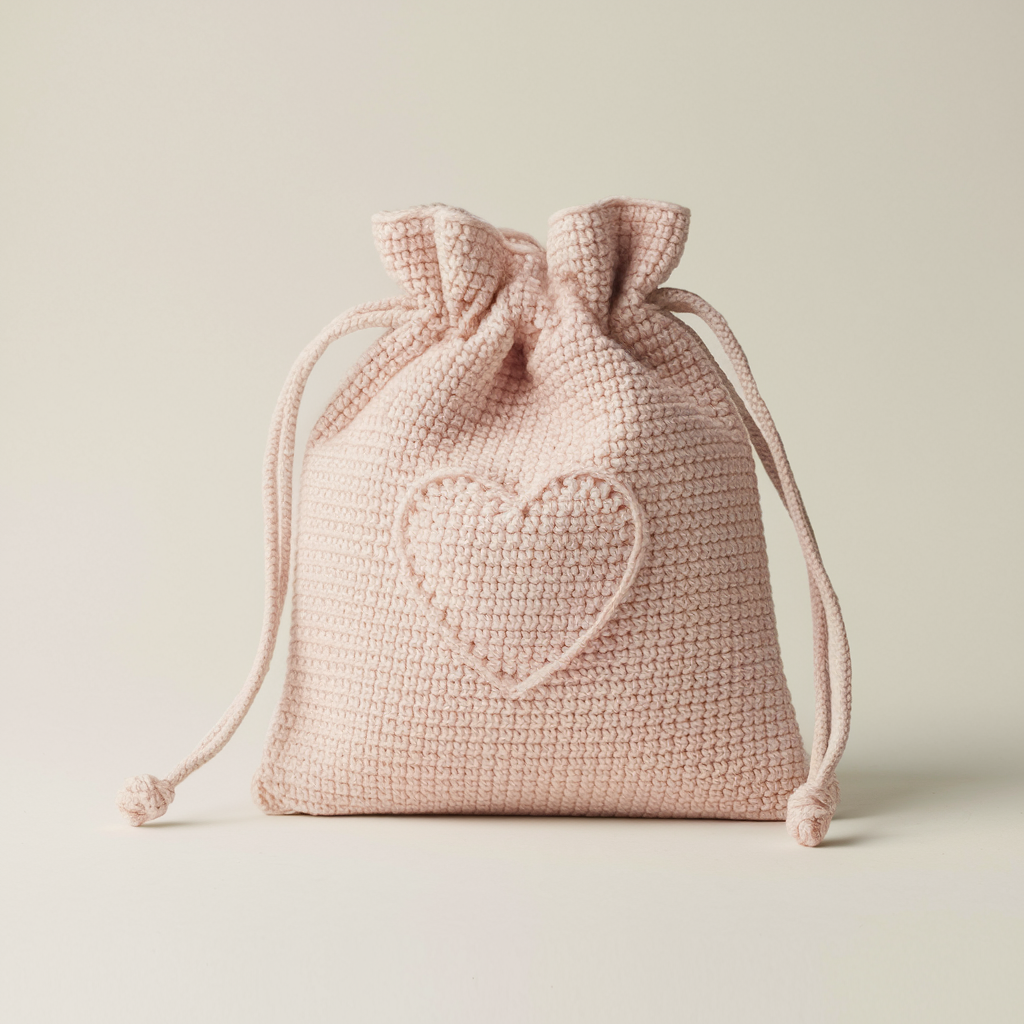
A cute, small bag with heart motif on front — great for gifts, jewelry, or a makeup pouch. Worked flat with a heart panel and body panel joined.
Skill level: Confident Beginner
Finished size (sample): medium pouch ≈ 8″ wide × 9″ high (before drawstring), depth flat (no gusset) — good for small daily carry.
Materials: worsted cotton (#4) ~150–200 yds, 5.0 mm hook, tapestry needle, cotton cord or thin cotton rope (approx 40–60″ depending on casing), optional lining fabric.
Gauge example used in math: 4″ = 16 sc → 4 sts/in.
Stitch repeat / multiple: no special multiple — panel uses sc base. Heart motif chart uses set pixels; we’ll place it centered.
Sizing math (tailor to your gauge)
- Target finished width = 8″. Stitches needed = 8 × 4 = 32 sts across.
- Foundation chain for panel (worked flat) = ch 33 (for 32 sc across when working in 2nd ch from hook) or ch32 + turning chain style — I prefer ch33 and sc in 2nd ch for neat edge.
Construction overview
- Make a front panel containing the heart motif (graph/tapestry or surface crochet).
- Make an identical back panel (plain or with a mirrored pattern).
- Seam side and bottom with mattress stitch, leaving top open for casing.
- Create drawstring casing and thread cord.
Step-by-step
Front panel with heart motif (flat tapestry approach)
- Ch 33. R1: sc in 2nd ch from hook and across — 32 sc. Turn.
- R2–R20: Work sc across for baseline rows until you have enough rows to place the heart pattern centrally — typical height ~9″ might be 36 rows depending on your row gauge. Use a 32 × 28 pixel chart scaled to your stitch/row counts (if you want a ready template: map 32 stitches × 28 rows, draw a heart, and use two colors). For each stitch, change color following tapestry technique (carry unused color inside row; crochet tightly to avoid gaps).
- After finishing motif, fasten off and weave ends.
Back panel
4. Make a matching back panel same stitch/row counts in main color (no motif) and block lightly to match size.
Seaming the sides & bottom
5. Place panels with RS (right sides) together. Seam two sides using mattress stitch or sc through both layers to create a tidy inside. Leave the top unseamed. For a flat bottom, fold bottom corners and seam a small triangle (optional), or add a narrow rectangular gusset strip (see gusset variant below).
Option — add boxed base for depth (gusset)
6. Instead of flat bottom, crochet a separate gusset strip: ch (desired depth × sts/in + 1) e.g. for 2″ depth at 4 sts/in → 2 × 4 = 8 → ch9, sc across, then join into a loop and work rounds until the strip length equals panel width (32 sc long). Sew the gusset to the panel edges. This gives a rectangular base.
Casing & drawstring method (simple eyelet row)
7. Around the top edge, work 2–3 rounds sc to tidy. On next round, make eyelets: sc 2, ch2, sk2 repeat around. This makes evenly spaced holes for a cord. Optionally make a second eyelet round offset for double-cord threading. Fasten off.
Cord & finishing
8. Make cord: either use commercially bought cotton cord or crochet an i-cord / chain and sc back over chain to form sturdy cord. Cord length: for a medium bag, two cords of ~30″ each (so when threaded and pulled you can close with overlap). If you use a single continuous cord (threaded as a loop through alternating holes), make ~60″.
9. Thread cord through eyelets, knot ends, or add toggles/beads. If you used tapestry colorwork, press gently and line the bag to hide color carries and protect contents. Sew on a small strap loop inside for keys if desired.
Lining (optional, recommended for makeup)
- Cut lining fabric 1/2″ smaller than crochet panel, sew side seams, attach zipper across top, or machine-stitch lining to the bag interior by hand; secure along the eyelet round for neat finish.
Variations & tips
- For a larger gift bag, scale up stitches using the same stitches-per-inch math.
- Use duplicate stitch to add the heart afterward if you don’t want to do tapestry while crocheting.
- Reinforce the eyelet row from inside with a small fabric strip stitched over the holes if you expect heavy use.
2. Crochet Herringbone Drawstring Bag Pattern
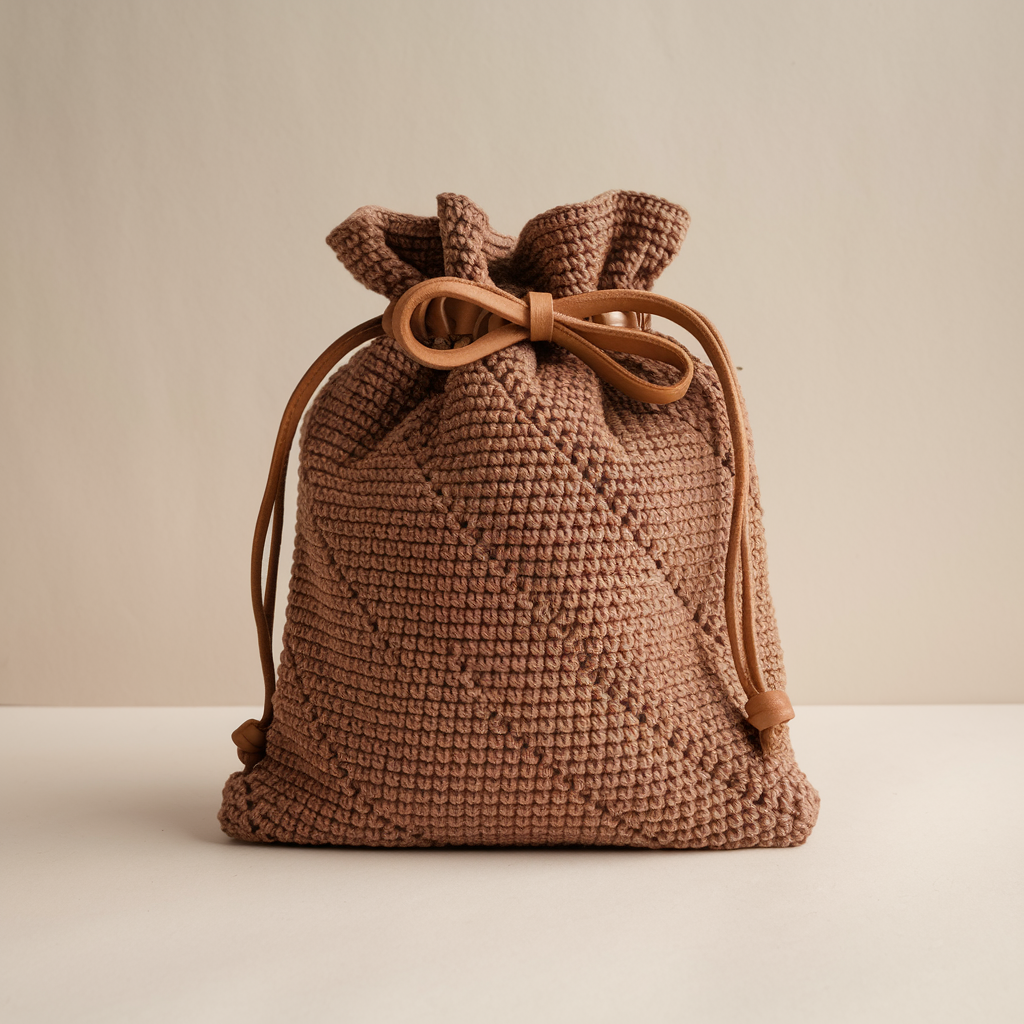
Dense, textured bag using the herringbone half double crochet (hhdc) — great for sturdier pouches and less floppy drawstrings.
Skill level: Confident Beginner → Intermediate (learn the hhdc)
Finished size (sample): medium pouch ≈ 9″ wide × 10″ high (before casing) — good for phone + wallet.
Materials: worsted cotton ~200–250 yds, 5.5 mm hook (slightly larger to achieve drape), cotton cord, tapestry needle.
Gauge & stitch: hhdc results differ from sc; make a 4″ swatch in hhdc. I’ll show example math assuming 4″ = 12 hhdc → 3 sts/in.
What is hhdc (quick): insert hook into stitch as for hdc, yarn over, draw up loop, yarn over and pull through the first loop on hook (so you have two loops on hook), then yarn over and pull through two loops twice — but the body is tall and twisted, creating a herringbone-like appearance. Practice first.
Sizing math (example)
- Target width = 9″. Stitches = 9 × 3 = 27 hhdc across. Foundation: ch 28 (work hhdc in 3rd ch from hook depending on your chosen start).
Construction overview
- Work a single panel in hhdc rows until desired height. Optionally add a bottom gusset strip for depth. Make a folded casing for a thicker cord.
Step-by-step
Panel
- Ch 28. R1: hhdc in 3rd ch from hook and across → 27 hhdc. Turn.
- R2–R30: ch2 (counts as hhdc height), hhdc across in each stitch (maintain tension; the hhdc leans a little — keep stitches vertically aligned). Continue until bag height ≈ 10″. Fasten off.
Gusset option
3. Add a gusset if you want a flat bottom: ch (depth × sts/in + 1) e.g., for 2″ depth at 3 sts/in → 7 ch; work sc in rows to make long strip, join to panel edges. Alternatively work a circular base and join.
Folded casing for heavy cord
4. Work 4 rounds of sc around top edge for stability. Fold the top over inward ~1″ and slip-stitch through both layers to create a robust tunnel wide enough for a 4–6 mm cord. Leave small openings (or use a safety pin) to feed cord.
Cord
5. Make or buy cord. For heavy use, a cotton macramé cord is fine. Thread cord through casing; position ends so pulling closes bag nicely. Add knots or toggles as desired.
Finishing
6. Reinforce the seam at either side where the cord tunnels meet by stitching a small patch on the inside. Weave ends and block lightly.
Advantages & tips
- hhdc creates a slightly elastic fabric with good body; great for small backpacks, pouches that hold tools, or cosmetic bags.
- If your hhdc comes out crooked, try working in continuous rounds instead of joined rows to reduce visible joins.
- Line the bag for makeup to stop pigment stains — hhdc hides grease poorly.
3. Crochet Flat Lay Makeup Drawstring Bag Pattern
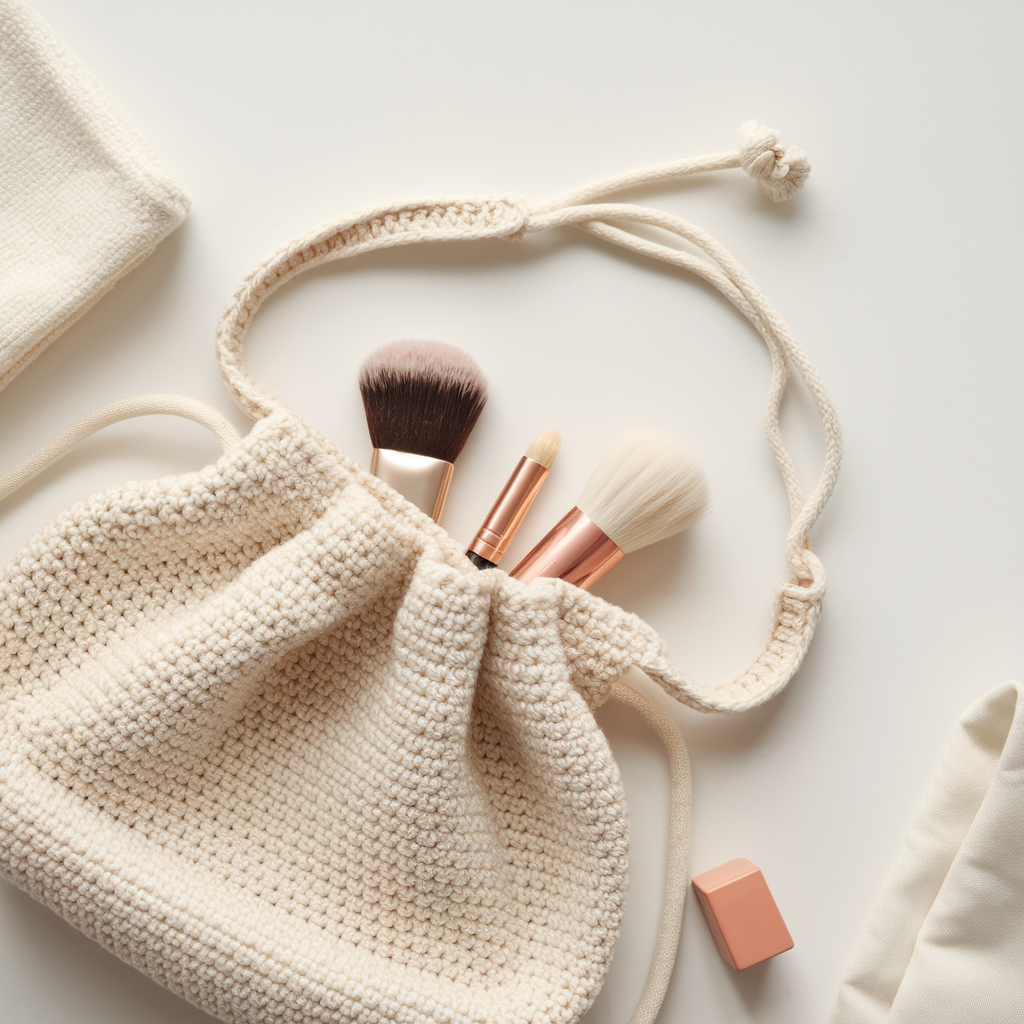
A flat, rectangular pouch that lays open for easy access — ideal for makeup, brushes, or chargers. Drawstring allows quick closure and compact carry.
Skill level: Confident Beginner
Finished size (sample): 10″ wide × 8″ high laid flat (so 16″ height when filled around curve).
Materials: worsted cotton or cotton blend ~200 yds, 5.0 mm hook, zipper (optional but we’ll keep drawstring), lining (water-resistant recommended), cotton drawcord.
Gauge example: 4″ = 16 sc → 4 sts/in.
Design note: “Flat-lay” means the base is shallow; the bag opens wide when uncinched, good for makeup brushes. We’ll use a rectangular panel folded in half, with short side as depth.
Sizing math (example)
- Desired width = 10″. Stitches = 10 × 4 = 40 sc across. Foundation ch = 41 if working in 2nd ch.
Construction overview
- Make a rectangular panel 10″ × 16″ (so when folded height becomes 8″ with seam at bottom). Add side seams and a narrow gusset if you want more depth. Add a neat top casing and cord.
Step-by-step
Panel
- Ch 41. R1: sc in 2nd ch from hook and across → 40 sc. Turn.
- R2–R??: sc in each st across until length = 16″ (rows determined by your swatch; e.g., if rows/in = 8, then 16 × 8 = 128 rows; check your swatch). Fasten off.
Fold & seam
3. Fold panel in half widthwise so short edges align and top edges are open. Whipstitch or mattress stitch along two side edges leaving top open. For a cleaner look, use sc through both layers along sides (this also reinforces). If you want slight expansion, leave a 1″ gusset at each side bottom (box seam) by pinching corners and stitching across.
Top casing (rolled tube)
4. Work 3 rounds sc around top edge (both layers) starting at seam to make tidy edge. Fold top down ~3/4″ and slip-stitch through both layers across to create a long, wide tunnel for a thicker cord — leave small hole for cord insertion.
Cord
5. Use a continuous cord: thread it through the tunnel using safety pin or bodkin. For flat-lay bags you may prefer a double-cord system (two ends on each side) so you can pull both to fully open. Typical cord length: 60–80″ depending on how you route it (two cords of ~30–40″ each for double pull).
6. Knot cord ends and add small beads/tips to prevent slipping through tunnel.
Lining (water-resistant recommended)
7. Cut lining to the folded size minus 1/2″ seam allowances. Sew sides, then insert into crocheted bag and hand stitch the lining to the top casing on the inside. This is the point at which a waterproof lining shines — makeup spills contained.
Finishing
8. Add a small interior elastic loop for brushes or a zippered pocket on the lining for tiny items. Weave ends and press gently.
Tips & Variations
- Add a small gusset strip along the bottom for more volume.
- Use vinyl or oilcloth interior for easy cleaning.
4. Crochet Granny Square Beach Drawstring Bag Pattern
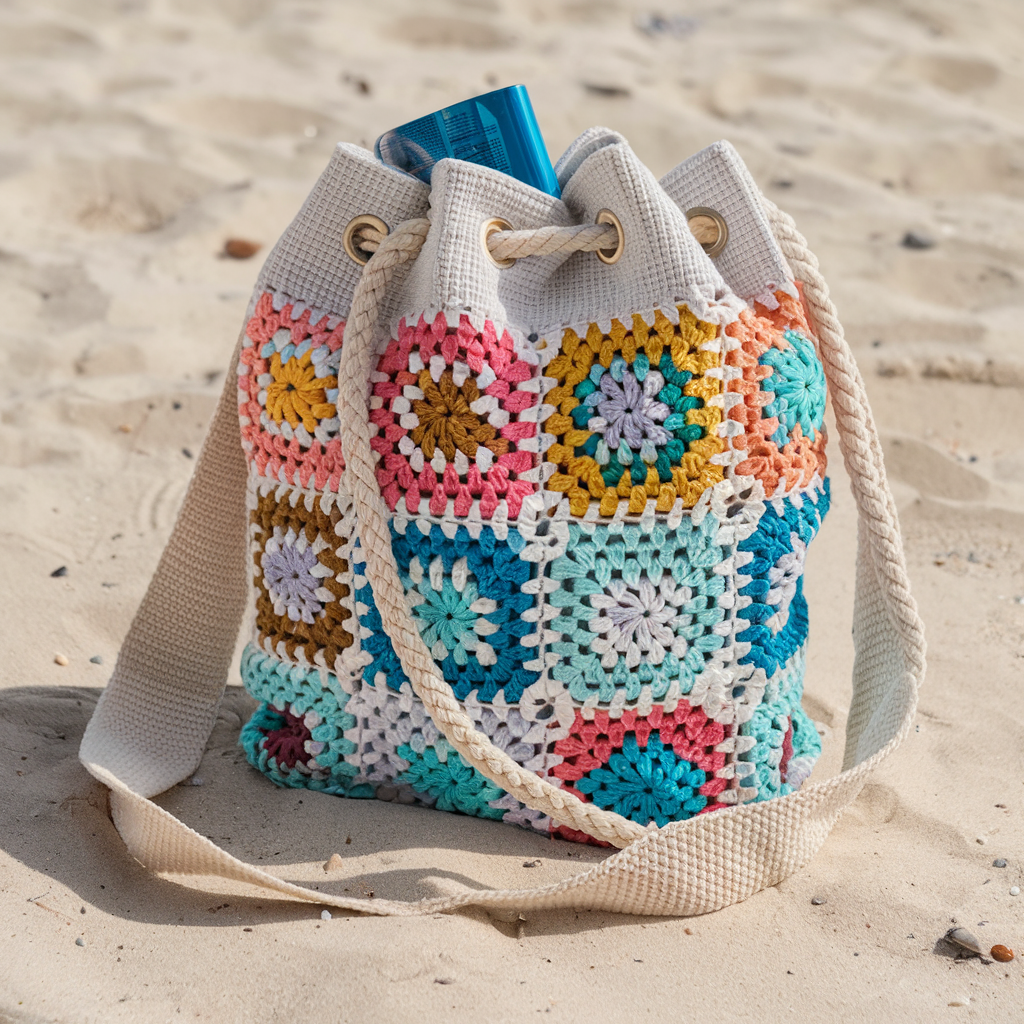
A fun large drawstring bag constructed from granny squares — breathable, stretch friendly, and perfect for towels and sunscreen when lined or used open.
Skill level: Confident Beginner → Intermediate (many squares to make)
Finished size (sample): large beach sack ≈ 20″ wide × 18″ tall with 4–5″ base depth (assembled from large squares)
Materials: worsted cotton in multiple colors ~900–1200 yds (depends on square size), 5.0 mm hook, cotton rope for drawstring ~120–160″, lining optional but recommended for small items.
Square size & grid: aim for squares ~6″ blocked; for 20″ width you need 4 squares across (4 × 6 = 24″, or choose 3 × 6 = 18″ if you prefer smaller).
Plan & math (example layout)
- If you pick 6″ squares and want 20″ width, pick 4 squares across → 4 × 6 = 24″ width (a roomy bag). Height 18″ uses 3 squares tall = 3 × 6 = 18″. This gives a 4 × 3 grid = 12 squares for front/back combined (front 6 squares, back 6 squares) plus base or use separate smaller squares for base.
Make granny squares (classic)
- MR, ch3 (counts dc), work 2 dc, ch2, 3 dc, ch2 repeat 3 more times. Sl st to join (round 1).
- Round 2: slip into corner, ch3, 2 dc, ch2, 3 dc in same corner; ch1, 3 dc in next corner, ch2, 3 dc in corner repeat around to expand.
- Continue rounds until square measures ~6″ blocked. Block squares for uniform size.
Assembly — join-as-you-go recommended
- Arrange squares into a grid (4 across × 3 tall for front, plus same for back or do one continuous panel). Join squares with slip-stitch or whipstitch; for a decorative seam use contrasting join color with exposed join (sl st through both loops).
- For the bottom, either: a) include extra squares sewn across the base to make a boxed base, or b) crochet a long gusset strip (ch length = base circumference) and join.
Drawstring casing & handles
- Top edge: work 2–3 rounds sc for stabilizing. Then make an eyelet round: sc 2, ch3, sk 3 repeat around — adjust spacing to match granny rows. This provides nice holes for a cotton rope. Optionally make two rows of eyelets offset so the rope can be threaded in two channels (more secure).
- Cord: use a long cotton rope or braided cotton cord. For a big beach bag you will want ~120–160″ if you loop through twice (you can estimate by trying a length and trimming). Thread cord evenly and knot ends, cap with beads or leather tips.
Lining & interior
- If you want to carry small items, make a lining with a drawstring or zipper pocket and sew it into the top edge before forming the casing. For beach use, use a simple unlined bag and keep valuables in a separate small pouch.
Finishing & styling
- Add a long shoulder strap by crocheting a wide strap and attaching securely to side squares with reinforced stitching and webbing hidden inside for strength.
- For lighter weight, make larger squares or use DK yarn.
5. Crochet Emery Drawstring Bag Pattern
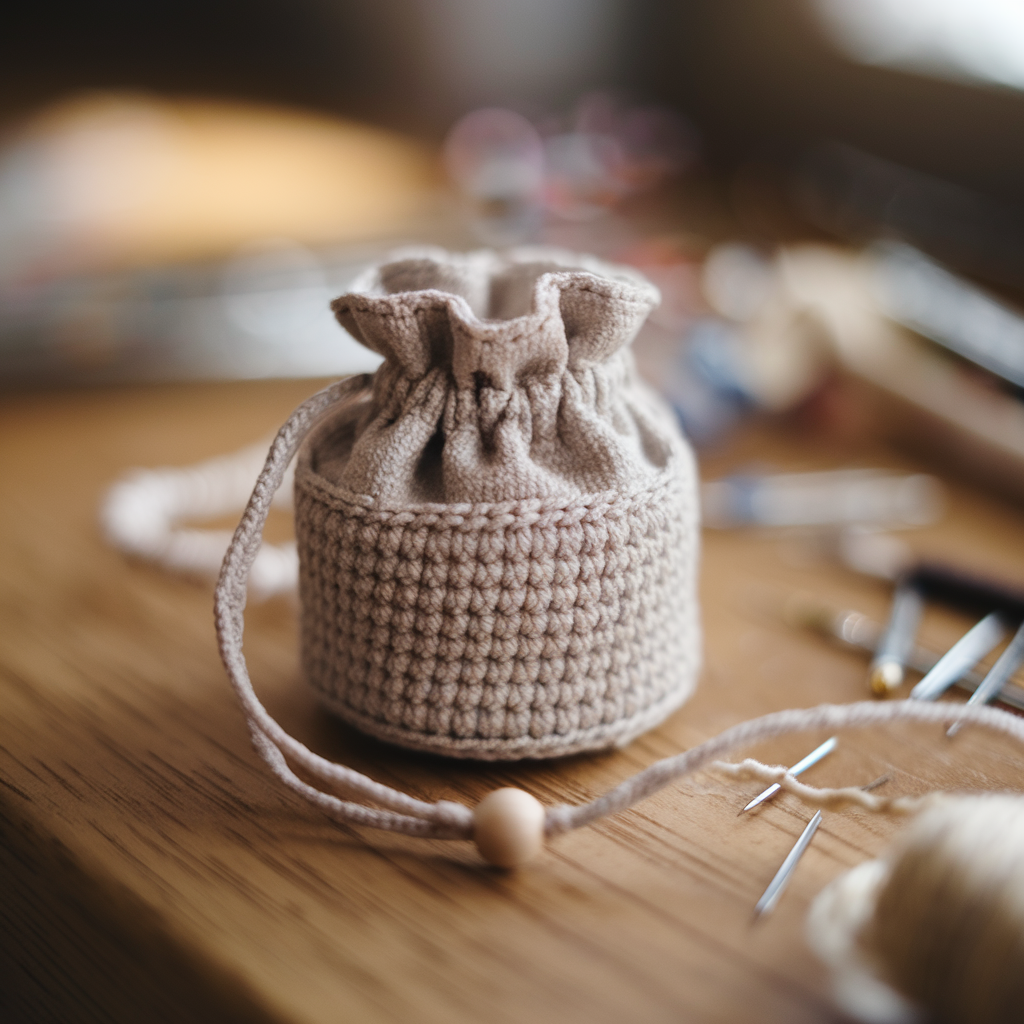
Tiny, functional emery bag used to store emery powder/cloth or wool for needle felting — perfect for sewing kits or gift-size pouches. Small, dense, and padded.
Skill level: Confident Beginner
Finished size (sample): tiny pouch ≈ 3″ wide × 4″ high — just the right size for needles, pins, or small sewing notions.
Materials: sport weight or DK cotton for outer (about 30–50 yds), small amount of felt or cotton for lining, optional emery powder/wool (if you intend to store needles), 3.5–4.0 mm hook, cotton drawcord. Safety note: if using emery powder, store carefully and label bag — not a toy.
Why emery bags exist
- Emery bags traditionally house emery (an abrasive) for sharpening pins or for keeping pins and needles clean of rust. Today they can be a charming accessory for stitchers who need a small storage bag. If using emery powder, ensure secure lining so powder doesn’t leak.
Construction overview
- Work a small dense tube or panel, line with tightly woven fabric (canvas or felt), add drawstring casing at top to keep contents secure.
Step-by-step
Panel or tube
- Decide circumference for small pouch: say 3″ diameter → circumference ~ π × d ≈ 3.14 × 3 = 9.42″ → ~9.5″. With gauge 4 sts/in → stitches = 9.5 × 4 = 38 sts. For smallness, we’ll use 36 sts for neat multiple. Ch 37.
- R1: sc in 2nd ch from hook and across → 36 sc. Join to work in rounds (or continue flat and seam). Working in joined rounds gives neater seam.
- R2–R10: sc in each st around until bag height ~4″. Fasten off.
Lining
4. Cut lining from tightly woven cotton or felt slightly smaller than interior. Sew into tube using ladder stitch or whipstitch so the lining fully contains any powder. If you plan to put emery powder inside, line twice or use small zippered pouch inside for powder.
Top casing & drawstring
5. Work 3 rounds sc at top; fold top inward 1/2″ and slip-stitch through both layers to make a narrow tunnel. For a small pouch, a single eyelet row of ch1, sk1 might be sufficient. Leave a small gap to feed cord.
6. Make a thin cord (crocheted chain + sc cover), thread through casing. Cord length of about 24–30″ allows for a nice closure and knot. Add bead or wooden toggles if desired.
Finish
7. If used as pin cushion/emery, fill with wool roving or a small sachet of emery rather than loose powder to avoid mess. Label the bag if giving as gift, warning about contents.
Variations & tips
- Make a matching set of tiny pouches for gift wrapping (jewelry, stitch markers).
- Use a denser stitch (sc in BLO) for stiffer walls so the emery pouch keeps shape.
- For a magnetic snap closure on non-emery pouches, attach snap to top folded band — but for emery/powder keep simple drawstring.
Final finishing checklist (do this every time)
- Swatch and re-measure before you commit to final row counts. If your bag is ⅜” off, remake — it matters.
- Reinforce eyelets and cord holes with extra rows or small felt patches on the inside. This is where bags fail.
- Line bags that hold small items, powder, or liquids. A cheap lining solves 70% of functional failures.
- Cord tips: knot the ends, add beads, or melt synthetic cords slightly to stop fraying (only for synthetic). For cotton, whip with thread or add leather caps.
- Care: cotton bags = machine wash gentle; acrylic = same but avoid heat; lined bags = remove lining first if it’s delicate. Emery bags: spot clean only if used with abrasive powder.
Conclusion
There — five drawstring bag patterns that are actually useful and fun to make. The steps you’re most likely to skip and regret are: do a swatch, reinforce the cord area, and decide whether you want lining. Do those, and your bag will survive more than a season.