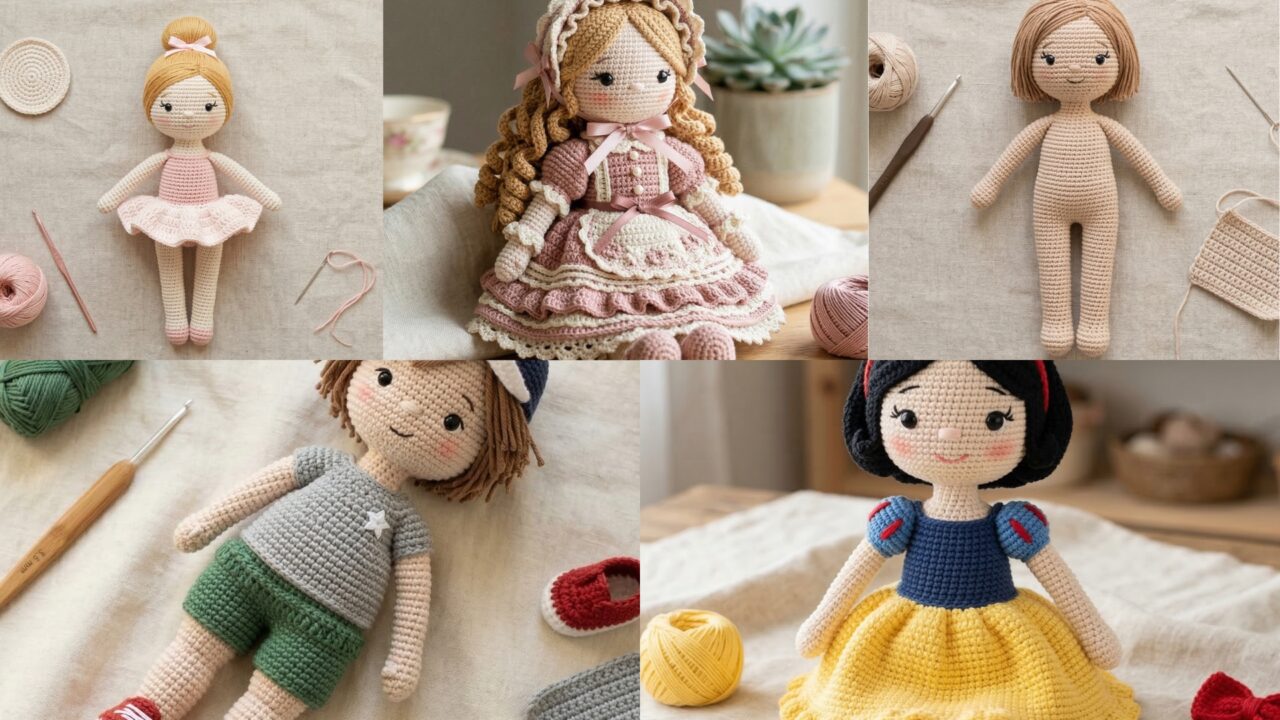
Handmade amigurumi dolls are timeless gifts — they carry personality, care, and the satisfaction of a small-but-meaningful handmade object. This post gives five complete doll patterns you can make for gifts or to sell: Ballerina Doll, Unibody Doll Base, Pretty Lolita-Style Doll, Snow-White-Inspired Doll, and Cute Tomboy Doll. Each pattern includes: skill level, finished size, exact materials, stitch abbreviations, very detailed step-by-step construction (head, body, limbs, hair, clothes, assembly), stuffing & safety notes, finishing and care, and customization ideas so you can personalize each doll.
Before you start: make a small gauge sample of sc in the yarn and hook you plan to use — amigurumi looks best when stitches are tight enough that stuffing won’t show through. Use polyester stuffing (washable) and safety-first hardware for eyes if giving to young children (or embroider faces for under-3s). Wherever possible I include alternative options for finishes (embroidered vs safety eyes, sewn clothing vs removable outfits).
General abbreviations (US crochet terms)
- MR = magic ring (magic circle)
- ch = chain
- sc = single crochet
- inc = increase (2 sc in same st)
- dec = decrease (sc2tog)
- hdc = half double crochet
- dc = double crochet
- sl st = slip stitch
- BLO / FLO = back/front loop only
- RS / WS = right/inside side
- rep = repeat
- st(s) = stitch(es)
1. Crochet Ballerina Doll Plush Pattern
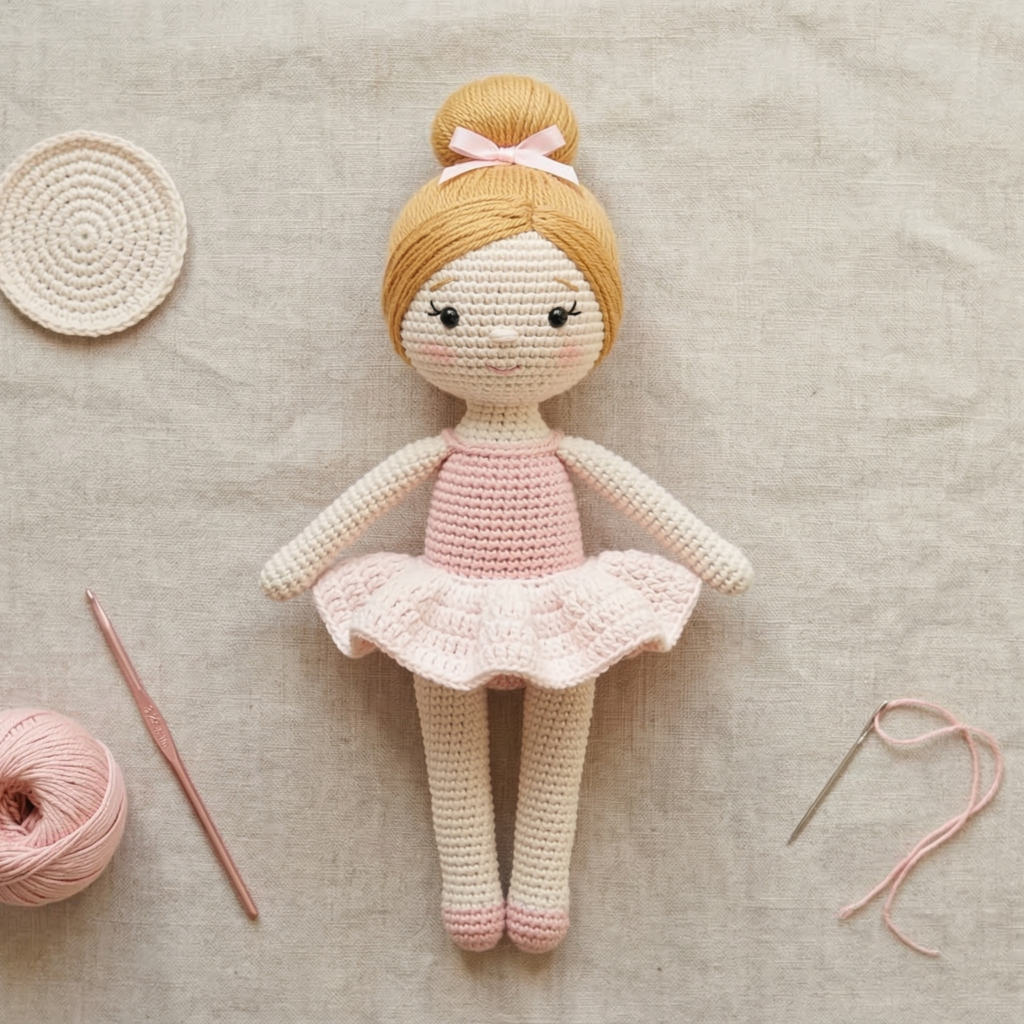
Skill level: Intermediate (amigurumi shaping + simple dress & tutu)
Finished size: approx 12–14 inches (30–35 cm) tall when finished (depends on yarn/hook).
Yarn & hook: Sport/DK cotton or cotton blend for body + fingering/sport for clothes. Main: ~150–200 yds body + ~50–100 yds clothing/trim. Hook: 3.0–3.5 mm (use smaller hook if your gauge is loose).
Stuffing: polyester fiberfill.
Eyes: 8 mm safety eyes (or embroidery).
Extras: tapestry needle, stitch marker, small ribbon for ballet bun, pipe cleaner (optional for poseable arms).
Gauge (informal)
- 18–20 sc = 4″ in single crochet. Gauge not critical but used to estimate size.
Notes on safety
- For children under 3, do not use safety eyes or glued embellishments — embroider features instead. Secure any sewn-on beads with multiple passes and thread knots inside stuffing.
HEAD (worked in continuous rounds)
- MR, 6 sc into ring. (6)
- inc ×6 → 12
- (sc, inc) ×6 → 18
- (2 sc, inc) ×6 → 24
- (3 sc, inc) ×6 → 30
- sc around 4 rounds (even) — you now have a moderate dome.
- (3 sc, dec) ×6 → 24
- (2 sc, dec) ×6 → 18 — insert safety eyes between Rows 10–11 spaced about 6 sts apart, or embroider later. Place a tiny bit of stuffing as you go.
- (sc, dec) ×6 → 12
- dec ×6 → 6 — fasten off, leaving a long tail; close hole with tapestry needle and weave in.
Tip: Place nose by embroidering a small raised stitch between the eyes (a short satin stitch with waste knot inside).
NECK & BODY (continue or join new yarn for body)
Neck: sc around the bottom of head for 3–4 rounds in a slightly darker shade if desired — keep narrow.
Upper body / torso:
- From neck opening, sc around evenly for 6 rounds (this makes shoulders).
- For torso shaping, work 2–3 rounds decreasing 2 sts evenly to create waist — or maintain even rounds if you prefer a straight torso. Example: if you had 30 sts, work 2 rounds sc, then (sc in next 6, dec) repeat around to remove 6 sts = 24 sts.
- Continue sc rounds for chest to waist length (~4–6 rounds). To create bust shaping, you can add small increases at front center while keeping back even — very subtle.
Hip & lower body (for dress or legs):
4. Increase slightly at hip row if adding skirt: (sc, inc) repeats to add 4–6 sts then begin dress rounds. If making legs attached later, leave a gap or work tube legs from base.
ARMS (make 2) — simple tube arms
- MR, 6 sc (6)
- sc around 10–12 rounds to reach approx 4–5″ length (depending on scale). Option: slightly taper wrist by dec at last 2 rows.
- Fasten off leaving tail for sewing. Lightly stuff.
Optional poseable arm: before stuffing, insert a length of pipe cleaner or thin armature wire, bent to desired shape; wrap lightly with yarn to keep edges covered.
LEGS (make 2)
- MR, 6 sc
- sc around 2 rounds for foot base (or shape a tiny flattened foot by doing slight shaping — see advanced notes below)
- sc around 12–14 rounds to reach leg length (depends on doll height). Option: make legs slightly longer if you want bend at knee later.
- Fasten off leaving tails for sewing. Stuff lightly.
ASSEMBLY — sew limbs to body
- Position arms at shoulder level and whipstitch through back loops of body rounds to anchor without big lumps.
- Sew legs to lower body opening: fold lower edge of torso flat and sew legs into seam so seam is hidden inside dress later. Make sure stitches are secure.
HAIR — BUN & BOW
Simple bun:
- Cut yarn strands long (~12–18″) — wrap across a small circle of cardboard or a bowl to create even length.
- Place strands on head and either sew down at center to form bun or form a small donut from a wrapped piece and stitch to top.
- Tidy edges and add ribbon or tiny bow. For a ballerina look, make a sleek bun: gather hair into a pony, wrap yarn around base until small bun forms, and stitch in place.
Faux bangs or pulled hair: attach short strands at front with latch technique.
TUTU & LEOTARD (making removable outfit)
Leotard / bodice (worked in rounds over torso):
- With contrast yarn, join at underarm and sc around for 2 rounds to create waist seam.
- For straps, mark front two stitches and chain appropriate length to cross shoulders (attach inside back with sl st) or create halter style. Alternatively crochet a small tube for straps and attach.
Tutu (ruffled skirt):
- Attach yarn at waist and ch2, 3 dc in same st across, skip 1 st, 3 dc in next st — repeat all around to form first ruffle — chain 1 and repeat another ruffle round for fullness. Make 2–3 ruffle rounds until tutu is poofy. Trim and attach ribbon to waist.
FACE — embroidery
- Use a small embroidery needle and three strands of embroidery floss (or fine yarn) for mouth and eyebrows. Make small satin stitch or single stitches for dimples. Keep features soft and friendly.
FINISHING & SAFETY
- Tuck all tail ends inside and anchor with multiple passes; apply a small knot and hide in stuffing.
- If handing to small children, embroider eyes and remove any beads.
- Washable: hand wash gently in cool water and air dry; stuffing may matt if machine washed — check yarn care.
VARIATIONS & GIFTING
- Make a small hair clip or ribbon bow in colors to match tutu and gift together.
- Personalize with an initial embroidered on the back of the leotard.
2. Crochet Unibody Doll Base Plush Pattern
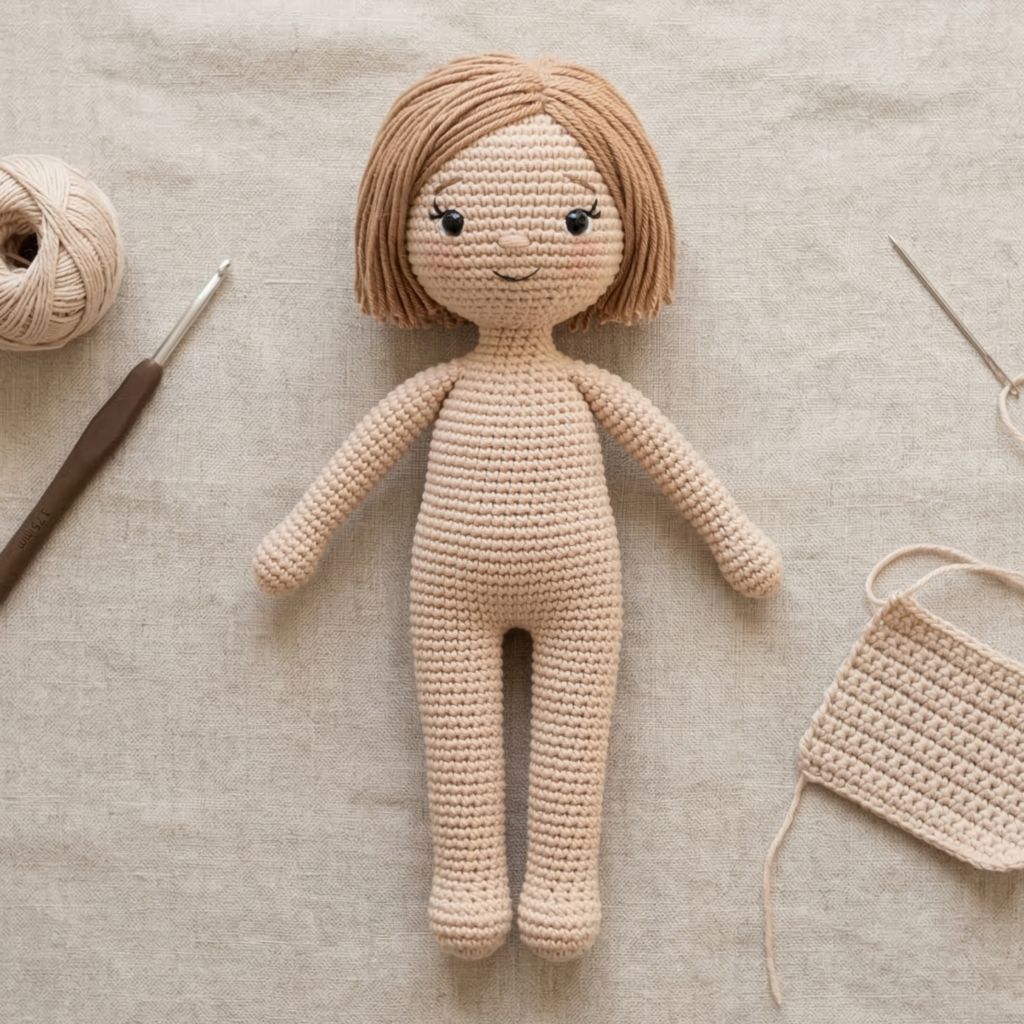
Skill level: Beginner–Intermediate (single-piece unibody for speed & durability)
Finished size: 10–12 inches (25–30 cm) tall. Ideal as a base to outfit & customize.
Why unibody: fewer seams, strong for play, a perfect “blank” to dress in many styles.
Materials & hook
- DK/worsted yarn for body ~200 yds, hook 3.5–4.0 mm.
- Stuffing, tapestry needle, optional safety eyes or embroidery thread.
Concept
The unibody doll is crocheted from the top of the head down in one continuous tube that splits into two legs — this reduces seams and sewing. You can add arms as separate pieces or crocheted on.
HEAD & NECK
Work head rounds as in Ballerina pattern up to the neck. Insert safety eyes between rounds 10–11 or embroider.
TORSO & SPLIT INTO LEGS (unibody shaping)
- From neck, sc in rounds for chest for 6 rounds.
- To divide into legs: keep working in continuous rounds but work half the sts into Leg A, place a marker, then work remaining sts into Leg B, leaving a small gap for crotch shaping.
Method (practical):
- Suppose you have 36 sts around chest. Work 18 sts for Leg A in back-and-forth rows (turn at ends) to create a tube for the leg, then rejoin and work 18 sts for Leg B. Alternatively make a chain that forms a gusset for crotch and then continue each leg in rounds.
Example split:
- Round at hips: sc around. Next round: sc in next 9, leave next 18 unworked for the second leg and continue sc in remaining 9 — this sets up legs; fasten one side to work leg in rows or in-turn continuous rounds.
Because continuous unibody split tutorials vary, the simplest method for beginners is:
- Make body tube to waist, then create two leg tubes joined to the body: fold bottom edge into two halves and sc across to form two round openings, then work each leg downwards in the round, finishing at foot and stuffing. Seam leg tops to inner torso opening.
ARMS (crocheted separately, sewn)
- MR, 6 sc. sc around for 10–12 rows. Stuff lightly; sew to sides around round 8–9 of torso.
HAIR & FEATURES — keep simple
- Embroider hairline with satin stitch or attach crocheted cap (worked as shallow dome) and sew on strands or a wigcap made from looped yarn.
OUTFITS
- Use this base to design any removable outfit: skirts, shirts, trousers, hats. Make dresses in rounds that slip on and off. Add snaps or small buttons at the back if you want removable clothing that’s easy for gift recipients.
FINISHING
- The one-piece base is highly durable — finish with hidden knotting and double seams on attachment points. Provide a small cleaning card for the recipient (spot wash or hand wash only).
3. Crochet Pretty Lolita-Style Doll Plush Pattern
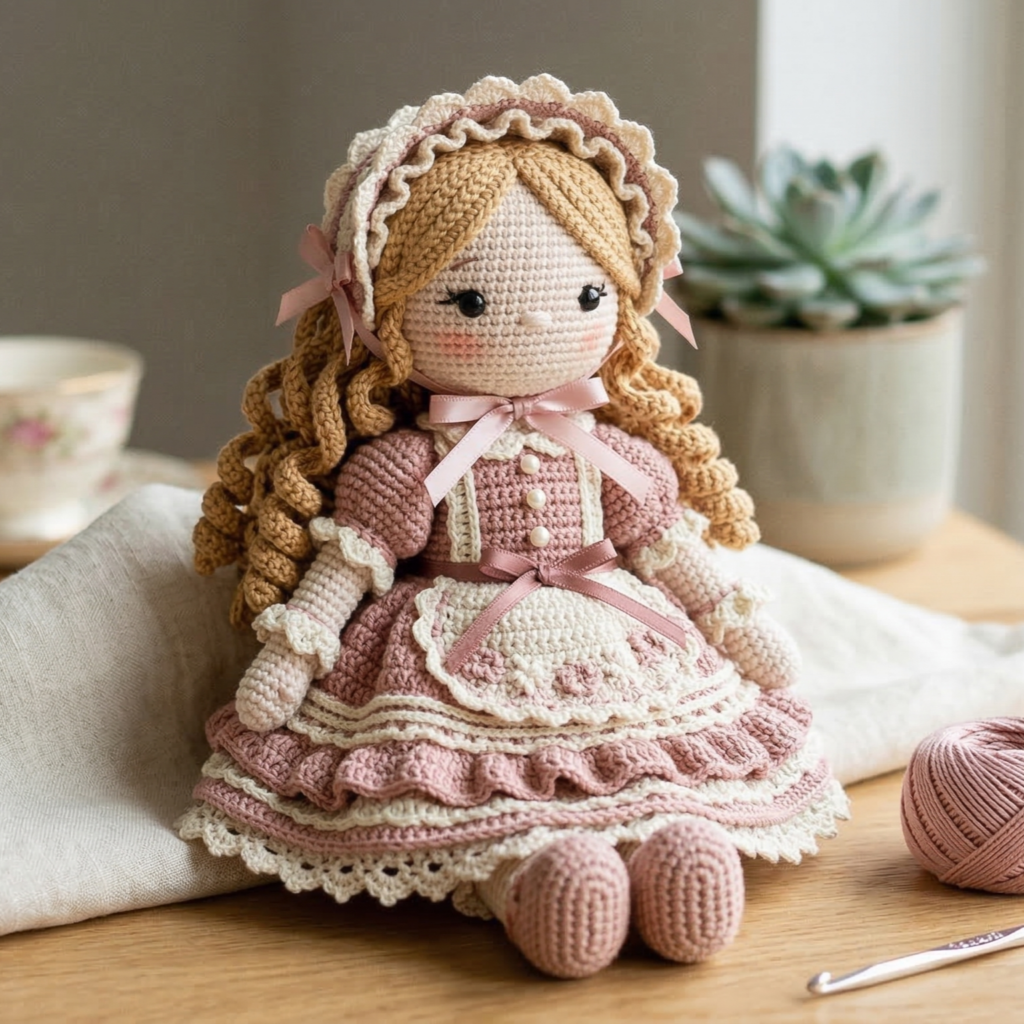
Skill level: Intermediate (lace trims, layered clothing)
Finished size: ~12–13 inches (30–33 cm) — ideal for shelf display or as a keepsake gift.
Materials: DK yarn for body, lighter yarn for lace trims, 3–4 colors for outfit, ribbon, small buttons for accents, hook 3.0–3.5 mm.
Distinctive features
- Puff sleeves, layered skirt, lace trims, bonnet or headband, embroidered face with soft blush.
HEAD & FACE
Work head as before. Use a soft pencil blush to lightly color cheeks (apply with a small dab of fabric-safe blush or diluted pastel chalk, solidified and sealed with a tiny bit of diluted fabric glue if desired). Embroider eyelashes and a bow-shaped mouth.
HAIR — curly ringlets or braided wig cap
Curly ringlets: attach yarn loops and then use a small crochet hook to pull loops into corkscrew curls by wrapping yarn around a knitting needle, steaming lightly with a distance iron to set (test yarn first).
Bonnets & bows: crochet a small bonnet with scallop edging: ch30, join and sc for 4 rounds, then scalloped edge. Tie under chin with ribbon.
DRESS (Lolita style)
Bodice: join yarn under arms and sc around to form tight bodice. Add two rows in contrasting color to simulate blouse.
Skirt: attach yarn at waist and work alternating rounds:
- Round A (ruffle base): ch2, 7 dc in next st, sl st in next — repeat around for gathered ruffle.
- Round B (lace trim): sc around and picot every 4 sts for delicate trim.
Add small puff sleeves by picking up stitches at shoulder and working a short tube with increases for fullness, finishing with a lace cuff.
Apron: work a small rectangle and tie with narrow straps.
ASSEMBLY & DRESSING
- Sew on tiny buttons down bodice (use thread, not glue). Attach ribbons at waist and use a small snap at back for removable skirt.
FINISHING & PRESENTATION
- Package with a tiny matching hair ribbon or a “care” card describing washing (hand wash, lay flat to dry) and materials (fiber content for allergy notice).
4. Crochet Snow White-Inspired Doll Plush Pattern
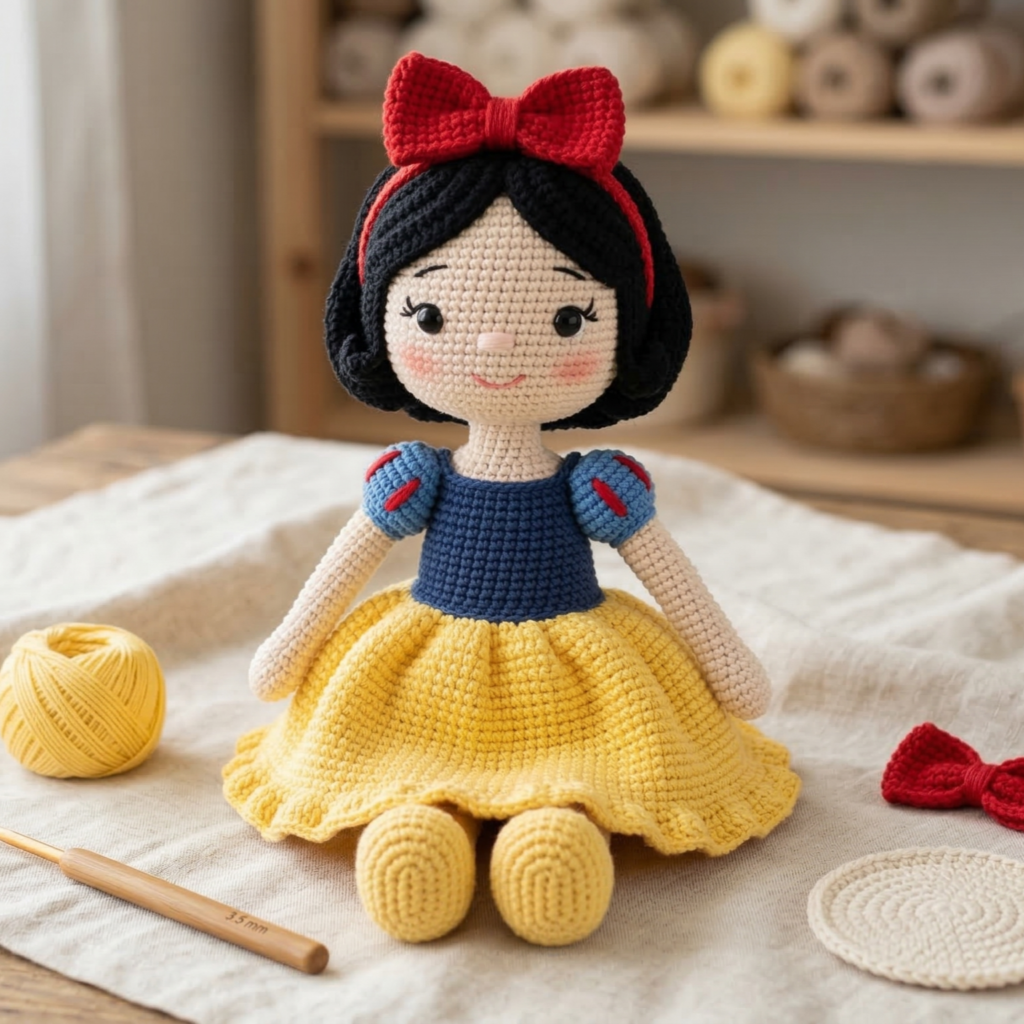
Skill level: Intermediate (costume detail + hair styling)
Finished size: approx 12–14″ (30–35 cm) tall.
Theme notes: Use classic Snow White palette (navy, red, yellow) for a themed gift — keep character generic (inspired rather than trademarked), with a blue bodice, puff sleeves with red accents, and a yellow skirt.
HEAD & BODY — standard amigurumi shaping
Follow unibody or separate limb patterns from earlier dolls. Keep proportions slightly short with a fuller skirt to evoke the classic silhouette.
COSTUME DETAILS
Puff sleeves with red ribbon:
- For puff sleeves, work a short tube starting at shoulder: increase at first round (e.g., inc every 2 sts) heavily for 2 rounds, then work even for 2–3 rounds, finish with a contrasting cuff row.
Bodice:
- Work snug round of dc in blue for bodice. Add tiny yarn embroidery crosshatch for decorative front.
Yellow skirt:
- Work gathered rounds (more increases per round) to create a wide skirt. Example:
- Round 1 (attached at waist): ch2, 2 dc in each st across (2× increases) — gives a very full skirt.
- Add 2–3 ruffle rounds of 5 dc in one st, skip 1, to create a swirl.
Red hair bow:
- Make a classic flat bow: ch 12, sc rows for 3–4 rows, fold and wrap a narrow band around center.
HAIR & LOOK
- Create a short bob / page cut using a wigcap sewn with short strands. Add a small embroidered mouth and soft blush for cheeks.
FINISHING
- Because this is a character-inspired doll, write “inspired” in product notes if selling. Emphasize handcrafted care and wash instructions.
5. Crochet Cute Tomboy Doll Plush Pattern
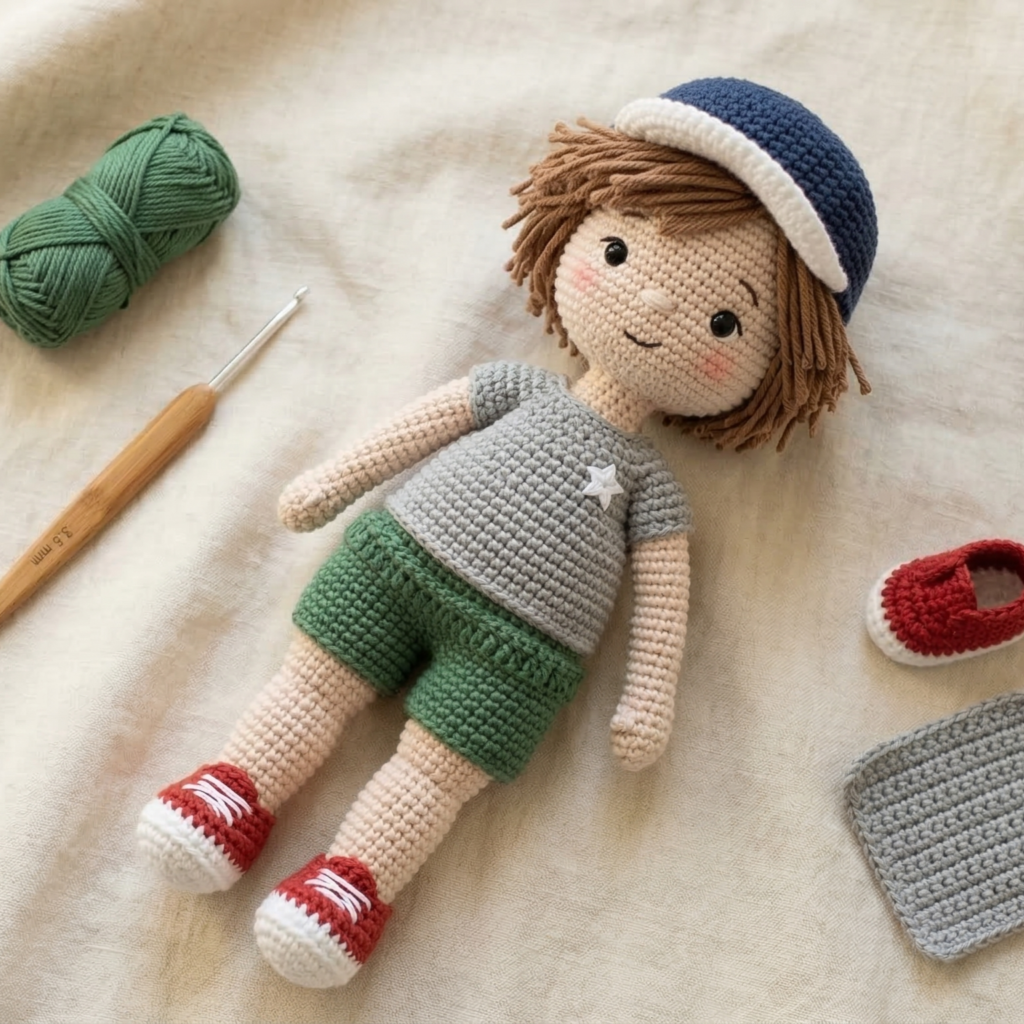
Skill level: Beginner–Intermediate (simple clothing, sporty vibe)
Finished size: ~10–12 inches (25–30 cm) depending on yarn/hook.
Style notes: Tomboy look includes short hair, a T-shirt, shorts, sneakers (crocheted), and a baseball cap or beanie.
BASE DOLL
Make an unibody or sewn-limb doll with slightly stockier legs and shorter arms to reflect sporty proportions.
OUTFIT — T-shirt & shorts (removable)
T-shirt: Work in rounds from neck down: ch 36, join and sc for 4 rounds, then make armholes by splitting front/back and working back-and-forth across chest for a few rows before rejoining — or simply crochet a small pullover that slips over head.
Shorts: With contrasting yarn, join at waist and work 2 rounds of sc, then sc, inc around for one round to create a ruffled waist or add belt stitch by weaving ribbon.
Sneakers (make 2):
- Make small oval sole: ch10, sc across, work into opposite chain to make rounded oval ~2.5″ long.
- Build upper: sc in BLO around 2–3 rows, leaving back open to slip onto foot; weave in shoelaces using embroidery thread.
HAT — baseball cap or beanie
Cap: small circle for top then add a tiny bill: MR, 6 sc; increase for 3 rounds to diameter needed, then pick up sts for a short bill by chaining and working dc in back loops to form a curved peak.
Final touches & personality
- Add a tiny embroidered patch on the T-shirt (star, number), or a wristwatch made by sewing on a small button.
- Poseable option: insert thin wire into arms for positioning (safely wrapped and covered).
Final assembly, stuffing & finishing tips (applies to all dolls)
- Stuffing: use small amounts at a time, pushing firmly into extremities with a chopstick or stuffing tool. Overstuffing makes seams pop; understuffing looks limp. For sturdy play dolls, add a small cloth pouch of rice or poly pellets in a sealed bag at torso base for weight (seal well and enclose inside lining).
- Seams: use a ladder stitch (invisible) to close openings neatly. Double back and tie inside stuffing.
- Wash & care: most cotton/ acrylic amigurumi can be hand-washed and dried flat. If you’ll machine wash, remove any fragile embellishments and place in mesh laundry bag on gentle cycle, air dry.
- Eyes: for toys for babies/toddlers always embroider eyes and sew beads/charms on only if adult supervised.
- Quality control for gifts: tug test sewn items (buttons, bows) with pliers to ensure they won’t come off.
Conclusion
These five doll amigurumi patterns give you a range of giftable toys and keepsakes — from an elegant ballerina to a versatile unibody base you can dress again and again, a detailed Lolita-style dress, a Snow-White-inspired themed doll, and a sporty tomboy. Each pattern is designed so you can personalize scale, fabrics, and clothing easily. Start with the unibody doll if you want the fastest route to a finished doll, or pick the ballerina if you want a detailed display piece.