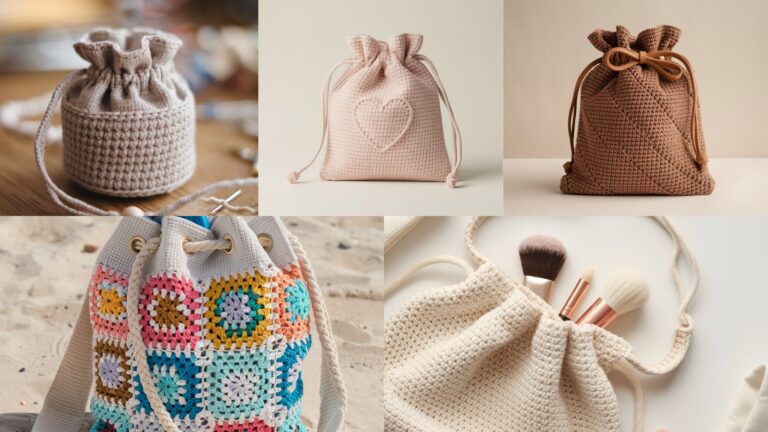
Cozy, floral, and a little whimsical — cottagecore bags are the kind of accessories that make errands feel like a stroll through a sunlit garden. Below are five full crochet bag patterns you can include in your blog post: Rose Bouquet Bag, Pink Flowers Embroidered Bag, 3D Rose Granny Square Tote, Ribbon Tote Bag, and Spiral & Stars Messenger Bag. Each pattern contains: skill level, finished size, materials and yardage estimates, stitch key (US terms), a very detailed step-by-step guide (construction, assembly, lining/backing where recommended), finishing tips, styling ideas, and variations so readers of every skill level can make a dreamy, functional bag.
Quick universal notes before we start:
- Abbreviations use US terms: ch, sc, hdc, dc, tr, sl st, sk, rep, inc (2 sc in same st), dec (sc2tog), BLO/FLO = back/front loop only.
- Yarn suggestions: for everyday bags choose cotton, cotton-blend, or sturdy recycled T-shirt yarn for structure and washability. For delicate cottagecore look mix a cotton body with linen/cotton handles or leather details.
- Hooks: I list recommended hooks but emphasize gauge — smaller hooks give denser, stronger fabric for bags.
- Finishing: for structure and longevity, consider a fabric lining and topstitching; adding a thin interfacing or thin felt/cork base gives excellent stability.
- Safety/teen note: buttons, beads, and metal hardware should be sewn on securely; avoid small detachable parts on bags for kids.
1. Crochet Rose Bouquet Bag Pattern
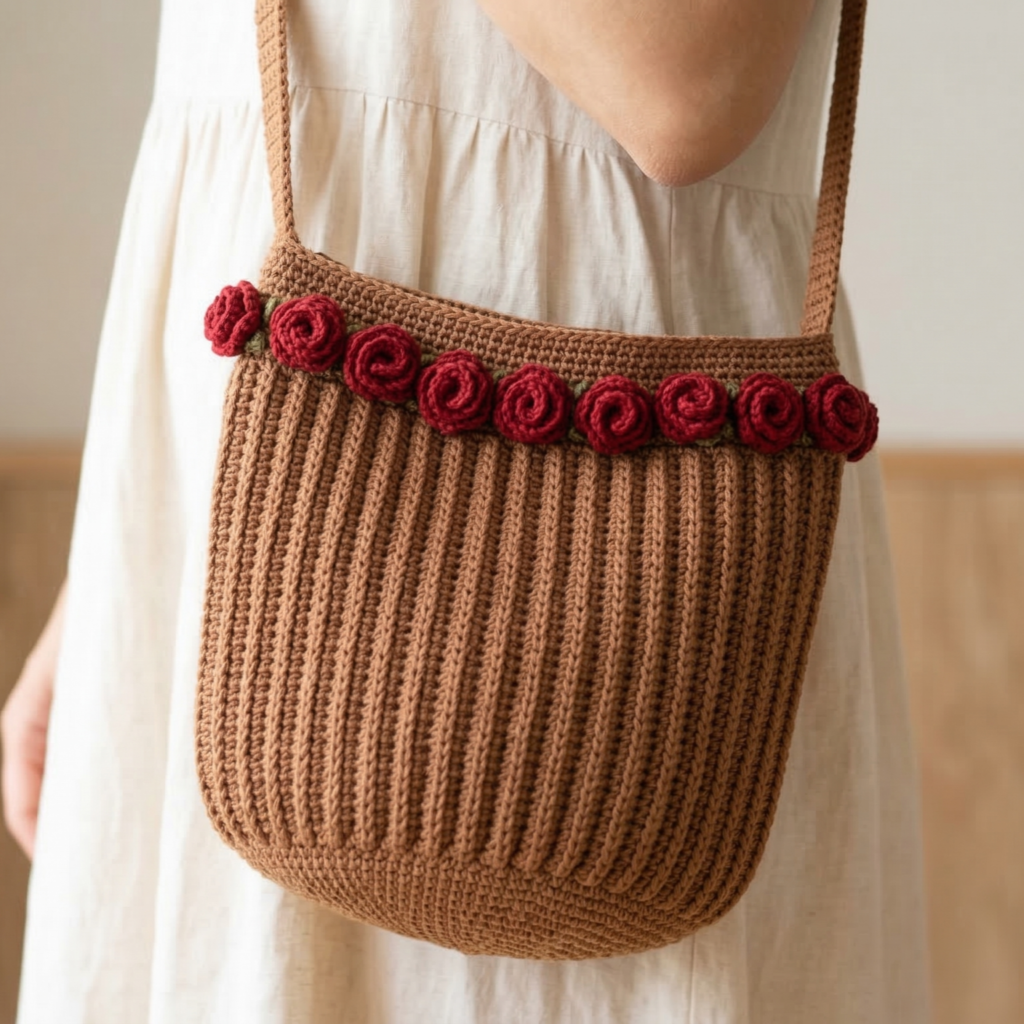
A romantic bucket-style bag with a textured band of embroidered/attached roses around the body — looks like a bouquet tucked into a tote.
Skill level: Intermediate (basic amigurumi petals + sew-on embroidery + bag construction)
Finished size: approx 10″ tall × 9″ diameter base (small market/bucket size).
Materials
- Sport/DK cotton yarn for body (main color) — ~350–450 yds.
- Small amounts of worsted or DK in rose/petal colors + green for leaves (approx 30–50 yds per accent).
- Crochet hook 4.0 mm (body), 3.0–3.5 mm (small motifs), tapestry needle, stitch markers.
- Lining fabric (lightweight canvas or quilting cotton) 0.5 yd, optional interfacing or thin cork for base.
- 1 magnetic snap or turnlock, optional leather or crocheted handles (approx 24–28″ each) or a single long strap.
Stitch key
- MR, ch, sc, hdc, dc, sl st, picot (ch3 sl st to first ch), 5-dc shell for larger petals.
Overview & construction plan
- Work a sturdy circular flat base in sc or hdc.
- Crochet the cylindrical body in rounds (sc) up to desired height.
- Attach a decorative rose band (make small rolled/spiral roses or layered petals) and sew on leaves.
- Add a firm top edge, straps, and a fabric lining with an optional base reinforcement. Finish with a magnetic snap.
Step-by-step
Base (dense, flat circle)
- MR, ch1, 8 sc in MR. Pull tight. (8)
- Round 2: inc around → 16 sc.
- Round 3: (sc in next st, inc) ×8 → 24.
- Round 4: (sc in next 2, inc) ×8 → 32.
- Continue increasing evenly (add one more sc between increases each round) until base diameter ≈ 9″ (this might be ~10–12 rounds depending on gauge). Aim for a flat circle — if it ruffles add fewer increases; if it cupps add more.
- Fasten off base or continue to body without fastening.
Body (worked in continuous rounds)
- From base edge, join yarn and work sc in BLO around the base rim for one round to create a defined join (optional). Continue working sc in both loops around to build the body tube: sc in each st around every round. Keep tension firm for a sturdy bag.
- Work evenly until bag height ≈ 7–8″ from base (for a total finished height of about 10″ counting top edge and rose band). For a slouchier bag, use a larger hook and looser tension.
Rose band (make small roses and leaves)
Small rolled rose (make 8–12 depending on band spacing)
- Ch 30 (or 18 for smaller rose). Turn. Row: sc across. Row 2: sc 2, hdc 1, dc 2, hdc 1, sc 2 repeat a few times across — this creates petal bumps; adjust to length. Fasten off a long tail for rolling.
- Roll strip up tightly from one short end to form a rose. Use tail to stitch through base layers to secure — take small stitches so the rose holds shape. Fluff petals outward. Use green yarn to crochet a small 3–4 sc circle under each rose as the calyx and stitch leaves (ch 8, sl st back to shape leaf or make small leaf motif and sew on).
- Arrange roses evenly around bag about 1–1.5″ below the bag rim. Sew securely through bag fabric and bag interior stitches to anchor.
Top edge & straps
- Work 2–3 rounds of sc in contrast or same color for a clean top edge. Optional: add 1 round of crab stitch (reverse sc) for a finished look.
- For straps: Option A — sew on leather handles with rivets (requires hardware). Option B — crocheted straps: make two long straps by chaining to desired length (e.g., 24–28″) and sc in each ch for 6–8 rows to create a dense strap; fold and sc-join edges to make a thick strap. Attach ends by sewing firmly into top edge and reinforcing with extra rounds and backstitching.
Lining & base reinforcement
- Trace the base circle onto interfacing/cork and cut to size. Cut fabric lining as a cylinder and a circle base; sew side seam and attach base by machine. Insert interfacing/cork into lining base pocket or glue in. Slip lining into crocheted bag and hand-stitch the lining top to the bag’s top edge for a neat interior finish. Lining prevents stretch and protects stitches.
Closure & final touches
- Sew a magnetic snap at top center (use backing patch of fabric to reinforce).
- Trim ends, block roses lightly if desired.
Finish tips & variations
- Mix rose sizes and colors for a wild bouquet effect.
- For a lighter summer bag, make roses in lighter yarn and use a slip-in cotton liner only.
- Make a mini wristlet version with a 6″ base and 3–4 small roses.
Care
- Hand wash lined cotton bags gently; reshape and dry flat. If leather handles are used, remove before washing or spot clean.
2. Crochet Pink Flowers Embroidered Bag Pattern

A structured rectangular tote with a panel embroidered with tiny crocheted flowers and vines — cottagecore charm with a refined silhouette.
Skill level: Intermediate (surface crochet & embroidery plus bag construction)
Finished size: approx 12″ wide × 11″ tall × 4″ deep (classic tote).
Materials
- DK or worsted cotton for body — ~450–550 yds. Use a tighter hook (e.g., 3.5–4.5 mm) for dense fabric.
- Small amounts of pinks, cream, green for embroidered flowers.
- Tapestry needle, small embroidery needle (for surface stitches), fabric lining (canvas) & interfacing for structure.
- 1 zipper or magnetic snap, optional wooden or leather handles.
Stitch key
- Surface slip-stitch embroidery, French knot, lazy daisy (chain stitch), tiny crocheted flowers (MR, small petals) for applique.
Overview & construction plan
- Work front and back rectangular panels in sc for a dense canvas-like fabric.
- Make small crocheted flowers (or embroider directly) and attach them to the front panel in a scattered bouquet or trailing vine.
- Seam sides and bottom, add boxed corners for depth, reinforce & insert lining, add handles and closure.
Step-by-step
Panels
- Foundation: Chain 36 (or multiple to get desired width). Row 1: sc in each ch across. Turn. Rows 2–X: ch1, sc across until panel height = 11″. Make two panels identical (front/back).
- Sides & bottom: For a 4″ deep bag, chain 10 and sc in rows to make side panels (two) and bottom panel (one) OR join panels and work in rounds connecting sides and base (preferred for cleaner seams).
Embroidery & flowers
- Make 12–18 tiny crocheted flowers (MR, ch1, 6 sc in MR; pull tight; make small petal round if desired) in pinks and creams. Alternatively use just embroidery: French knots for centers and lazy daisy stitches for petals.
- Plan layout: use pins to arrange flowers along one corner or across the center. Sew each flower securely through the base layer into the panel, taking stitches that pass through the sc fabric so they won’t pull off.
- Add vines/leaves with surface slip-stitch (use green yarn and a blunt tapestry needle or work surface-crochet slip stitches along the sc texture). Add tiny French-knot centers or seed beads (sew on well).
Assembly
- With RS facing, seam side panels to bottom and front/back panels using whipstitch or mattress stitch. For a neat finish, use sc-join on the exterior to create a board-like seam.
- Box corners: fold bottom edges to make 4″ x 4″ boxed base and sew across each lower corner for depth and stability.
Lining & finishing
- Sew a fabric lining (measure battery to match interior dimensions: width minus seam allowance, height = 11″ + seam). Add interfacing to lining for stiffness and a small interior pocket if desired; add zipper before sewing lining into bag.
- Insert lining and hand-stitch to inside top edge. Topstitch around top edge for stability.
- Handles: add leather handles or crochet handles (dense sc strips) and attach with reinforced stitching.
Styling & variations
- Embroider a monogram among flowers for a personalized gift.
- For a boho twist, add a scallop trim at the top edge (shell stitch) or lace ribbon.
Care
- Remove handles if leather before hand-washing linen lining. Spot-clean embroidery gently.
3. Crochet 3D Rose Granny Square Tote Bag Pattern
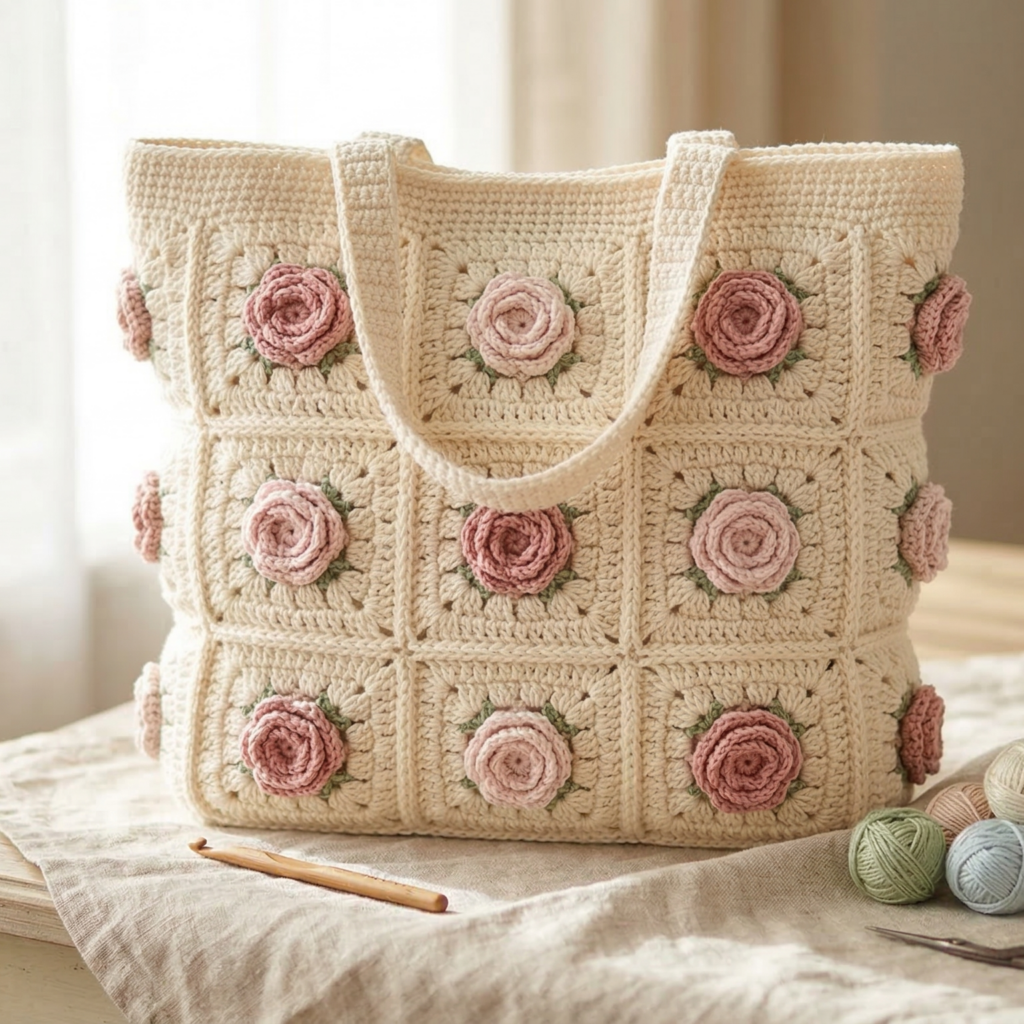
Classic granny squares meet sculpted 3D roses — make a grid of granny squares with central applied rose motifs, joined into a roomy tote.
Skill level: Intermediate (granny motifs + 3D motif application + joining)
Finished size: approx 14″ wide × 12″ tall × 4″ deep (market tote size).
Materials
- Worsted or DK cotton for granny squares (multiple colors—cream background + rose colors), ~600–800 yds total.
- Small yarn for roses + green for leaves, hook 4.0–5.0 mm for granny.
- Tapestry needle, fabric lining + interfacing, optional wooden handles.
Stitch key
- Classic 3-dc granny cluster, MR, sc, ch-sp joins, small 3D rose motif (spiral strip or layered petal motif).
Overview & construction plan
- Make granny squares with a plain center round to accept a small 3D rose sewn onto center.
- Join squares into panels (front/back, optional sides and base).
- Add lining, handles, and top edge. Optional: single large granny rose panel on one side for focal point.
Step-by-step
Granny square (make 12–16 squares)
- MR, ch3, 2 dc in MR, ch2, 3 dc in MR, ch2 repeat total 4 corners. Join. (Classic small granny)
- Round 2: sl st into corner ch-2, (3 dc, ch2, 3 dc) in corner, ch1, 3 dc in side space, ch1 repeat around. Continue adding rounds until square measures approx 4–4.5″ per side (so that 3×4 or 4×4 squares give a body size ~12–16″ wide).
- Fasten off and weave ends.
3D rose motif (small rolled rose)
- Ch 24, sc across to form a long strip; in the next row create petal bumps by working sc, hdc, dc group alternations to produce petal texture. Fasten off leaving long tail.
- Roll strip tightly and sew through base layers to secure; attach to center of granny square using the base stitches. Add a small green calyx (sc circle and 3 small leaves) and stitch in place.
Join squares into panels
- Arrange squares into a 4 (width) × 3 (height) grid for each panel or 3×3 for smaller bag. Join-as-you-go on last round while making squares (sl st into neighboring squares at corner join) or sew squares together with mattress stitch for a neat join.
- Add side panels and bottom if you want boxy depth, or fold the joined panel and seam sides to create depth.
Lining & handles
- Make a lining from fabric, add interfacing for stability, and stitch interior seams. Insert lining into assembled bag and hand-sew lining to top edge.
- Add handles: either crochet thick straps or attach wooden handles using strong stitches and a backing patch.
Finish & variations
- Embellish with a cluster of three roses on one corner for a cottage bouquet effect.
- Make squares in pastel ombré colors for a softer vintage look.
Care
- Wash gentle cycle for cotton grannies; reshape while damp.
4. Crochet Ribbon Tote Bag Pattern
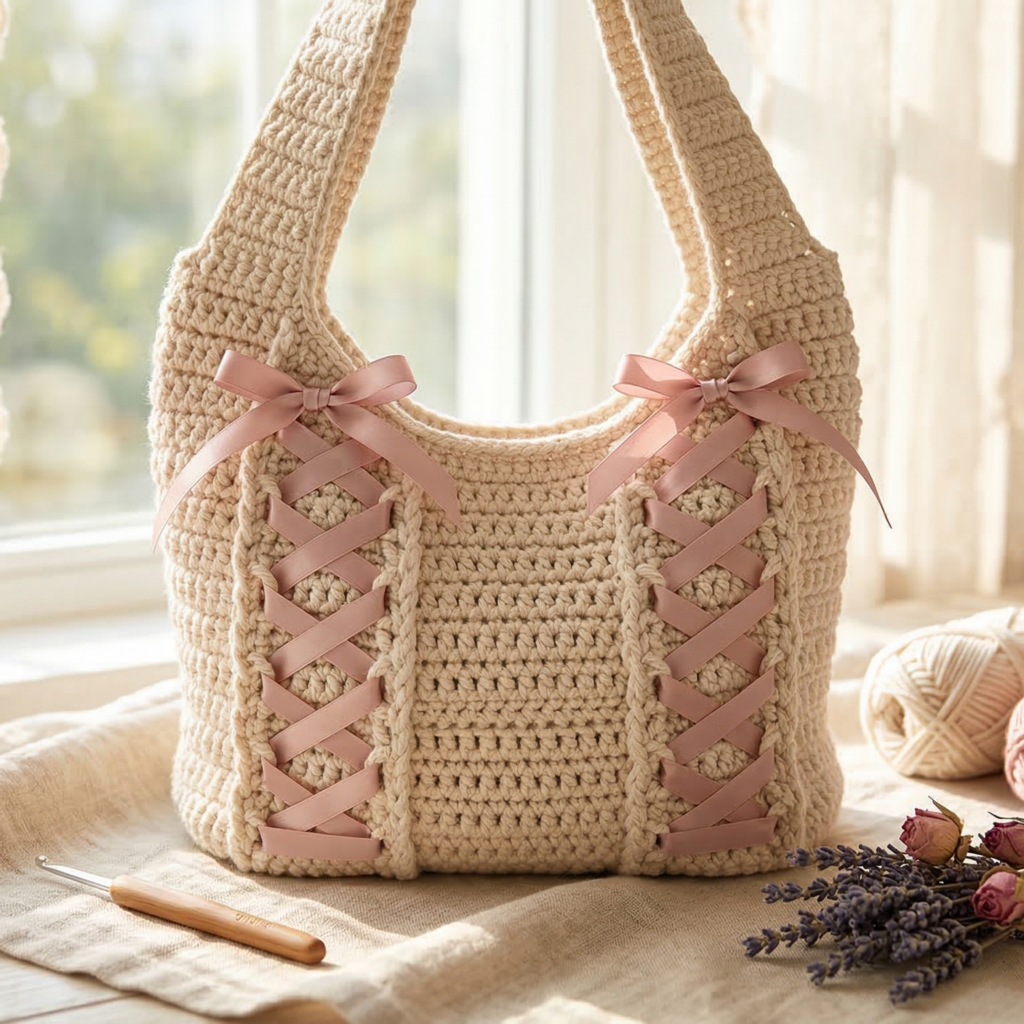
A soft everyday tote woven with ribbon-style loops — think woven ribbon strap detail and a relaxed cottagecore silhouette.
Skill level: Beginner–Intermediate (texture + ribbon weave)
Finished size: approx 13″ wide × 13″ tall × 4″ deep (bucket tote).
Materials
- T-shirt yarn or bulky cotton ribbon yarn (~300–400 yds) for body. This creates slouchy, durable bags.
- DK cotton or satin ribbon for weaving accent and ties (optional).
- Hook: 8.0–12.0 mm depending on ribbon yarn manufacturer’s recommendation.
- Tapestry needle, lining (optional), handles (crocheted or leather).
Stitch key
- sc in rounds or single loops of t-shirt yarn produce tight, sturdy knit-like stitches. If you want a woven ribbon across the surface, weave a thin satin ribbon through holes or create an intentional lacy row for the ribbon channel.
Overview & construction plan
- Work a tight round base in sc using textile (t-shirt) yarn.
- Crochet the body in sc in the round until desired height.
- At a mid-row, create a horizontal ladder of chain spaces to thread a decorative ribbon through.
- Finish with straps and a fabric lining if desired.
Step-by-step
Base
- MR, ch1, 8 sc in MR. Pull tight.
- Round 2: inc in each → 16 sc.
- Continue increases until base diameter ≈ 11–12″. Because t-shirt yarn is thick, fewer rounds will be needed.
Body
- Sc in BLO or full loop around for about 10–12 rounds to create 10–12″ tall body. If you want a slouchy bag, work even; for a structured bag use a smaller hook.
- Ribbon channel row: At about 1/3 from top, do a row of (ch4, sk 2) across to create chain spaces. On the next round, work sc into each ch-4 loop to anchor. Leave the ch-4 tension roomy enough for ribbon to slide. Thread ribbon horizontally from one side to other; tie ends under a trim or tuck into lining.
- Top edge: 2 rounds of sc for neatness. Add a row of picot or scallop if desired.
Handles
- Crochet two wide straps: ch to desired length (20–26″), sc across 6–8 rows for a strong strap. Fold and sc-join edges to make a dense strap. Atttach by sewing ends into the top edge and reinforcing with extra rounds.
Lining
- Optional: cut a fabric lining and stitch in for a cleaner interior and added stability. Hand-stitch into top edge.
Styling & variations
- Weave multiple ribbons for colorful stripes.
- Add fringe tassels at sides for boho cottagecore.
Care
- Many t-shirt yarn bags are machine washable on gentle; check fiber content.
5. Crochet Spiral and Stars Messenger Bag Pattern
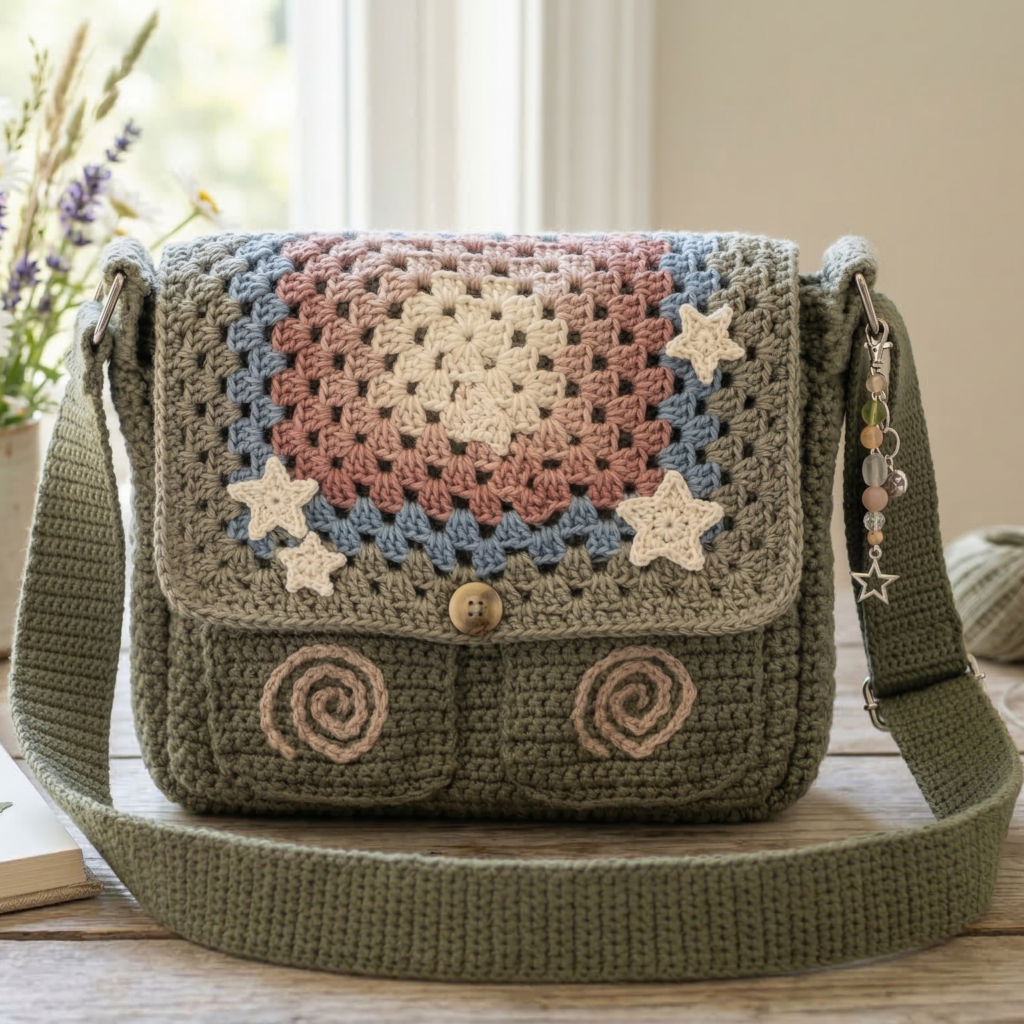
A medium messenger bag featuring a spiral granny motif front panel with embroidered or crocheted star appliqués — comfy crossbody for everyday cottagecore errands.
Skill level: Intermediate (circular panel + appliqué + flap construction)
Finished size: flap bag approx 10″ wide × 8″ tall body with 2–3″ flap overlap.
Materials
- DK cotton for body + accent colors for spiral and stars, ~500–700 yds.
- Hook 4.0 mm for dense fabric, tapestry needle, lining fabric, long strap material (crocheted strap or leather).
- 1 button or magnetic snap for closure.
Stitch key
- Spiral granny: work a round-based spiral of dc clusters in color changes for a rosette effect; small star appliqué: 5-point star made by ch-loops and picot petals.
Overview & construction plan
- Crochet a large spiral round panel for the front flap.
- Work a rectangular body by crocheting in rounds joined to one edge of the flap or make a separate body and sew on flap.
- Add star appliqués and lining, straps.
Step-by-step
Spiral flap (large round)
- MR, ch3, 11 dc into ring (12 dc). Do not join; place stitch marker for start and work in continuous spiral.
- Increase evenly to keep the spiral flat: after initial rounds, increase every N stitches in the round to expand diameter. Change color every 2–3 rounds to build a spiral/target effect (use tonal colors for cottagecore look—e.g., cream center, dusty rose, sage green, soft blue, then neutral).
- Continue until disk diameter ~10–11″ to give a generous flap (this will fold down over body). Fasten off and block if needed.
Body (rectangular box)
- Make a rectangle or a tube sized to be slightly smaller than flap width: chain 26 (or gauge to get ~10″ width) and work sc rows to height of ~8–9″. For depth, you can add a boxed bottom or side panels later. Make back panel separately or work sequentially and attach to flap.
- Join body seams on three sides leaving top open. Attach flap to top back edge by seaming.
Stars & appliqué
- Make 3–5 small star appliqués (MR, ch4 loops, into each loop make a small shell or picot to create points). Sew stars to flap in a scattered constellation arrangement. Option: embroider tiny French knot centers on stars for detail.
Lining & strap
- Sew a fabric lining and install an inner pocket. Hand-stitch lining to top edge and around flap base.
- Make strap: either crochet a long dense strap (sc 6–8 rows in a long strip and seam into a strap) or use a leather strap. Attach strongly to side seams with reinforced stitching.
Closure & finish
- Sew a button or attach a magnetic snap and add a loop on the flap underside. Topstitch around edges for a finished look.
Variations & styling
- Make a smaller crossbody for markets by scaling down spiral by 2–3″ and shorter strap.
- Use variegated yarn for a dreamy watercolor spiral; add tiny embroidered daisies among the stars for extra cottage charm.
Care
- Lined cotton messenger bags can usually be machine washed on gentle; check any leather or wooden hardware and remove if needed.
Final finishing tips, styling ideas & gift suggestions
Structural tips (apply to all patterns)
- Reinforce handles and hardware: stitch through many times and use a fabric or felt patch under the attachment to distribute stress.
- Base reinforcement: cut a piece of cork, thin plywood, or interfacing for the base and insert between the lining and crochet base for a professional, flat bottom.
- Block motifs and panels before sewing for straighter seams and neater joins.
- Edge finishing: crab stitch (reverse sc) or a tidy round of hdc around openings gives a polished frame.
Cottagecore styling & color palettes
- Soft pastels: dusty rose, sage, buttercream
- Earthy neutrals: oatmeal, moss, muted terracotta
- Vintage brights: faded teal, rose pink, pale mustard
- For a true cottagecore vibe, mix creamy neutrals with one or two floral accent colors.
Uses & gifting
- Market bag (Ribbon tote or Granny tote) for groceries or farmers’ markets.
- Everyday crossbody (Spiral & Stars) for hands-free walks in the orchard.
- Gift set idea: a Rose Bouquet Bag paired with a matching rose brooch and a sachet of lavender makes a perfect cottagecore present.
- Make a mini version as a coin pouch or little sachet bag.
Care
- Cotton and cotton-blend bags typically wash well on gentle; reshape while damp. Leather handles should not be machine washed—spot clean only. If using metallic or glued accents, spot clean only.
conclusion
These five cottagecore bags balance charming floral details with real-world functionality: a Rose Bouquet bucket, an embroidered Pink Flowers tote, a 3D Rose granny-square tote, a rustic Ribbon tote, and a whimsical Spiral & Stars messenger. Each pattern can be scaled, lined, and reinforced for everyday durability, or made lighter for decorative use. Encourage readers to experiment with color mixes, lining fabrics, and hardware to match their personal cottagecore mood — from pastoral pastels to earthy, harvest-season hues.