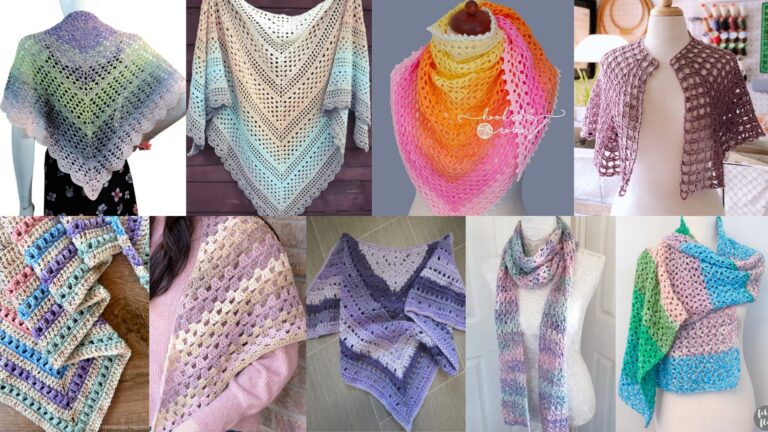
Handmade crochet coasters are quick, practical, and thoughtful gifts — they protect surfaces, show off stitch texture and color, and can be made in an evening. This post walks you through five gift-ready coaster patterns: Carnation, Jasmine Stitch Flower, Tulip-Inspired, Pumpkin Pie Slice, and Flower-Embroidered Square. For each pattern you’ll get: a short skill-level note, finished size, materials, stitch abbreviations, a very detailed step-by-step pattern (construction, shaping, borders), blocking/finishing instructions, care notes, and variations/gift ideas so you can personalize them for your recipient.
Quick notes for all patterns
- Use cotton or cotton-blend yarn for coasters because it’s absorbent and durable; worsted weight (category 4) or DK (category 3) are both great depending on the thickness you want.
- A smaller hook than the yarn label suggests gives a firmer, denser coaster that resists curling. Typical hooks: 3.5–4.5 mm for DK–worsted.
- Always weave in ends neatly and block coasters to flatten and even stitches.
- If gifting multiple coasters, make a coordinated set (3–6 pieces), stack with ribbon and a care tag (hand wash, lay flat to dry).
1. Crochet Carnation Coaster Pattern
Skill level: Intermediate (working petals/two-layer motifs)
Finished size: ~4.5–5″ (11–13 cm) diameter (depends on yarn/hook)
Materials
- Worsted weight cotton yarn (main color for petals) — ~30 g per coaster
- Contrasting center yarn (optional) — small amount
- Crochet hook: 4.0 mm (adjust for desired density)
- Tapestry needle, scissors
- Blocking mat + pins (optional)
Stitches & abbreviations
- ch = chain
- sl st = slip stitch
- sc = single crochet
- hdc = half double crochet
- dc = double crochet
- tr = treble (UK: treble = US dc; here use US terms)
- puff = puff stitch (yarn over, insert hook, pull up loop; repeat 3 times, yarn over and pull through all loops)
- picot = ch3, sl st in 1st ch (small decorative point)
Gauge (informal)
- Not critical; aim for a firm fabric. If your coaster comes out floppy, go down one hook size.
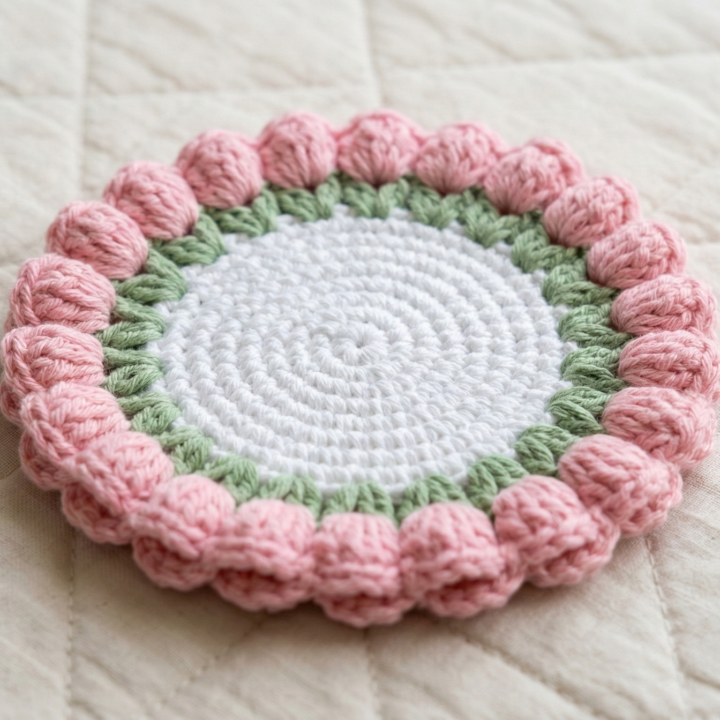
Pattern overview & idea
This coaster is a two-layer flower: a textured circular base for stability, topped with a carnation-style ruffled layer of petals. The base keeps the coaster flat; the ruffled petals create the carnation look while remaining reasonably flat for use.
Step-by-step
A — Base (flat circle)
- MR (magic ring). Round 1: ch1, 8 sc into ring. Pull ring tight. (8)
- Round 2: 2 sc in each st around. (16)
- Round 3: sc in next st, 2 sc in next around. (24)
- Round 4: sc in next 2, 2 sc in next around. (32)
- Round 5: sc in next 3, 2 sc in next around. (40) — adjust to reach desired base diameter: each round increases by 8 sts on worsted; stop when base is about 3.5–4″ across.
- Optional neat edge: ch1, sc around in BLO (back loop only) to create a slight rim. Fasten off and weave in ends.
B — Petal round(s) — carnation texture
- Join petal color to any front loop of Round 5 (or to RS of base). Ch1, sc in same st, ch2, skip 1 repeat across to create spaced loops to hold petal clusters. Join with sl st. (These ch2 spaces form anchors for petals.)
- Round 2 (petal foundation): in ch2 space: (hdc, dc, tr, dc, hdc) — a fuller petal cluster. Sl st into next sc anchor and repeat around. You’ll get ruffled petals that stand slightly up.
- Round 3 (ruffling): Into each petal cluster work a row of puff stitches or smaller clusters to add volume: puff, ch1, puff across each cluster spacing as needed. This adds carnation frill. Fasten off and weave ends into back.
C — Optional second petal layer (denser carnation)
- If you want an ultra-ruffled carnation, make a second row of smaller petals between the first round’s seams by working into the gaps created under the petal clusters. Use ch-1 loop anchors and small shells (5 dc in one stitch) to create a secondary frill.
D — Final border
- Work a neat border around the base edge to camouflage joins: join same yarn as base and work sc, hdc, sc, picot every 6 sts for a decorative edge; or simply sc evenly for a tidy finish.
Blocking & finishing
- Wet-block lightly: pin coaster flat on blocking mat to the intended diameter and let dry. Ruffle petals gently to settle shape. Blocking helps the base stay flat under the ruffle.
- Weave in tails and hide ends under the base stitches.
Care & gifting
- Recommend hand wash or gentle machine wash in a mesh bag; lay flat to dry. Include a small care card.
- For a gift set, make three coasters in coordinating colors with one contrasting carnation.
2. Crochet Jasmine Stitch Flower Coaster Pattern
Skill level: Beginner–Intermediate (texture stitch and layered join)
Finished size: ~4″ (10 cm) diameter
Materials
- DK or sport weight cotton yarn — 1 ball will make several coasters
- Crochet hook: 3.5–4.0 mm
- Tapestry needle, scissors, blocking pins
Stitches & abbreviations
- ch, sl st, sc, hdc, dc, Jasmine stitch — also called star stitch in some books; instructions below.
- st(s) = stitch(es)
Jasmine (star) stitch — quick how-to
- Single Jasmine/star stitch cluster (worked into one base loop): Yarn over, insert hook into stitch, draw up loop; (repeat insert and draw up loop 3–4 times) — you’ll have several loops on hook; yarn over and pull through all loops, ch1 to close cluster. This produces a star-like petal cluster. Many patterns create a neat textured fabric by working Jasmine stitches into staggered spaces.
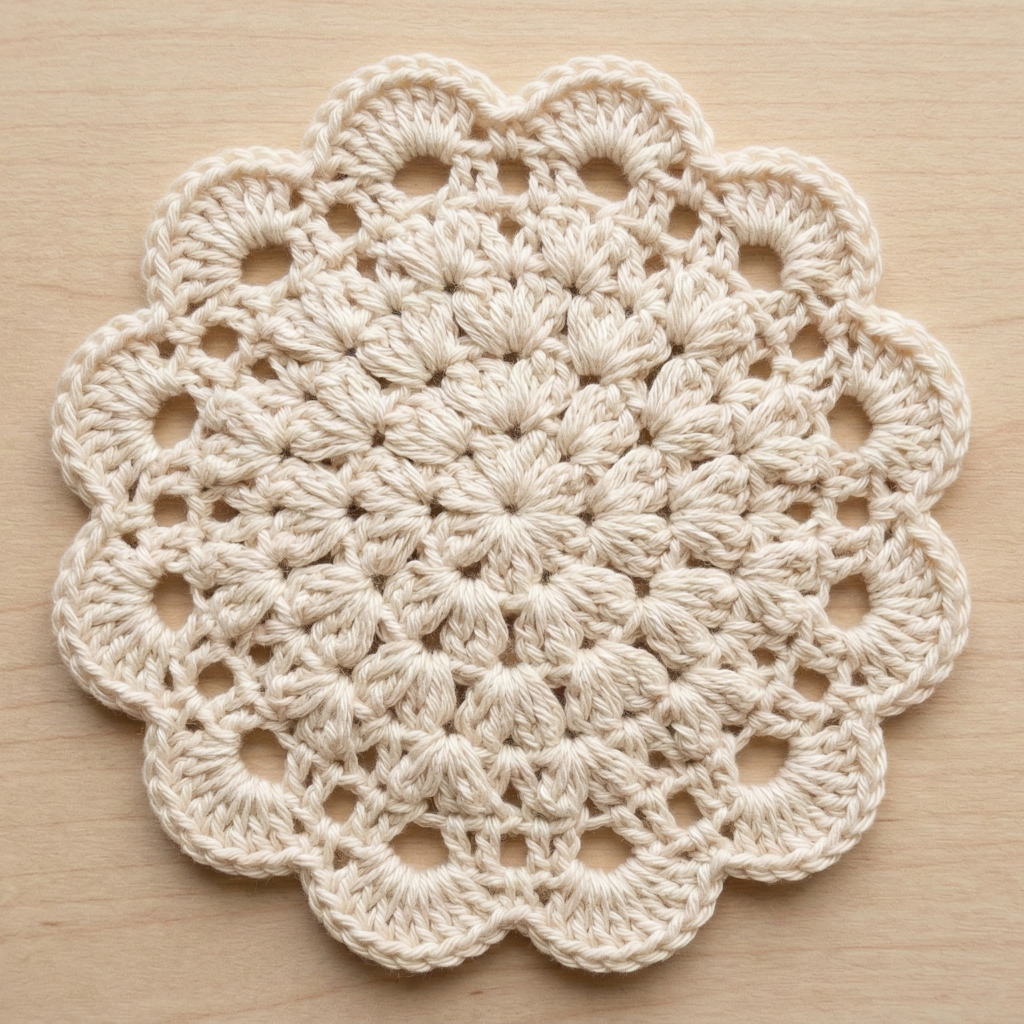
Pattern — textured flower coaster
A — Center medallion
- MR, ch1, 8 sc into ring. Join. (8)
- Round 2: ch1, work jasmine/star stitch into each st around (8 clusters). Join with sl st. This creates a textured center like a jasmine bud.
B — Petal rounds
- Round 3: join new color, ch3, skip 1 st, sc in next around to create chain loops for petal anchors. Join.
- Round 4: into each ch3 loop work (sc, hdc, dc, hdc, sc) to form rounded petals. Join. (You’ll have a ring of petals.)
- Round 5: Between petals, work a single jasmine cluster into the space to add texture filling and tie petals together: in the gap: jasmine cluster, sl st into next petal base.
C — Outer rim & stability
- Join base color or a contrast and work 2–3 rounds of sc around the outer edge to widen the coaster to desired diameter (work increases evenly: sc 4, 2 sc in next st).
- Final round: sc in BLO to create a subtle raised rim that helps drinkware sit stably. Fasten off and weave in ends.
Blocking, care & variations
- Block flat. Because the jasmine stitch is textured, steam-block lightly to avoid flattening too much.
- Variation: Use two contrasting colors — center in one, petals in another for pop. Make a set with alternating petal colors for a coordinated gift set.
3. Crochet Tulip Inspired Coaster Pattern
Skill level: Beginner–Intermediate (shaping petals and worked-in rounds)
Finished size: ~4–5″ (10–12 cm) across (tulip top)
Materials
- Worsted or DK cotton yarn — 2 colors (tulip color and green for leaves)
- Hook: 4.0 mm
- Tapestry needle, scissors
Stitches & abbreviations
- MR, ch, sl st, sc, hdc, dc, tr, shell (shell = 5 dc in same st), V-st (dc, ch1, dc), BLO/FLO as needed
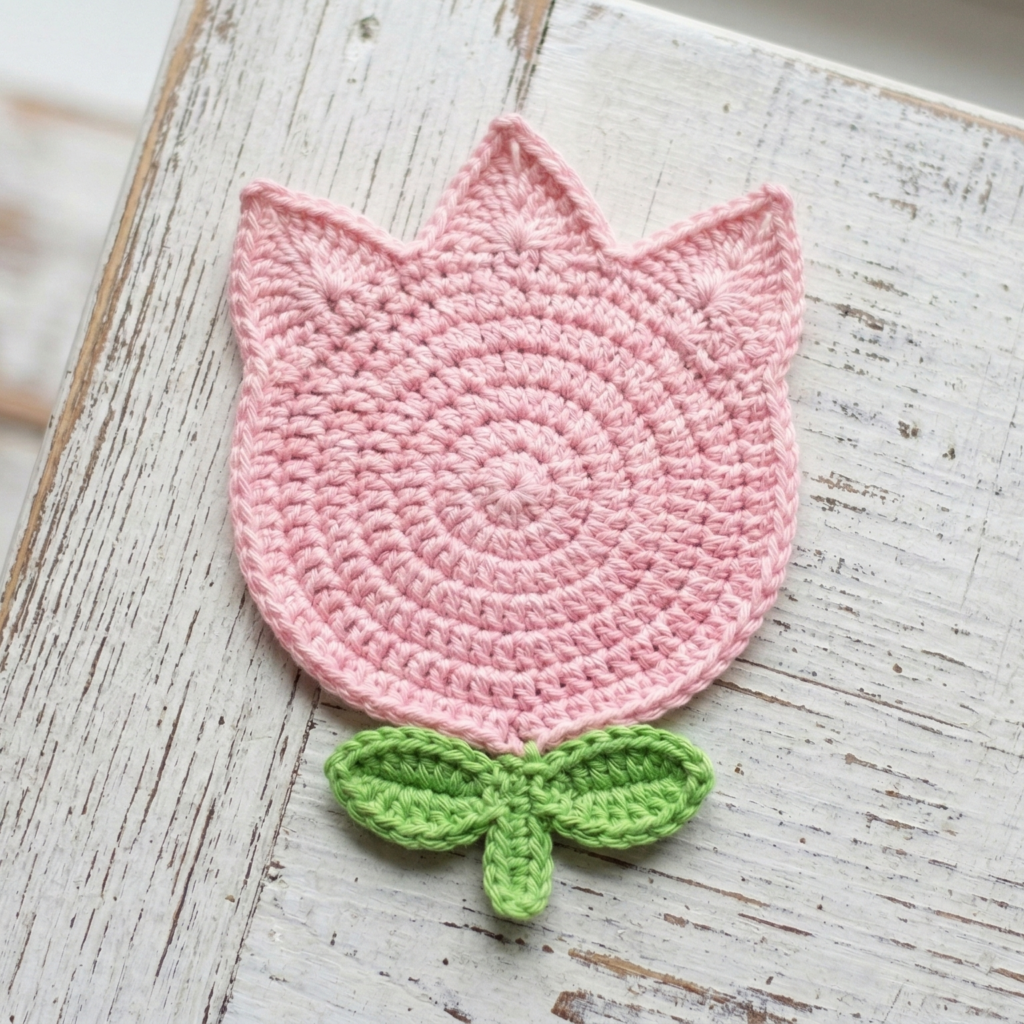
Pattern overview
This coaster uses a stylized tulip top: petal shapes arranged around a circular base, with small green leaf points around the rim for a botanical look. It stays flat and is very giftable when made in soft pastel or vibrant tulip colors.
Step-by-step
A — Base circle
- MR, ch1, 8 sc into ring. (8)
- Round 2: inc in each st (16).
- Round 3: sc in next, inc around (24).
- Round 4: sc in next 2, inc around (32). Stop when base reaches about 3–3.5″.
B — Petal placement
- Choose 6 petal positions evenly spaced. A simple way: mark every 5th stitch if base has 30–32 sts.
- At each mark, create a petal foundation: ch4, sl st to next marked point to make small loops spaced evenly. Alternatively, sc in next 3 sts, ch 3 around as anchors.
C — Petal cluster (make 6)
- Into each chain loop: (sc, hdc, dc, tr, dc, hdc, sc). This creates a tall tulip petal with a pointed tip. Fasten off each petal or work continuously if you prefer.
- After working all petals, there will be gaps near the base: fill them with small jasmine/star stitch clusters or tiny shells (3 dc in a space) for texture.
D — Leaf rim (green)
- Join green yarn at edge between two petals and work small leaf points: ch6, sc into 2nd ch from hook, hdc, dc, hdc, sc; sl st to base. Space leaves between petals for a leafy silhouette.
- Work an outer round of sc around entire edge to unify colors and flatten coaster.
Finishing & tips
- Press flat with a warm iron through a damp cloth or pin and lightly steam block.
- Variations: Make the tulip in two-tone petals (color change at half-height) or create a mini tulip garden coaster set with 3 different tulip colors.
4. Crochet Pumpkin Pie Slice Coaster Pattern
Skill level: Beginner (shaping a wedge & simple colorwork)
Finished size: wedge ~4″ (10 cm) tall × 3.5″ base — looks cute stacked as a pie
Materials
- Worsted cotton yarn: orange (pie), tan/cream (crust), small brown for a pumpkin spice stitch if desired
- Hook: 4.0 mm
- Tapestry needle, scissors
Stitches & abbreviations
- ch, sl st, sc, hdc, dc, dec (sc2tog), inc, BLO/FLO optional
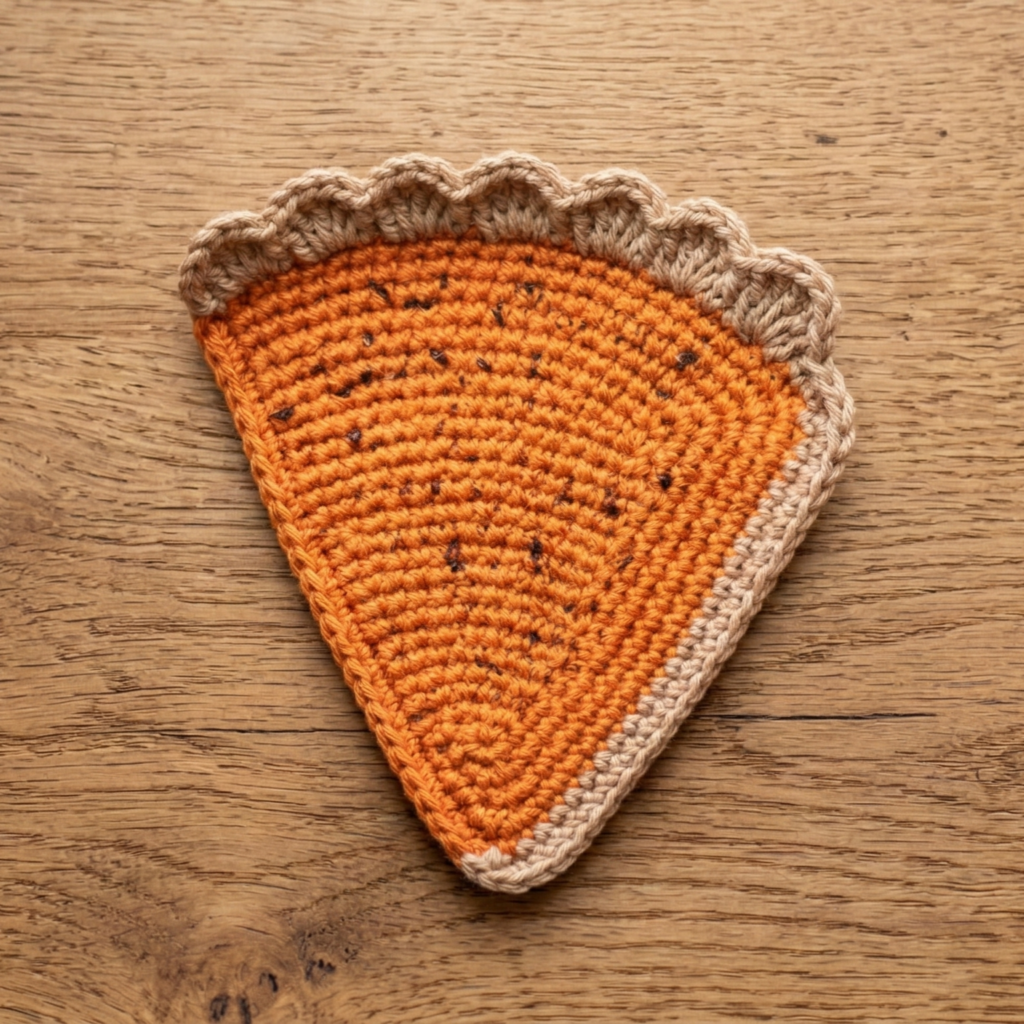
Pattern overview
This coaster is a triangular wedge shaped and striped like a pumpkin pie slice. The crust is a textured rib or shell at the wide end. Make 4–6 slices and present as a “whole pie” gift by arranging them into a circle and wrapping with ribbon.
Step-by-step
A — Pie wedge body (worked in rows)
- Ch 21 (this is the base width; change for larger/smaller wedges). Row 1: sc in 2nd ch and across (20 sc). Turn.
- Row 2: ch1, sc across. Turn.
- To shape wedge, decrease one stitch at the end of each odd row (or at both ends to make triangle): Row 3: ch1, sc2tog at start? A simpler wedge: decrease 1 st at the beginning of every other row: Row 3: ch1, sc in first stitch, sc across to last 2 sts, sc2tog. Continue decreasing on alternate rows until you reach a point (about 1–2 sts). Fasten off, weave ends. This makes a right-angled triangular wedge.
Alternative simpler method (worked from point outward): Start MR and increase to wedge size by making semi-circular increases in rows that increase at one edge only.
B — Crust (ribbed or scalloped)
- Join crust color at the wide end. Work 2–3 rounds of sc in BLO to create a ridged, folded crust. Or work shell edging: 5 dc in one stitch, skip 1, sl st in next across for scalloped crust. Fold crust over and tack down with a few stitches to create a raised crust look.
C — Pumpkin spice detail
- Optional: embroider small stitches of brown or darker orange on wedge to mimic spice specks. Or sew a tiny star of whipped-cream (a small white puff) as a novelty topper.
D — Reverse & finishing
- Make a backing wedge the same way and join both wedges together with sc around to make the coaster a little thicker and hide raw edges (or leave single-layer for slim coaster). If joining, pad lightly with a thin layer of felt between for added stability.
Presentation idea
- Make six wedges and arrange into a circle to gift as a full “pumpkin pie” coaster set. Tie with raffia or ribbon and include a small tag: “Handmade pumpkin pie — for cozy mugs.”
5. Crochet Flower Embroidered Square Coaster Pattern
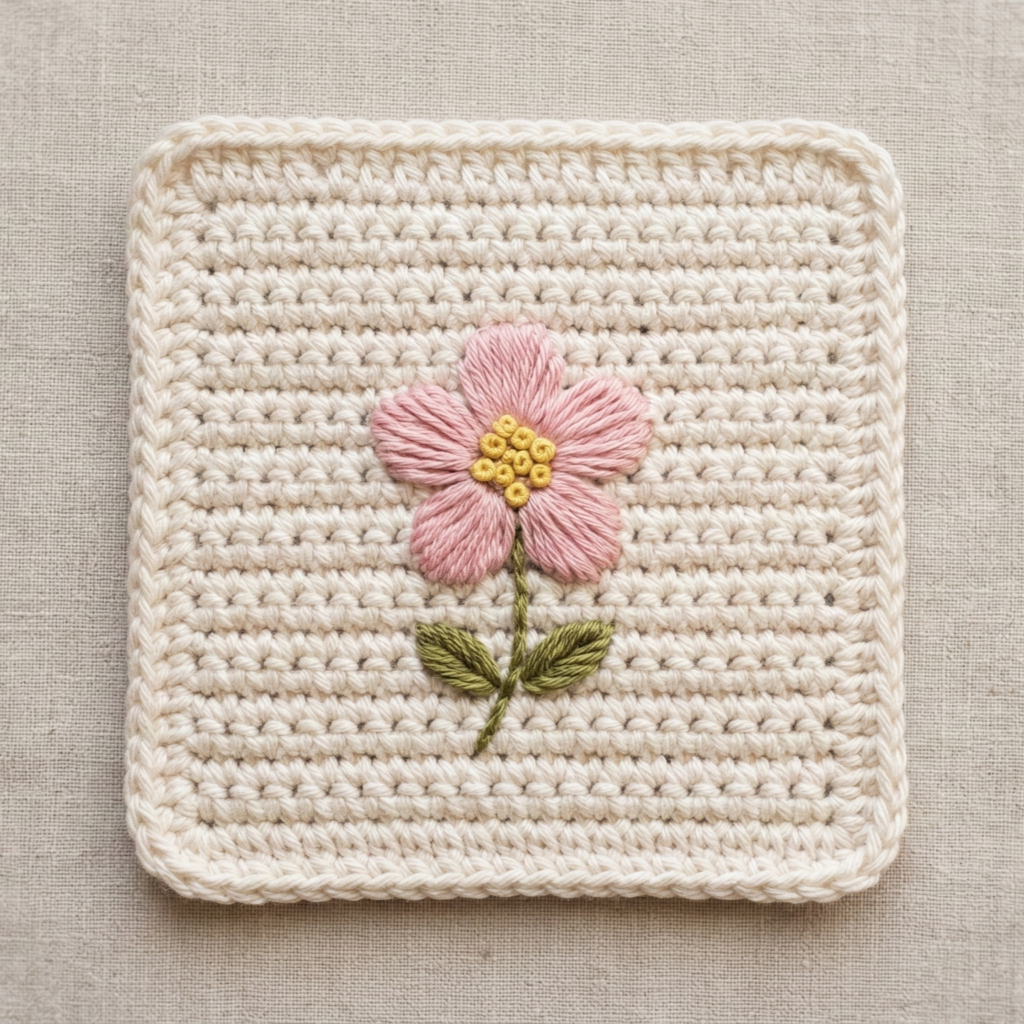
Skill level: Beginner–Intermediate (granny/solid square + surface embroidery)
Finished size: ~4–5″ square (10–13 cm)
Materials
- Worsted cotton yarn — main background color + small amounts for flower embroidery (contrasting)
- Hook: 4.0 mm
- Tapestry needle, scissors
- Optional small embroidery needle for finer floss (if using DMC thread)
- Blocking pins, mat
Stitches & abbreviations
- ch, sl st, sc, hdc, dc, (for square) dc cluster or classic granny square cluster; surface embroidery stitches: backstitch, french knot, lazy daisy
Pattern — solid square base (dense, coaster-friendly)
- Start with foundation ch 18 (or desired finished width + 2 ch for turning). Row 1: sc in 2nd ch from hook and across. Turn.
- Rows 2–14: ch1, sc across. (Adjust rows for square proportion.) Fasten off and weave in ends. This gives a dense, absorbent square coaster as a canvas for embroidery.
Alternative: You can make a classic 7-round granny square for a lacy, decorative look — but for a functional coaster, dense fabric is recommended.
Surface embroidery — floral motif
Pick a simple 5-petal flower, or a small bouquet.
A — Mark placement
- Center the small motif by folding the square lightly to find the center, or mark with a removable fabric pen.
B — Embroidery stitches used
- Lazy daisy for petals: ch-loop anchored with sl st.
- French knots for flower centers and accents.
- Backstitch for stems and simple leaf veins.
- Satin stitch for filled petals/leaves (if using embroidery floss).
C — Embroidering steps
- Thread embroidery floss (3–6 strands depending on thickness) into an embroidery needle.
- For a simple 5-petal flower: make 5 lazy daisy petals around a center point, secure each with a small sl st or backstitch. Fill center with 3–5 French knots.
- Add a short backstitched stem and 1–2 leaves using satin stitch or lazy daisy for leaf shapes.
- Repeat or vary flowers for a cluster of 2–3 blossoms. Keep motifs small (1–2″ diameter) so they don’t soak up all coaster space.
D — Secure & finish
- Secure floss ends on the wrong side with small stitches and trim. If you used embroidery thread, consider backing the coaster with a thin felt circle or extra fabric square sewn on to hide knots and reinforce the coaster.
Blocking & care
- Lightly steam-block to flatten and set embroidery. Avoid harsh agitation for embroidered coasters; recommend hand washing or gentle machine wash in a mesh bag.
Variation & gift set idea
- Make a set with different flower colors or stitch one flower per coaster to create a “garden collection” set.
Conclusion
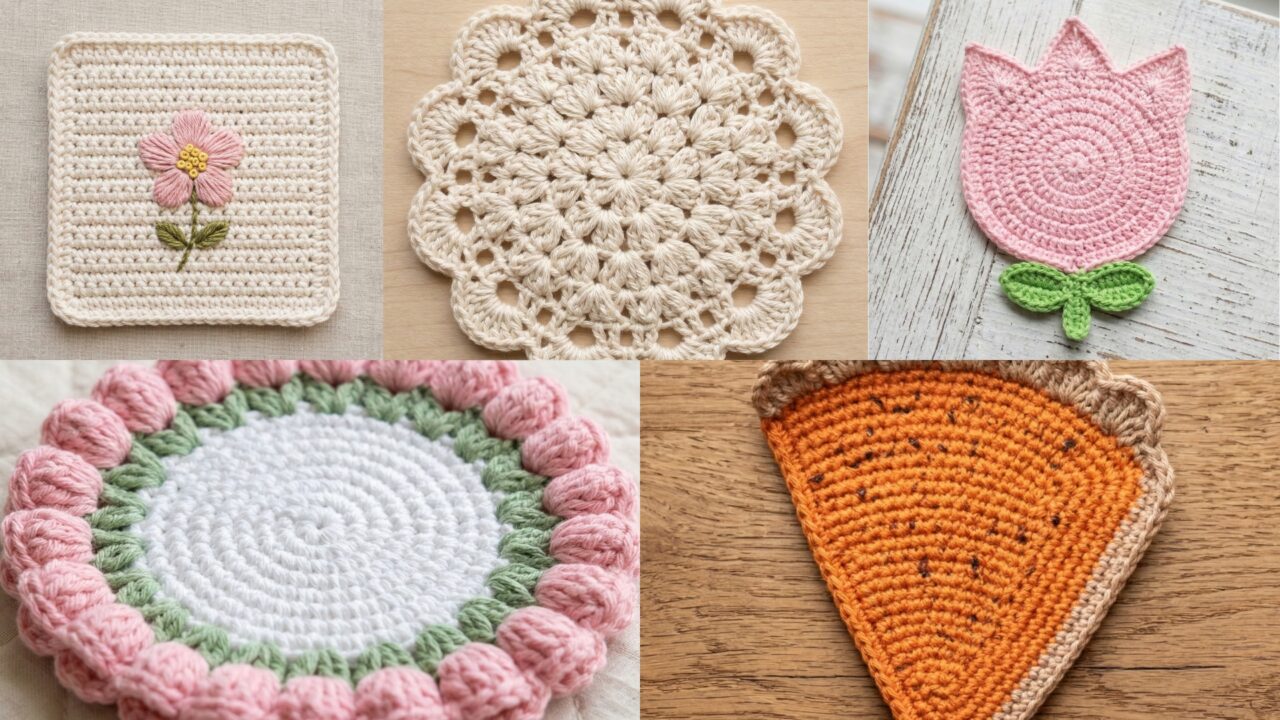
These five coaster patterns give you a range of styles — frilly and floral (Carnation), textured and delicate (Jasmine stitch), botanical (Tulip), whimsical and seasonal (Pumpkin Pie Slice), and classic embroidered squares ideal for personalization. Coasters are fast makes (many finished in under an hour each), practical, and lovely to give as sets.
Practical final tips:
- Consistency: Use the same yarn and hook across a set for uniform size and appearance.
- Stability: For extra stiffness (if you want a very flat coaster), insert a thin circle of cork or stiff felt between two layers and stitch them together.
- Presentation: Stack 4–6 coasters, tie with ribbon, and include a small care card with washing instructions. A kraft box or muslin bag makes a cozy handmade gift package.
- Care note to include: “Hand wash in cool water or use gentle cycle in a mesh bag. Reshape and lay flat to dry.”