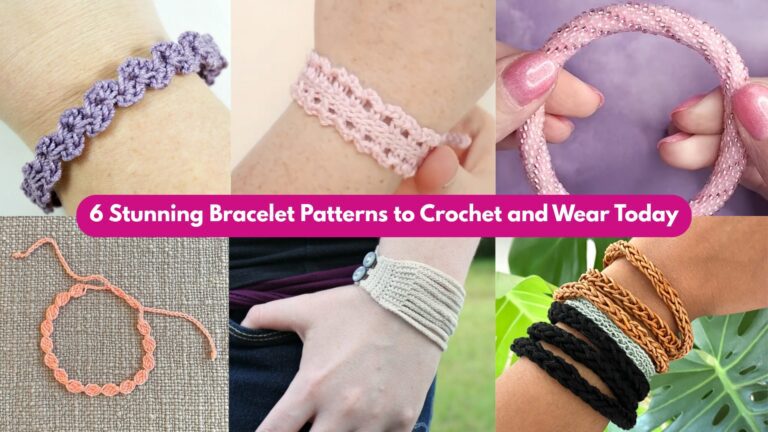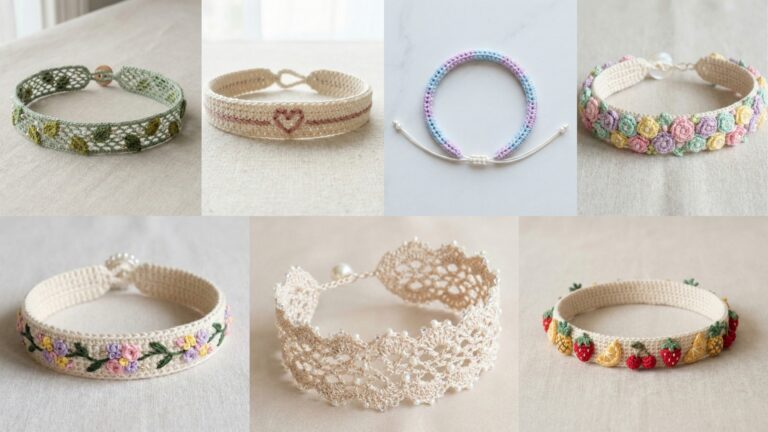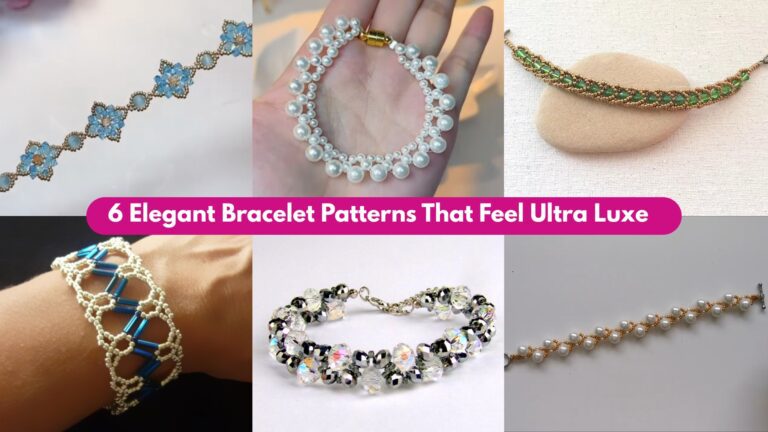
Crochet bracelets are small projects with a lot of charm. They are quick to make, easy to personalize, and perfect for using up leftover yarn in a way that still feels stylish and thoughtful. A handmade bracelet can be soft and delicate, bold and textured, or sweet and simple depending on the stitch pattern and closure you choose.
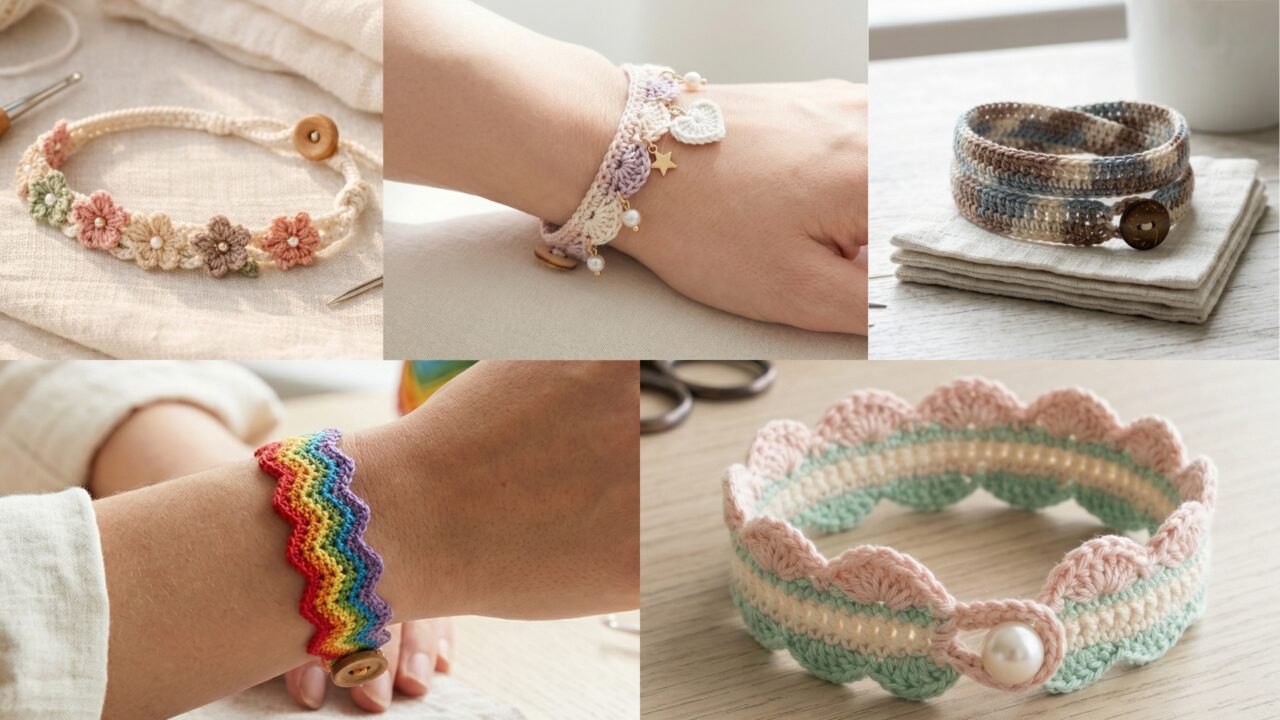
The five bracelet patterns below are designed for everyday wear, gifting, and small handmade collections. Each one has its own personality: shell stitch with little charms, a micro floral macrame-style bracelet, a scalloped bracelet, a wrap bracelet with a button closure, and a chevron bracelet. They are all compact enough to finish quickly, but detailed enough to feel special.
Before you begin, keep a few things in mind:
Use a fine or lightweight yarn if you want a delicate bracelet, and a slightly larger yarn if you want a thicker fashion piece. Cotton is a great choice because it is comfortable, sturdy, and holds its shape well. For closures, use buttons, ties, or crochet loops depending on the style you want. If you add charms or beads, sew them securely so the bracelet stays neat and wearable.
1. Crochet Shell Stitch Charms Bracelet Pattern
Skill level: Beginner to intermediate
Style: Feminine, decorative, and lightly textured
Best for: Everyday wear, small gifts, and charm bracelets
This bracelet uses shell stitch texture to create a soft, pretty surface. The little charms add extra personality and make it feel like a tiny piece of jewelry.
Materials
- Fine or sport weight yarn
- Crochet hook, usually 2.0 mm to 3.5 mm
- Small button or clasp
- Tapestry needle
- Scissors
- Optional tiny crochet charms, beads, or metal-style charms
Step-by-step guide
Step 1: Make the foundation chain
- Measure your wrist before starting.
- Chain a length that fits snugly around the wrist, leaving a little room for closure.
- Make sure the chain is not too tight.
- Add a few extra chains if you want the bracelet to overlap slightly.
Step 2: Work the first row
- Work one row of single crochet or half double crochet across the chain.
- This creates a firm base for the shell texture.
- Turn your work.
Step 3: Add shell stitches
- Work several double crochet stitches into one stitch or space to form a shell.
- Skip a few stitches between shells.
- Repeat across the row until the bracelet is covered in pretty shell shapes.
- Keep the shells evenly spaced for a balanced look.
Step 4: Add a second texture row
- Work a row of sc or hdc across the top of the shells.
- This helps hold the bracelet shape.
- Repeat shell rows and anchor rows until the bracelet reaches the desired width.
Step 5: Add charms
- Crochet or attach tiny charms to the bracelet.
- Small hearts, stars, flowers, or simple loops work beautifully.
- Sew them securely so they stay in place.
Step 6: Finish the bracelet
- Add a button loop or a tiny clasp.
- Weave in all ends carefully.
- Try the bracelet on and adjust the closure if needed.
Finishing tips
- Use one soft color for a delicate look or two colors for contrast.
- Keep the charms lightweight so the bracelet stays comfortable.
- Shell stitch looks especially beautiful in pastel or pearl-like shades.
Style ideas
This bracelet looks lovely in cream, blush, lavender, or pale blue.
2. Crochet Micro Floral Macrame Bracelet Pattern
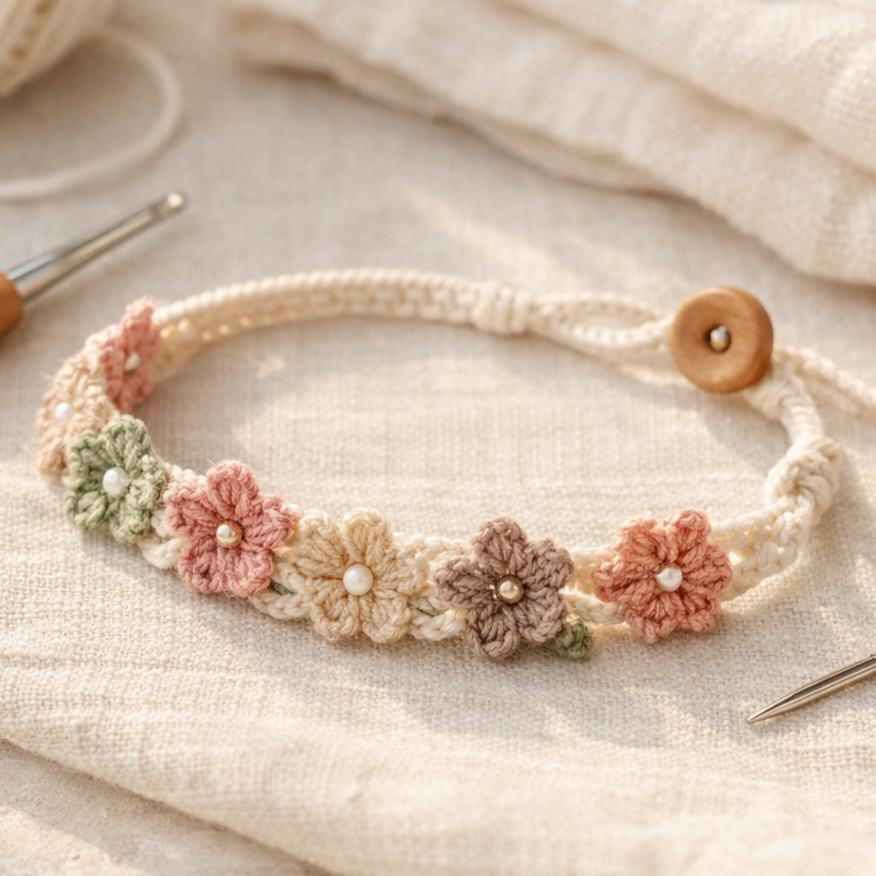
Skill level: Beginner to intermediate
Style: Boho, delicate, and floral
Best for: Festival style, friendship gifts, and everyday accessories
This bracelet has a soft macrame-inspired feel, but it is made entirely with crochet. Tiny floral motifs give it a romantic and boho look.
Materials
- Cotton or cotton-blend yarn
- Crochet hook, usually 2.0 mm to 3.0 mm
- Tapestry needle
- Small button, tie, or clasp
- Optional tiny beads or flower centers
Step-by-step guide
Step 1: Make the bracelet cord
- Chain the length you need for the bracelet.
- Work a narrow row of single crochet across the chain.
- Continue until you have a thin strap or cord-like base.
- Keep the stitches tight so the bracelet feels neat.
Step 2: Make micro flowers
- Start each flower with a magic ring.
- Work a few stitches into the ring for the center.
- Add tiny chain loops for petals.
- Work small petal shapes into each loop.
- Make several tiny flowers for the bracelet.
Step 3: Arrange the flowers
- Lay the flowers across the bracelet base.
- Space them evenly or group them in the center for a focal point.
- Sew the flowers onto the cord using a tapestry needle.
Step 4: Add a macrame-style look
- If you want a more boho effect, leave small open spaces between the flowers.
- Use thin cords or chain sections to connect the floral parts.
- Keep the bracelet airy and lightweight.
Step 5: Add the closure
- Sew a button to one end.
- Make a chain loop on the other end.
- Test the fit before weaving in the ends completely.
Finishing tips
- Soft neutrals give this bracelet a natural macrame look.
- Tiny beads can be added to the center of the flowers for sparkle.
- Cotton yarn works best for a neat, firm finish.
Style ideas
Use ivory, taupe, sage, or dusty rose for a soft handmade feel.
3. Crochet Scallop Bracelet Pattern
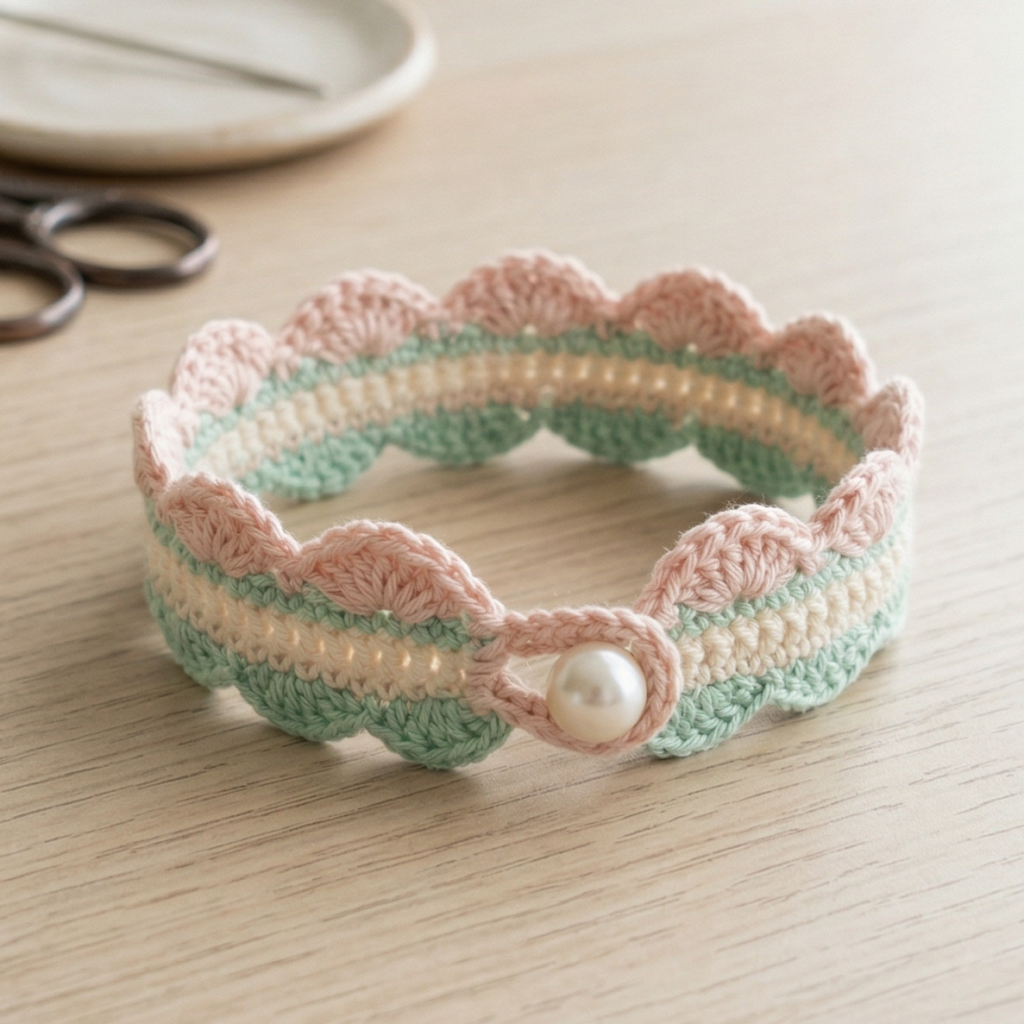
Skill level: Beginner
Style: Cute, classic, and easy to wear
Best for: Everyday style, simple gifts, and small accessory sets
The scallop bracelet is simple but elegant. The gently curved edges give it a soft, feminine look without needing complicated shaping.
Materials
- Lightweight yarn
- Crochet hook, usually 2.0 mm to 3.5 mm
- Tapestry needle
- Scissors
- Small button or snap closure
Step-by-step guide
Step 1: Start the base band
- Chain enough stitches to fit around the wrist.
- Work one row of single crochet across the chain.
- Turn your work.
Step 2: Create the scallops
- Work several stitches into one stitch or space to create the first scallop.
- Skip a few stitches.
- Repeat the scallop shape across the row.
- Keep the scallops the same size for a clean, balanced look.
Step 3: Add a second row
- Work a row of sc or hdc to stabilize the scallops.
- Repeat scallop rows if you want a wider bracelet.
- Continue until the bracelet is the width you want.
Step 4: Shape and close
- Try the bracelet around your wrist.
- Add a button loop or snap.
- Sew the closure firmly in place.
Step 5: Finish
- Weave in all ends.
- Flatten the bracelet gently with your fingers.
- Check that the scallops lie evenly.
Finishing tips
- Scallops look especially pretty in a solid color.
- Soft pink, cream, and mint are lovely choices.
- A tiny pearl button makes the bracelet look extra polished.
Style ideas
This bracelet is beautiful in pastel shades, white, or warm neutral tones.
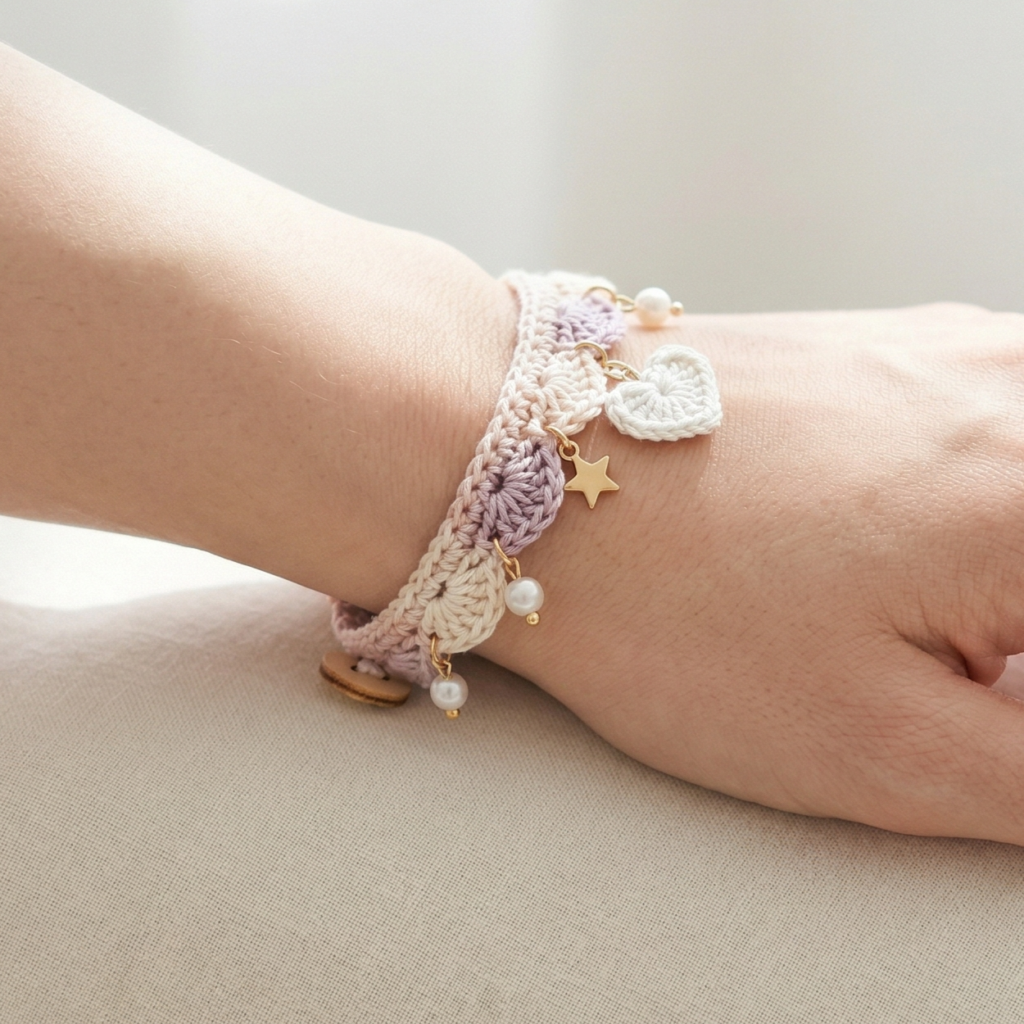
4. Crochet Wrap Bracelet with Button Pattern
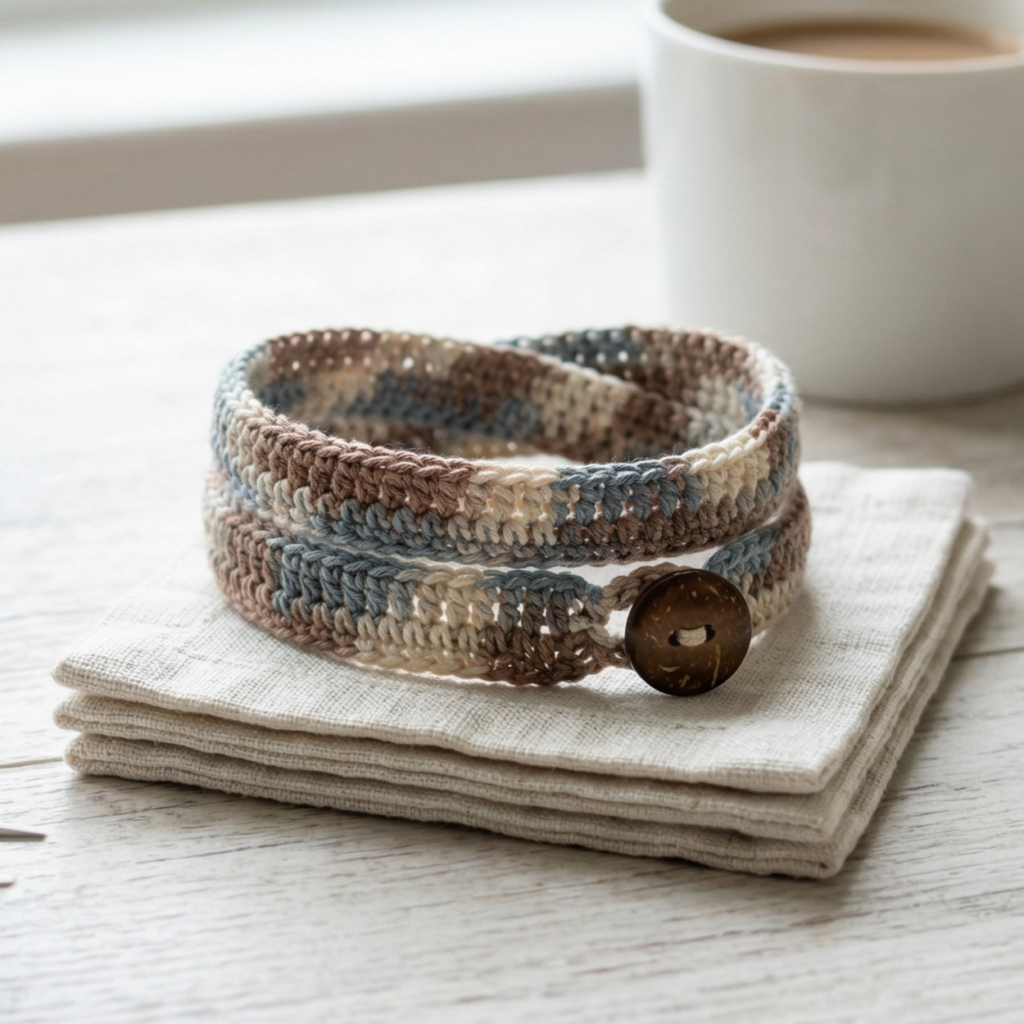
Skill level: Beginner
Style: Adjustable, simple, and stylish
Best for: Layered outfits, gifts, and everyday wear
Wrap bracelets are practical because they can be adjusted to fit comfortably. A button closure gives them a tidy and classic finish, and the longer style makes them feel more like a fashion accessory.
Materials
- Fine or sport weight yarn
- Crochet hook, usually 2.0 mm to 3.5 mm
- Tapestry needle
- Scissors
- Small button
Step-by-step guide
Step 1: Make the long chain
- Measure the length you want for the wrap.
- Chain long enough to wrap around the wrist once or twice, depending on the style.
- Add a few extra chains for overlap.
Step 2: Build the bracelet strip
- Work single crochet or half double crochet across the chain.
- Turn and repeat for several rows.
- Keep the strip narrow and even.
Step 3: Add texture if desired
- You can keep the wrap smooth.
- Or add a textured row like BLO sc for a ribbed effect.
- Keep the texture subtle so it wraps comfortably.
Step 4: Add the button loop
- On one end, chain a short loop.
- Make sure the loop fits the button snugly.
- Reinforce the loop with an extra row if needed.
Step 5: Sew on the button
- Attach the button to the opposite end.
- Make sure it is centered and secure.
- Check the fit by wrapping the bracelet before weaving in ends.
Finishing tips
- Use a small decorative button for a polished look.
- Thin yarn makes the wrap bracelet feel lightweight and soft.
- Keep the strip flexible enough to wrap easily.
Style ideas
This bracelet looks beautiful in earthy browns, soft blue, ivory, or deep jewel tones.
5. Crochet Chevron Bracelet Pattern
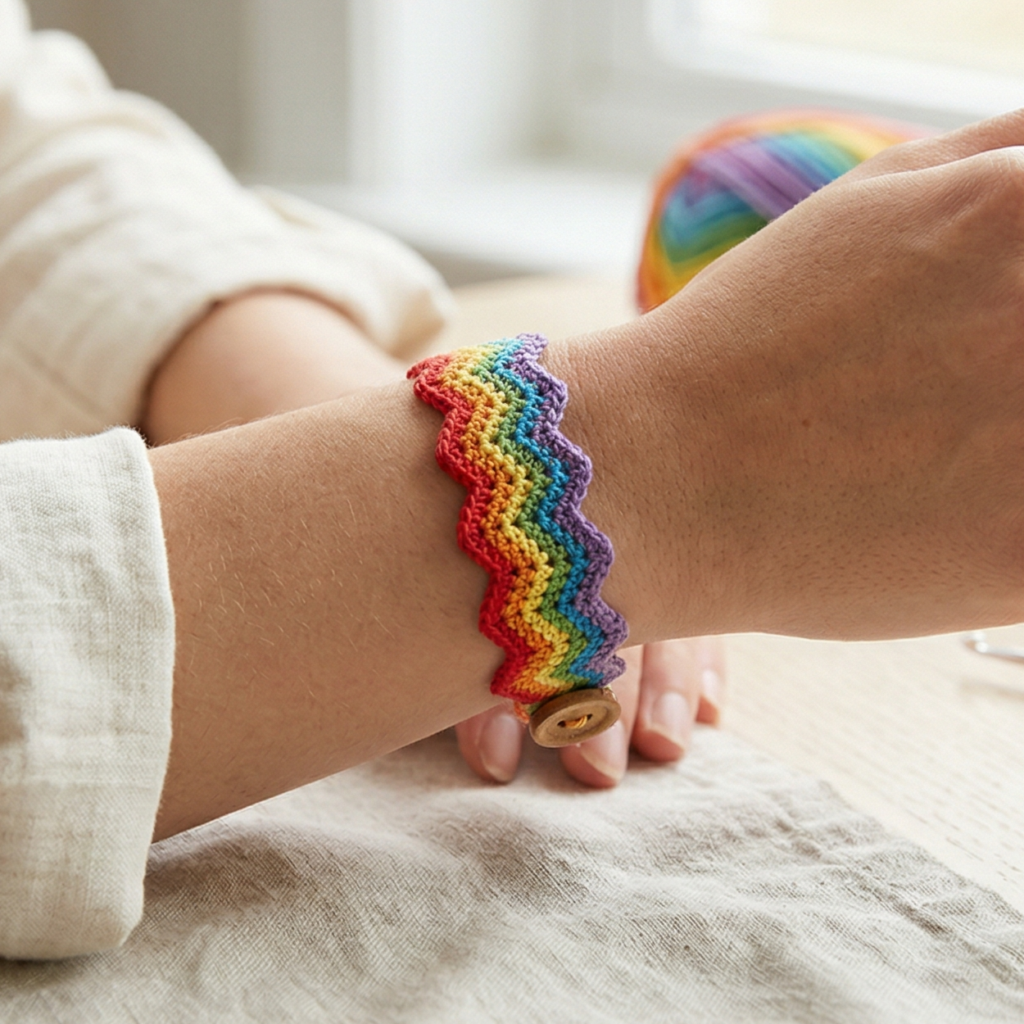
Skill level: Beginner to intermediate
Style: Modern, graphic, and colorful
Best for: Everyday wear, friendship bracelets, and stash-busting projects
Chevron stitching gives this bracelet a lively zigzag pattern. It is a great way to use contrasting colors and create a bold accessory in a small size.
Materials
- Small amounts of yarn in 2 or more colors
- Crochet hook, usually 2.0 mm to 3.5 mm
- Tapestry needle
- Scissors
- Small button or clasp
Step-by-step guide
Step 1: Make the foundation chain
- Chain a length that fits around the wrist.
- The chain should be long enough to allow for the closure.
- Keep it even so the chevron pattern stays neat.
Step 2: Work the first zigzag row
- Start with a row of single crochet or double crochet.
- Use increases and decreases to form the points and dips of the chevron.
- Follow the same increase-decrease rhythm across the row.
Step 3: Continue the pattern
- Repeat the zigzag rows.
- Change colors every few rows if you want a bold striped effect.
- Keep the peaks and valleys evenly spaced.
Step 4: Add width
- Work enough rows until the bracelet reaches the width you want.
- A few rows may be enough for a narrow bracelet.
- Keep the tension even so the points stay crisp.
Step 5: Finish the bracelet
- Add a button loop or clasp.
- Secure all edges and weave in ends.
- Smooth the bracelet flat so the chevrons are easy to see.
Finishing tips
- Bright colors make the chevron design stand out.
- Keep the bracelet narrow for a delicate everyday look.
- Use cotton yarn if you want a firmer shape.
Style ideas
Try bold blue and white, rainbow shades, or soft ombré yarn for a trendy finish.
Conclusion
Crochet bracelets are such satisfying projects because they are fast, stylish, and easy to customize. The five patterns above each offer a different look, from the softness of shell stitches to the boho feel of micro florals, the simplicity of scallops, the practicality of a wrap style, and the boldness of chevrons. They are all small enough to make in a short amount of time, yet thoughtful enough to give as gifts or wear every day.
A bracelet is one of the easiest ways to turn leftover yarn into something beautiful. With just a few stitches, a small button, and a bit of creativity, you can create an accessory that feels personal and handmade. These patterns can also be adjusted in size, color, and texture, which makes them even more versatile.