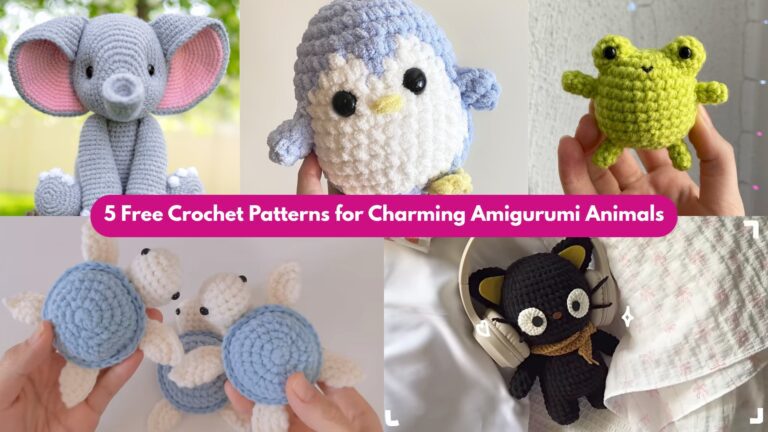
Handmade amigurumi animals are warm, personal gifts that become keepsakes. They’re small enough to finish in an afternoon or two, yet detailed enough to feel special — perfect for birthdays, baby showers (with safety adjustments), or market stalls. Below you’ll find five complete amigurumi animal patterns with clear skill level, finished size, materials, stitch lists, step-by-step construction (head, body, limbs, ears/tails, assembly), stuffing & safety notes, finishing tips, and simple variations so readers can personalize every toy.
Before you start: amigurumi works best with tight stitches so stuffing doesn’t show. Use a hook 0.5–1.0 mm smaller than the yarn label recommends if your fabric looks loose. For toys for very young children, do not use safety eyes or glued pieces — embroider faces instead.
Quick shared notes (applies to all patterns)
- Terms: US crochet abbreviations used throughout (MR = magic ring, ch, sc, inc = 2 sc in same st, dec = sc2tog, sl st, st(s), BLO/FLO = back/front loop only).
- Work: Unless noted otherwise, work in continuous rounds (spiral) to avoid visible seams. Use a stitch marker to mark round starts.
- Stuffing: polyester fiberfill is washable and safe; add small amounts gradually and push stuffing into limbs with a chopstick or stuffing tool.
- Safety: For children under 3, embroider eyes and small features; do not attach buttons/beads. Sew on sewn-on parts with multiple passes and hide knots inside stuffing.
- Finishing: Weave tails inside and make several passes; knot then hide the tail. Light blocking is optional for shaping.
- Sizing: Gauge varies; finished sizes below are approximate for DK yarn with hooks indicated. Adjust hook/yarn to change size.
Abbreviations (US)
- MR — magic ring
- ch — chain
- sc — single crochet
- hdc — half double crochet
- dc — double crochet
- inc — 2 sc in same st
- dec — sc2tog (single crochet two together)
- sl st — slip stitch
- st(s) — stitch(es)
- BLO / FLO — back loop only / front loop only
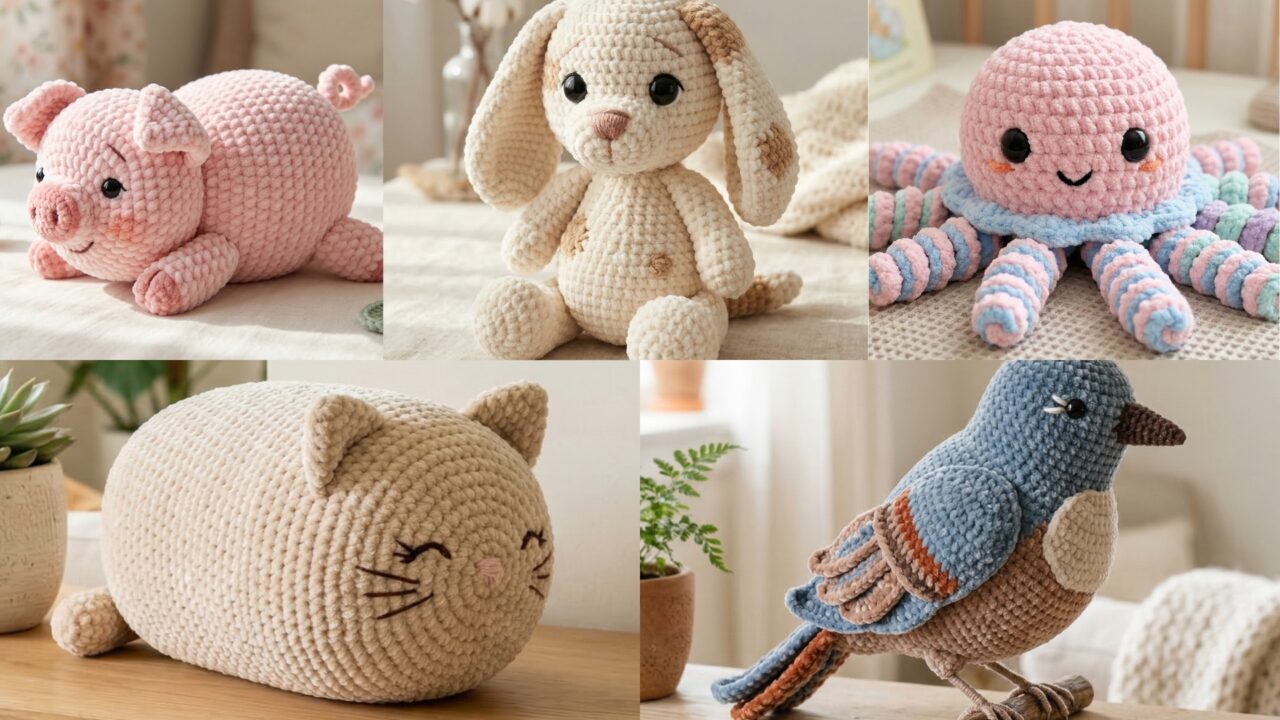
1. Crochet Cute Pig Amigurumi Pattern
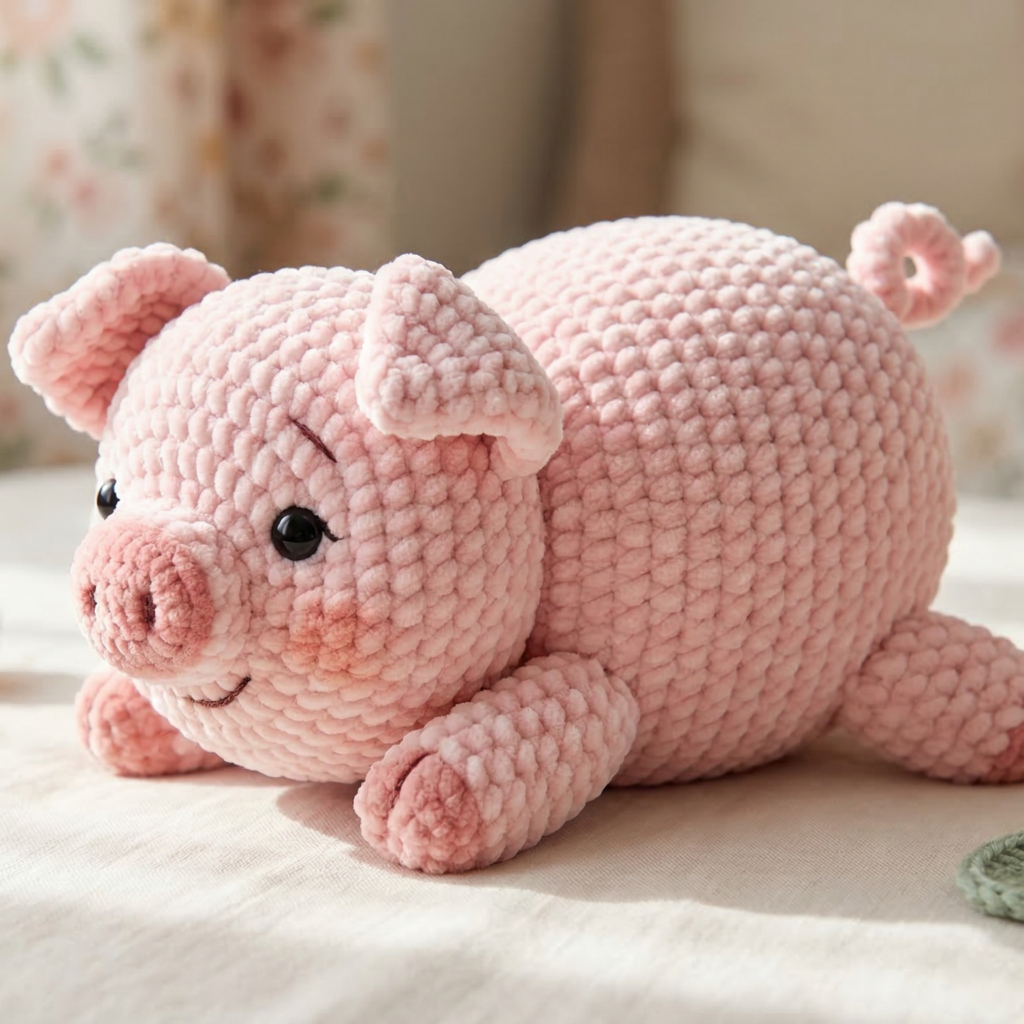
Skill level: Beginner–Intermediate
Finished size: ~7–8 inches (18–20 cm) tall (using DK yarn + 3.5 mm hook).
Why make it: Classic, round, quick to personalize — little piggies are adorable as nursery gifts.
Materials
- DK cotton or cotton-blend yarn (main pink) — ~150–200 yds
- Small contrast yarn for snout and hooves (light pink / darker pink) — small amounts
- Hook: 3.5 mm (or size for tight stitches)
- Polyester stuffing, tapestry needle, stitch marker
- Safety eyes 8 mm (or embroider eyes for baby-safe version)
- Optional small blush with pastel chalk
Stitches used
MR, sc, inc, dec, sl st, ch
Head (worked in continuous rounds)
- MR, ch1, 6 sc into MR. (6)
- inc ×6 → 12
- (sc, inc) ×6 → 18
- (2 sc, inc) ×6 → 24
- (3 sc, inc) ×6 → 30
- sc around 4 rounds (30) — insert safety eyes between rounds 9–10 spaced about 6–8 sts apart.
- (3 sc, dec) ×6 → 24
- (2 sc, dec) ×6 → 18
- (sc, dec) ×6 → 12 — stuff head firmly.
- dec ×6 → 6. Fasten off leaving tail; close hole with tapestry needle and weave in.
Snout (make 1)
- MR, ch1, 6 sc into MR. Pull tight. (6)
- inc ×6 → 12
- sc around 1 round (12). Fasten off leaving tail for sewing. Embroider two nostrils using short satin stitches in darker pink before sewing to head.
Attach snout centered between eyes; sew securely with waste yarn tucked inside.
Body (worked in continuous rounds)
- MR, ch1, 6 sc into MR. (6)
- inc ×6 → 12
- (sc, inc) ×6 → 18
- (2 sc, inc) ×6 → 24
- (3 sc, inc) ×6 → 30
- sc around 6–8 rounds (30) — this makes the torso height.
- (3 sc, dec) ×6 → 24
- (2 sc, dec) ×6 → 18 — stuff firmly.
- (sc, dec) ×6 → 12
- dec ×6 → 6. Close and fasten off; weave tail inside.
Sew body to head: position head on top of body and whipstitch through head last rounds and body opening, pulling tight for a neat join.
Ears (make 2)
- ch 5. Row 1: sc in 2nd ch from hook and across (4 sc); turn.
- Row 2: ch1, sc2tog, sc2tog (2 sc) ; turn.
- Row 3: ch1, dec (sc2tog) — fasten off leaving tail. Flatten and sew to head sides.
Legs (make 4 — two front, two back)
- MR, ch1, 6 sc in MR (6)
- sc around 4–6 rounds to length ~1.5–2 in depending on scale. Flatten slightly and sew to body — front legs closer together; rear legs slightly to sides. Stuff lightly.
Tail
Make a short chain of 8–12 ch and slip stitch back along chain to make a spiral corkscrew. Sew to back of body.
Assembly & finishing
- Sew snout, ears, legs, and tail securely. Use small stitches and several passes.
- Embroider mouth with a few short stitches under the snout for a smile.
- Add blush: a tiny dab of pastel chalk on cheeks (optional — not recommended if toy will be washed frequently).
Safety notes
- For baby gifts, embroider eyes and avoid small parts. Reinforce seams heavily.
Variations & gift ideas
- Make piglets in different sizes using sport or fingering yarn and smaller hooks.
- Dress pig with a tiny crochet scarf or a removable bandana for seasonal gifts.
2. Crochet Adorable Puppy Amigurumi Pattern
Skill level: Beginner–Intermediate
Finished size: ~9–10 inches (23–25 cm) sitting height (DK yarn + 3.5 mm).
Why make it: puppies are endlessly customizable (breeds, colors, floppy ears).
Materials
- DK yarn main color (body) + small amounts for patches/inner ears — ~200–250 yds
- Hook: 3.5 mm
- Safety eyes 8–10 mm (or embroidered), stuffing, tapestry needle, stitch marker.
Head (continuous rounds)
- MR, ch1, 6 sc. (6)
- inc ×6 → 12
- (sc, inc) ×6 → 18
- (2 sc, inc) ×6 → 24
- (3 sc, inc) ×6 → 30
- sc around 4 rounds. Insert eyes between rounds 9–10 about 8 sts apart.
- (3 sc, dec) ×6 → 24
- (2 sc, dec) ×6 → 18 — stuff.
- (sc, dec) ×6 → 12
- dec ×6 → 6. Fasten off and close.
Muzzle (make 1)
- MR, ch1, 6 sc in MR. (6)
- inc ×6 → 12
- sc 1–2 rounds. Fasten off leaving tail; sew centered under eyes. Embroider nose (triangle) and mouth.
Body (continuous rounds)
- MR, ch1, 6 sc (6)
- inc ×6 → 12
- (sc, inc) ×6 → 18
- (2 sc, inc) ×6 → 24
- (3 sc, inc) ×6 → 30
- sc around 6–10 rounds for torso length. For a sitting puppy, stuff and then close leaving an opening for joining to head. If you make legs separately, leave top open to sew in. Fasten off.
Legs & Paws (make 4)
- MR, ch1, 6 sc. (6)
- sc around 5–7 rounds (adjust length) then stuff lightly and close flattening to sew into body. For hind legs, make slightly longer and position to make puppy sit.
Ears (make 2)
- Floppy ear: ch 10, sc in 2nd ch and across (9 sc), turn, sc across 3–4 rows then fold and sew base to head for floppy look. For short ears, make a small oval and sew upward.
Tail
- Short tail: MR, 6 sc, sc around 3 rounds, fasten off and sew on.
Assembly & finishing
- Sew head to body (or crochet body as continuation of head if you prefer). Attach legs and ears firmly. Add patch color spots — either surface crochet or small sewn-on appliqués.
Variations
- Make a beagle by adding brown patches and longer ears, or a dalmatian with embroidered spots. Add a tiny crocheted collar with a charm for a gift tag.
3. Crochet Octopus Squish Amigurumi Pattern
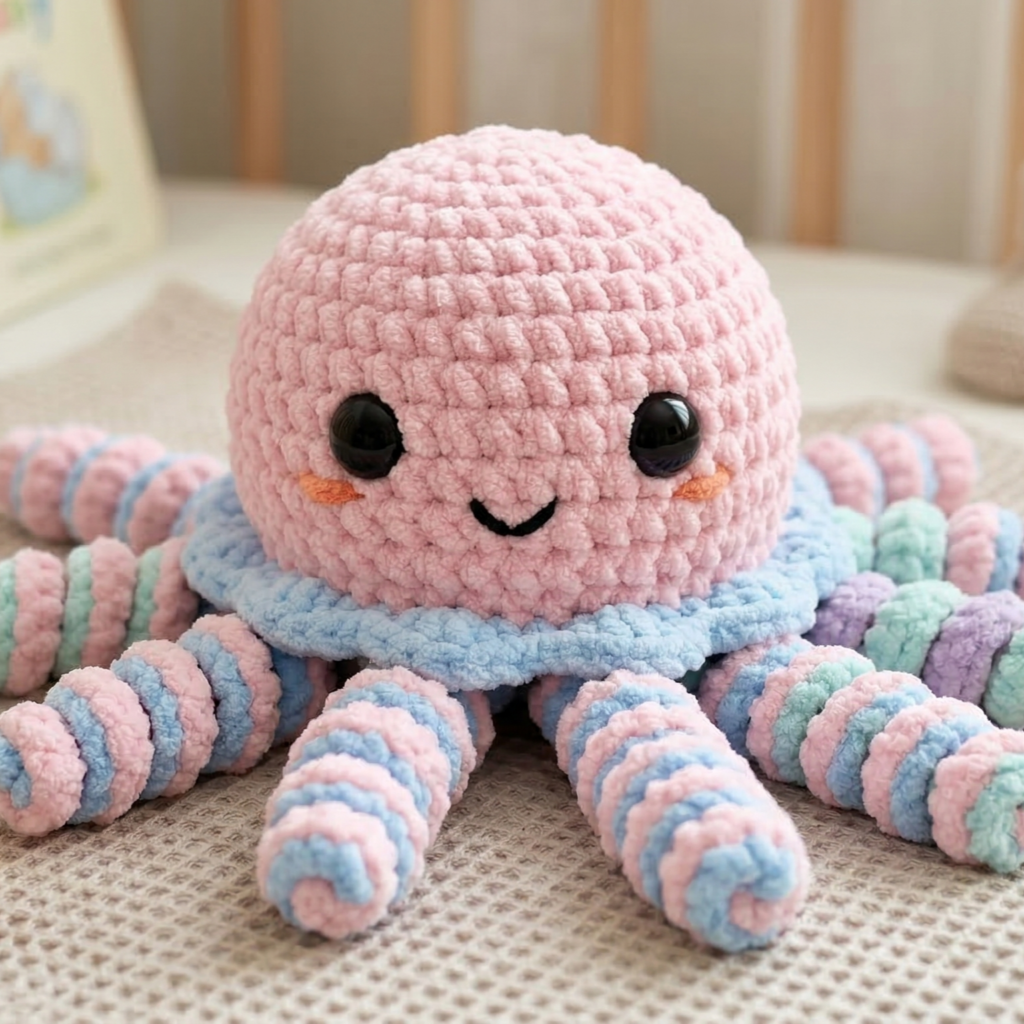
Skill level: Beginner–Intermediate
Finished size: ~6–7 inches (15–18 cm) across body (tentacles length vary) — great for baby-safe options (embroider face).
Why make it: octopuses are tactile and popular for sensory comfort; tentacles are easy to crochet and fun to squish.
Materials
- DK or worsted cotton (worse t gives more squish) — 150–200 yds
- Hook: 3.5–4.0 mm (choose tighter for stuffing not to show)
- Safety eyes 6–8 mm or embroidered eyes, stuffing, tapestry needle
Body (rounded dome)
- MR, ch1, 6 sc. (6)
- inc ×6 → 12
- (sc, inc) ×6 → 18
- (2 sc, inc) ×6 → 24
- (3 sc, inc) ×6 → 30
- sc around 6–8 rounds to form dome height.
- (3 sc, dec) ×6 → 24
- (2 sc, dec) ×6 → 18 — insert a small amount of stuffing.
- (sc, dec) ×6 → 12
- dec ×6 → 6; do not close — leave opening to attach tentacles.
Tentacles (make 8)
Simple curly tentacle (i-cord style):
- Ch 20 (or length desired). Turn.
- Row 1: sc in 2nd ch from hook and across. Turn. Repeat Row 1 for 6–8 rows. Fasten off leaving long tail. Now curl the strip by wrapping around a pencil and steaming OR work a chain stitch curl: ch 30, then 3 dc in each ch across to create a ruffle curl that naturally coils — this is quicker.
Alternative spiral method (quick curl): ch 30 then 3 dc in each ch across; the many increases force curl.
Sew the straight end of each tentacle firmly to the base opening of the body, spacing evenly. Stuff body before closing fully, then finish closing around stitched tentacle bases.
Eyes & face
- Sew safety eyes (or embroider) and a small smiling mouth with yarn/embroidery floss. For baby-safe toy, embroider the eyes with satin stitches and add blush.
Finishing & sensory options
- Add a small bell inside or a knot of soft ribbon for texture (for adult gifts avoid choking hazards). Make tentacles in different colors for sensory contrast.
Variations & care
- Make the octopus in pastel colors for nursery gifts. Machine wash gentle; reshape while damp.
4. Crochet No-Sew Loaf Cat Amigurumi Pattern
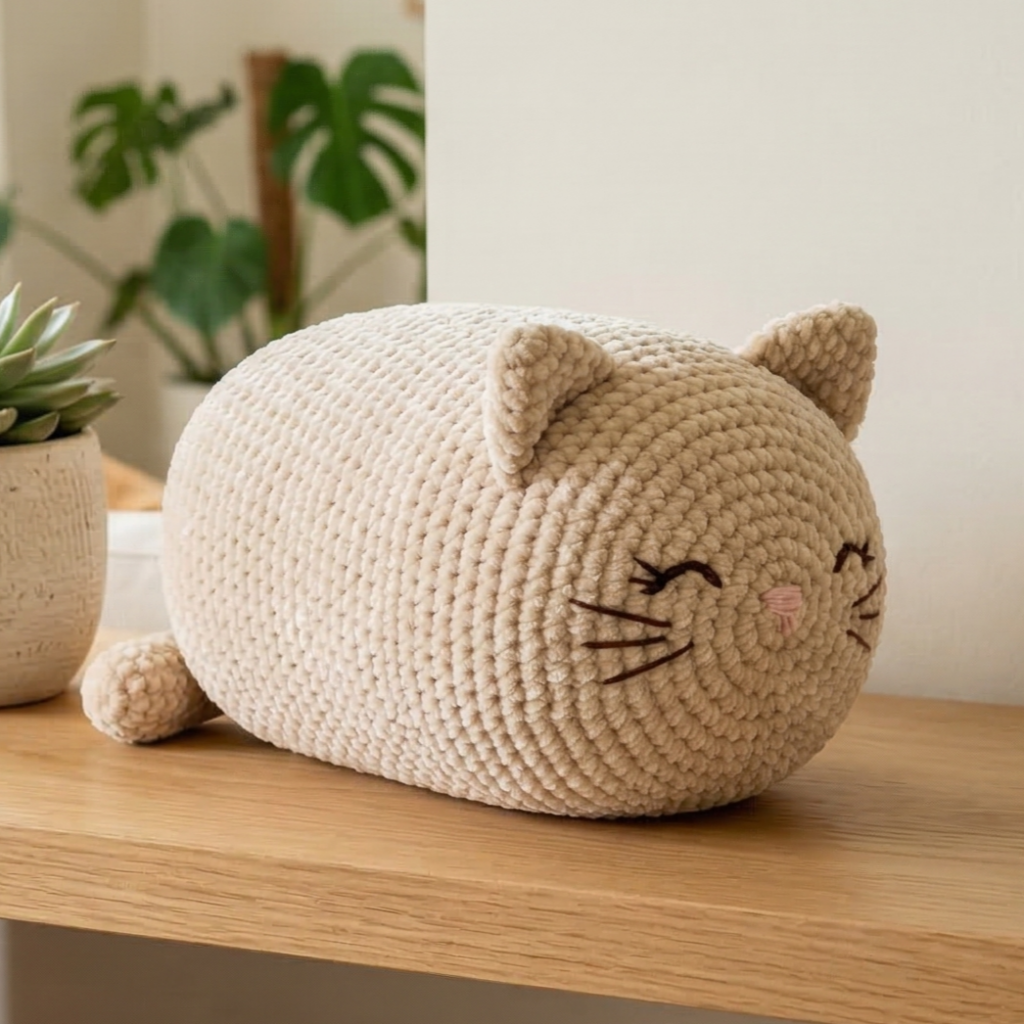
Skill level: Beginner (no sewing required except to close final hole if desired)
Finished size: ~6–7 inches (15–18 cm) loaf shape — a cute pillow-like cat that sits on a shelf.
Why make it: flat-sided shaping uses decreases to make a “loaf” — quick and forgiving; minimal sewing.
Materials
- DK yarn — 150–220 yds depending on size
- Hook: 4.0 mm for slightly looser plush (or 3.5 mm for denser)
- Stuffing, tapestry needle (you’ll need at least small seam for final close), stitch marker, optional felt or embroidered features
Body (loaf shape: worked in oval rounds)
Base (oval)
- Ch 9. Row 1: sc in 2nd ch from hook and across (8 sc), turn and work along other side of chain: sc in each of the remaining 8 sts — total 16 sc around forming oval. Join to work in rounds (or continue in continuous rounds).
- Round 2: inc in first st, sc in next 7, inc in next 2 sts (short end), sc in next 7, inc in each of next 2 (other short end) — maintain oval increases until base reaches roughly 4–5″ long depending on desired loaf width.
Sides
3. Work even rounds sc around until height of loaf is ~3–4″ (depending on size desired) — this will be the cat’s loaf body tube. No seam needed if working continuous rounds.
Taper for top
4. Begin decreasing rows to create a rounded top: do one or two rounds with occasional decs evenly spaced until the top is small enough to close; stuff firmly and use a ladder stitch/closing with tapestry needle to finish. This step can require a few hand stitches but is minimal.
Headless, no-sew detail
- Because it’s a loaf, you don’t need to sew separate head/limbs — features are embroidery and small appliqués glued or stitched on.
Ears (make 2 small triangle tabs)
- ch4, sc in 2nd ch from hook and across (3 sc); turn. Row 2: sc2tog, sc (2 sts). Row 3: sc2tog (1 st). Fasten off leaving tail. Fold base and sew to top of loaf for ears — this requires small sewing to attach but is minimal.
Tail (optional)
- Make short tube: MR, 6 sc; sc around 4 rounds, taper by decreasing last rounds and sew to side.
Face (no-sew look)
- Embroider eyes, nose and whiskers using yarn or embroidery floss. Tiny felt patches for eyes/nose can be glued on with fabric glue (not recommended for toys for small children).
Assembly & finishing
- Close any final hole with a few whipstitches; stitch ears and tail on. Use safety eyes? For small children, embroider features instead.
Variations
- Make “sleepy loaf” by embroidering closed eyes; for kitties with patterns, surface crochet stripes.
5. Crochet Realistic Bird Amigurumi Pattern
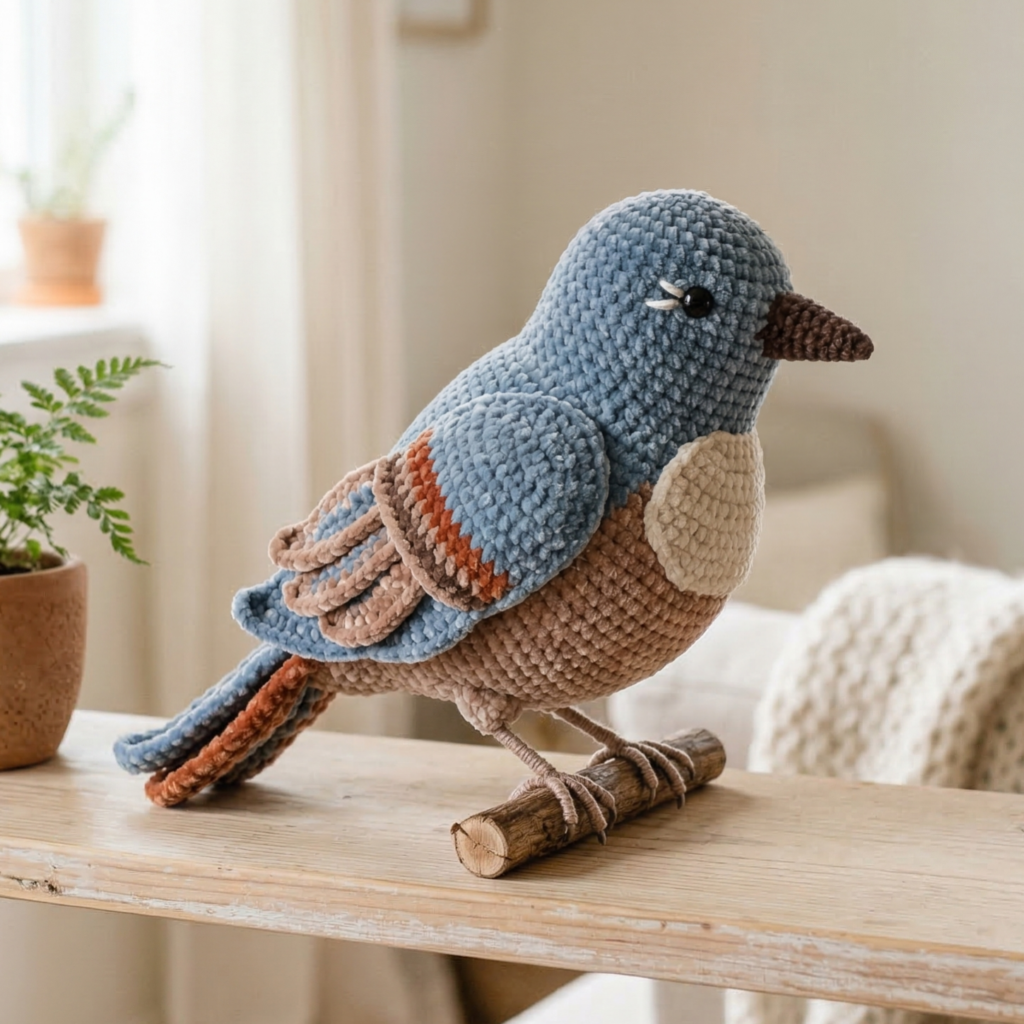
Skill level: Intermediate–Advanced (shaping for beak, wings, tail, and slight colorwork)
Finished size: ~8–10 inches (20–25 cm) from beak to tail for a medium songbird (DK yarn + 3.5 mm hook)
Why make it: A realistic bird is a beautiful heirloom gift; variations lend to many species.
Materials
- DK yarn in main body color + contrast for belly/wing accents + small bits for beak and feet — total ~200–300 yds depending on size
- Hook 3.5 mm (smaller for tighter detail), stuffing, tapestry needle, optional wire for leg shaping (wrap wire in yarn)
- Safety eyes 5–6 mm or embroidered
Body & head (worked continuous but shaped)
Head
- MR, ch1, 6 sc (6)
- inc ×6 → 12
- (sc, inc) ×6 → 18
- (2 sc, inc) ×6 → 24
- sc around 3–4 rounds — place eyes between rounds ~8–9.
Beak (make 1)
- With beak color, ch5. Row 1: sc in 2nd ch and across (4 sc). Row 2: sc across (4 sc). Row 3: sc2tog, sc2tog to taper (2 sc). Stuff lightly, fold and sew base into head front between eyes. Use short secure stitches.
Neck & body
6. From head bottom, continue in main color: sc around 24 sts for connecting neck and begin increase rounds to form chest: add increases evenly to reach body width (e.g., increase to 36–40 sts). Work even for torso length (6–10 rounds), then dec toward tail to shape posterior.
Wings (make 2)
- Ch 12 (or length to produce wing), join to work in rows: Row 1: sc across, 10–12 rows. For feather details, in last row work shells or picots along outer edge to mimic feathers. Slightly shape by decreasing inner edge. Sew onto sides overlapping slightly with body.
Tail
- Make 3–5 feather strips: ch10, sc across 6–8 rows depending on length; for pointed feathers, taper ends by decreasing. Sew feathers together and secure to back end.
Feet (make 2)
- For realistic feet, twist 3 short lengths of craft wire together and wrap with yarn, leaving ends to stitch to belly inside. Option: crochet tiny tubular legs over the wire: ch6, sc in back loops to form a tube, slip wire inside and stitch base to underside.
Colorwork & markings
- Use stranded/surface crochet or tiny appliqués for wing bars, breast markings, or eye rings. Surface slip stitch works well for thin stripes.
Assembly & finishing
- Sew wings and tail securely; use ladder stitch for hidden joins. Add fine embroidery for eyes if not using safety eyes. Pose tail and wings with a little fiberfill under base to set the posture.
Variations
- Make a robin (rusty breast), bluebird (blue back, orange chest), or a tiny hummingbird in bright greens — scale hook/yarn down for smaller ornament-sized birds.
Conclusion
These five amigurumi animal patterns — Cute Pig, Adorable Puppy, Octopus Squish, No-Sew Loaf Cat, and Realistic Bird — cover a range of styles and skill levels so you can make a fast plushie or a more detailed heirloom. A few finishing and gifting tips:
- Safety first: For toys for babies and toddlers, embroider faces and sew seams with multiple passes. Avoid small detachable parts.
- Wash & care: Most cotton/acrylic amigurumi are hand-wash or machine-gentle (mesh bag) and air-dry. Check embellishments (glue, felt) before washing.
- Packaging: Present as a gift set — toy + little blanket or a tiny crocheted hat. Add care tag with fiber content and washing instructions.
- Personalization: Embroider a name, add a tiny scarf, or include a removable accessory (hat/ bow) to make the toy unique.
- Scale sets: Make a family of animals in three sizes for a charming gift collection.