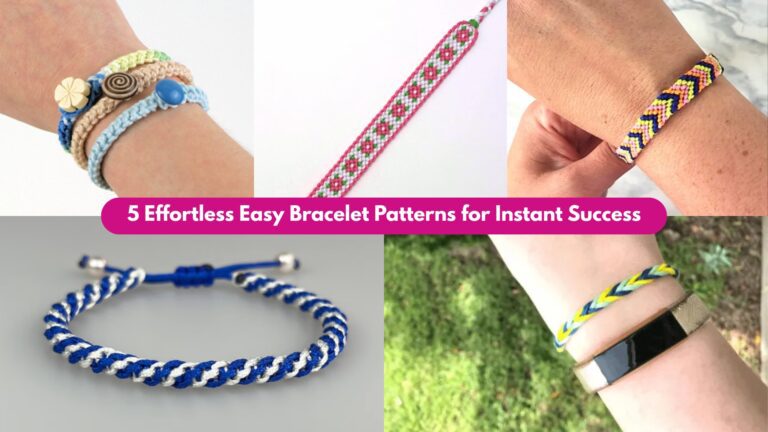
Yes, you need another bracelet pattern. No, this one won’t fall apart after one wear. Below are five full, usable bracelet blueprints — materials, bead counts, tools, realistic step-by-step instructions, finishing, and variations so you can stop guessing and start making. I kept the math tidy and the instructions practical. Swatch once. Adjust tension. Don’t treat thread like spaghetti.
Quick common notes (read this — it saves time)
- Finished length used in examples: 7″ (standard women’s bracelet). Adjust by ±¼” if you want it snugger or looser.
- Bead sizing baseline (for counting):
- Miyuki Delica 11/0 ≈ 1.6 mm wide → ~15.875 beads per inch (≈16). For 7″ → 15.875 × 7 = 111.125 → round to 112 beads across length.
- Tila bead ≈ 5.0 mm wide → ~5.08 beads per inch. For 7″ → 5.08 × 7 = 35.56 → round to 36 Tila beads.
- Swarovski/Bicone 4 mm → ~6.35 beads per inch → 6.35 × 7 = 44.45 → round to 44 bicones.
- Thread: FireLine (6–8 lb) or Nymo/KO doubled for peyote/loom work. Use 1–2.5 m of thread per bracelet depending on technique (I give per-pattern recommendations). Better to have extra than run out.
- Needles: size 10–12 beading needles (long, thin) for Delicas.
- Tools: flat bead mat, ruler (mm), thread conditioner (optional), small pliers for findings, strong jewelry glue (optional, tiny dot under knots).
- Finishing: weave pass the tail through 20–30 beads and make half-hitch knots; a tiny dot of glue inside hidden area is OK for extra insurance.
- Tension: keep it firm — beaded bracelets act like fabrics. Too loose = floppy; too tight = brittle. Aim for fabric that curves without kinking.
1. Metallic Mint Beaded Bracelet with Tila Pattern
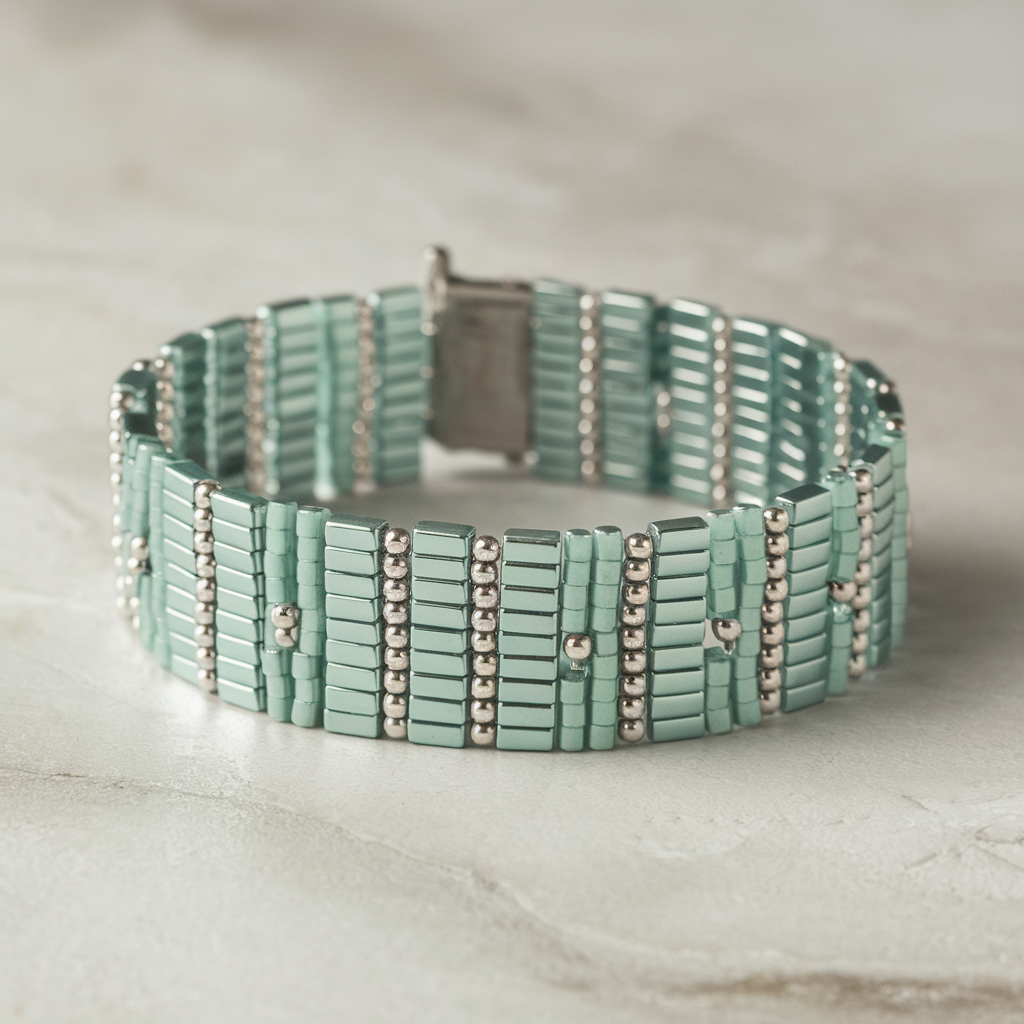
Clean, modern, and surprisingly fast. Tila beads give an architectural look — rectangular tiles with neat negative space — paired with tiny Delicas to hold everything tight.
Skill level: Confident Beginner
Finished size: 7″ (adjustable)
Materials (per bracelet)
- Miyuki Tila beads (5 × 5 mm): 36 (approx — see note above).
- Miyuki Delica 11/0 (accent / spacer): ~112 (approx) plus extras for edges — plan ~200 Delicas total.
- FireLine 6 lb or Nymo doubled, ~1.5–2.0 m.
- 1 pair crimp ends or a small metal tube slide finish OR sew-on button clasp + 1 small button; jump rings + 1 clasp.
- Size 12 beading needle, bead mat, ruler.
Why it works
Tila beads form the visual “tiles”; Delicas make a tidy flat band and lock Tila in place. The result is flat, modern, and comfortable.
Design choices
Make a flat band 3 rows of Delicas high with a central row of Tila tiles offset by Delica spacers. That gives a sleek width of roughly 3×1.6mm ≈ 4.8 mm plus tile height — a slim, elegant bracelet.
Bead math (quick):
- Tila across length ≈ 36 tiles.
- Delica spacer rows length ≈ 112 beads (7″ × ~16 beads/inch). Multiply by rows needed (e.g., 3 rows + extra for edges) → plan ~200 Delicas.
Step-by-step (ladder + stitch)
- Prepare thread: Cut ~1.8 m FireLine. Thread needle and condition.
- Foundation ladder: Pick up alternating Delicas and Tila to create a ladder base: [D, T, D, T, D] until you reach 36 Tila. End with an extra Delica to stabilize. This step establishes the length. Don’t join into a loop yet — work flat.
- Weave structural rows: Use one-needle even-count peyote or two-needle ladder-to-peyote method to add Delica rows between and around Tilas so each Tila sits snug between Delicas. Work across the band building 3–4 Delica rows that sandwich each Tila row. Aim for symmetrical edges. Keep tension even so the tiles align perfectly.
- If a Tila has two holes, use the holes to anchor Delica stitches; if single-hole Tilas, place Delica columns above and below as spacers.
- Edge finishing: Add an edge row of Delicas (two rows if you prefer bulk) to create a clean border.
- Measure: Try bracelet around wrist before finishing. If short, add an extra Tila or adjust by adding Delica spacer rounds.
- Attach findings: Sew on crimp tubes or sew on a button loop (make a 6–8 Delica loop) and attach a small button on the opposite end. If using crimp ends, flatten crimp tube carefully and cover with a ribbon crimp or bead cap for neatness. Use jump rings and lobster clasp as needed.
- Secure tails: Weave both tails back through 25–30 beads in different directions, make two half-hitches around thread, trim and hide tail inside beadwork. Add a small dot of glue under a hidden bead knot if desired.
Finishing & care
- Delica/Tila bracelets are flat: store flat to avoid kinks. Spot clean; avoid heavy solvents. If you used metallic finish Tila, don’t soak — finishes can wear over time.
Variations
- Alternate matte and metallic Tila for a two-tone block effect.
- Make double-width by working two adjacent tile rows for a cuff look.
2. Crystal Beaded Bracelet Pattern
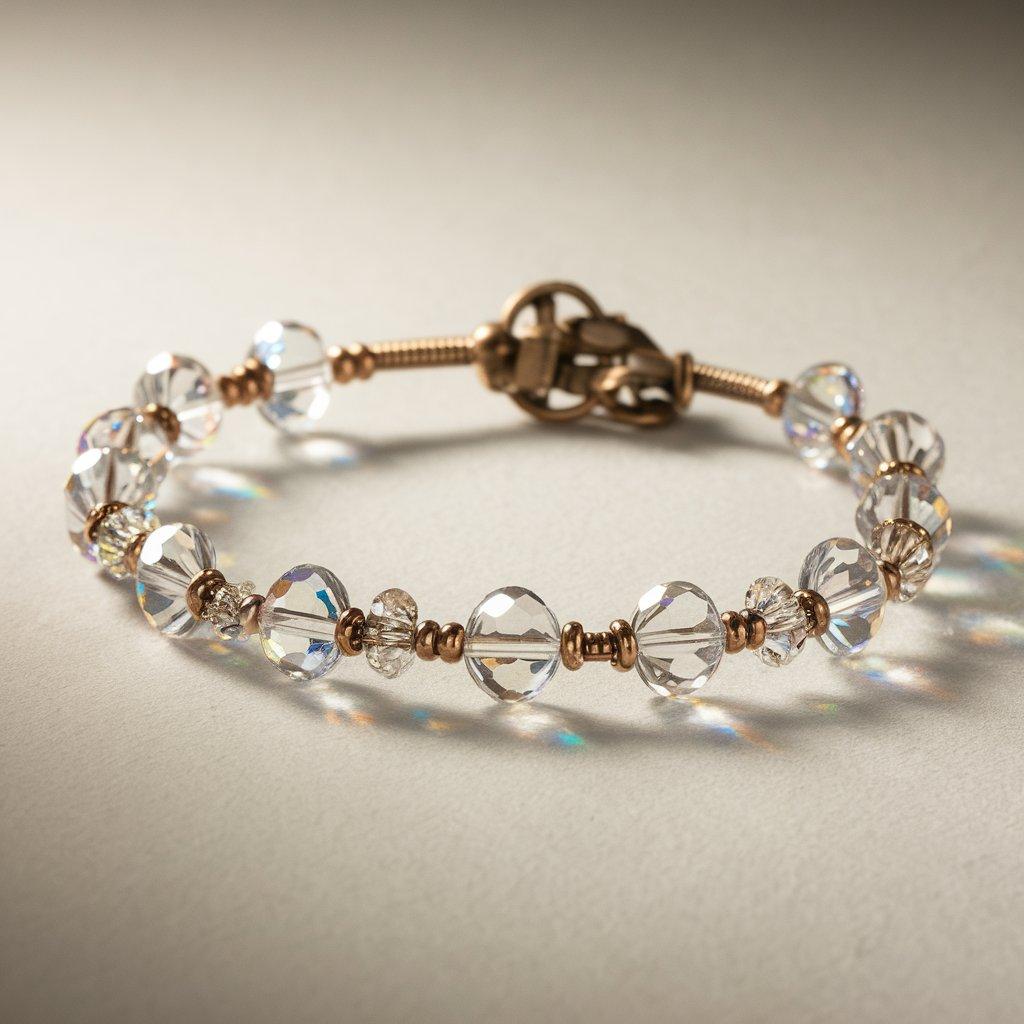
Simple stringing, high glam: Swarovski bicones, rondelles, and tiny seed bead highlights. Fast for gift production — no loom, no peyote.
Skill level: Beginner
Finished size: 7″
Materials (per bracelet)
- Swarovski bicone 4 mm (main): ~44 (approx — see math above).
- 11/0 seed beads (Toho/Miyuki) as spacers: ~120.
- Accent rondelle crystals or small metal spacers: 10–12.
- Beading wire (0.010″–0.012″ flexible wire like Soft Flex), crimp beads (2–4), crimp covers (optional), clasp + jump rings.
- Wire cutters, crimping pliers, ruler.
Why it works
Crystal bracelets are all about rhythm: crystal, spacer, bead, repeat. They look expensive and are stupidly simple.
Bead math (quick)
- 4 mm crystals per inch ~6.35 → 6.35 × 7 ≈ 44 crystals. Use 44 and place seed beads between to widen design.
Step-by-step (stringing)
- Cut wire: Allow ~8–10″ of beading wire for a 7″ bracelet to allow for crimping.
- Crimp & start: Thread crimp bead and one half of clasp onto wire, loop wire back through crimp, pull tight to leave 1/8″ guard, crimp the bead firmly, tuck crimp into cover if using. Trim tail.
- String pattern: Sequence idea — seed ×2, crystal ×1, seed ×2, rondelle/metal ×1 — repeat until length reaches about 6.75″. Insert clasp end and test. If too long, clip a small repeat. If too short, add beads.
- Finish: Add crimp bead, loop wire through clasp, crimp, hide crimp. Tidy with crimp cover.
- Secure: Tug test the clasp and crimp; add a second crimp for insurance.
Finishing & care
- Crystals tolerate gentle cleaning. Avoid perfumes and lotions — wire and crimps can corrode with time if exposed to salty sweat; rinse and dry after heavy perspiration.
Variations
- Make a triple-strand clustered bracelet: three wires with slightly different crystal sizes braided into a single clasp for major glam.
3. Snake Chenille Beaded Bracelet Pattern

A plush, tactile rope that reads “snake” in pattern and “chenille” in feel. This is a tubular bead crochet technique using a soft chenille yarn wrapped core or fuzzy thread plus beadwork for texture.
Skill level: Intermediate (bead crochet or tubular peyote comfort required)
Finished size: 7″ (circumference as rolled rope)
Materials (per bracelet)
- Delica 11/0 (or 8/0 for chunkier rope): ~1300 Delicas (approx: see math below — tubular ropes use lots of beads).
- Core yarn: thin chenille or soft floss (for plush center) — 1 small skein or scrap.
- Crochet hook 0.75–1.5 mm (small steel) or bead crochet hook; size depends on bead and yarn.
- FireLine (~1.5–2.5 m per bracelet) OR use pre-strung bead crochet technique (string beads onto thread first).
- End caps or sewn ends + clasp.
Bead math (explained)
This is where bead counts get big. If you crochet a tubular rope with circumference ≈ 12 beads around (a comfortable round), you need rows = length in beads ≈ 112 (for 7″ at ~16 beads/inch). So total beads ≈ 112 rows × 12 beads/row = 1,344 beads. If you use 8/0 round beads (bigger), counts drop, but still many beads. Plan accordingly.
Why it works
The chenille core gives the rope a soft, pillowy feel while the bead surface provides pattern and shine. The “snake” look comes from color changes or spiral patterns in the beadwork.
Step-by-step (pre-string + bead crochet)
Option A — Pre-stringed bead crochet (recommended):
- Pre-string beads: You’ll need ~1,350 beads. String them in the repeating color order for your snake pattern (e.g., 3 black, 6 metallic mint, 3 black — repeat). This saves time while crocheting.
- Start crochet loop: Make a small adjustable slip knot on the chenille core and hold a short tail. Use a small hook to make the first few single crochet stitches around the core, sliding pre-strung beads into place when needed so they sit on the outside of the rope. Typical method: slide one bead up to hook, make sc through core and pull the bead into place, continue.
- Work tubular single crochet: Continue around the core, placing beads according to color order. Crocheting tight but not so tight that the chenille compresses too much. Maintain consistent tension.
- Curve shaping / snake head (optional): To make a tapered head, decrease beads per round gradually; stuff tiny bit of polyester into head for shape. For a tail, taper similarly.
- Finish: Thread tail through end, weave into beadwork, and secure with multiple stitches. Add end caps or sew cap with felt inside for a neat finish; attach clasp to end cap.
Option B — Tubular peyote rope (off-loom, if you hate crochet):
Use tubular peyote stitch following counts: pick an even circumference (12, 14, 16) and work until you reach length. Same bead count math applies.
Finishing & care
- These ropes are heavy in bead count — handle carefully. Chenille core may pill over time; keep dry and spot-clean. If end caps are metal, ensure they’re secure and soldered or glued.
Variations
- Make spiral snake by alternating 2–3 colors in diagonal repeat.
- Add tiny beaded eyes near the head (seed beads or 2mm pearls).
4. Braided Beaded Bracelet Pattern
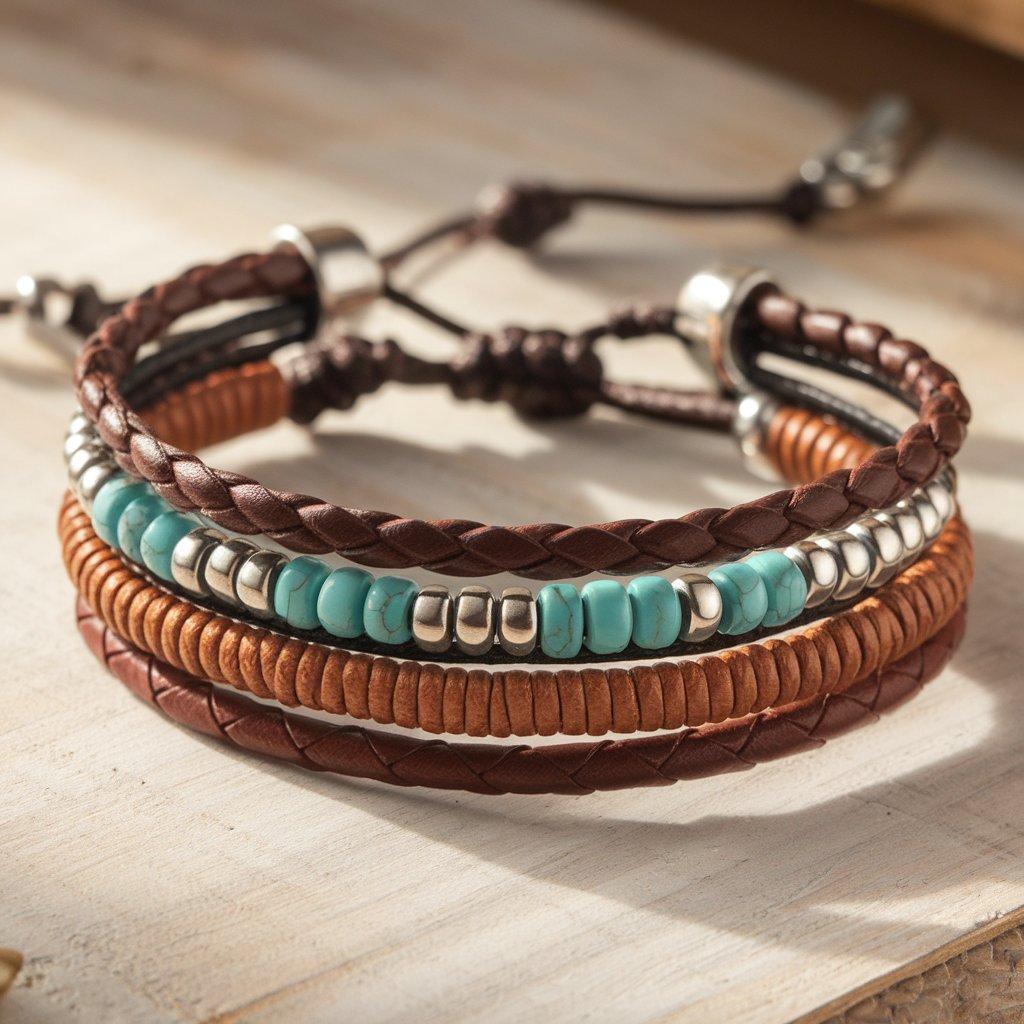
Handmade, tactile, and looks way more complicated than it is. It uses three leather or cord strands braided with beads threaded onto strands for texture.
Skill level: Confident Beginner
Finished size: 7″ (including clasp)
Materials (per bracelet)
- 3 cords: leather 1–1.5 mm or waxed cord, each ~12–16″ to allow braiding and attaching.
- Beads: 4 mm faceted rondelles or seed beads: ~40–60 depending on spacing.
- Ribbon crimps or glued/folded metal ends + clasp.
- Optional: small spacer beads, charms.
Why it works
This mixes textile and bead techniques — simple but looks layered and boho-chic. Perfect for men or women depending on bead choice.
Step-by-step (basic 3-strand braid with beads)
- Measure & prep cords: Cut three cords at ~12–16″ each (longer if you want more braid slack). Fold them in half and attach to a clasp ring with a Lark’s Head knot or use a folded crimp. This yields four working ends; you’ll braid with three strands (use only three after securing ends).
- Thread beads on individual strands: Decide bead placement intervals (e.g., every ¼” or every ½”). Pre-thread beads on each strand where you plan them to sit. Use a small awl if bead holes are tight.
- Start braiding: With beads on strands, begin a three-strand braid (left over center, right over center, etc.). When a bead reaches the braid area, slide it into the braid so it sits exposed. The bead will lock into place by subsequent crossings. Continue braiding until desired length.
- Finish: Secure ends into cord clamps/crimp ends or fold and stitch ends into a glued cap; attach jump rings and clasp.
- Trim & secure: Add a drop of glue inside clamp if using; cut flush. Tidy any frayed cord ends.
Finishing & care
- Leather tolerates occasional moisture but avoid soaking. Waxed cord ages nicely. For longevity, inspect clamps periodically.
Variations
- Add a central focal bead or charm before braiding for a centerpiece.
- Use 4-strand or 8-strand kumihimo braids for more complex textures.
5. Square Stitch Chevron Beaded Bracelet Pattern
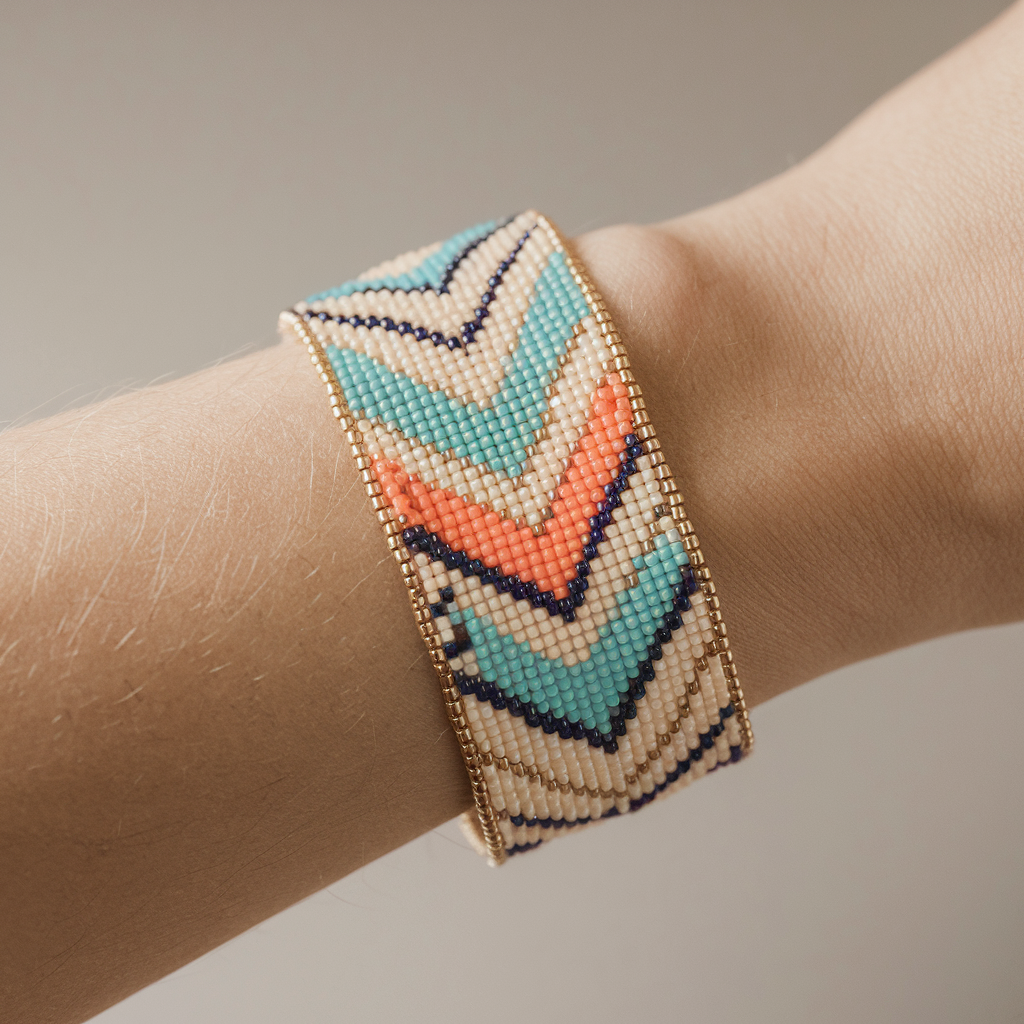
A guaranteed crowd-pleaser. Make it on a loom or off-loom (square stitch). Chevron is a forgiving repeat and reads great on any wrist.
Skill level: Beginner → Confident (depending on finish)
Finished size: 7″ × width variable (I’ll show a 10-bead wide chevron example for narrow cuff)
Materials (per bracelet)
- Miyuki Delica 11/0 in 5 colors (A–E): plan ~112 beads per color distributed but quantity depends on pattern — safe plan is ~600 Delicas total for a 7″ band in multi-color.
- Bead loom (optional) or size 12 needle + FireLine.
- Clasp: tube clasp, fold-over, or button loop.
Why it works
The chevron is timeless. Square stitch or loom gives crisp rows and a neat, even fabric that shows pattern sharply.
Sample chevron chart (10 beads wide — narrow cuff)
I’ll give a simple V chevron that repeats across length. Width = 10 beads (odd or even widths both fine). Use colors A (main), B (accent chevron peak), C (secondary), D/E (edges).
A textual mini-chart for one chevron repeat across 10 columns × 10 rows (you can tile this down lengthwise):
Row 1 (top edge): A A A B A A A A A A
Row 2: A A B B B A A A A A
Row 3: A B B B B B A A A A
Row 4: B B B B B B B A A A
Row 5: A B B B B B A A A A
Row 6: A A B B B A A A A A
Row 7: A A A B A A A A A A
Rows 8–10: repeat/mirror for symmetry (or continue downward)
(That’s one stylized V. You can draw a clearer chart on graph paper.)
Bead math (quick)
- For 10 beads width × 112 rows ≈ 1,120 beads (close to our 112 beads per row earlier). If each color used equally, distribute accordingly; but chevrons will use more of the main color.
Step-by-step (loom or off-loom square stitch)
Option A — Loom
- Warp the loom to 10 warp threads (or beads across + 1 depending on your loom). Thread the warp tight and consistent.
- Weft with Delicas row-by-row: Follow the color chart. Each row you pick up beads in order onto your needle, lay them across the warps, then pass the needle under each warp thread to seat beads. Repeat for all rows.
- Finish edges: Weave in tail threads, add tidy edge bead row (optional), and remove from loom.
- Attach clasp: Sew both ends into a tube clasp or add tie loop + button.
Option B — Off-loom square stitch (needle & thread)
- String first row of beads in the order of the top row of chart. Slide into place and secure by sewing back through the first beads to stabilize.
- Square stitch downwards: For each new bead you want to add under the bead above, pass needle up through the bead just placed above, string the new bead, pass down through the warp/structure bead below, and repeat. Square stitch emulates loom spacing. Follow chart row-by-row.
- Edge & clasp: Same as loom finish.
Finishing tips
- Make sure the rows are square — if tension pulls too tight, the bracelet narrows; too loose = sloppy.
- Add a beaded border row in metallic for a finished look.
- Attach a tube clasp by sewing warp threads into it tightly; use glue for additional insurance.
Variations
- Scale up to 14–20 beads wide for a bold cuff.
- Use gradient or ombré color transitions instead of solid chevrons.
Final finishing checklist (so the bracelet is wearable, not a puzzle)
- Try on before finalizing — if it’s tight, add a few beads; if floppy, remove a repeat.
- Lock your knots by weaving them through multiple beads and tie micro half-hitches around thread, then tuck and hide. A tiny dot of glue hidden under a bead is fine.
- Use strong findings — cheap crimps and soft end-caps fail; spend 15–20% more on clamps and crimps.
- Keep spare beads (at least 10–20 of each color) in case of repairs.
- Document counts as you work — write down how many beads you used per color and per row. Saves future you from crying into a bead jar.
Care summary
- Beaded bracelets: avoid soaking; nylon/FireLine resists water but finishes and metal findings do not. Wipe with damp cloth.
- Chenille + bead crochet rope: spot clean only; avoid heavy moisture.
- Crystal stringing: rinse salt/sweat off and dry to prevent corrosion.
Conclusion
You now have five fully usable beaded bracelet patterns: architectural Tila + Delica, simple Swarovski sparkle, plush Snake-Chenille rope, tactile braided bead cord, and a pixel-perfect chevron in square stitch. Each pattern includes realistic bead counts, thread recommendations, and concrete finishing steps — so you can make something that actually lasts. Pick one that matches your patience level (stringing < peyote/tubular crochet), gather the beads, and stop overthinking.