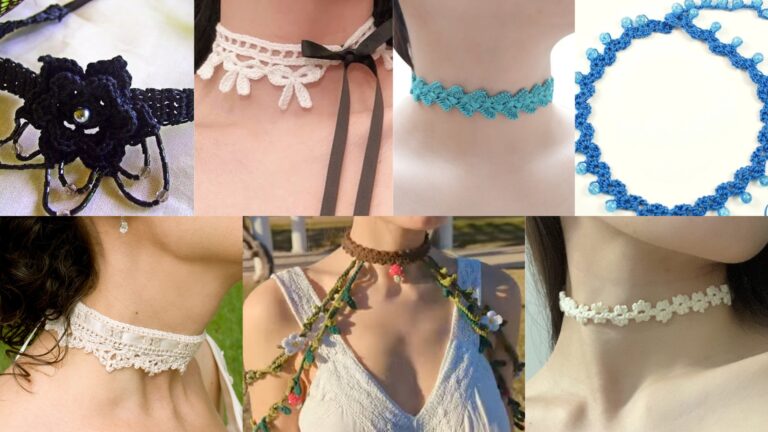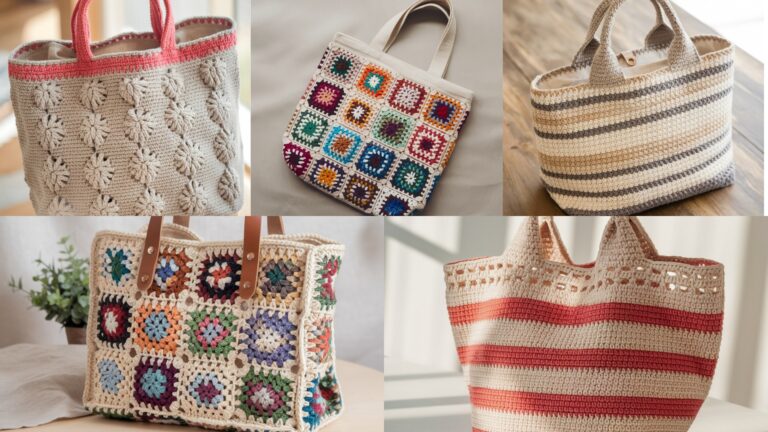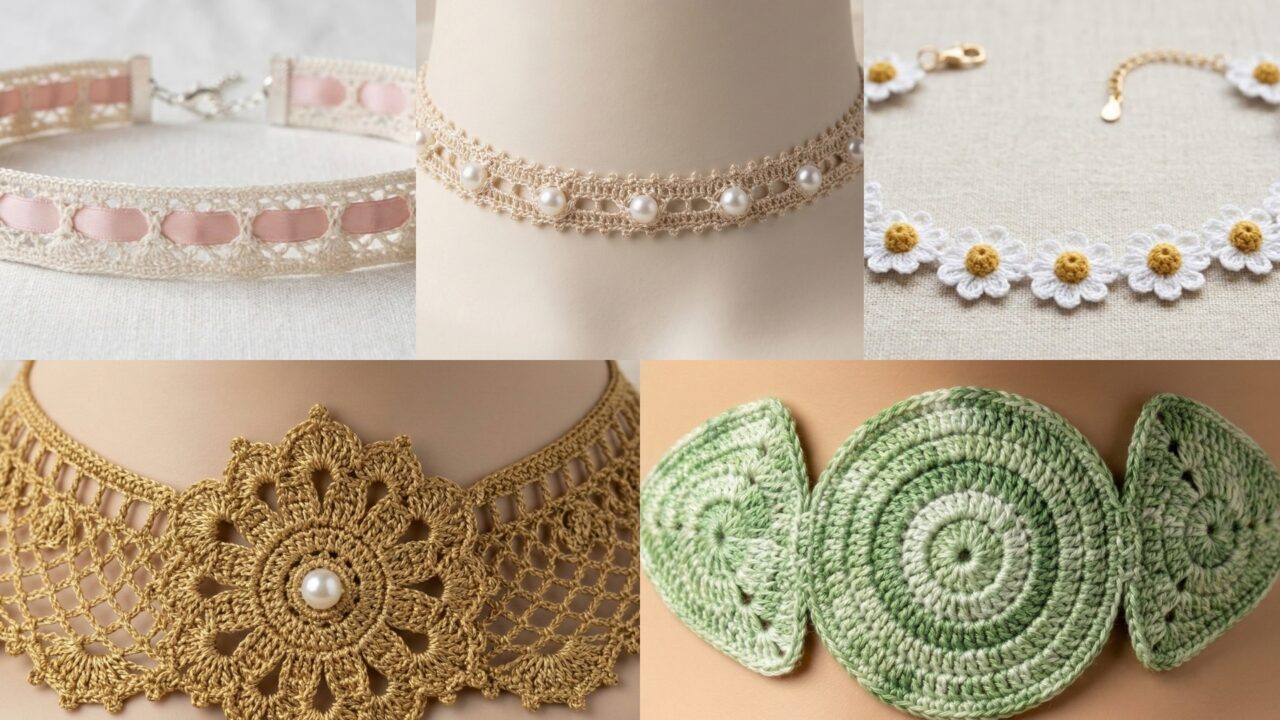
Chokers are tiny canvases for creativity — quick to make, endlessly customizable, and perfect for selling, gifting, or wearing. This post gives you a friendly introduction (materials, sizing, jewelry findings and safety), then five full choker patterns with long step-by-step guides so your readers can make each style start-to-finish: Spiral Choker, Silk & Pearl Choker, Guinevere (medieval lace) Choker, Lacy Ribbon Neck Lace, and Mini Flower Lacy Choker. Each pattern includes materials, stitch notes, construction, finishing and styling ideas.
Quick primer — supplies, measurements, and safety
Yarn / thread choices
- Size 10 crochet thread (cotton) — classic fine look for delicate chokers.
- Fingering or sport weight cotton/silk blend — a soft, slightly thicker choker.
- Silk ribbon or satin cord — great for mixing with crochet lace.
- Beading thread (Nymo, FireLine) — use when stringing many beads; strong and thin.
- Embroidery floss — useful for tiny decorative stitches.
Hooks & tools
- Steel crochet hooks (0.75 mm — 1.75 mm) for thread, or 2.0–3.5 mm for fine yarn.
- Beading needle (if using small seed beads), tapestry needle, jewelry pliers (round-nose, flat-nose), jump rings, lobster clasp or toggle clasp, crimps/clamshell ribbon ends, end caps.
Jewelry findings (quick list)
- Lobster clasp + jump ring — common and secure.
- Toggle clasp — decorative and easy to use.
- Ribbon clamps / end crimps — for ribbon ends.
- Crimp beads — for beaded ends (use with beading wire/thread).
- Breakaway clasp — recommended for chokers for safety (especially for young wearers).
Measurements & fit
- Measure the wearer’s neck snugly (not tight). For a choker, subtract ¼”–½” for snug fit depending on stretch; for a looser neckband subtract less (0 or no subtraction).
- Common choker length range: 12″–15″ (adult). Adjust for child/teen appropriately and prioritize comfort & safety.
Safety note (very important)
- Jewelry worn at the neck can be dangerous for young children. For anyone under 14, prefer breakaway clasps and avoid small loose beads that could detach.
- For chokers intended for everyday wear, use sturdy construction, reinforce attachment points, and test closures.
Abbreviations (US)
- ch = chain
- sl st = slip stitch
- sc = single crochet
- hdc = half double crochet
- dc = double crochet
- tr = treble crochet
- pic = picot (ch3, sl st into base)
- sp = space
- rep = repeat
1. Crochet Spiral Choker Necklace Pattern
(Modern, sculptural rope — add beads to make it sparkle)
Skill level: confident beginner
Finished sample: adult choker ~13½” (adjust)
Materials
- Size 10 crochet thread or fingering cotton (small skein)
- Steel hook ~1.5–2.0 mm (or 2.5–3.0 mm with fine yarn)
- Optional: small seed beads or 3–4 mm crystals (pre-strung)
- Lobster clasp + 2 jump rings (or ribbon clamp ends)
Why this works
Working several different height stitches into each foundation chain stitch creates a spiral rope automatically — no turning, just continuous rounds. The result is a flexible, attractive tube that sits nicely around the neck.
Construction overview
- Measure neck, decide final length (L).
- Chain a foundation slightly longer than L (we’ll seam later); make a base round where each chain turn gets (sc, hdc, dc) in the same stitch to create the spiral effect. Work 3–4 rounds in continuous (no turning) to build rope thickness.
- Add beadwork (optional) by pre-stringing beads on thread or adding on the fly. Finish with end caps / jump rings + clasp.
Step-by-step
A — Decide length
- Measure neck and choose finished choker length L (e.g., 13½”). Add ½” for joining allowance. Make a small test chain to determine your stitches-per-inch (spi) if you want precise counting, or simply crochet until the chain reaches length + allowance.
B — Foundation chain
2. Ch (N) equal to L in inches × spi (or chain until it measures L + ½”). Example: if spi = 6 and L = 13.5″ → 6 × 13.5 ≈ 81 ch. Make a few extra to adjust.
C — Spiral round (Round 1)
3. Work back into each chain as follows (do not turn at end): in each chain stitch, work (sc, hdc, dc) all into the same chain. Continue to end. Slip stitch into first sc to close. You’ll already see a spiral forming because different height stitches stack unevenly.
D — Build body (Rounds 2–4)
4. Repeat Round 1 but this time work the group (sc in the sc of previous round, hdc in the hdc, dc in the dc) — keeping stitch alignment forms a tube. Work 3–6 total rounds depending on desired thickness. If you want a taller spiral, add rounds.
E — Optional bead accent
5. Two bead options:
- Pre-strung beads: before starting, string beads on a length of thread and slip them up as you reach positions on the spiral, securing each bead by crocheting a st around the bead or couching it with a tiny stitch.
- Add beads on the fly: using a beading needle, slip bead onto hook and push into place before making sc in that stitch; or make a picot to enclose the bead.
F — Finish ends & attach hardware
6. When rope is desired thickness, sc two rounds for a clean edge. Flatten end and insert into a small jewelry end cap (or whipstitch end into a few rounds to make a neat end), attach jump ring. Repeat for other end. Add lobster clasp to one ring to finish.
Variations & styling
- Make a double-wrap spiral (longer chain) to wear as a layered choker.
- Use metallic crochet thread or add spaced crystal beads for evening look.
2. Crochet Silk & Pearl Choker Necklace Pattern
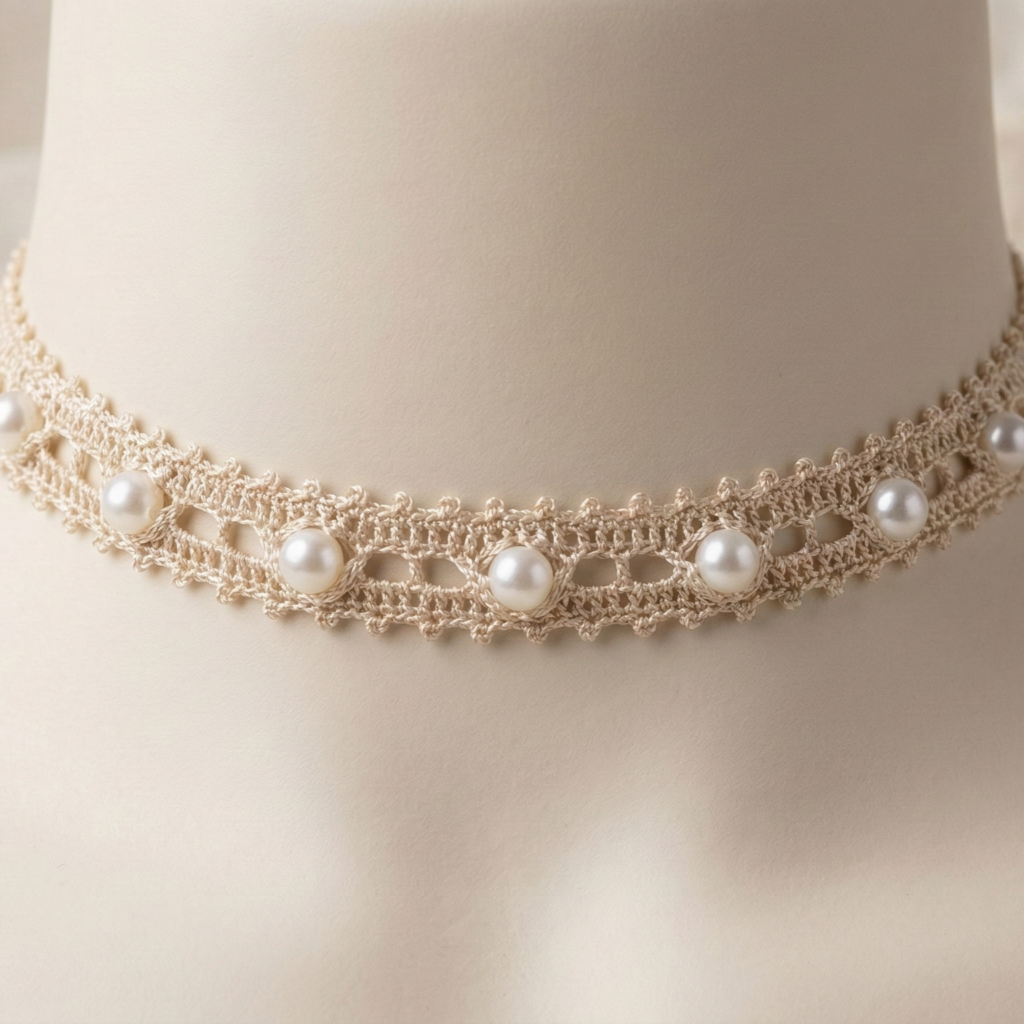
(Elegant, bridal-friendly: tiny crocheted chain threaded with pearls)
Skill level: confident beginner
Finished sample: 13–14″ choker (adult)
Materials
- Silk cord or size 10 silk embroidery thread (strong, soft)
- 3–4 mm faux pearls (about 30–40 depending on spacing)
- Fine steel hook (1.25–1.75 mm) or small hook for thread
- Beading needle (for stringing pearls)
- Ribbon crimps or jump rings + clasp
Why this works
Stringing pearls onto thread and crocheting a narrow lace chain that anchors them gives a luxurious but delicate choker. Because pearls slide on thread, you can space them precisely.
Construction overview
String pearls in desired order on thread, crochet a decorative ladder or picot chain that locks beads in place, finish with ribbon ends or clasp. Option: crochet a small silk cord (i-cord) and sew pearls on.
Step-by-step
A — Prepare beads
- Decide spacing: e.g., pearl every 5 stitches or clustered sets (3 pearls with 2-st gaps). Estimate quantity: for 13″ choker and pearls every ½” you’ll need ~26 pearls.
- Using a beading needle, string all pearls onto the thread/yarn. Slide them far up the tail and keep them out of the way.
B — Chain and seat pearls
3. Make a foundation ch about 1″ shorter than desired finished length (you’ll adjust). Example: ch 75 (depends on stitch gauge). Work a delicate ladder:
- Row: ch 4, sl st into same chain-space to form small loop across; leave loops open as bead seats.
- To seat a pearl: slide a pearl down the working thread to the next loop location, then sc around the loop to lock bead in place: sl st into loop, sc around loop, sl st to next loop — repeat.
Alternative simpler method (easiest):
- Work a simple sc chain (ch length appropriate). For each pearl position: slide pearl onto thread, then sc in next ch, then sl st to hold pearl on the top of the stitch. This cradles the pearl.
C — Make decorative edging
5. Work a narrow picot or tiny shell row along the outer edge for a lacy look: sc, picot (ch3 sl st to base), sc repeat.
D — Finishing
6. To finish, fasten off leaving long tails. Attach ribbon clamps (crimps) folded over the thread ends and press shut with pliers OR wrap thread into a small end cap; attach jump rings and lobster clasp.
Variations & styling
- Single strand of pearls with tiny lace edges for wedding choker.
- Use colored freshwater pearls and silk thread for boho-elegant mixes.
3. Crochet Guinevere Choker Necklace Pattern
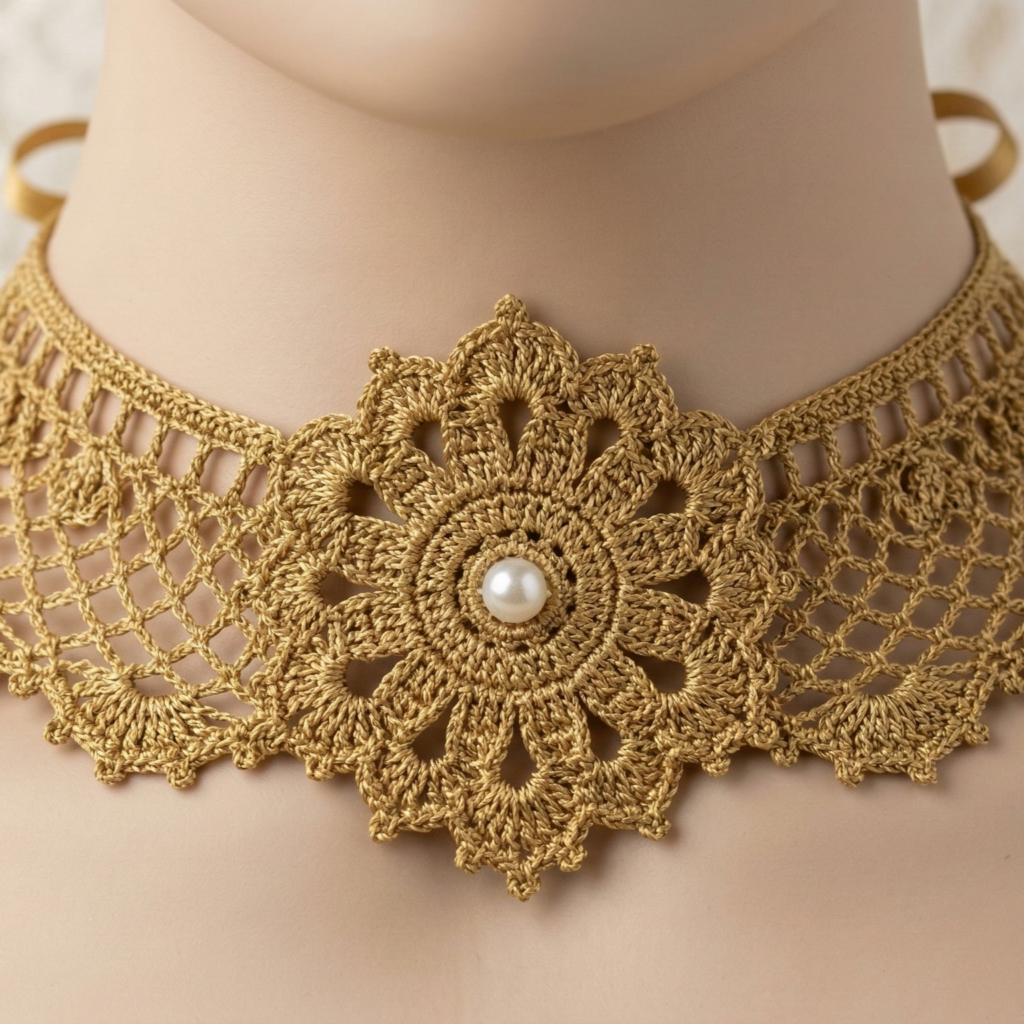
(Medieval-inspired lace with center medallion — ornate and dramatic)
Skill level: intermediate → advanced
Finished sample: 13–15″ with central medallion, adjustable ties
Materials
- Size 10 crochet thread for delicate lace OR DK cotton for a bolder look
- Steel hook appropriate to thread (1.25–1.75 mm)
- Small round cabochon or bead for center (optional)
- Clasp or ribbon ties + crimps
Why this works
This pattern uses an open lace mesh, picots and a small central medallion (a star or flower) for a medieval feel — imagine Guinevere’s courtly collars. It’s perfect with a focal pendant.
Construction overview
- Crochet a central medallion motif (circle/flower) sized to sit at front center.
- Crochet two matching lace side panels that mirror each other and join to medallion.
- Add small edging picots and finish with ribbon ties or a back clasp.
Step-by-step
A — Medallion (center focal)
- MR, ch3, 12 dc in MR, sl st to join (or 16 dc depending on size).
- R2: ch3, skip 1, sc in next around to create loops. R3: In each loop work (sc, hdc, 5 dc, hdc, sc) to make petals. Fasten off and block gently to shape.
B — Side lace panels (make 2)
3. Rejoin to medallion edge: ch10, turn and work lace filet rows to form a tapered panel that widens as it moves toward mid-back:
- Row pattern (example): Row 1: sc along chain; Row 2: ch3, sk 2, sc to create airy mesh; Row 3: shells into ch-spaces to form scallops. Repeat rows until panel reaches desired side length (~4–6″ depending on choker style). Mirror for second side.
C — Join & edge
4. Seam side panels to medallion with small invisible stitches. Add one round of sc around entire choker to even out joins. Add picot edging (ch3, sl st to base) every few stitches for medieval lace look.
D — Back closure
5. Attach small ribbon ties to ends (thread ribbon through open lace and knot), or apply small jump rings and clasp.
Styling
- Attach a small cabochon or pearl to medallion center for a focal gem.
- Wear with medieval / renaissance attire or as a statement piece for evening.
4. Crochet Lacy Neck Lace with Ribbon Pattern
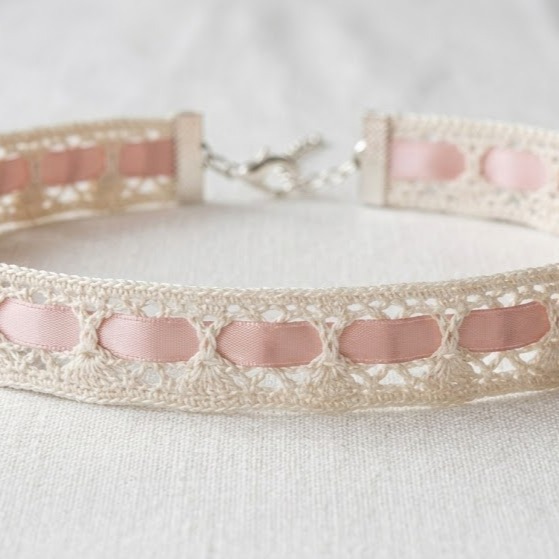
(Delicate flat lace strip threaded through ribbon — easy, romantic)
Skill level: confident beginner → intermediate
Finished sample: 13–15″ choker with 6–10 mm ribbon threaded through
Materials
- DK cotton or crochet thread #10
- Hook sized for thread (1.5–3.0 mm)
- Ribbon (6–10 mm wide) in coordinating color
- Ribbon clamps OR sew ends; lobster clasp optional
Why this works
A narrow lace strip is quick to crochet and ribbon adds color and ties the choker together. Ribbon threaded through eyelets or picots makes the choker adjustable and comfortable.
Construction overview
- Crochet a flat lace strip using shell or v-stitch with evenly spaced eyelet spaces for ribbon.
- Block to shape. Thread ribbon through eyelets. Finish ribbon ends with clamps or tie a bow.
Step-by-step
A — Decide eyelet spacing
- Make a small sample with your chosen stitch (e.g., shell stitch: skip 2, 5 dc in next st, skip 2, sc in next) and decide how frequently you want an eyelet for the ribbon (every 6–8 sts is common).
B — Lace strip
2. Chain a multiple to achieve desired width (e.g., ch 50 for ~14″ length — you can always lengthen). Work Row 1: sc across foundation. Row 2: ch3, sk 2, shell in next, sk 2, ch3, sc in next — creating small ch-spaces at regular intervals. Continue rows until strip is about ¾–1″ wide (you can make wider for a statement ribbon).
C — Add eyelet row
3. Add a row near center with evenly spaced ch-3 eyelets: sc 2, ch3, sk3 repeat. These will accept ribbon.
D — Block
4. Stretch and block the lace strip: pin to even width and steam or wet block per fiber. Let dry.
E — Thread ribbon & finish
5. Thread ribbon through eyelets. For ends: fold ribbon tail into clamp and use ribbon end crimps OR fold ribbon and hand-stitch to lace end and glue lightly on reverse for security. Add a clasp, or tie ribbon ends in a bow for adjustable closure.
Variations
- Use sheer organza ribbon for evening looks.
- Add a small pendant in center by sewing a jump ring to the ribbon and hanging charm.
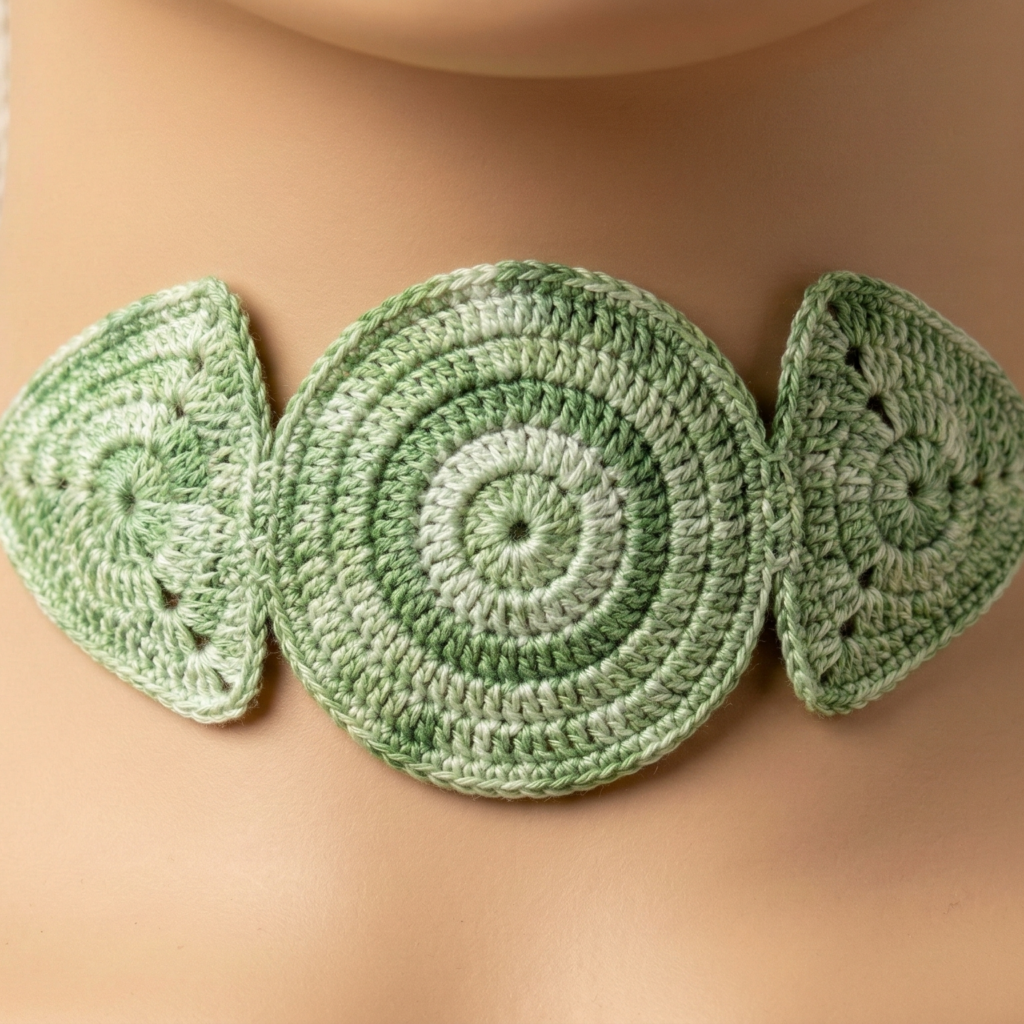
5. Crochet Lacy Mini Flower Choker Necklace Pattern
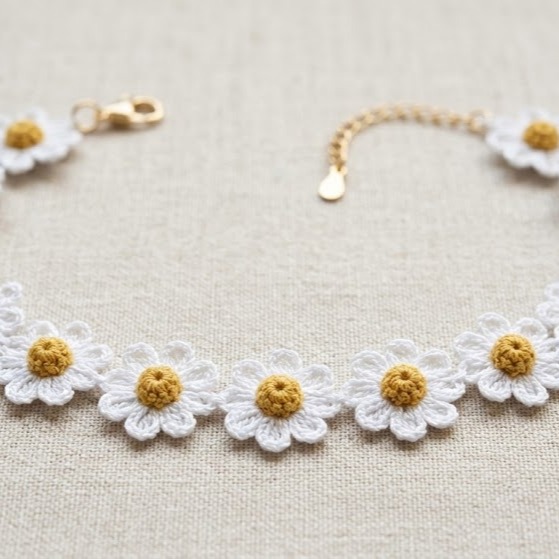
(Pretty chain of tiny flowers joined into a dainty choker)
Skill level: confident beginner
Finished sample: 13–14″ choker composed of 9–12 mini motifs
Materials
- Size 10 crochet thread (or fingering cotton)
- Steel hook ~1.25–1.75 mm
- Tiny seed beads for centers (optional)
- Small clasp + jump rings or ribbon ties
Why this works
Flower motifs are fast to crochet, very forgiving for fit, and look endlessly cute when joined into chains. This project is great for scrap-busting.
Construction overview
- Crochet a repeated small flower motif (magic ring → petal round).
- Join flowers as you go into a chain long enough for the neck.
- Finish with clasp or ribbon.
Step-by-step
A — Tiny flower motif (make many)
- MR, ch1, 6 sc in MR, sl st to join — (6).
- Round 2 (petals): ch4, sl st into next sc repeat to make 6 loops.
- Round 3: In each loop: (sc, hdc, 3 dc, hdc, sc) to form small petal. Fasten off leaving tail for joining. Optional: before finishing each petal, drop a seed bead into the center and secure it with a tiny stitch.
B — Join-as-you-go chain
4. Start first flower. For the second flower, when working Round 2 use join-as-you-go: after making a petal, sl st into corresponding petal loop of previous flower where you want them to touch; continue. Join each subsequent flower to previous one on one lateral petal to make a neat chain. Keep the chain straight by joining consistently on the same petal positions.
C — Length & finishing
5. Make the chain until choker length is reached. Add clasp by sewing a jump ring to each end flower (attach to the outermost petal with strong thread passes) and then attach lobster clasp. Alternatively sew ribbon to ends for a tie closure.
Styling & variations
- Make mixed-color flower chains for a spring look.
- Add tiny charms dangling between flowers for movement.
Finishing, blocking, and care (applies to all patterns)
- Blocking: for thread/chokers block flat to open lace and set shape — pin onto blocking mat and mist or wet block per fiber instructions. Small wire or shaping pins help keep circular form.
- Attaching hardware: use small jump rings and pliers; for thread, secure ring with multiple passes of sewn thread before attaching jump ring. If using ribbon clamps, flatten gently with pliers to avoid crushing delicate cords.
- Washing & care: hand wash in cool water with mild detergent for thread and delicate beads; lay flat to dry. Silk ribbon should be spot-cleaned per manufacturer instructions. Avoid machine washing for beaded chokers.
- Storage: hang or lay flat to avoid flattening 3-D elements (flowers, cabochons). Avoid prolonged exposure to sunlight for dyed ribbons/threads.
Quick troubleshooting tips
- Too tight? Add ¼”–½” to choker length, or use an adjustable ribbon tail instead of fixed clasp.
- Beads pulling? Reinforce bead placement with a small backstitch and a drop of fabric glue into the knot (on non-porous beads only).
- Ends fraying? Finish thread ends with a tiny dab of clear nail polish or fray-check inside clamps or under stitches.
conclusion
These five choker designs give you a neat range of styles — from the modern Spiral Rope and elegant Silk & Pearl to the ornate Guinevere lace, the romantic Ribbon-thread Lace, and the sweet Mini Flower chain. Each pattern can be customized: change fibers, bead types, or closures to match the wearer and the occasion. Chokers are perfect small projects that make great gifts or product listings for your shop.