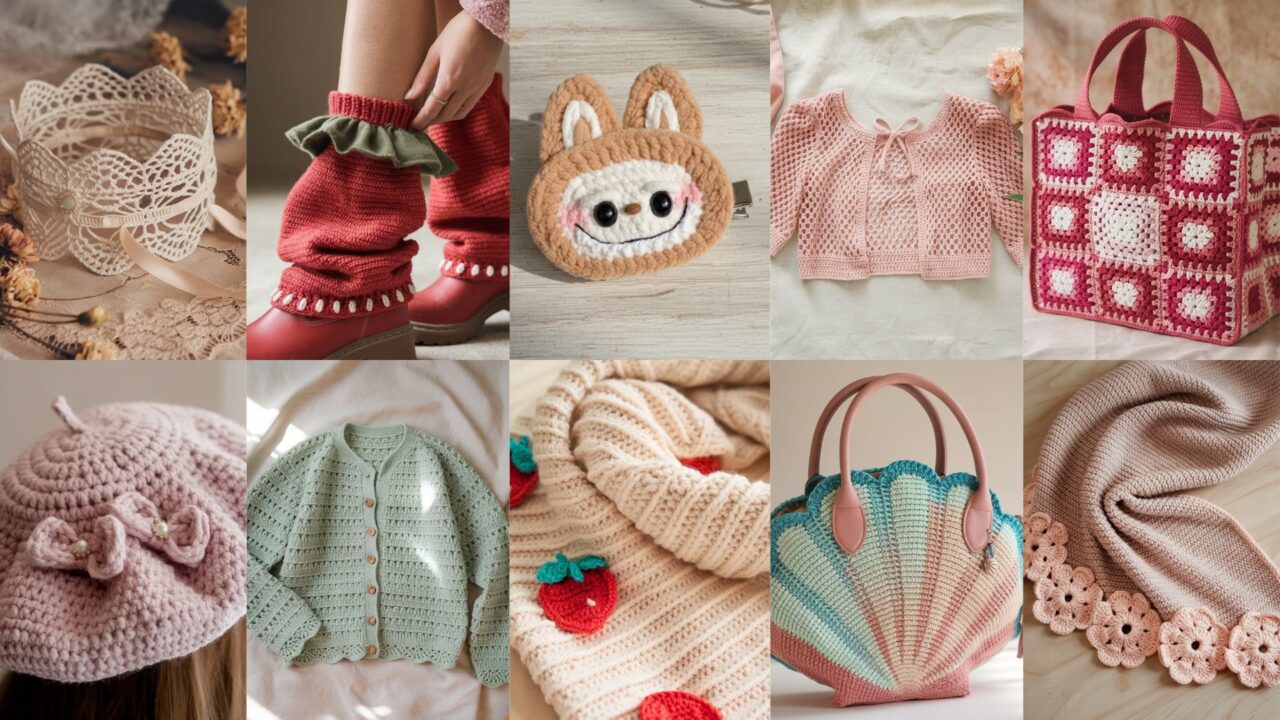
If you like charming accessories that actually get worn and admired, you’re in the right place. These 10 patterns mix easy techniques with sweet details — strawberries, bows, shells, lace cuffs — so you can make gifts, seasonal accessories, or keep everything for yourself. Each pattern below includes skill level, materials, gauge where relevant, step-by-step instructions, finishing notes, and styling/variation ideas. Work at your own pace and adapt yarns or sizing to suit your look. Let’s get into the cute stuff.
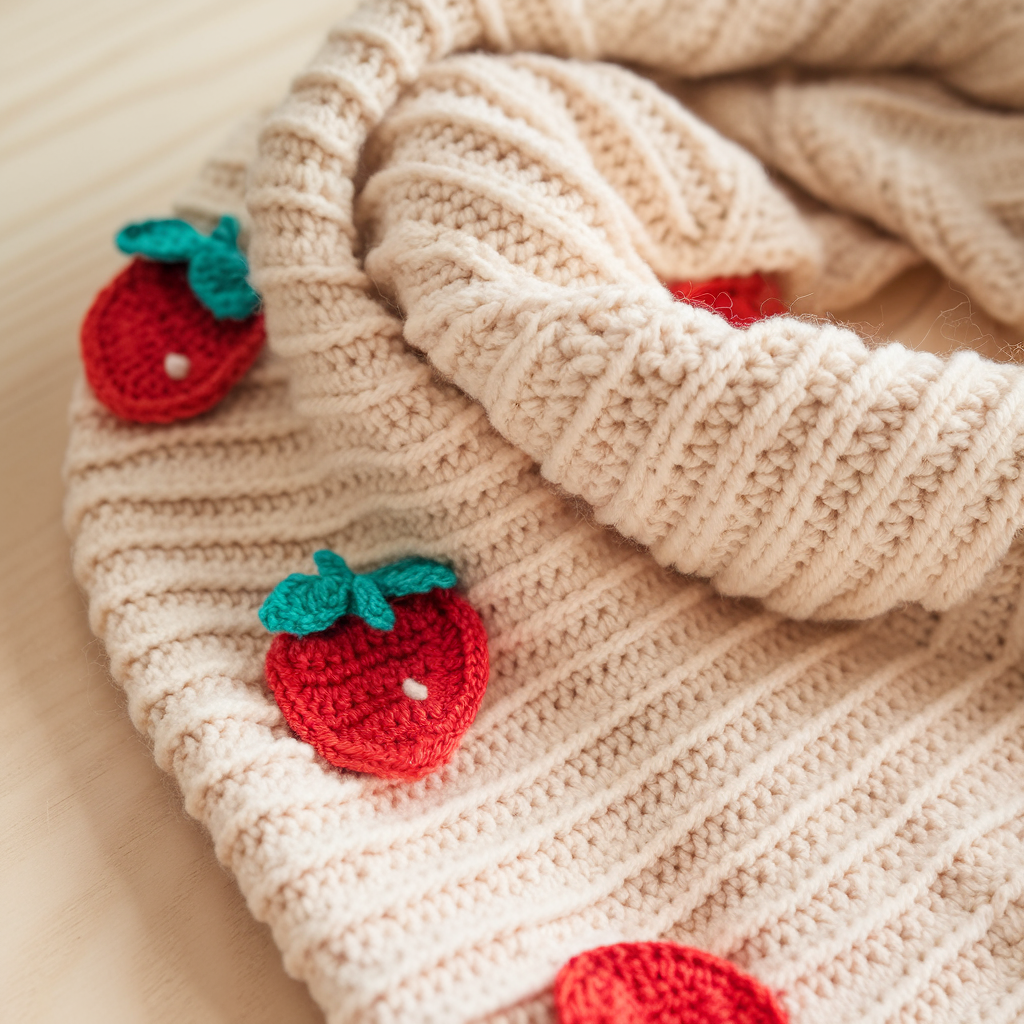
1. Crochet Scarf with Strawberry Appliques Pattern
Skill level: Confident beginner — basic stitches + simple appliques.
Materials: DK/light-worsted yarn (main color for scarf, contrasting for strawberries and leaves), 4.0 mm (G/6) hook, yarn needle, stitch markers, scissors.
Gauge: 18 sts × 12 rows = 4 in in half-double crochet (hdc) — optional for sizing.
Finished size: Approx. 6–7 in wide × 60–70 in long (adjustable).
Abbreviations: ch, sc, hdc, dc, sl st, BLO (back loop only).
Notes: The scarf is worked flat in hdc for a squishy, warm fabric. Strawberries are small round appliques sewn on after.
Scarf body (step-by-step):
- Ch 24 (for ~6.5 in width; add multiples of 2 for different widths).
- Row 1: Hdc in 3rd ch from hook and across, turn — 22 hdc.
- Row 2: Ch 2 (counts as first hdc), hdc in BLO across, turn. (BLO gives subtle ribbing).
- Repeat Row 2 until piece measures desired length (60–70 in). Fasten off; weave ends.
Strawberry applique (make 8–12):
- Using bright red, magic ring, ch1. Round 1: 6 sc in ring (6).
- Round 2: Inc around (12).
- Round 3: Sc, inc repeat around (18).
- Round 4: Sc around, but when you want a tapered bottom, skip one or two sc on one side for a slightly hearted shape; or work sc2tog once for shaping. Finish off leaving a long tail for sewing.
- Leaf topper: With green, ch 6; sc in 2nd ch from hook and next, hdc in next, dc in next, sl st to base. Make 2–3 leaves and sew to top of strawberry.
Assembly & finishing:
- Block scarf gently if desired.
- Arrange strawberries along one or both ends, or scattered across the scarf. Sew on with yarn needle using mattress stitch for flat joins.
- Optional: add tiny French knot seeds with embroidery thread, or tiny seed beads before sewing for sparkle.
Tips & variations:
- Use sport weight + smaller hook for a daintier scarf.
- Make berries in ombré reds or pastel for a playful look.
- For a fringe: add 2–3 in tassels at ends before finishing.
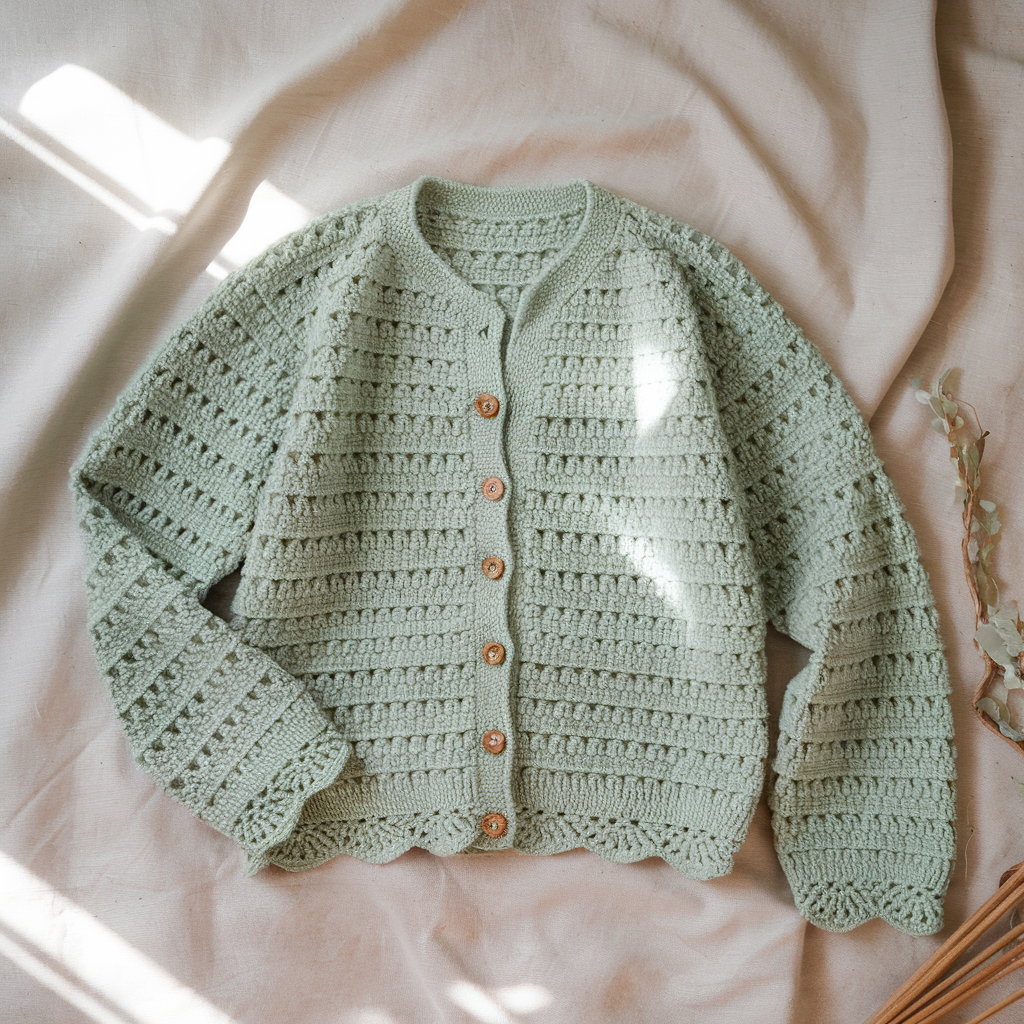
2. Crochet Callistee Cardigan Pattern
Skill level: Intermediate — shaping, simple seaming.
Materials: DK yarn, 4.0 mm and 4.5 mm hooks (or size to obtain gauge), stitch markers, tape measure, tapestry needle, 6–8 buttons (optional).
Gauge: 20 sts × 28 rows = 4 in in pattern stitch (see stitch note).
Finished sizes: S (M, L, XL) — instructions include adjustments.
Stitch pattern: Alternate row of dc shells and rows of hdc — creates a light lacy fabric with structure.
Notes: Worked top-down in pieces (back, two fronts, sleeves) then seamed, with optional button band.
Back panel:
- Using 4.5 mm hook, ch 64 (S) / 72 (M) / 80 (L) / 88 (XL).
- Row 1: Dc in 4th ch from hook, ch1, skip ch1, dc in next 3 ch repeat across, turn.
- Row 2: Ch3 (counts dc), shell (5 dc) in each ch-1 space from previous row, dc in ch spaces as needed. Repeat Rows 1–2 until back measures 16 (17, 18, 19) in from shoulder. Shape shoulders by decreasing 2–3 sts each side over 3 rows, or stop and leave live sts for seaming.
Front panels (make 2):
- Ch 34 (S) / 38 (M) / 42 (L). Work same pattern as back until length equals back minus shoulder shaping. Add a deeper edge (extra 2 rows of dc) for button band on one side, or leave both edges symmetrical for open cardigan.
Sleeves:
- Ch 40. Work pattern in rounds (join each row) or flat in rows and seam. Increase 1 st each 4 rows until sleeve cap width matches armhole measurement. Attach sleeves and seam sides.
Finishing:
- Block pieces to measurements. Seam shoulders and sides using mattress stitch.
- Pick up stitches along front edges and work 6–8 rows of sc or ribbing (sc in BLO) for neat button bands. Add buttons and buttonholes spaced evenly.
- Weave ends, press lightly.
Tips & styling:
- Add a scalloped hem by working a round of shells along the bottom before blocking.
- Use a slightly tweedy yarn for texture, or a soft cotton blend for warmer weather.
3. Crochet Strawberry-Inspired Leg Warmers Pattern
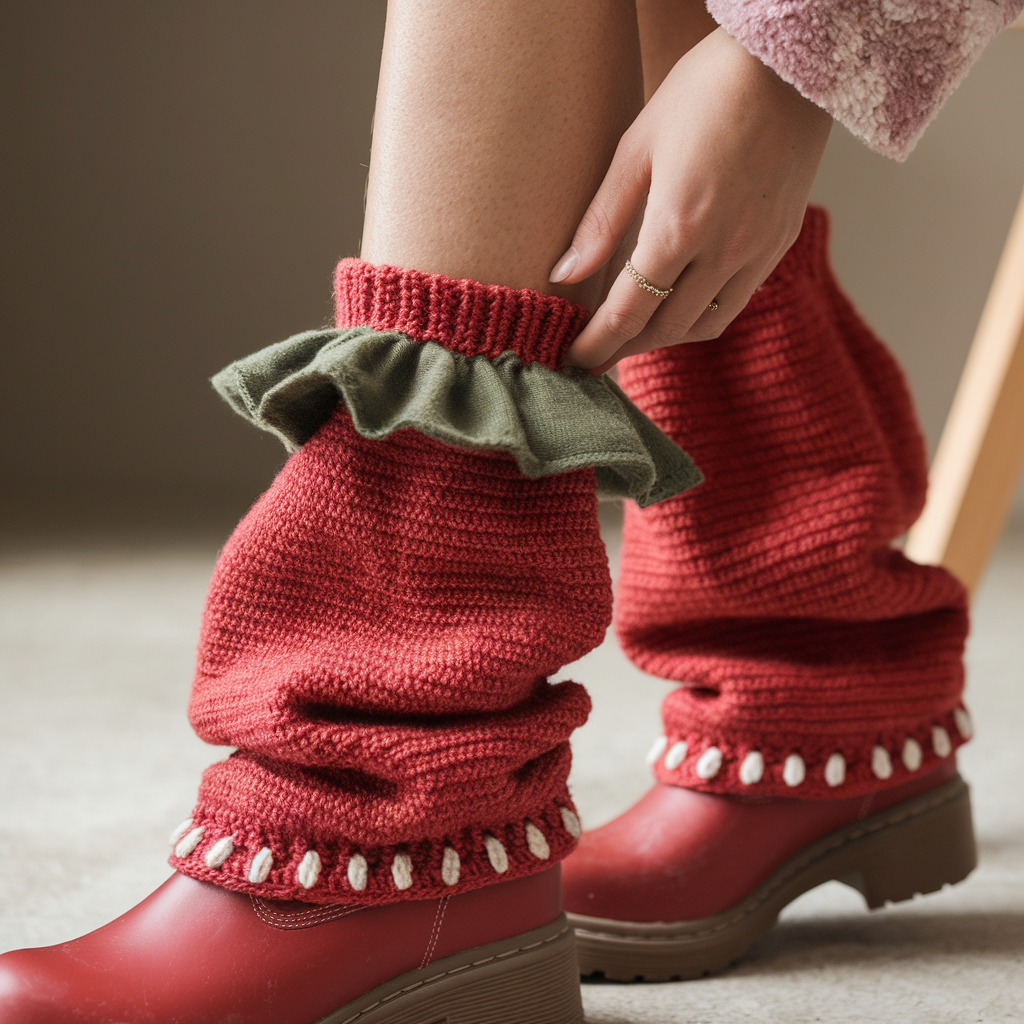
Skill level: Beginner to confident beginner.
Materials: Bulky or aran yarn for warmth (or DK for lighter weight), 5.5 mm hook, elastic thread (optional for top band), small strawberry appliques (see pattern 1), stitch markers.
Finished size: Fits average adult calf 12–16 in circumference (unstretched); length 15–18 in.
Stitch pattern: Worked in rounds — half double crochet rib (hdc in BLO) gives stretch.
Leg warmer (step-by-step):
- Measure calf circumference; divide by gauge to determine starting chains. For example: for 14 in circumference, make ch 40 and join to work in rounds (avoid twisting).
- Rounds 1–3: Hdc in each st around.
- Rounds 4–end: Hdc in BLO around to create ribbing; repeat until length 15–18 in. For a snug top, work 2–3 rounds of sc in back loop only at top edge or work elasticized row (sew elastic a few inches into top hem).
- Finish with a neat round of sc or crab stitch (reverse sc) at top and bottom for a polished edge.
Decoration:
- Sew 3–5 small strawberry appliques vertically or scattered.
- Add a decorative picot edge at top: ch3, sl st in 3rd ch from hook spaced every 6 sts.
Tips:
- Work two identical pieces; block lightly.
- For children, reduce chain count and length proportionally.
4. Crochet Ocean Shell Bag Pattern
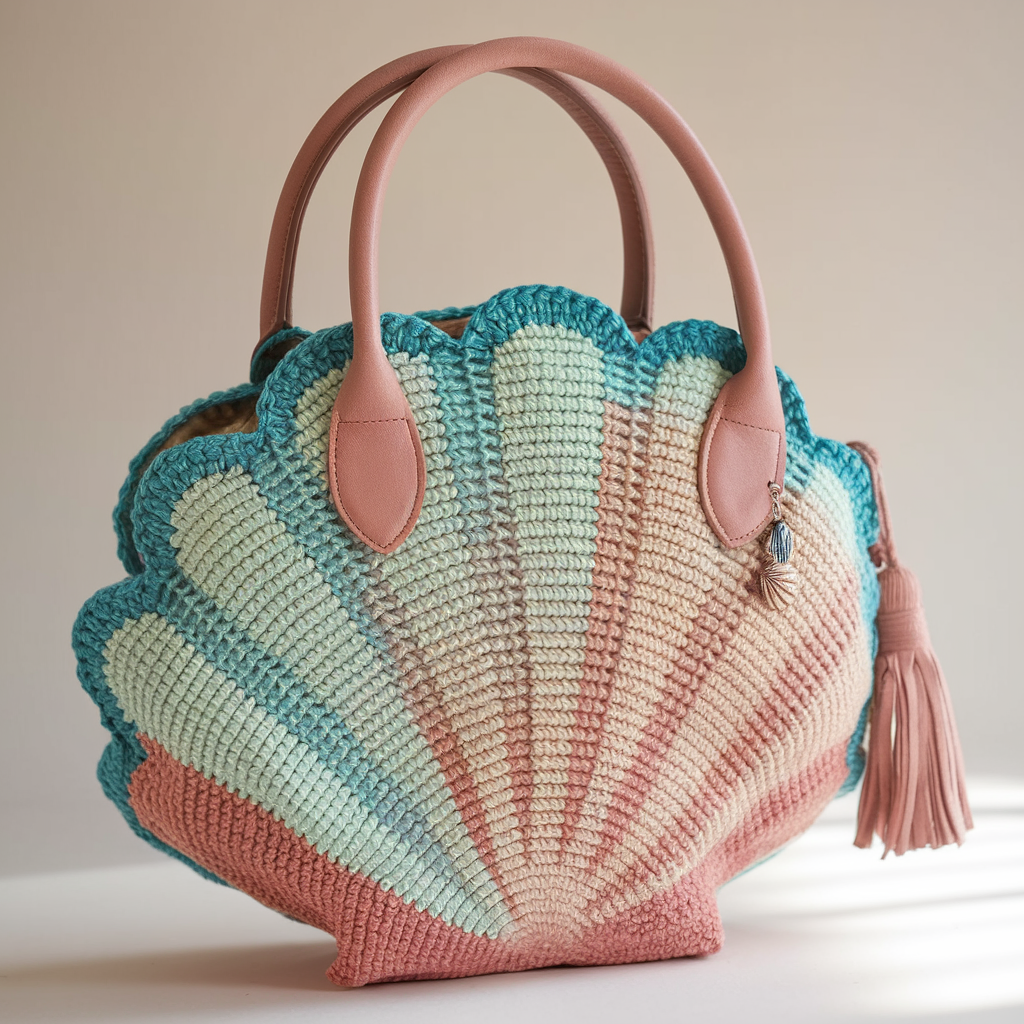
Skill level: Intermediate — texture stitches and lining recommended.
Materials: Cotton worsted (for structure), 5.0 mm hook, fabric for lining (optional), magnetic snap or zipper, yarn needle, optional tassel hardware.
Finished size: Approx 12 in wide × 9 in tall.
Stitch pattern: Shell stitch (groups of dc) alternating with mesh rows for a shell-and-net look.
Base (oval):
- Ch 31. Row 1: Sc in 2nd ch from hook and across (30 sc). Turn and work in rounds to form oval base: sc around, placing 3 sc in corner sts to round the ends. Work until base measures 12 in long.
Body:
- Round 1: Join yarn, ch3 (counts as dc), skip 2 sts, 5 dc in next st (shell), skip 2, dc in next st repeat around. Join.
- Round 2: Ch1, sc in each dc and shell space to anchor shells. Repeat Rounds 1–2 until bag reaches 9 in height.
Handles:
- Decide handle placement. Option A: Crochet two straps by ch 50 and attach ends to bag with sturdy sl st rows. Option B: sew leather handles for contrast.
Finishing & lining:
- Line the bag with fabric for durability: cut fabric to size, sew seams, and hand-stitch into bag, catching top edge into edge row. Add magnetic snap for closure.
- Optional: add a tassel with shell colors or small crocheted shells as charms.
Tips & variations:
- Use variegated cotton for ocean colors.
- For a smaller pouch, reduce base chain to 21.
5. Crochet Flower Pet Scarf Pattern
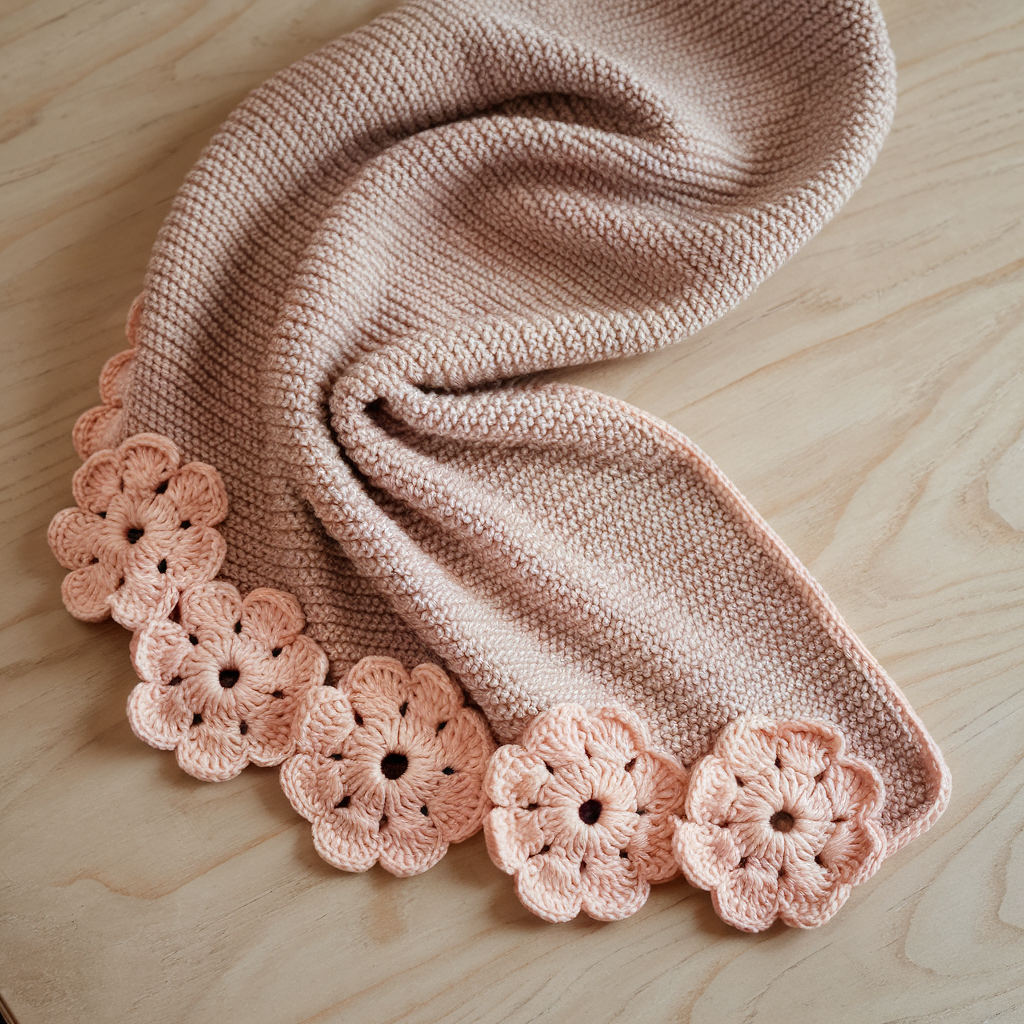
Skill level: Confident beginner.
Materials: Light worsted/DK yarn, 4.0 mm hook, tapestry needle.
Finished size: Approx 6–7 in wide × 50–60 in long, with flower motifs along one edge.
Concept: Scarf body is simple rows; one edge is embellished by a repeated flower motif that makes a scalloped decorative border.
Scarf body:
- Ch 22. Row 1: Hdc across, turn. Repeat until length is desired minus 6 in (reserve length for flower border), finish off.
Flower motif (make enough for one side):
- With contrast color, attach at edge. Ch 5, sl st to form ring. Round 1: ch2, 10 dc in ring, sl st to first dc (10 dcs). Round 2 (petals): [ch3, tr, ch3, sl st] into same st repeat into each dc to get 10 petals. Fasten off leaving tail.
- Stitch each flower along one long edge, spacing evenly so petals touch or slightly overlap for continuous scallop.
Finishing: Weave in ends. Block gently so petals open.
Tips:
- Use a soft mohair blend for a romantic floaty effect.
- For warmer scarf, make larger flowers with extra rounds and a denser body.
6. Crochet Labubu Hair Clip Pattern
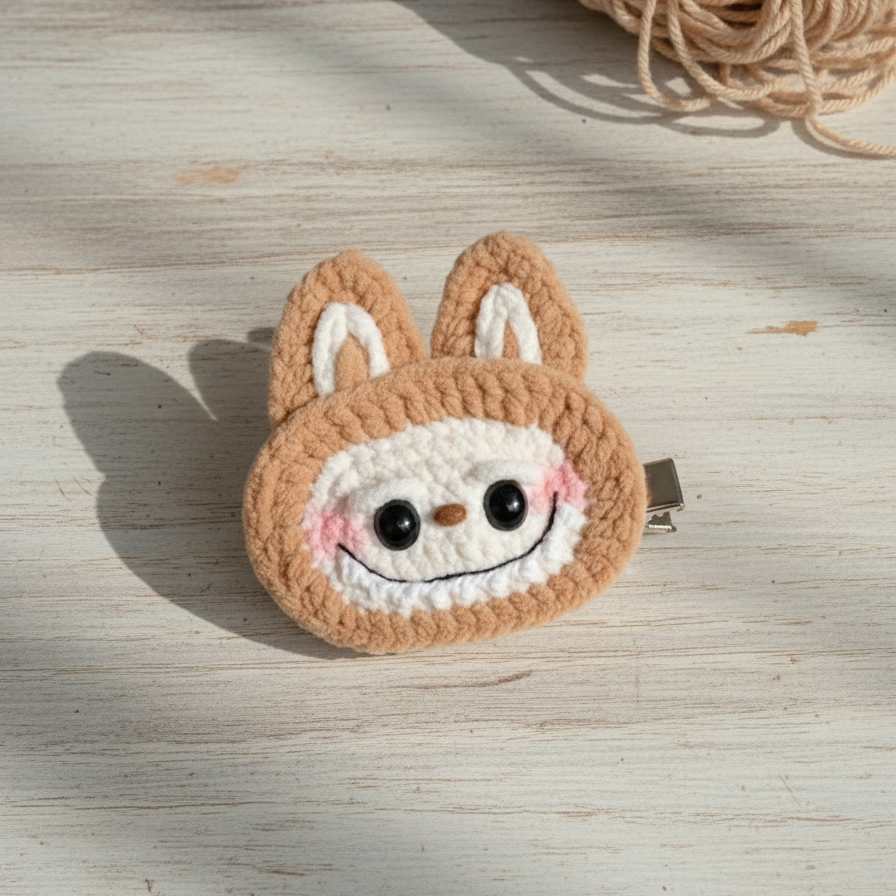
Skill level: Beginner.
Materials: Small amounts of fingering or sport yarn, 3.0 mm hook, small alligator or snap hair clips, hot glue or strong craft glue, felt circles for backing.
Finished size: 2–3 in depending on motif.
Patterns for motifs: Labubu implies a cute character or rounded motif — here we do a small amigurumi-style face and bow.
Mini face (step-by-step):
- Magic ring, 6 sc (6). R2: inc around (12). R3: sc, inc (18). R4–5: sc around (18). Flatten and close by sewing top and bottom, or stuff tiny bit if desired. Finish off leaving long tail.
Bow:
- Ch 12, sc in 2nd ch and across (11 sc). Work 3–4 rows sc. Fold in half, wrap center with leftover yarn to create bow shape.
Assembly:
- Glue felt circle to the clip. Sew or glue face and bow onto felt backing. Reinforce with thread stitches for durability. Trim excess felt.
Tips:
- Use safety eyes or embroidered eyes.
- Scale up for headbands or small brooches.
7. Crochet Coquette Mesh Shrug Top Pattern
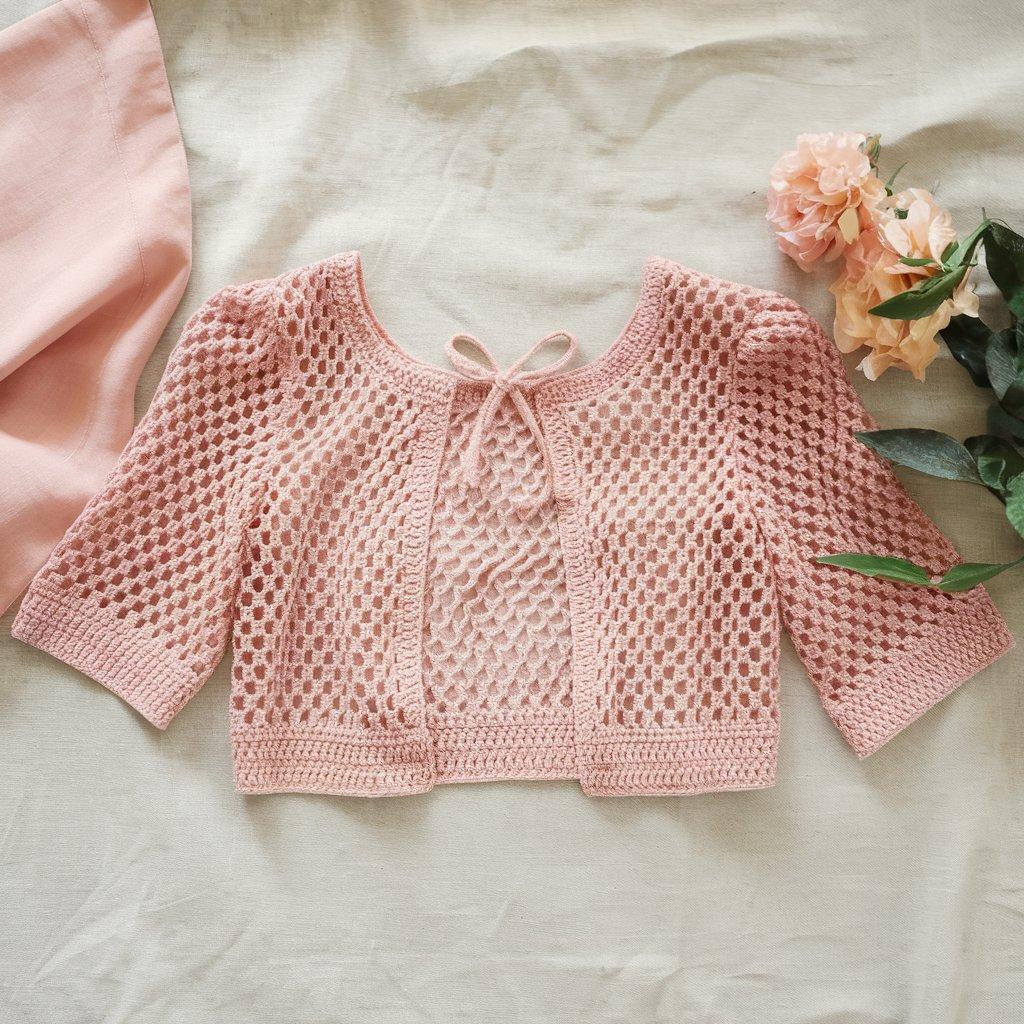
Skill level: Intermediate — shaping and seaming.
Materials: Lightweight yarn (sport/DK), 4.0 mm hook, stitch markers, tapestry needle.
Finished sizes: S/M (L/XL) — easily adjustable.
Style: Cropped, open-front mesh shrug with 3/4 sleeves; light and coquettish.
Mesh stitch: V-stitch (dc, ch1, dc) spaced by chains creates airy fabric.
Back panel:
- Ch 80 (S/M) / 92 (L/XL). Row 1: Dc in 4th ch from hook, ch1, skip ch1, dc to end to establish spacing. Row 2: Ch3, [dc, ch1, dc] in ch1 space (V-stitch), ch2 repeat across. Continue until back measures 12–14 in (cropped).
Front panels (make 2):
- Ch 28 (S) / 32 (L). Work same mesh until length matches back. Add a 2 in band worked in sc for the edges.
Sleeves:
- Ch 40 and work in rounds in mesh stitch, increasing 1–2 sts evenly every 6 rounds to shape sleeve until desired width. Work to 12–14 in length for 3/4 sleeve.
Assembly & finishing:
- Seam shoulders and sides, leaving openings for sleeves. Attach sleeves and finish all edges with 3–4 rounds of sc to stabilize. Add a cute tie at the front or small bow closures.
Tips & styling:
- Wear over dresses or high-waisted tops.
- Make longer for a cardigan effect.
8. Crochet Heart Granny Square Tote Bag Pattern
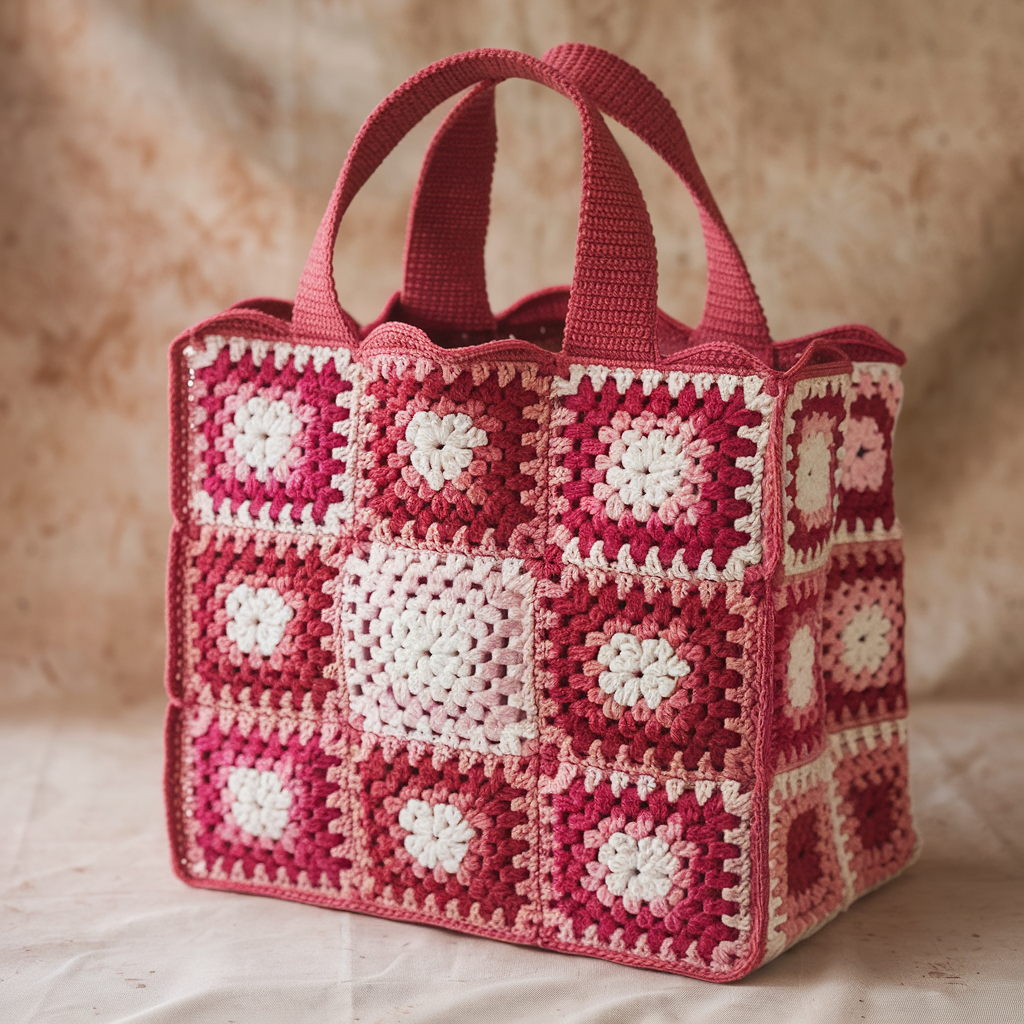
Skill level: Confident beginner.
Materials: Worsted cotton yarn (sturdy), 5.0 mm hook, fabric lining optional, sturdy handles, tapestry needle.
Finished size: Approx 12 × 10 in (without handles).
Heart granny motif (square):
- Start with magic ring. Round 1: ch3 (counts as dc), 3 dc, ch2, 4 dc, ch2, 4 dc, ch2, 4 dc into ring. Sl st to join — you have four clusters separated by ch-2 corners. This forms the heart top with clusters.
- Round 2: In each corner ch2 space, [3 dc, ch2, 3 dc]; in side spaces, 3 dc. Continue rounds until square measures 5 in.
Assemble bag:
- Make 6–8 squares for front and back (3×2 layout per side), seam together to form panels. Crochet panels together with sc for a solid seam and leave top open.
- Add base: either crochet a rectangular inset with sc rounds or attach a fabric base. Line the bag for strength and sew in handles.
Finishing: Add a decorative scallop row along top and secure lining.
Tips:
- Use bold contrasting colors for heart centers.
- Reinforce handles by sewing through both lining and bag yarn.
9. Crochet Coquette Beret with Bows Pattern
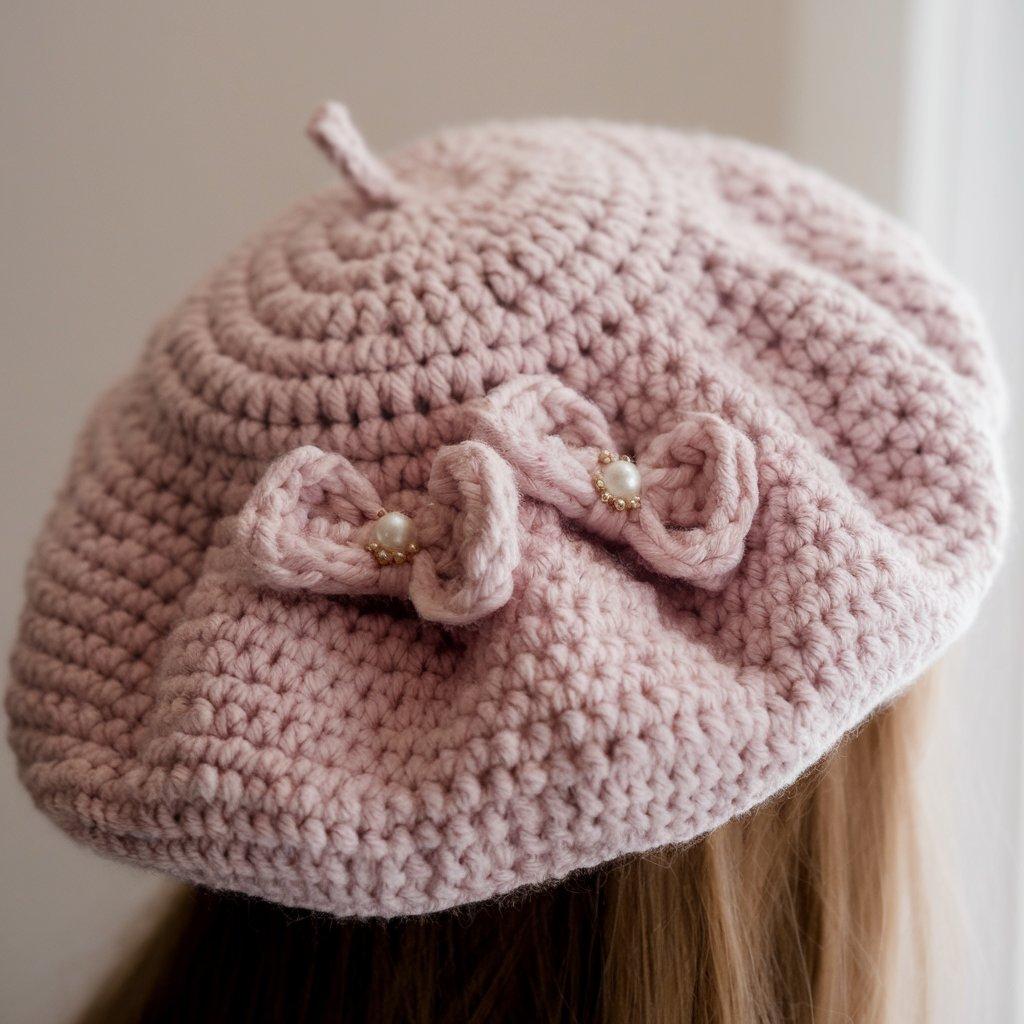
Skill level: Confident beginner to intermediate.
Materials: Bulky DK or aran yarn for body, 5.5 mm hook, small bows (crochet or pre-made), tapestry needle.
Finished size: Adult one-size (stretchy).
Beret body (step-by-step):
- Magic ring, ch2. Round 1: 12 hdc in ring (12). R2: inc around (24). R3: hdc, inc around (36). R4: 2 hdc, inc (48). Continue increasing by 12 sts each round until crown measures 7–8 in.
- Work even rounds (hdc) until desired depth (approx 6–7 in from crown). For beret slouch, stop sooner; for deeper beanie, add a few more rounds. Begin working in BLO for the rib brim: 6–8 rounds of hdc in BLO to create band. Finish with a neat round of sc.
Bow embellishment:
- Small bow: ch 10, sc back along chain to create a flat rectangle, wrap center with small yarn or make a small tie to cinch bow. Sew bow to side of beret. Optionally add two bows opposite each other for symmetry.
Finishing: Weave ends and block lightly for shape.
Tips:
- For a fluffy look, use boucle or mohair blend.
- Add a small button at bow center or tiny pearls for vintage flair.
10. Crochet Antique Lace Cuffs Pattern
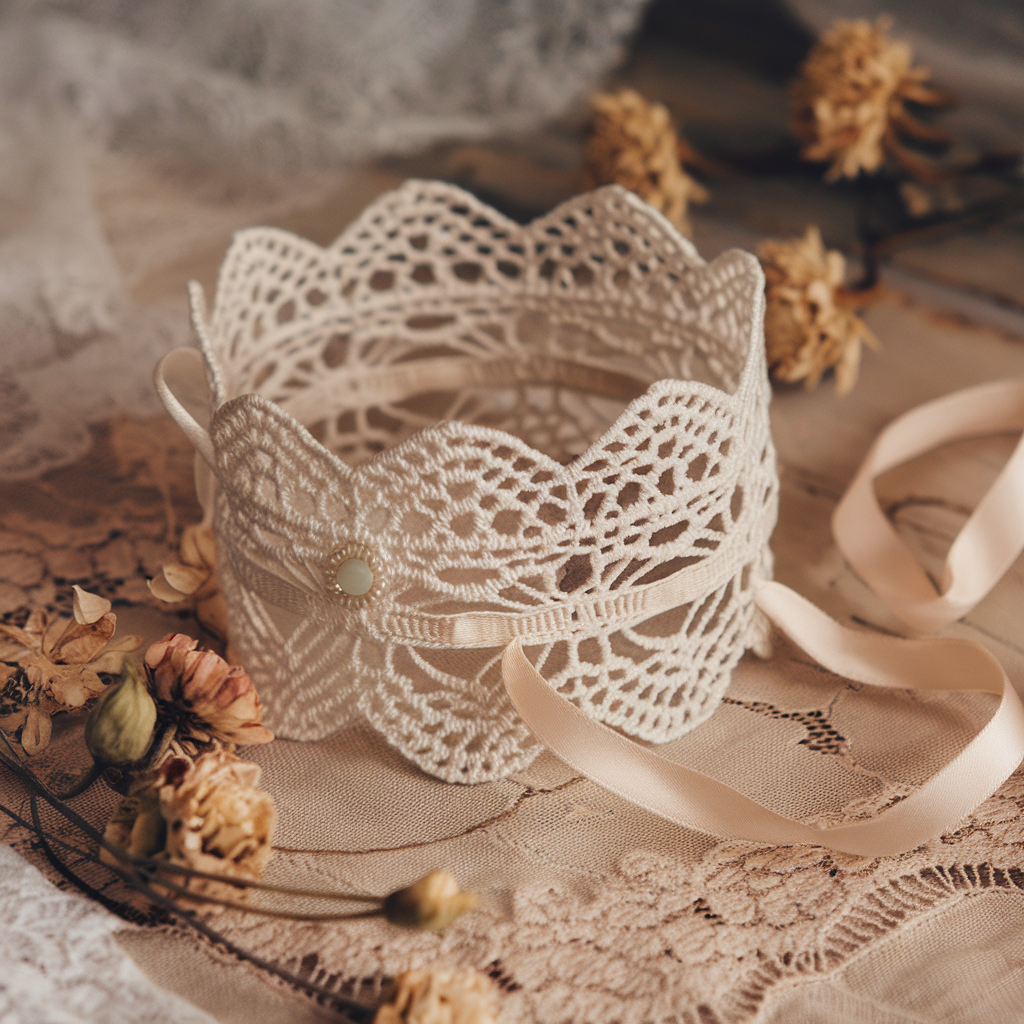
Skill level: Intermediate — attention to lace repeats.
Materials: Fingering or lace weight yarn, 3.0 mm hook, small pearl buttons or ribbon tie, tapestry needle.
Finished size: Wrist circumference 6–8 in, cuff width 2–3 in.
Lace stitch idea: Small picot and shell lace alternating for an antique feel.
Cuff (step-by-step):
- Ch 40 (adjust to wrist size; should be slightly smaller than wrist circumference for gentle stretch). Join to work in rounds, careful not to twist.
- Round 1: sc, ch3, skip 2 around to create a base mesh. Round 2: shell (5 dc) in ch3 space, ch1 around. Round 3: Sc in top of shell, ch3, sl st to form picot between shells. Repeat rounds 2–3 until cuff reaches 2–3 in.
- Edging: Work a delicate picot edge: sc, ch3, sl st in 3rd ch from hook across. Optionally leave a 1 in opening and add a small button loop for closure.
Finishing: Sew a pearl button and fasten; weave ends.
Tips & variations:
- Make a pair and gift them as a set; use ivory for antique look or blush tones for modern twist.
- Add a ribbon threaded through an eyelet row for a Victorian touch.
Conclusion
There — ten sweet projects, each with practical instructions and options so you can adapt yarns, sizes, and embellishments. Start with one small accessory (hair clip or lace cuffs) if you want a quick finish, or pick a scarf or tote if you want something satisfying and giftable. Keep notes as you make adjustments; small tweaks in yarn weight, hook size, or stitch count are how you make every pattern yours. Happy crocheting — and yes, you’ll probably make two of each. That’s how this works.