Pink is a timeless color for gifts and decor — it reads romantic, playful, vintage, and modern depending on shade and texture. Crocheting in pink gives you instant cohesion: a small set of matching pieces (coaster + keychain + hair clip) makes a thoughtful gift, while larger items like plush toys and wall hangings add personality to nurseries or living rooms.
This collection of ten pink projects is designed so you can stitch beautiful, usable items with clear, practical instructions. Each pattern includes recommended materials, skill level, finished-size notes, step-by-step guidance (with sample stitch counts sized to common needs), plus variations and finishing suggestions so you can personalize every piece. Use soft blush for nursery work, saturated rose for statement décor, or dusty rose and mauve for a modern, muted palette.
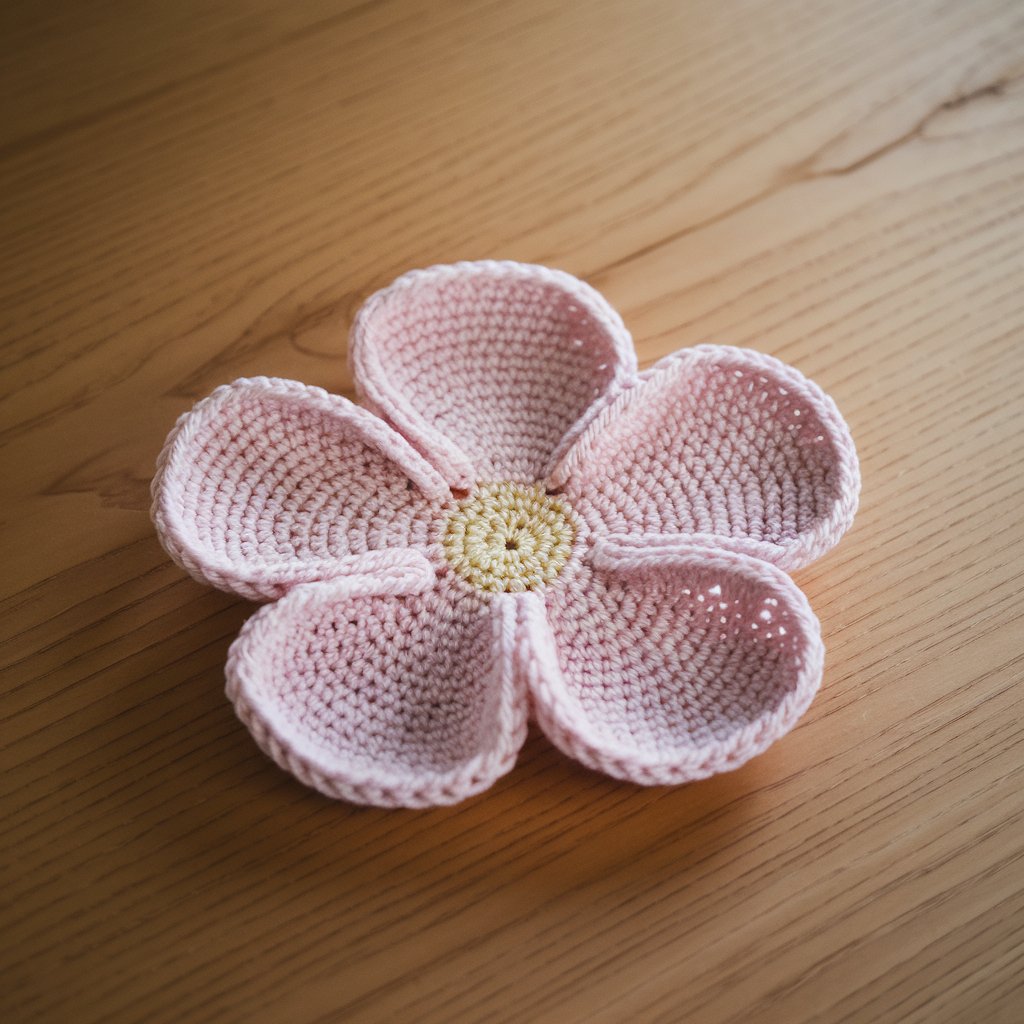
1. Crochet Cherry Blossom Coaster Pattern
Overview
A small circular coaster with a delicate raised cherry-blossom motif in the center — perfect for tea trays, guest sets, or a coordinated table of pinks.
Skill level: Beginner → Confident beginner
Materials
- Cotton DK or sport-weight yarn in blush (main) and pale cream (accent).
- 3.5 mm hook (adjust to yarn & preferred density).
- Yarn needle, scissors, optional small piece of felt for backing.
Finished size (sample): ~4.5 in (11.5 cm) diameter
Step-by-step guide (one coaster)
US terms. Work in rounds unless noted.
- Center disk: MR, R1: 8 sc in ring (8). R2: inc around (16). R3: sc 1, inc around (24). R4: sc around (24). Fasten off blush if switching color for blossom.
- Blossom petals (make 5): Join cream to one evenly spaced stitch on round 4. Ch 3, (2 dc, ch 2, sl st) into same space to form a petal arch; sl st into next chosen space and repeat until 5 petals made. Fasten off, weave tails.
- Edge rounds: With blush, join behind petals and work 2 rounds sc evenly around to expand coaster to ~4.5 in. R6 optional: shell edging ( 5 dc in one st, skip 2, sc in next ) to make a lacy rim.
- Finishing: Weave in tails. Optionally glue or sew a thin felt circle to the back for furniture protection.
Variations
- Make the petals in gradient pinks for a watercolor effect.
- Use puff-stitch petals for a more 3-D blossom.
- Work smaller 3-in versions as mug mats or larger versions for pitchers.
Finishing & care
- Block lightly to flatten if your petals sit unevenly. Machine-washable if using cotton; reshape and dry flat.
Styling tips
- Group three coasters on a wooden tray and pair with a small bud vase of fresh cherry stems for an elegant tea-time set.
2. Crochet Rose Flower Pattern
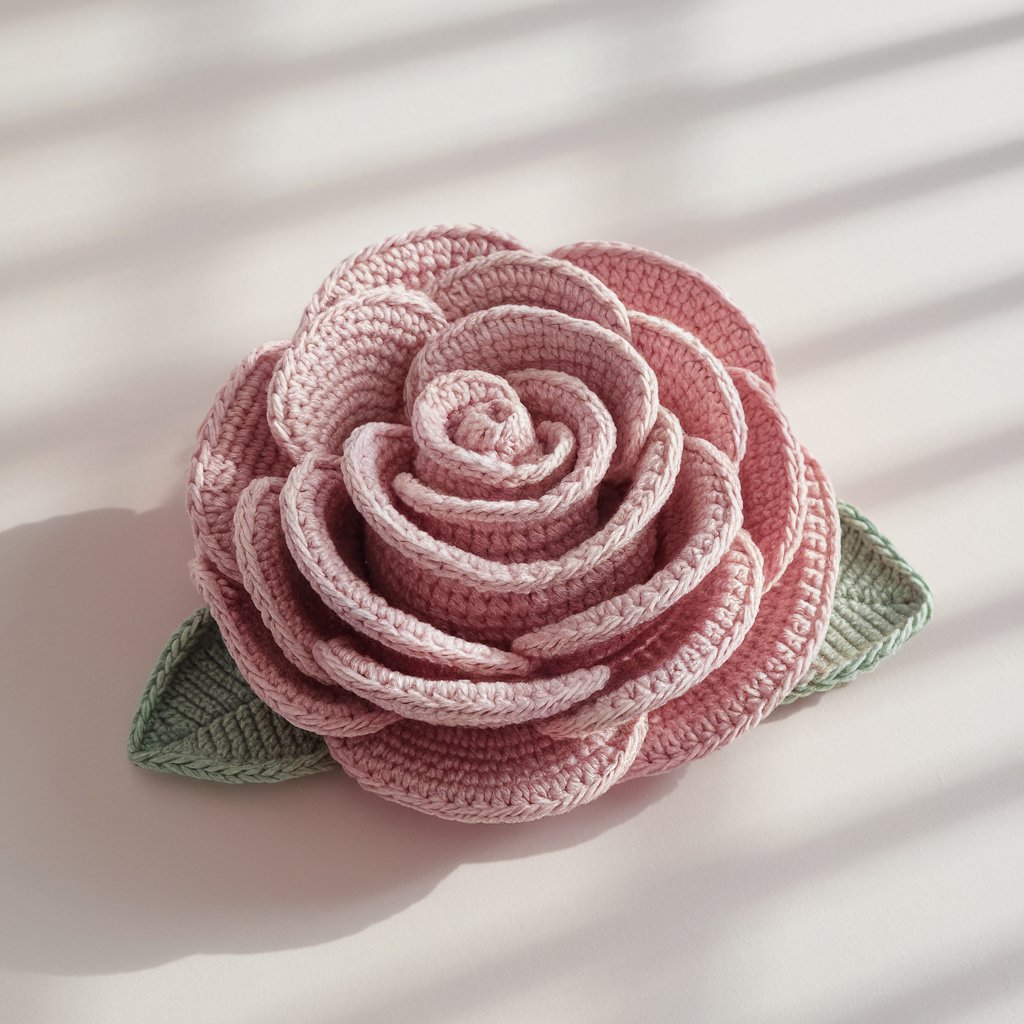
Overview
A classic layered rose motif that can be used as an applique, brooch, coaster center, or stand-alone small decor accent.
Skill level: Intermediate (spiral and shaping technique)
Materials
- Fingering or DK cotton in rose pink and leaf green.
- 2.5–3.5 mm hook depending on yarn.
- Yarn needle and small button/clip if making into accessory.
Finished size (sample): 3–4 in diameter depending on rounds
Step-by-step guide (spiraled rose)
- Spiral foundation: Ch 50 (adjust for larger flower). Row 1: sc in 2nd ch from hook across (49 sc). Row 2: ch1, turn, sc across. Row 3: ch1, turn, sc 2, hdc 2, dc 3, hdc 2, sc 2 repeating across to begin forming petal texture — you will create alternating petal clusters along the strip. Continue 2–3 petal rounds depending on desired fullness.
- Create rose: Leave a long tail. Roll the strip tightly from one end into a spiral and sew the base together with the tail to secure. Adjust petals as you stitch to form a pleasing rose shape.
- Add backing (optional): Crochet a small circle (MR → 10–12 sc → 2 rounds sc) and sew the rose to it for a neat back that hides stitches. Attach a pin back or hair clip if desired.
Variations
- Make mini roses for a hair clip cluster.
- Crochet leaves (ch 8, sc 2, hdc, dc, hdc, sc) and tack beneath the rose for realism.
- Work in boucle or velvet yarn for a plush vintage look.
Finishing & care
- If used as accessory, secure with sturdy stitches. Hand-wash delicate yarns; cotton roses are machine washable on gentle.
Styling tips
- Sew a rose onto a plain throw pillow or clutch; repeat 3–5 roses for a romantic cluster.
3. Crochet Retro Heart Wall Hanging Pattern
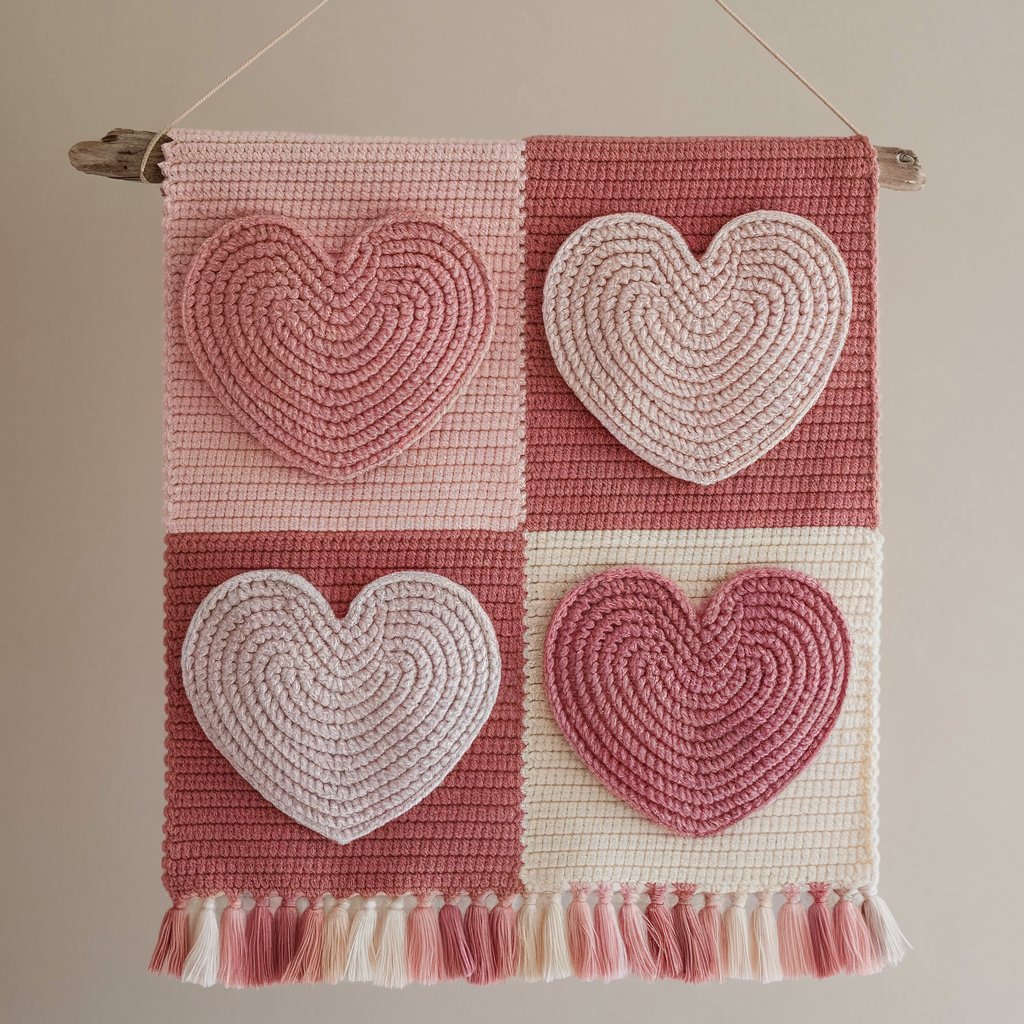
Overview
A mid-century retro heart motif arranged into a small wall hanging; use multiple hearts or one large stylized heart with tassel fringe for cottage or retro décor.
Skill level: Beginner → Intermediate
Materials
- Cotton worsted or DK in bubblegum, blush, and cream for contrast.
- Hook: 4.0 mm.
- Small wooden dowel or driftwood (6–12 in), tapestry needle, scissors.
Finished size (sample): 8–12 in wide × 10–14 in long including fringe (dependent on row repetition)
Step-by-step guide (large stylized heart panel)
- Heart motif (large single): Ch 32 (base width), Row 1: sc in 2nd ch, sc across (31), turn. Row 2: sc across. Row 3: work decrease shaping at center to form top lobes: sc to center, sl st to create curve, sc remaining — alternately use small shells to sculpt lobes. Or use established heart chart (search simple heart schematic) and translate to crochet: sc increases and decreases to create lobed top and pointed bottom.
- Panel body: Once heart outline established, embellish with concentric stripes in different pink shades using sc or hdc rounds to increase size and create a retro concentric heart effect. Work until panel reaches desired size.
- Add fringe: Chop lengths of yarn twice desired fringe length; fold in half and attach with lark’s head knots along bottom edge. For a boho look, trim fringe into a soft V-shape.
- Mount: Weave top loops behind a wooden dowel, stitch at ends to secure, and hang with cotton cord.
Variations
- Make a grid of small hearts joined into a large tapestry.
- Add beads along fringe tips for extra weight and sparkle.
Finishing & care
- Block flat before hanging to ensure straight edges. Dust with a soft brush; spot clean as needed.
Styling tips
- Hang above a bedside or a reading nook. Mix with macramé pieces for textured eclectic walls.
4. Crochet Pink Plush Teddy Bear Pattern
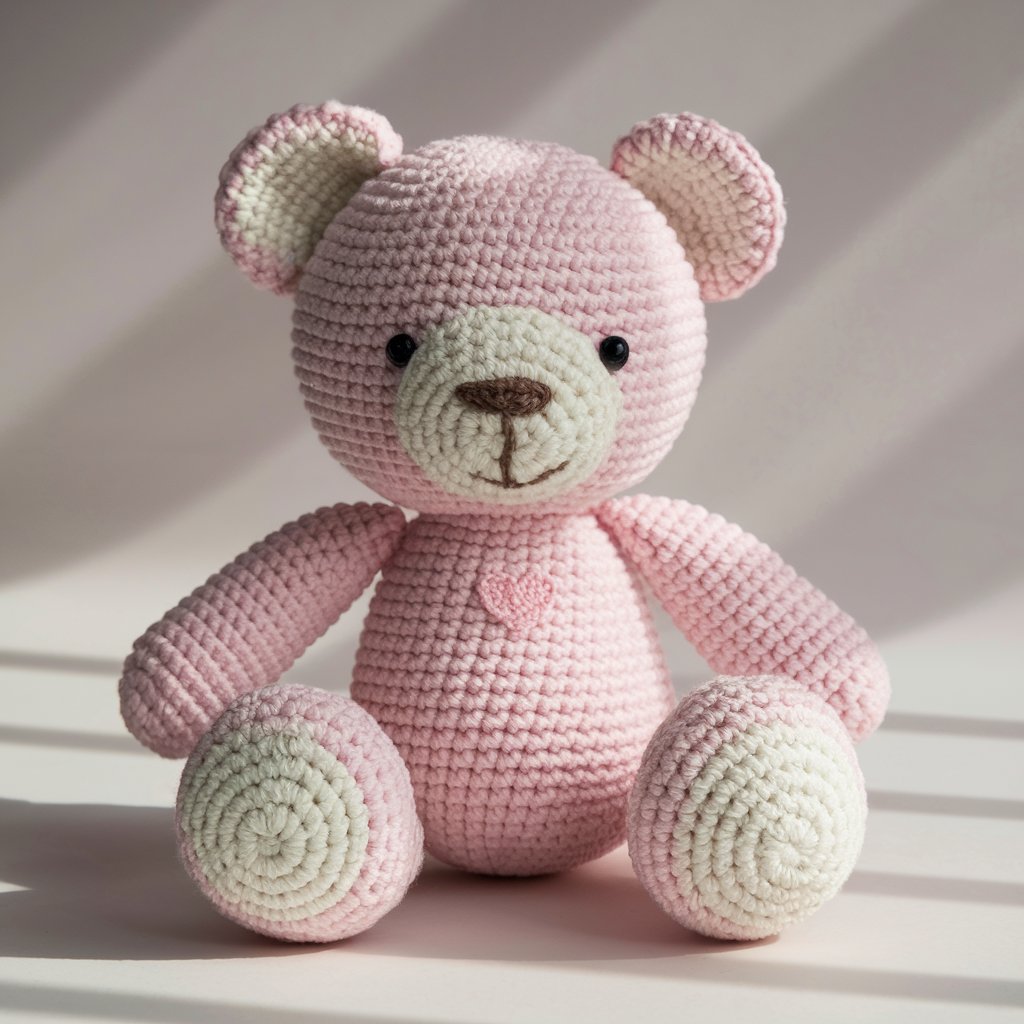
Overview
A plush, pink teddy ideal for baby gifts or nursery decor. Worked in soft plush yarn and stuffed firmly for a cuddly feel.
Skill level: Intermediate (amigurumi shaping)
Materials
- Chenille/velvet or plush acrylic in soft pink for body; cream for muzzle/inner ear.
- Hook: 3.5 mm (make tight stitches for stuffing security).
- Fiberfill, safety eyes (if intended for older child), tapestry needle, stitch markers.
- OPTIONAL: embroidered eyes for baby-safe version (avoid plastic safety eyes for infants).
Finished size (sample): ~10–12 in tall sitting
Step-by-step guide (summary)
Full amigurumi patterns are extensive; here is a workable summary to create a basic plush bear — adjust counts by gauge.
- Head: MR, inc to 36–42 sts (depending on yarn). Work even for 8–10 rounds, then begin decreases to shape face. Insert safety eyes at appropriate round if using. Stuff firmly but not overstuffed. Close top with decreases.
- Body: MR, inc to 30–36 sts, work even for 6–8 rounds to form chest, then increase slightly for belly and work even. Stuff and closed as for head. Join head to body with whipstitch or crochet join.
- Arms & legs (make 4): MR → 6 sc, inc rounds to 12, work tube for limb length ~6–8 rounds, stuff lightly, close. Sew to body in desired positions.
- Ears (make 2): MR → 6–8 sc, flatten and sew to top sides of head. Add inner ear felt or cream crochet circle if desired.
- Muzzle: crochet small oval in cream; embroider nose and mouth and sew to front of head.
- Finishing touches: Add a small crochet bow, tiny heart applique, or embroidered eyelashes. For baby-safety, embroider eyes and avoid small detachable parts.
Variations
- Make miniature bear keychains using embroidery for face and a small metal clasp (only for adult use).
- Create a coordinating blanket or hat in matching yarn for a gift set.
Finishing & care
- Hand-wash delicate velvet yarn in cool water or follow yarn label instructions. Reshape while damp and air-dry.
Safety
- For infants, avoid safety eyes and removable accessories — use stitched features only.
Styling tips
- Make multiple shades of pink for a collectible set; display on nursery shelves or use as a baby shower centerpiece.
5. Crochet Lola Flower Hair Clip Pattern

Overview
A delicate layered flower hair clip named “Lola” — perfect for baby headbands, bridesmaid accessories, or everyday flair.
Skill level: Beginner → Confident beginner
Materials
- Fingering or DK cotton in two or three coordinating pinks.
- 2.5–3.5 mm hook.
- Alligator hair clip or small barrette, hot glue or thread to attach, yarn needle.
Finished size (sample): ~2–3 in diameter (clip-friendly)
Step-by-step guide (layered flower)
- Small center: MR, 6 sc in ring, sl st to join. Work 1–2 rounds of sc to make a small tight center.
- First petal round: Ch 3, 2 dc, ch 2, sl st into base stitch to make 5–6 small petals around center. Fasten off color A.
- Second petal round (larger): Join contrasting color in between petals; ch 4, 3 dc, ch 3, sl st into each gap to create larger petals. Fasten off.
- Base circle: Crochet a small round disk (2 rounds) and sew the flower on top; use disk to attach clip securely — either glue the clip to disk then sew the edges, or stitch clip to disk with small tight stitches.
- Finishing: Weed any glue excess and hide stitches; add small bead or knot in center if desired.
Variations
- Make double or triple layered flowers for fuller look.
- Add a small green leaf beneath the flower for realism.
Finishing & care
- Hand wash clip decor gently; if glued, avoid submerging in water. Hand-wash hairbands separately.
Styling tips
- Use several smaller clips across a braid for festival-ready hair; attach to baby headband for a classic look.
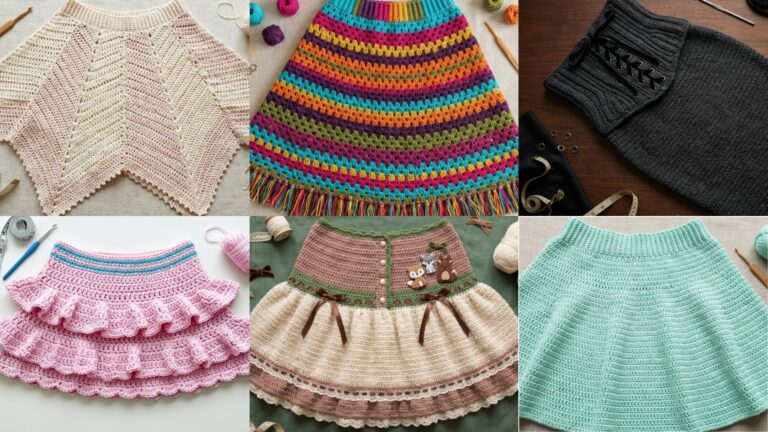
6. Crochet Butterfly Top Pattern
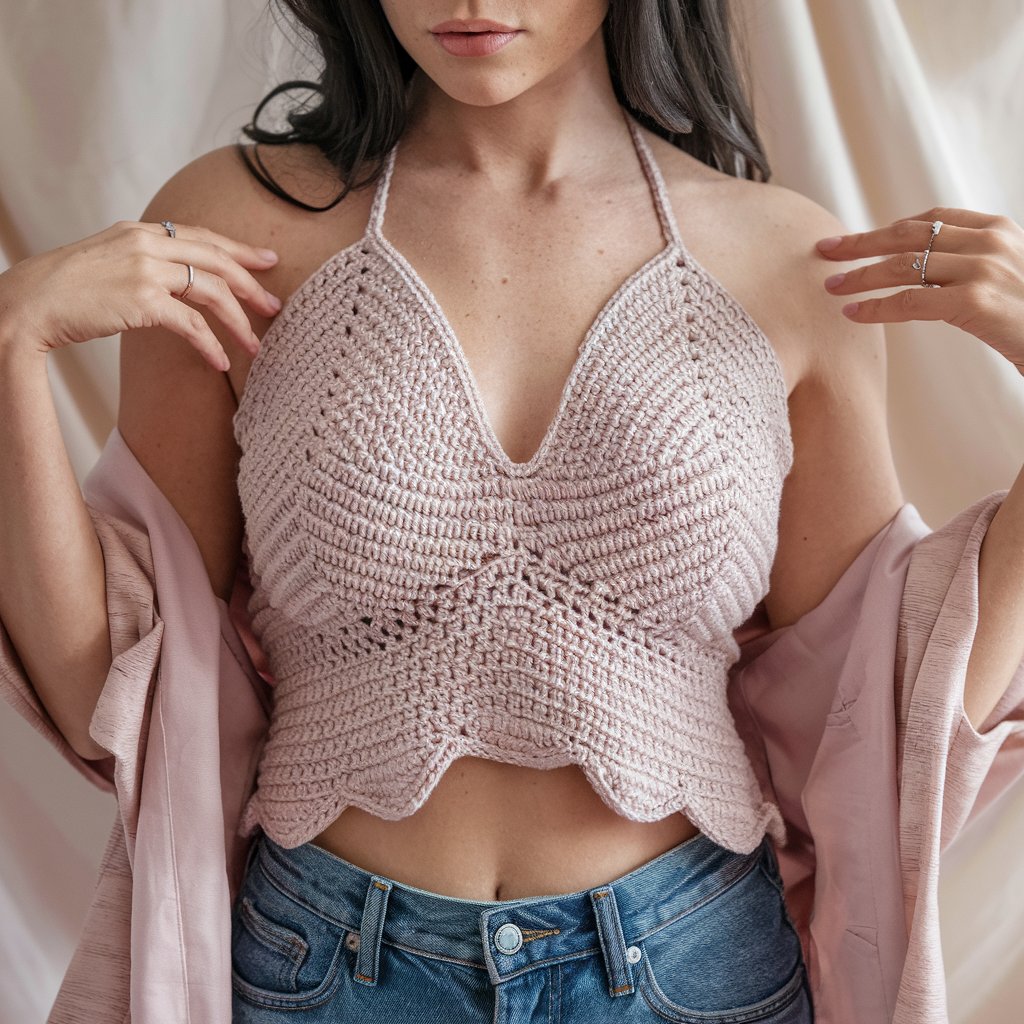
Overview
A lightweight, lacy butterfly-sleeve crop top or tunic in soft pink — summer-friendly, airy, and great layered over tanks.
Skill level: Intermediate (garment shaping and lacy stitch repeats)
Materials
- Sport or light DK cotton yarn in dusty rose.
- Hooks: 3.0–3.5 mm for gauge; stitch markers; tape measure.
- Yarn amounts depend on size — approximate 600–1000 yds for adult sizes.
Finished sizes: Provide sample for small/medium; adjust with gauge. (This section gives construction overview and shaping — for a custom fit, make gauge swatch and adjust counts.)
Step-by-step guide (construction overview)
- Gauge & measurements: Make 4-in (10-cm) square in chosen lace pattern and measure st/row count. Decide bust measurement and ease.
- Body panels: Work two identical rectangular panels for front and back in a butterfly lace stitch (V-stitches or shell mesh) until they reach desired length (crop or tunic). These are worked flat; for a crocheted top, you’ll shape side seams or leave sides open for a kimono/butterfly style.
- Sleeves: For butterfly-style sleeves, continue lace pattern beyond shoulder in a generous rectangle that wraps over the upper arm — or create separate sleeve panels and join to armholes.
- Neckline & Edging: Work a simple round of sc around neckline; add a decorative picot or scallop edge for visual polish.
- Joining: Seam shoulders and sides with mattress stitch or join-as-you-go, leaving armholes or creating slight flares for butterfly effect. Add a narrow band at hem if desired to define shape.
- Finishing: Weave in ends; block the garment to open lace and set dimensions.
Variations
- Make a crop style with tie-front instead of seamed sides.
- Use ribbon yarn for a shimmery summer top.
Finishing & care
- Cotton tops may be machine-washable (gentle). Block to shape after washing and dampen if needed.
Styling tips
- Layer over camisoles or wear with high-waisted jeans for a modern feminine outfit. For a boho look, add layered necklaces and sandals.
7. Crochet Heart Fingerless Mittens Pattern
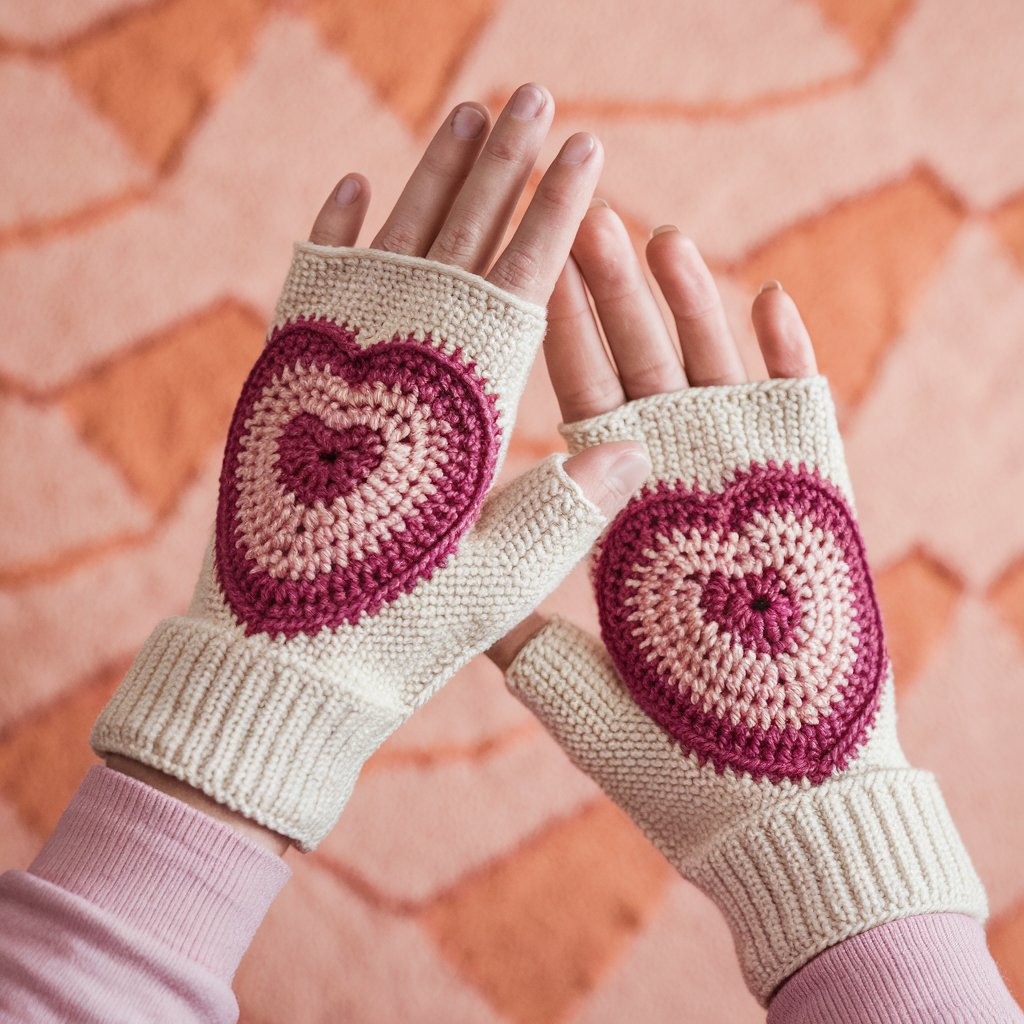
Overview
Fingerless mitts with a heart motif across the back of the hand — a cozy, pink-accented accessory for gifting.
Skill level: Confident beginner
Materials
- DK or light worsted cotton/wool-blend in rose and cream for heart.
- Hook: 4.0 mm.
- Tapestry needle.
Finished size (sample): Fits average adult woman; circumference ~7–8 in unstretched
Step-by-step guide (one mitten)
- Cuff band: Chain to desired wrist circumference (e.g., ch 30), join, and work 6–8 rounds of hdc in the round to form snug cuff.
- Hand tube & heart colorwork: Continue in rounds establishing height to place the heart (work plain rounds until you reach the start round). Then either use tapestry crochet to work the heart chart across several rounds (change colors according to pixel chart) or applique a crocheted heart later. Work evenly until approaching thumb hole.
- Thumb opening: Mark stitches for thumb opening (approx 6–8 sts). For a simple method, work back-and-forth rows across the hand area instead of full rounds for two rounds, then rejoin in the round, leaving gap for thumb. Later pick up stitches around gap and work 6–8 rounds for thumb tube.
- Top finish: Work 6–8 rounds above heart to create back-of-hand height, then finish with a neat round of sc or picot edge at top.
- Thumb: Pick up 6–8 sts around thumb opening and work a small tube (sc rounds) for 6–8 rounds; close with slip stitch or leave open depending on fit.
- Optional heart applique: If not working tapestry, make small heart motif and sew it centered across back of hand.
Variations
- Make matching fingerless mittens for him in muted rose/gunmetal.
- Add a thumb button tab that can snap closed to convert to full mitten.
Finishing & care
- Weave tails, block lightly. Hand-wash wool blends; cotton on gentle machine.
Styling tips
- Pair with a matching beanie or scarf for a coordinated gift set.
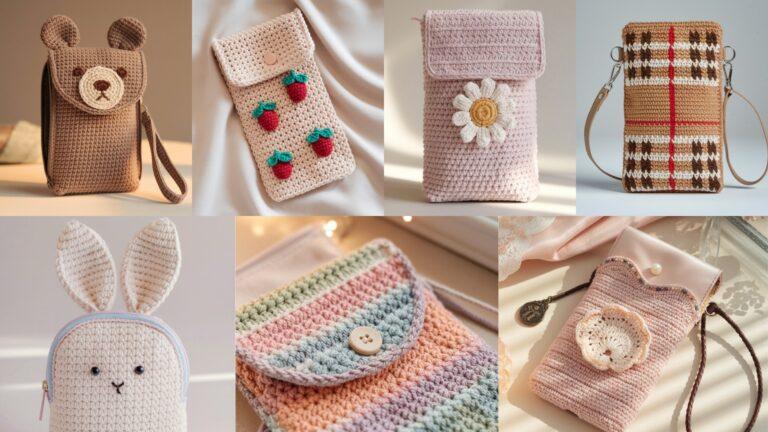
8. Crochet Tiny Flower Pot Keychain Pattern
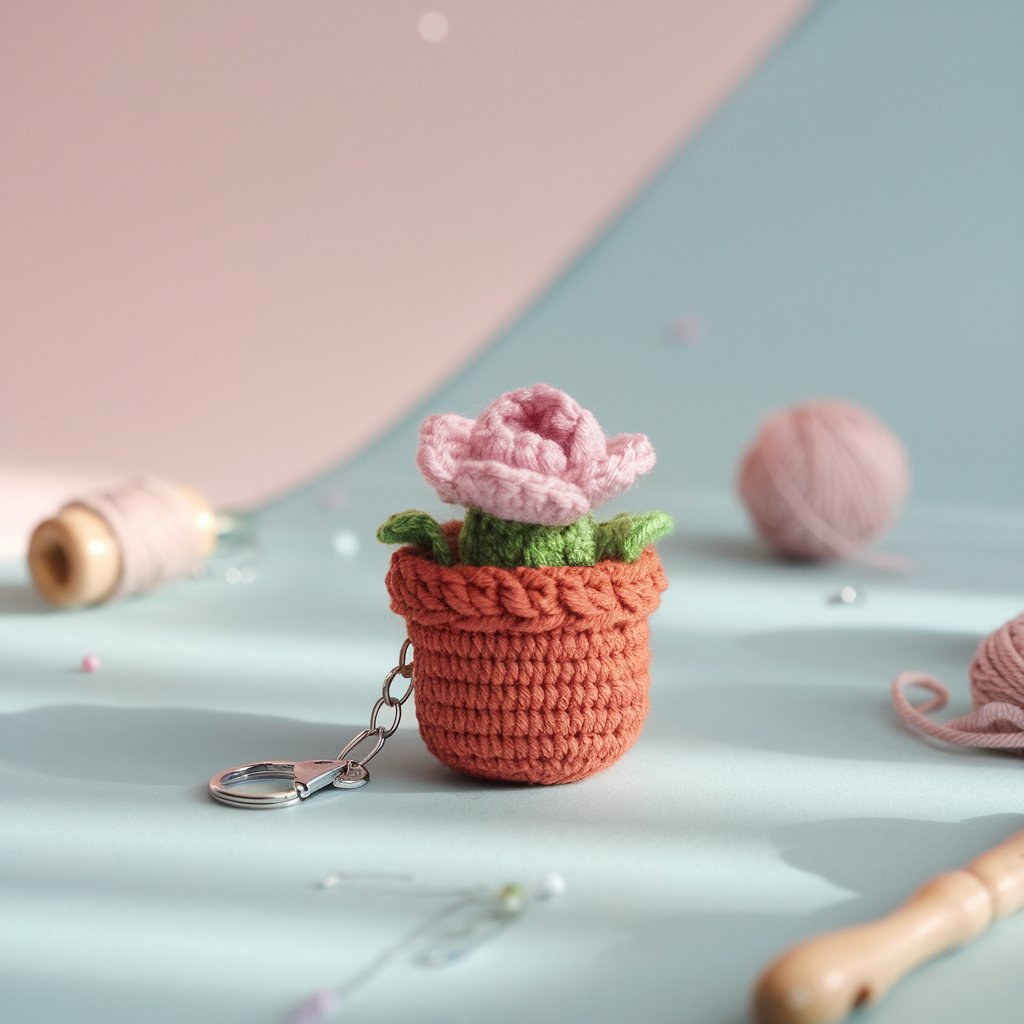
Overview
A tiny pink flower pot keychain: a small pot with a crocheted succulent/flower — quick, adorable, and great as a stocking stuffer or small shop item.
Skill level: Beginner → Confident beginner
Materials
- DK cotton in terracotta (pot) and shades of pink/green for flower.
- 3.0 mm hook, small split ring or lobster clasp, fiberfill (tiny amount), yarn needle.
Finished size (sample): ~1.5–2 in tall (miniature)
Step-by-step guide (mini pot & flower)
- Pot base: MR, 6 sc. R2: inc around (12). R3: sc 1, inc around (18). R4–R6: sc around to build height (3 rounds). R7: optional outward round to create rim: 5 dc in one st, skip 1 for a tiny flared rim. Fasten off leaving tail for sewing. Stuff lightly and close bottom.
- Flower: Make a small rosette or 3–4 petal motif (MR with 5–6 sc then petal round). Sew flower into pot mouth.
- Attachment: Sew a short loop of chain to the back of pot’s rim and thread a small keyring or lobster clasp through. Weave ends inside pot and knot securely.
Variations
- Make succulents by crocheting tiny rosettes in green and sewing in.
- Add embroidered name tag to pot for personalization.
Finishing & care
- Wipe clean — avoid soaking metal hardware. Small plush parts may be spot-cleaned.
Styling tips
- Package several mini pots on a small card for a gift set or display on an Etsy product card.
9. Crochet Pink Lady Baby Booties Pattern
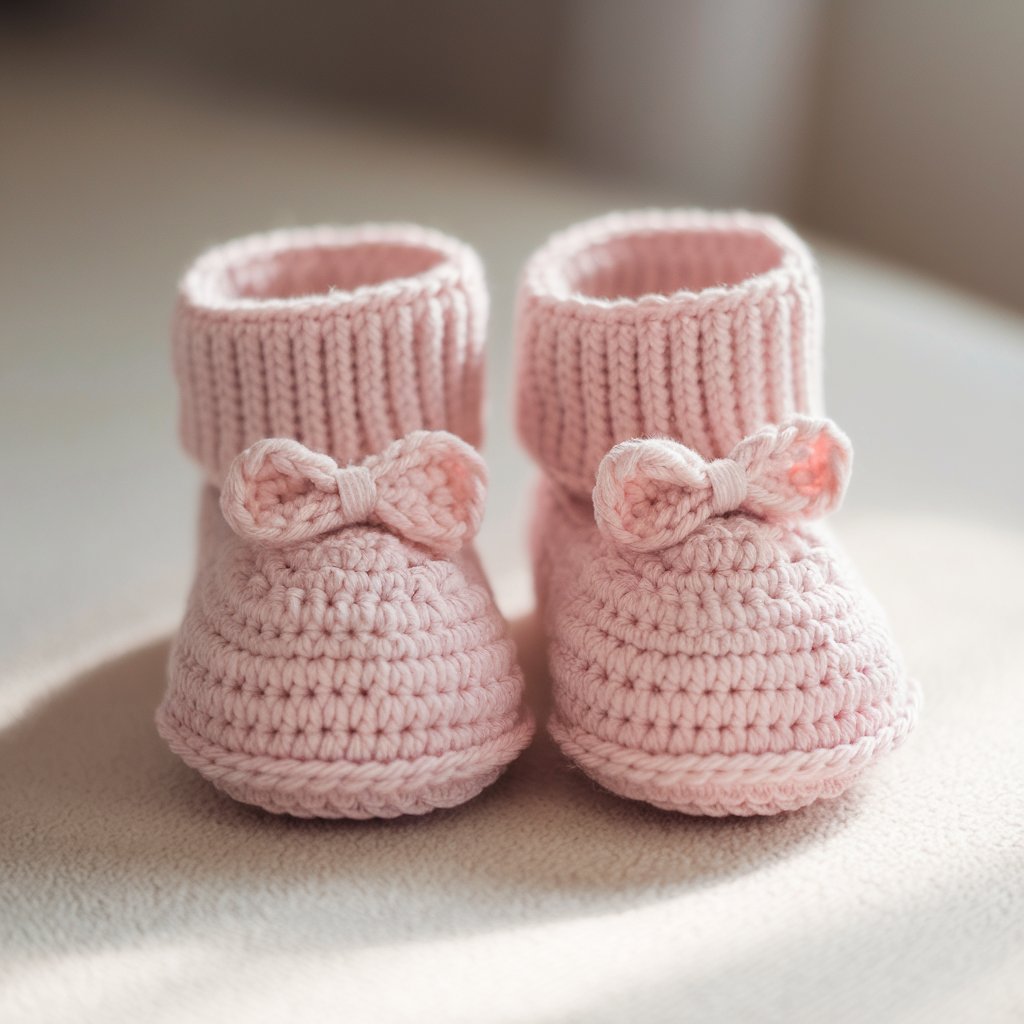
Overview
Soft, classic baby booties in pink with a tiny heart or bow accent — practical, adorable, and perfect for newborn gifts.
Skill level: Beginner → Confident beginner
Materials
- Soft DK cotton or daily-wear baby yarn (non-itchy, machine washable).
- Hook: 3.25–3.5 mm.
- Yarn needle.
Finished size (sample): Newborn (0–3 months) — sole length ~3.5 in (9 cm)
Step-by-step guide (simple sole-to-upper bootie)
- Sole (flat): MR; R1: 6 sc in ring (6); R2: sc, inc around (9); R3: sc 2, inc around (12); R4: sc 3, inc around until sole measures ~3.5 in length (typically 5–6 rows depending on yarn). Shape as an oval by increasing at each end.
- Upper (worked around sole): Join yarn along edge, work sc evenly around to form a small wall ~1–1.25 in; for cuff, add 4–6 rounds of ribbing (hdc in BLO) for stretch.
- Toe shaping: Decrease gently over next 2–3 rounds to create a rounded toe and closure. Fasten off and weave in ends.
- Decoration: Sew a small crocheted heart or make a tiny bow (sc rectangle, cinch center) and sew to vamp. For safety, avoid buttons or beads on infant booties; if added for photo props only, advise parent to remove before baby uses.
Variations
- Add ankle strap with small crochet loop and embroider name on sole.
- Make Mary Jane style with buttoned strap — use embroidered buttons or snaps.
Finishing & care
- Machine wash cold in lingerie bag and dry flat to keep shape; follow yarn label.
Safety
- No small detachable embellishments for infants; keep decorations flat and sewn down.
Styling tips
- Pair booties with a matching bonnet or blanket for a shower gift set.
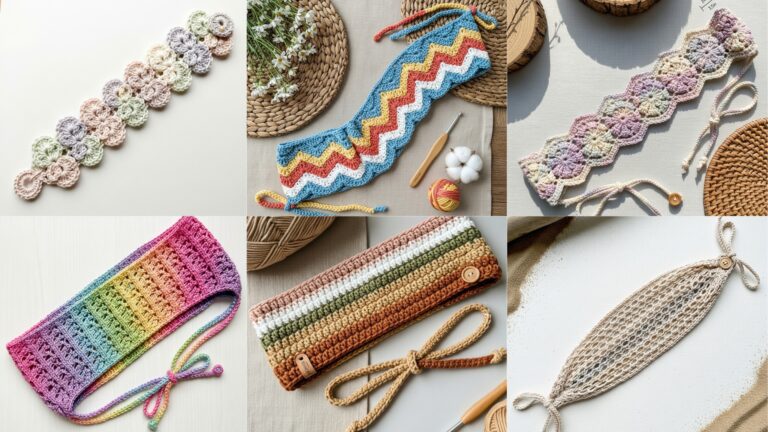
10. Crochet Twisted Ear Warmer Pattern
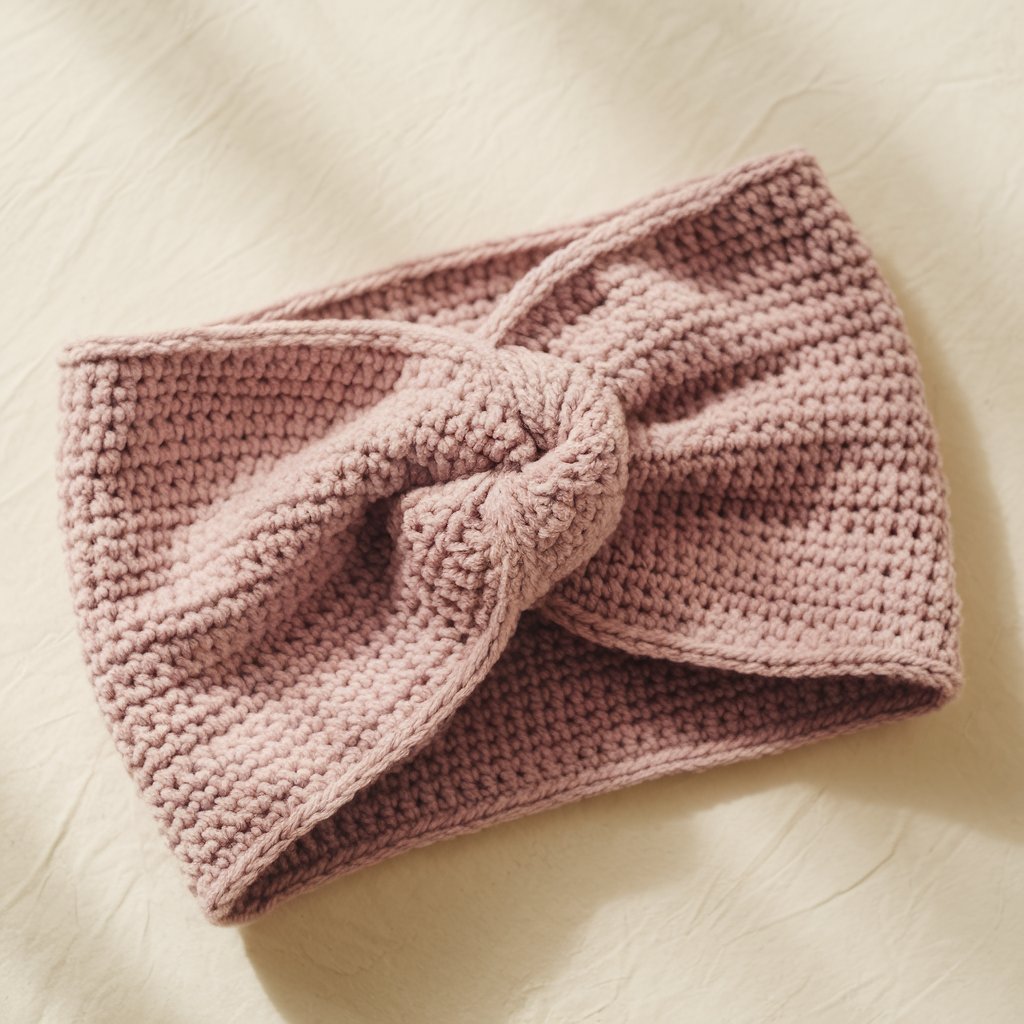
Overview
A cozy twisted-ear-warmer (headband) in pink — quick to make, stylish, and a great last-minute gift. The central twist gives a crochet version of the turban knot.
Skill level: Confident beginner
Materials
- Bulky or aran-weight yarn in dusty rose for warm winter versions; lighter aran or DK for mild weather.
- Hook: 6.0–8.0 mm for bulky, 4.5–5.5 mm for aran.
- Tapestry needle, optional small amount of elastic for stability.
Finished size (sample): Adult head circumference ~20–22 in unstretched; width 3–4 in
Step-by-step guide (worked flat then twisted & seamed)
- Band rectangle: Chain enough to make head circumference (e.g., ch 48 for bulky yarn; adjust by gauge). Row 1: hdc in 2nd ch from hook across. Row 2–10: hdc across to build width to ~3–4 in. For ribbed effect, work BLO hdc rows or alternate rows of fpdc/bpdc.
- Create twist: Lay rectangle flat, fold short ends toward center in opposite directions so they overlap as a twist (like making a Mobius but simpler). Cross one end over the other once and seam ends together with tidy mattress stitch.
- Finish: Weave tails, add a narrow line of back-stitch across seam for extra strength. Optionally stitch a narrow piece of elastic inside at each end before seaming for non-slip fit.
Variations
- Make a thinner lace band for spring use with a cotton blend yarn.
- Add a small knit-style cable (front/post stitches) across center before twisting for a textured look.
Finishing & care
- Bulky acrylic/wool blends: hand wash or gentle machine wash per labels; reshape and dry flat. Cotton: machine-washable.
Styling tips
- These make lovely wrapped gifts; pair a neutral ear warmer with a rose pink pom pom hat for a coordinated set.
Conclusion
Pink yarn projects are endlessly versatile: from tiny keychains to wearable garments, from baby booties to plush toys and wall décor. These ten patterns give you a range of maker-friendly projects you can finish quickly or expand into a themed gift bundle. Use soft blush and cream for nursery sets, or vivid rose and coral for bold décor accents.