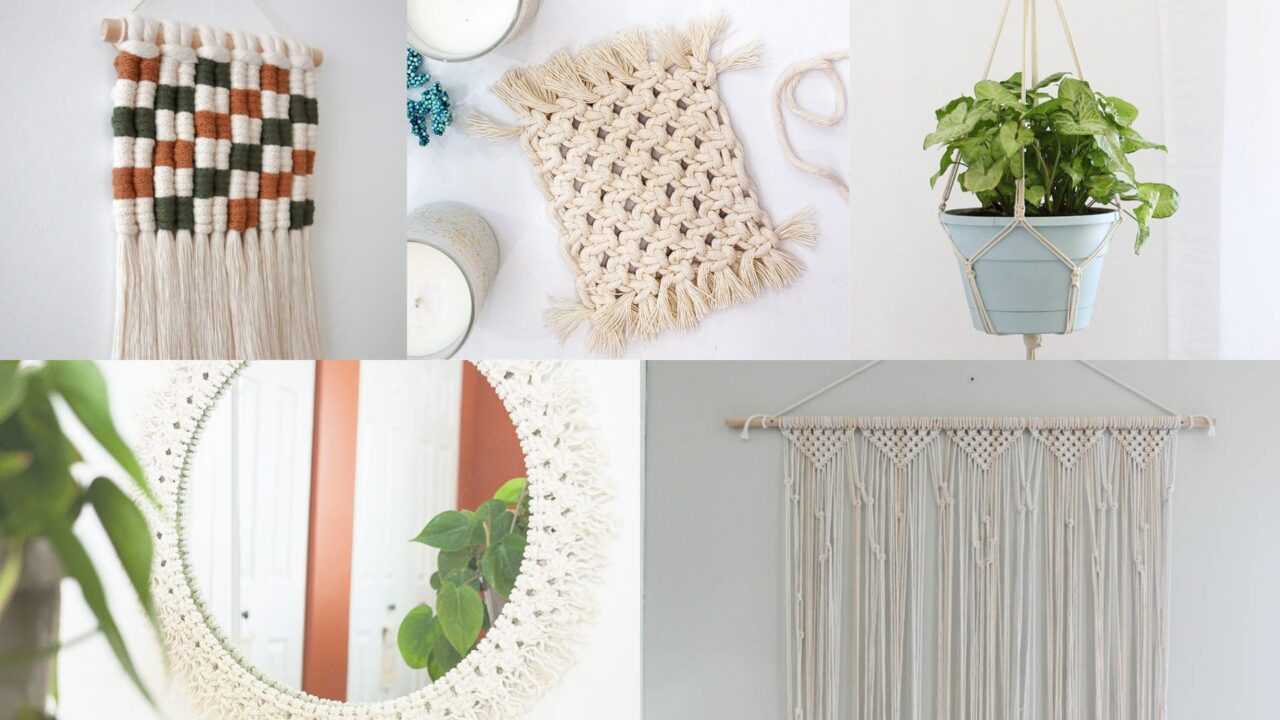
Macramé brings texture, warmth, and a handmade spirit into any room. These ten projects cover a wide range of scales and skills—tiny wall hangings, a dramatic chandelier, practical planthangers and baskets—and each pattern is designed so you can make something beautiful without guesswork. Below you’ll find a clear Skill level, Materials, a step-by-step construction (with knot calls and measurements), plus Variations and Final tips for each design. Grab your cords and pins—we’re making boho magic.
1. Mini Checkered Macramé Wall Hanging Pattern
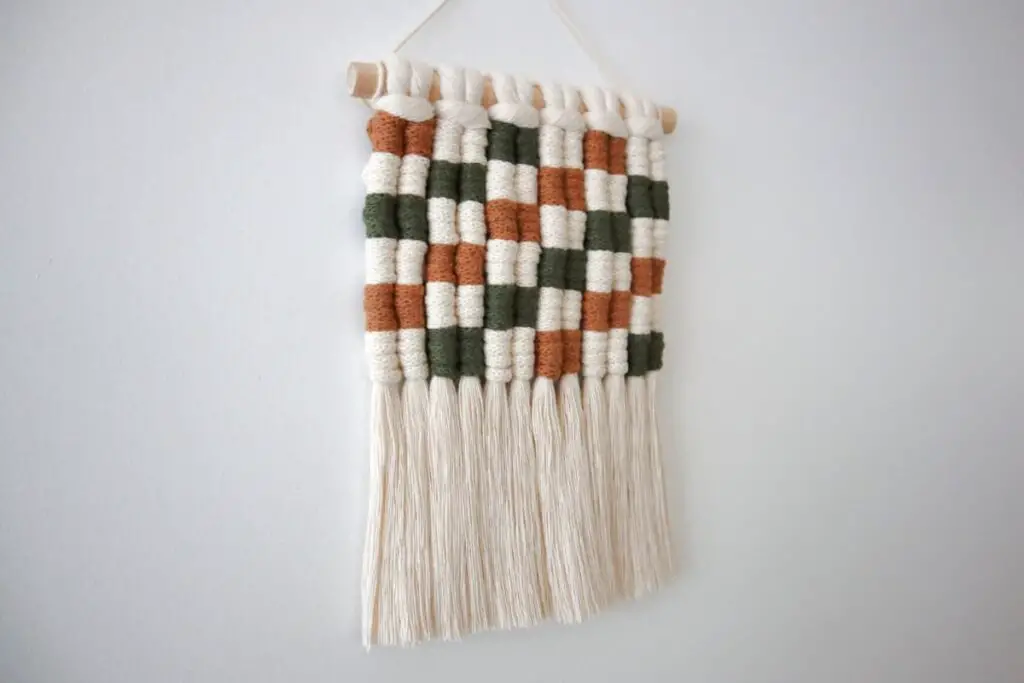
Skill level: Beginner → Intermediate
Finished size (example): ~8″ wide × 12″ long (including fringe)
Materials
- 3–4 mm cotton macramé cord, 8–10 cords × 1.2 m each
- Wooden dowel 8–10″ long or driftwood piece
- Pins or clipboard, fabric scissors, tape measure
Step-by-step
- Fold each cord in half and attach to the dowel with lark’s head knots so you have 16 working ends (8 loops). Space evenly across the dowel.
- Create the first row of squares using square knots: group cords in 4s (1–4) and tie a flat square knot, (5–8) next group, etc. Repeat across the row.
- For a checkered effect, alternate the square-knot offsets on the next row: start the row using cords 3–6 for the first knot, then 7–10, producing an offset grid. Continue for 6–8 rows to create a block of checks.
- Lock the bottom of the checker panel with a row of double half hitch (DHH) knots forming a straight line across—this gives a neat lower border.
- Trim fringe to a soft V-shape or leave straight, and lightly comb for a low-fuzz boho look.
Variations
- Use two cord colors and alternate color for every two square-knot rows for a bicolored checkerboard.
- Make a diamond check by rotating the filling pattern (work more rows and stagger differently).
Final tips
- Keep square-knot tension even—practice on a small sample before starting the full piece.
- Pin the hanging to a board when working to maintain straight rows.
2. Macramé Bohemian Chandelier Tutorial
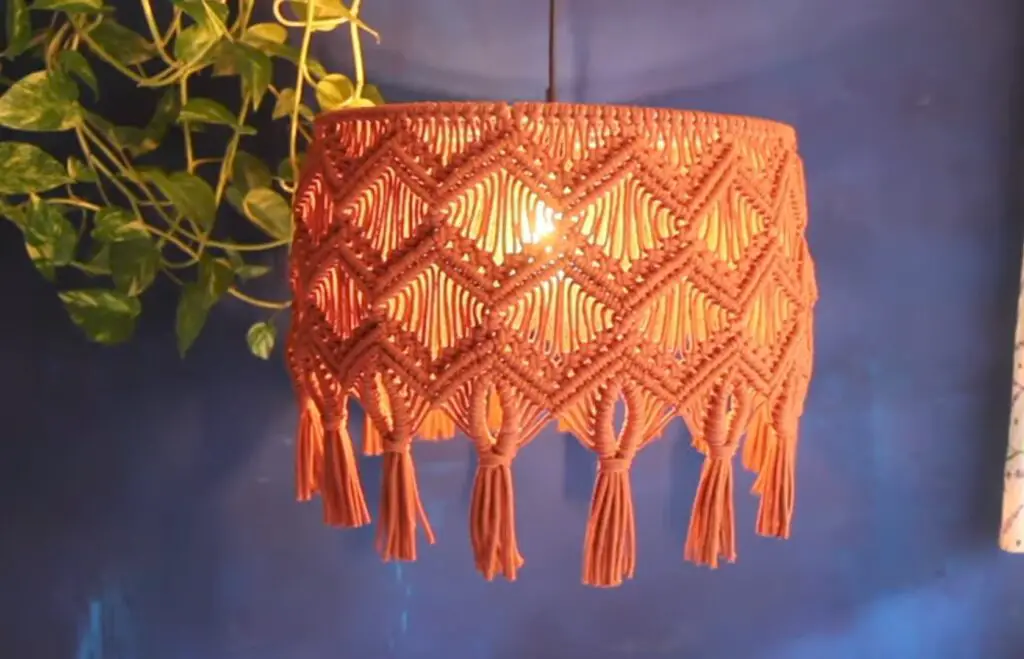
Skill level: Intermediate → Advanced
Finished size (example): 24–30″ diameter chandelier with 18–24″ drop (customizable)
Materials
- 3–5 mm cotton cord, ~400–800 m (heavy; estimate depends on size)
- Metal hoop(s) (one large base hoop, optional smaller hoops), string lights (battery or low-voltage), tapestry needle, USB battery pack/transformer (if using lights)
- Clips, scissors, macramé board
Step-by-step
- Attach a long length of cord to the hoop to form your top suspension loops—you’ll need 3–4 anchor cords evenly spaced to hang the chandelier. Secure temporarily.
- Create multiple long fringe bundles around the hoop using lark’s head attachments. These bundles will be the “arms” of the chandelier. Space them every 1–2″ depending on hoop circumference.
- For each bundle, work decorative sections: begin with a few rows of square knots (flat panels), then transition into spiral half-knots (for a twist), then a long DHH spiral tapering toward the free ends. Repeat around the hoop so every bundle has the same sequence.
- Weave string lights into the interior: either wrap lights around the hoop first and then knot over them, or use small clips to hold the light string beneath the knotted arms. Ensure weight is balanced. If using mains/transformer, follow electrical safety—use low voltage.
- Finish by trimming long tails to layered lengths, creating a feathered waterfall. Add tassels or wooden beads at select ends for interest. Hang from a sturdy ceiling hook.
Variations
- Use multiple hoops stacked vertically for a tiered chandelier.
- Add dyed cord color runs to create ombré light diffusion.
Final tips
- This is a heavy piece—ensure your ceiling hook is rated for the weight (and battery packs are secured).
- Work in balanced sections (divide hoop into quarters) so ornamentation is even.
3. Simple Macramé Plant Hanger Pattern
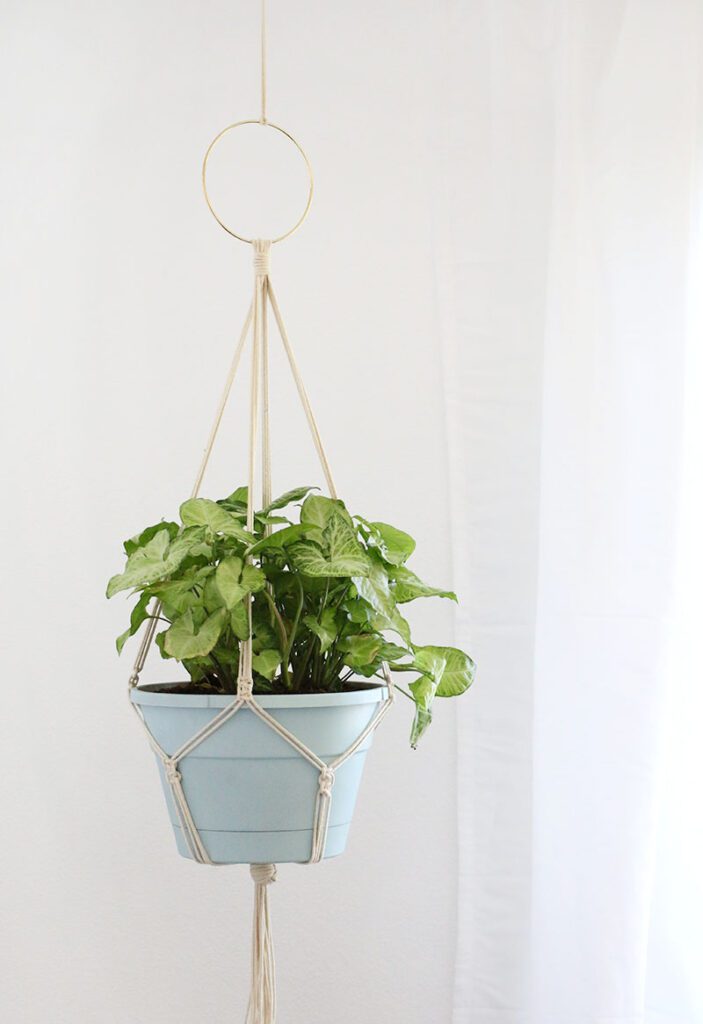
Skill level: Beginner
Finished size (example): fits pots 4–6″ diameter; hanging length ~30–40″
Materials
- 3–4 mm cotton cord, 8 cords × 4 m (cut length gives plenty)
- Wooden ring for ceiling or metal O-ring, scissors, tape measure, potted plant
Step-by-step
- Fold cords in half and attach all loops to the O-ring using lark’s head; you’ll have 16 working ends.
- Bring four adjacent cords together to tie a decorative square knot about 6–8″ down from the ring; repeat around to create a crown of knots that will hold pot neck.
- Below that, form the cradle by creating groups of 4 cords and tying square knots spaced 3–4″ apart. After one row, take 2 cords from one knot and 2 from the adjacent knot to form new groups—tie another row of square knots to form the net. Repeat until net height matches pot depth.
- Gather all cords at base with a gathering knot (wrap a thin cord around several inches and secure). Trim tails to preferred length.
- Insert pot and adjust knot spacing to fit snugly.
Variations
- Use alternating colors for each cord pair for a striped effect.
- Replace square knots with half-knots to create a spiral net.
Final tips
- Measure pot circumference before knotting to ensure a snug cradle.
- Use a test pot early to check fit and adjust knot spacing as needed.
4. Macramé Cushion Cover Tutorial
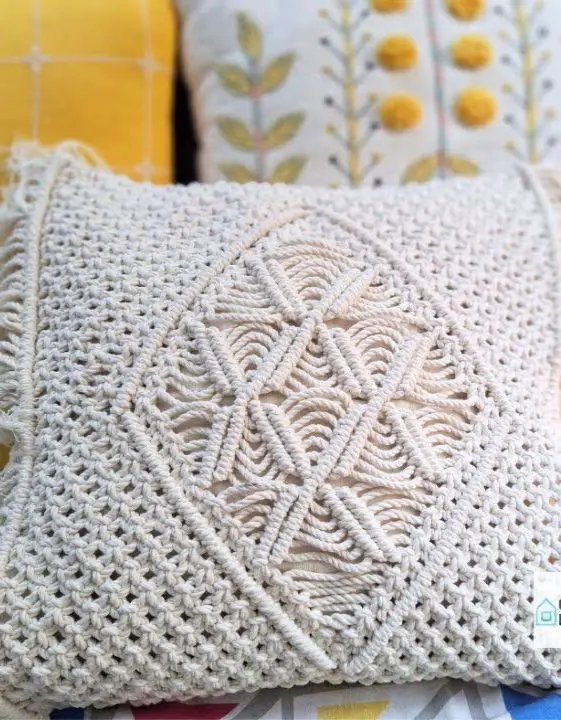
Skill level: Intermediate
Finished size (example): fits a 16″ square cushion insert
Materials
- 3–4 mm cotton cord, 300–450 m depending on pattern density
- 16″ wooden dowel or rod for top suspension (optional for panel design)
- 16″ cushion insert (or make panels and stitch to insert), tapestry needle, scissors
Step-by-step
- Make two matching panels (front & back) worked flat—each panel should be a little larger than cushion by 1″ for seam allowance. Attach cords to a top dowel or work with taped top edge.
- Design panel using a combination of square knots (for blocks), DHH diagonal rows (to form chevrons), and open mesh (alternating square knots). A good sequence: top border of square knots → a central diamond made with diagonal DHHs → bottom border of alternating square knots.
- After both panels are complete, block them flat to size. Trim ends and weave in.
- Seam panels together using whipstitch or mattress stitch, leaving one side open to insert cushion. Optionally make a zipper installation by sewing a fabric zipper into the open edge.
- Insert cushion and close seam.
Variations
- Make only a front panel and back with plain fabric for an easy mixed-media look.
- Add fringe along the lower edge for boho charm.
Final tips
- Keep knots consistent across panels—pin panels to measure and match rows before seaming.
- A lining stabilizes the cushion and prevents stretch over time.
5. Macramé Door Curtain Pattern
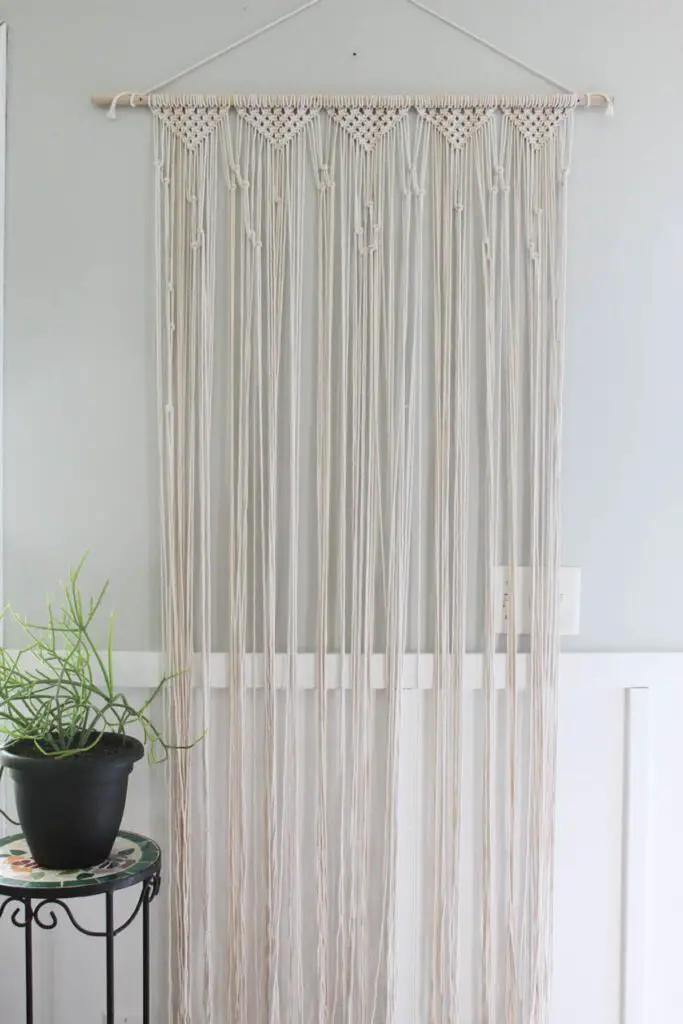
Skill level: Intermediate
Finished size (example): doorway coverage ~30–36″ wide × 72″ long
Materials
- 3–4 mm cotton macramé cord, many meters (estimate 800–1500 m depending on width and density)
- Wooden curtain rod or dowel long enough for door width
- Tape measure, pins, scissors
Step-by-step
- Attach many cords to the curtain rod using lark’s head; number depends on desired density (for dense curtain, space cords every 1/2″–1″).
- Work vertical panels across the rod: each panel can be a repeating motif (eg. rows of square knots and diagonal DHHs forming diamonds). Build motifs down the length to create consistent repeating pattern.
- Between motif bands leave airy ladder sections (open loops) for light. Repeat across the full rod. Remember to stagger diamond centers so curtain reads as continuous across width.
- Finish bottom with long fringes or shaped edge (V or scallop) by trimming cords to desire pattern.
- Hang and adjust panels so weight distributes evenly across rod.
Variations
- Leave a central section open as a doorway lane; make side panels decorative only.
- Add beads or driftwood pieces woven into panels for texture.
Final tips
- Curtain weight can be heavy—use a sturdy rod and wall anchors.
- Pre-measure doorway and allow extra length for rod fittings and hems.
6. Diamond Mesh Macramé Tablecloth Tutorial
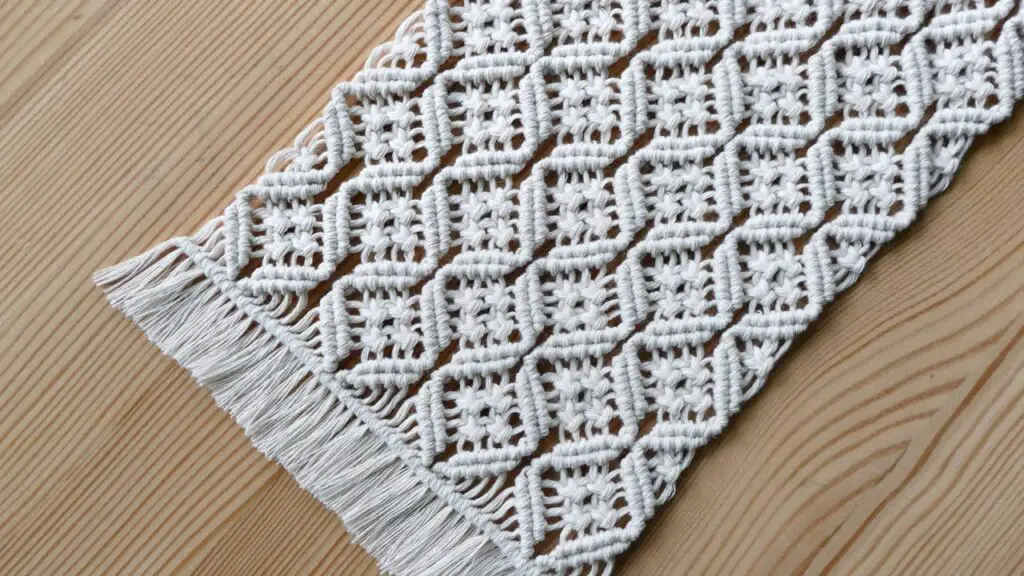
Skill level: Advanced
Finished size (example): table runner width 16″ × length 60″ (scale up for full tablecloth)
Materials
- 2–3 mm cotton cord (finer cord for tablecloth), many meters (pattern is cord-hungry)
- Pins, blocking board, large working surface
Step-by-step
- Work long length of cord loops attached to the leading edge (if runner style) or create a full mesh by joining a series of diamond motifs. Use lark’s head attachments for starting edge.
- Build the diamond mesh with double half hitch (DHH) diagonals: pick an anchor cord and weave adjacent cords with DHHs forming diagonal lines; mirror to form diamonds. Repeat in a grid until desired width and length are established.
- Reinforce intersection points with small square-knot clusters (groups of 4 cords) at every diamond junction to make the cloth more stable.
- Finish edges with a scalloped border or a row of small tassels at each diamond point.
- Block thoroughly on a table-sized board to open the mesh and keep it flat.
Variations
- Add tiny beads at diamond intersections for subtle sparkle.
- Use natural undyed cord for a raw boho table runner or colored threads for festive tables.
Final tips
- Tablecloths require lots of pinning for blocking—plan workspace.
- Keep tension moderate so the tablecloth drapes nicely without pulling on dishes.
7. Boho Macramé Coaster Pattern
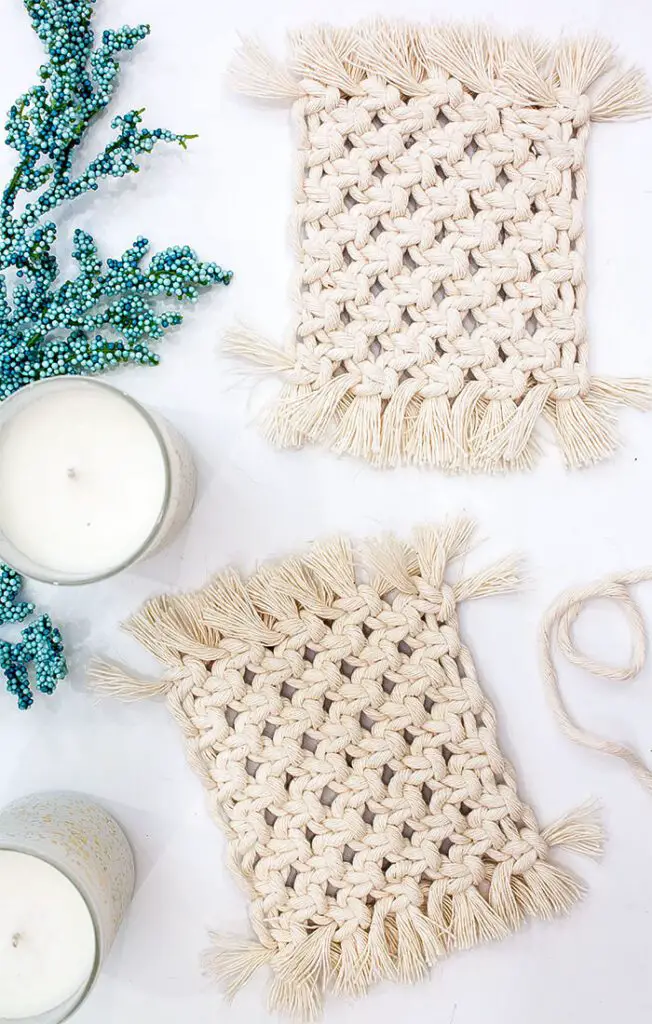
Skill level: Beginner → Intermediate
Finished size (example): ~4–4.5″ diameter
Materials
- 1–2 mm macramé cord or cotton thread, small quantities per coaster (≈5–10 m each)
- Small circular template (cardboard or cup), pins, scissors
Step-by-step
- Cut several shorter cords (6–8 cords × 40–60 cm). Fold in half and attach around a small circular template with lark’s head.
- Form a round by working a spiral of square knots or repeating half-knots around the circle; use DHH to create continuous circular rows. Keep the center tight.
- Once coaster reaches ~4″, secure the outer round with a final binding row (slst) and trim fringe short.
- Optionally add a felt backing glued to the underside for extra absorption and stability.
Variations
- Make a two-tone coaster by switching cord color every other round.
- Use finer thread for delicate lace-like coasters, or small rope for rustic coasters.
Final tips
- Keep center knots tight to avoid a hole; work outward with the same tension for a flat coaster.
- A felt backing makes the coaster spill-resistant and protects surfaces.
8. Macramé Hanging Pocket Tutorial
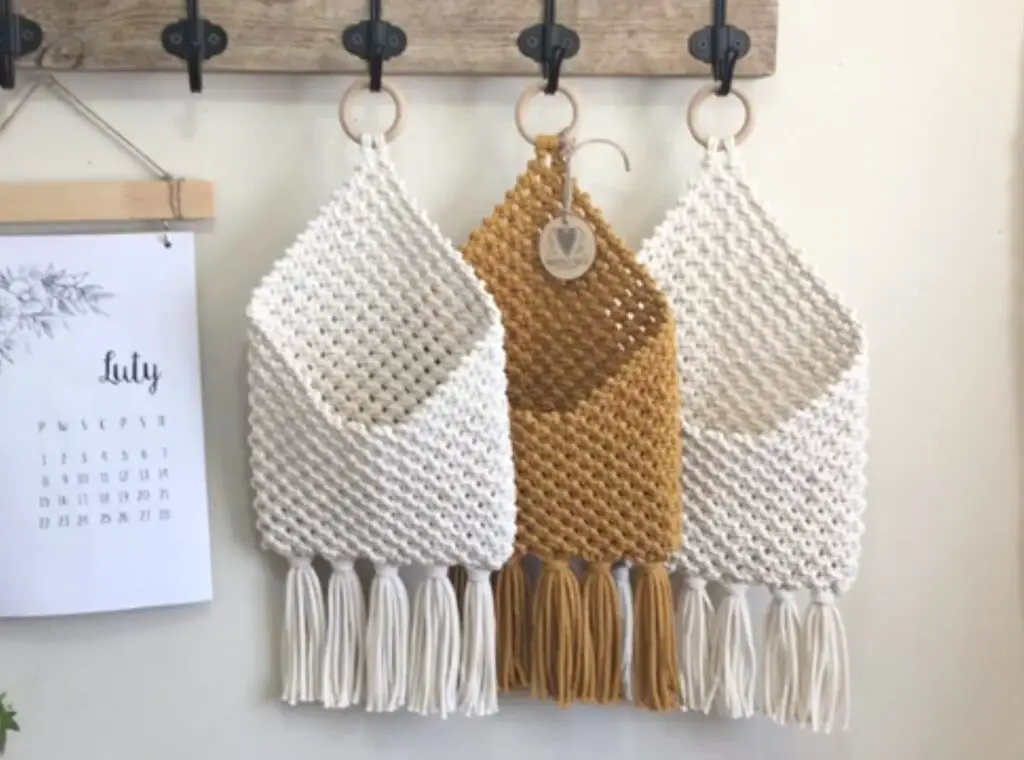
Skill level: Intermediate
Finished size (example): pocket ~8″ wide × 10″ deep; hanging length 30–40″
Materials
- 3–4 mm macramé cord, 100–200 m depending on size and number of pockets
- Wooden dowel, pins, scissors, optional small baskets for insertion
Step-by-step
- Attach cords to the dowel using lark’s head; create a broad field of cords so pocket can be built across width.
- Work the front panel: create a lower rectangle with square-knot rows to form a dense pocket back. Leave two cords on each side as selvage.
- To form pocket walls, take pairs of cords and tie square knots to form vertical walls; join cords from adjacent sections to form full width. Add an inner row of wrap stitches to make top edge stronger.
- Create opening by leaving top 3–4″ unknotted or by forming a buttoned flap. The pocket can be lined by sewing a piece of fabric behind the macramé if you plan to store small items.
- Add straps (rope or chain) to hang the pocket and test load before finalizing.
Variations
- Make multiple pockets by dividing panel into sections with rope separators.
- Add decorative fringe and beads to pocket fronts.
Final tips
- Reinforce pocket top edge with extra wraps so it won’t sag under weight.
- For plants or heavier items, use a fabric insert.
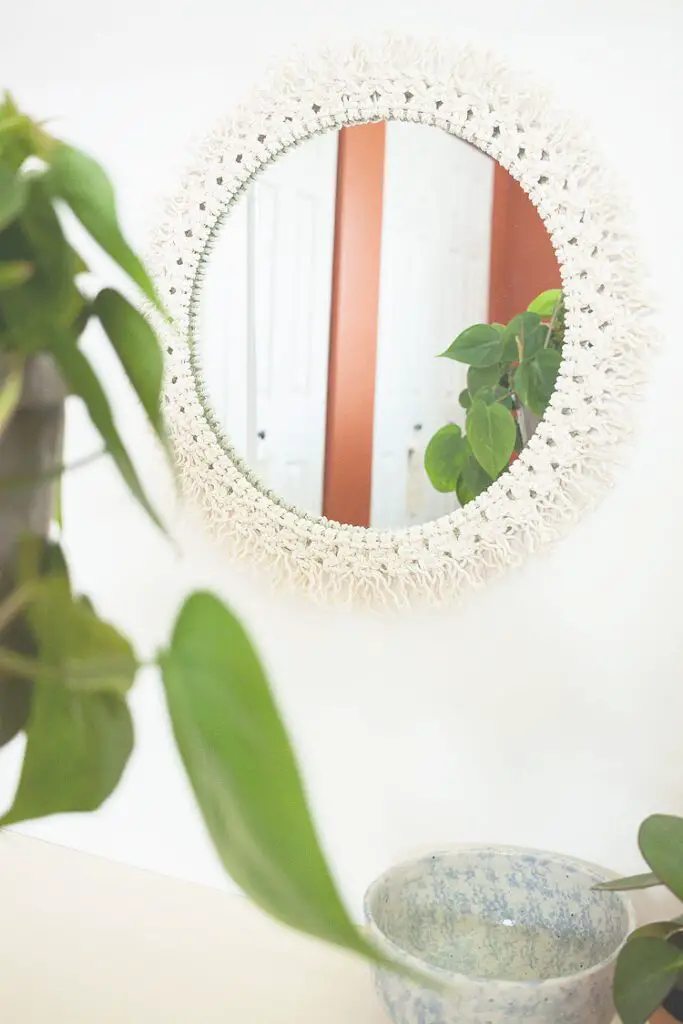
9. DIY Macramé Mirror Pattern
Skill level: Intermediate
Finished size (example): small round mirror with 12–18″ full hanging; mirror diameter 6–10″)
Materials
- Mirror (small round, with flat edge), 3–4 mm cord, scissors, glue or small screws for mirror backing
- Wooden ring or embroidery hoop (to seat mirror), pins
Step-by-step
- Fit mirror into a ring or secure it on a backing disc. Attach cord around hoop using lark’s head, leaving enough length to create a decorative border.
- Work a circular frame using square knots and DHH to build a textured bezel that holds the mirror securely. Create 2–3 rows to add depth. Add small overhang tabs (tiny loops) into which you glue or screw the mirror onto backing to lock it in place.
- Create a hanging loop at top and finish lower fringe or tassels for drama. Optionally add bead loops or tiny shell accents around the frame.
- Mount mirror to wall with a sturdy hook.
Variations
- Combine a woven macramé halo with a thin metal ring for mixed materials.
- Use thin cord for a delicate halo or chunky cord for a bold statement.
Final tips
- Ensure the mirror is securely fixed; test weight before hanging.
- Use hot glue and small felt pads where macramé meets mirror to prevent slipping.
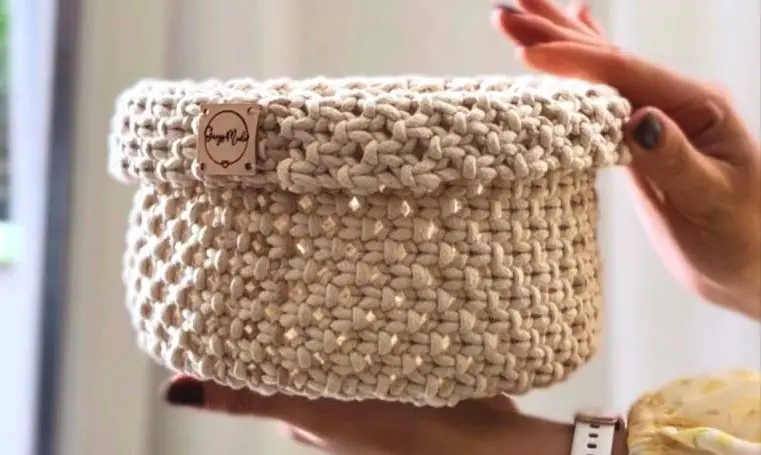
10. Macramé Basket with a Fold-over Edge Tutorial
Skill level: Beginner → Intermediate
Finished size (example): 10–12″ diameter × 8–10″ high (fold-over gives a cuff look)
Materials
- 6–8 mm cotton rope or chunky macramé cord, many meters (estimate 300–700 m depending on size)
- Crochet hook (large) or thick needle to help weave, scissors
Step-by-step
- Start with a tightly crocheted or knotted base to create a firm bottom (magic ring of rope or several rounds of sc with thick cord). Increase rounds until base reaches desired diameter.
- Build sides with single crochet in the round (if you’re using rope and a hook) or use macramé square-knot rows for texture. Work until you have extra height equal to final desired height plus cuff (e.g., for 8″ finished height with 2″ fold, work 10″ side height).
- To make a fold-over cuff, fold the top edge down 2″ and sew or knot through both layers to lock it in place (use a large needle and spare cord). This creates a neat double-thick rim that stands up.
- Trim and tuck ends; optionally add a leather handle or wooden toggle for carrying.
Variations
- Make a shallow bowl by reducing side height, or tall baskets for laundry by increasing side rounds.
- Use speckled or dyed rope for modern color accents.
Final tips
- Thick rope is heavy—use a stout surface to work on and a strong hook.
- A folded cuff adds structure and hides raw rope ends.
Conclusion
These ten macramé home-decor patterns cover tiny accents to large statement pieces. They’re designed so you can pick a project that fits your time, space, and skill level—from a quick coaster to a dramatic chandelier. Each piece brings handcrafted texture into a home and can be easily customized with color, cord thickness, and embellishments to match your boho vision.
Happy knotting — may your home feel cozier (and more creative) with every fringe you make.


